The web-based workbench by default will install two sample repositories that contain various sample projects that help you getting started. This section shows different examples that can be found in the jbpm-playground repository (also available here: https://github.com/droolsjbpm/jbpm-playground). All these examples are high level and business oriented.
If you want to contribute with these examples please get in touch with any member of the jBPM/Drools Team.
To import the Human Resources example, as well as other examples, follow these steps:
Logging into Workbench
On the command line, change into the
$SERVER_HOME/bin/directory and execute the following command:for Unix environment:
./standalone.shfor Windows environment:
./standalone.bat
Once your server is up and running, open the following address in a web browser:
http://localhost:8080/business-centralThis opens the login page.
Log into Workbench with the user credentials created during installation.
Importing Projects Through Git
Click → .
Click → .
In the New Repository dialogue, enter following information:
Repository Name: for example, playground.
Organizational Unit: select your organizational unit, for example example.
Git URL: enter the Git URL you want to import, for example: https://github.com/droolsjbpm/jbpm-playground.
Click .
This will import a number of premade examples into your instance of jBPM.
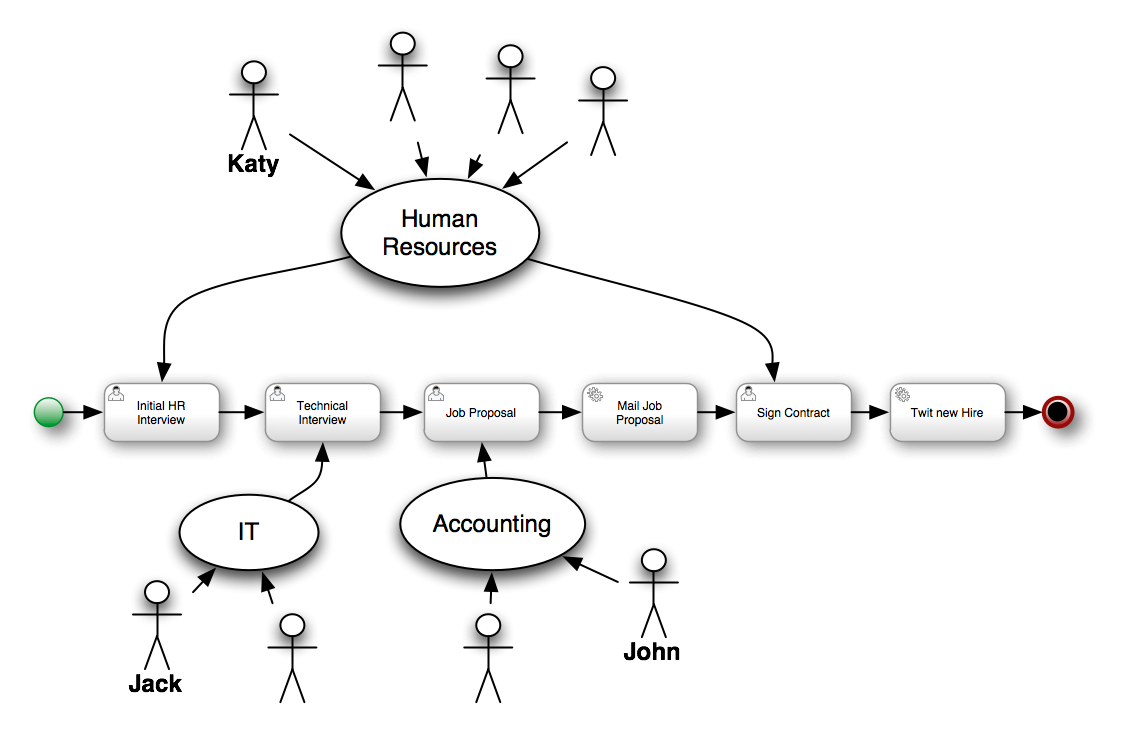
The Human Resource Example's use case can be described as follows: A company wants to hire new developers. In this process, three departments (that is the Human resources, IT, and Accounting) are involved. These departments are represented by three users: Katy, Jack, and John respectively.
Note that only four out of the six defined activities within the business process are User Tasks. User Tasks require human interaction. The other two tasks are Service Tasks, which are automated and connected to other systems.
Each instance of the process will follow certain actions:
The human resources team performs the initial interview with the candidate.
The IT department team performs the technical interview.
Based on the output from the previous two steps, the accounting team creates a job proposal.
When the proposal has been drafted, it is automatically sent to the candidate via email.
If the candidate accepts the proposal, a new meeting to sign the contract is scheduled.
Finally, if the candidate accepts the proposal, the system posts a message about the new hire using Twitter service connector.
Note, that Jack, John, and Katy represent any employee within the company with appropriate role assigned.
To start exploring the project:
Click → .
Click → .
The authoring perspective contains the hiring.bpmn2 process and a set of forms for each human task. Click these assets to explore. Notice that different editors open for different types of assets.

To build the Project:
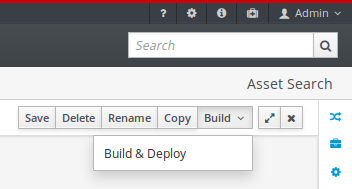
Click → .
Click .
Click → .
creates a new JAR artifact that is deployed to the runtime environment as a new deployment unit.

After successfully building and deploying your project, you can verify its presence in the Deployments tab. Click → to do so.
You can find all the deployed units in the Deployments tab. When you a project from the Project Editor, it is deployed using the default configurations. That means using the Singleton Strategy, the default Kie Base and the default Kie Session.
If you want a more advanced deployment, undeploy and re-deploy your artifacts using their GAV and selecting non-default settings. Then, you will be able to set a different strategy, or use a non-default Kie Base or Kie Session.
Once your artifact that contains the process definition is deployed, the Process Definition will become available in → .
To create new process instances:
Click → .
Start your instance:
Figure 4.3. Starting Process Instances

You can start process instances using any of the two highlighted options.
The Process Definitions tab contains all the available process definitions in the runtime environment. In order to add new process definitions, build and deploy a new project.
Most processes require additional information to create a new process instance. This is done through forms. For this project, fill in the name of the candidate that is to be interviewed.
When you click , you create a new process instance. This creates the first task, that is available for the Human Resources team. To see the task, you need to logout and log in as a user with the appropriate role assigned, that is someone from the Human Resources.
When you start the process, you can interact with the human tasks. To do so, click → .
Note that in order to see the tasks in the task list, you need to belong to specific user groups, for which the task is designed. For example, the HR Interview task is visible only for the members of the HR group, and the Tech Interview Task is visible only to the members of the IT group.

