- I. Getting Started
- 1. Overview
- 2. Getting Started
- 3. jBPM Installer
- 4. Examples
- II. jBPM Core
- 5. Core Engine API
- 6. Processes
- 7. Human Tasks
- 8. Persistence and Transactions
- III. Workbench
- 9. Workbench (General)
- 10. Workbench Integration
- 10.1. REST
- 10.2. Keycloak SSO integration
- 10.2.1. Scenario
- 10.2.2. Install and setup a Keycloak server
- 10.2.3. Create and setup the demo realm
- 10.2.4. Install and setup jBPM Workbench
- 10.2.5. Securing workbench remote services via Keycloak
- 10.2.6. Securing workbench's file system services via Keycloak
- 10.2.7. Execution server
- 10.2.8. Consuming remote services
- 11. Workbench High Availability
- 12. Designer
- 13. Forms
- 14. Runtime Management
- 15. Process and Task Management
- 16. Business Activity Monitoring
- 17. Remote API
- IV. Eclipse
- V. Integration
- VI. Advanced Topics
- 25. Release Notes

Introduction and getting started with jBPM
Table of Contents
- 1. Overview
- 2. Getting Started
- 3. jBPM Installer
- 4. Examples
jBPM is a flexible Business Process Management (BPM) Suite. It is light-weight, fully open-source (distributed under Apache license) and written in Java. It allows you to model, execute, and monitor business processes throughout their life cycle.
A business process allows you to model your business goals by describing the steps that need to be executed to achieve those goals, and the order of those goals are depicted using a flow chart. This process greatly improves the visibility and agility of your business logic. jBPM focuses on executable business processes, which are business processes that contain enough detail so they can actually be executed on a BPM engine. Executable business processes bridge the gap between business users and developers as they are higher-level and use domain-specific concepts that are understood by business users but can also be executed directly.
Business processes need to be supported throughout their entire life cycle: authoring, deployment, process management and task lists, and dashboards and reporting.
The core of jBPM is a light-weight, extensible workflow engine written in pure Java that allows you to execute business processes using the latest BPMN 2.0 specification. It can run in any Java environment, embedded in your application or as a service.
On top of the core engine, a lot of features and tools are offered to support business processes throughout their entire life cycle:
- Pluggable human task service based on WS-HumanTask for including tasks that need to be performed by human actors.
- Pluggable persistence and transactions (based on JPA / JTA).
- Web-based process designer to support the graphical creation and simulation of your business processes (drag and drop).
- Web-based data modeler and form modeler to support the creation of data models and process and task forms
- Web-based, customizable dashboards and reporting
- All combined in one web-based workbench, supporting the complete BPM life cycle:
- Modeling and deployment - author your processes, rules, data models, forms and other assets
- Execution - execute processes, tasks, rules and events on the core runtime engine
- Runtime Management - work on assigned task, manage process instances, etc
- Reporting - keep track of the execution using Business Activity Monitoring capabilities
- Eclipse-based developer tools to support the modeling, testing and debugging of processes
- Remote API to process engine as a service (REST, JMS, Remote Java API)
- Integration with Maven, Spring, OSGi, etc.
BPM creates the bridge between business analysts, developers and end users by offering process management features and tools in a way that both business users and developers like. Domain-specific nodes can be plugged into the palette, making the processes more easily understood by business users.
jBPM supports adaptive and dynamic processes that require flexibility to model complex, real-life situations that cannot easily be described using a rigid process. We bring control back to the end users by allowing them to control which parts of the process should be executed; this allows dynamic deviation from the process.
jBPM is not just an isolated process engine. Complex business logic can be modeled as a combination of business processes with business rules and complex event processing. jBPM can be combined with the Drools project to support one unified environment that integrates these paradigms where you model your business logic as a combination of processes, rules and events.
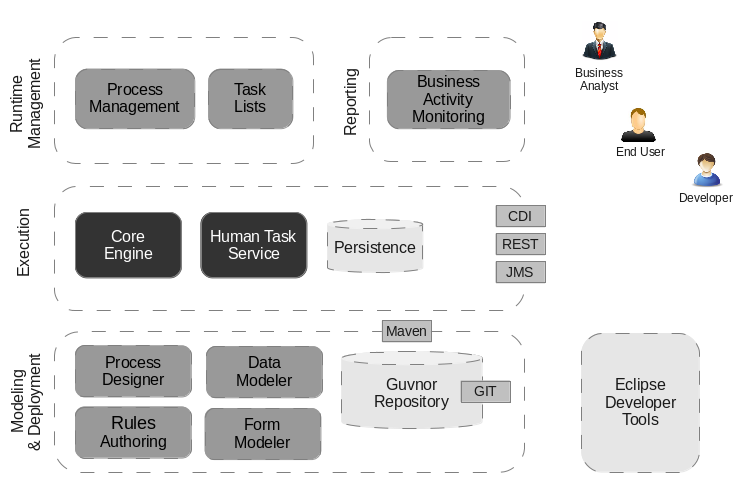
This figure gives an overview of the different components of the jBPM project.
- The core engine is the heart of the project and allows you to
execute business processes in a flexible manner. It is a pure Java component that you can
choose to embed as part of your application or deploy it as a service and connect
to it through the web-based UI or remote APIs.
- An optional core service is the human task service that will take care of the human task life cycle if human actors participate in the process.
- Another optional core service is runtime persistence; this will persist the state of all your process instances and log audit information about everything that is happening at runtime.
- Applications can connect to the core engine by through its Java API or as a set of CDI services, but also remotely through a REST and JMS API.
- Web-based tools allows you to model, simulate and deploy your processes and other
related artifacts (like data models, forms, rules, etc.):
- The process designer allows business users to design and simulate business processes in a web-based environment.
- The data modeler allows non-technical users to view, modify and create data models for use in your processes.
- A web-based form modeler also allows you to create, generate or edit forms related to your processes (to start the process or to complete one of the user tasks).
- Rule authoring allows you to specify different types of business rules (decision tables, guided rules, etc.) for combination with your processes.
- All assets are stored and managed on the Guvnor repository (exposed through Git) and can be managed (versioning), built and deployed.
- The web-based management console allows business users to manage their runtime (manage business processes like start new processes, inspect running instances, etc.), to manage their task list and to perform Business Activity Monitoring (BAM) and see reports.
- The Eclipse-based developer tools are an extension to the Eclipse IDE, targeted towards developers, and allows you to create business processes using drag and drop, test and debug your processes, etc.
Each of the components are described in more detail below.
The core jBPM engine is the heart of the project. It's a light-weight workflow engine that executes your business processes. It can be embedded as part of your application or deployed as a service (possibly on the cloud). Its most important features are the following:
- Solid, stable core engine for executing your process instances.
- Native support for the latest BPMN 2.0 specification for modeling and executing business processes.
- Strong focus on performance and scalability.
- Light-weight (can be deployed on almost any device that supports a simple Java Runtime Environment; does not require any web container at all).
- (Optional) pluggable persistence with a default JPA implementation.
- Pluggable transaction support with a default JTA implementation.
- Implemented as a generic process engine, so it can be extended to support new node types or other process languages.
- Listeners to be notified of various events.
- Ability to migrate running process instances to a new version of their process definition
The core engine can also be integrated with a few other (independent) core services:
- The human task service can be used to manage human tasks when human actors need to participate in the process. It is fully pluggable and the default implementation is based on the WS-HumanTask specification and manages the life cycle of the tasks, task lists, task forms, and some more advanced features like escalation, delegation, rule-based assignments, etc.
- The history log can store all information about the execution of all the processes in the engine. This is necessary if you need access to historic information as runtime persistence only stores the current state of all active process instances. The history log can be used to store all current and historic states of active and completed process instances. It can be used to query for any information related to the execution of process instances, for monitoring, analysis, etc.
The web-based designer allows you to model your business processes in a web-based environment. It is targeted towards business users and offers a graphical editor for viewing and editing your business processes (using drag and drop), similar to the Eclipse plugin. It supports round-tripping between the Eclipse editor and the web-based designer. It also supports simulation of processes.
Processes almost always have some kind of data to work with. The data modeler allows non-technical users to view, edit or create these data models.
Typically, a business process analyst or data analyst will capture the requirements for a process or application and turn these into a formal set of interrelated data structures. The new Data Modeler tool provides an easy, straightforward and visual aid for building both logical and physical data models, without the need for advanced development skills or explicit coding. The data modelers is transparently integrate into the workbench. Its main goals are to make data models into first class citizens in the process improvement cycle and allow for full process automation through the integrated use of data structures (and the forms that will be used to interact with them).
The jBPM Form Modeler is a form engine and editor that enables users to create forms to capture and display information during process or task execution, without needing any coding or template markup skills.
It provides a WYSIWYG environment to model forms that it's easy to use for less technical users.
Key features:
Form Modeling WYSIWYG UI for forms
Form autogeneration from data model / Java objects
Data binding for Java objects
Formula and expressions
Customized forms layouts
Forms embedding
The form modeler's user interfaces is aimed both at process analyst and developers for building and testing forms.
Developers or advanced used will also have some advanced features to customize form behavior and look&feel.
Business processes can be managed through a web-based management console. It is targeted towards business users and its main features are the following:
- Process instance management: the ability to start new process instances, get a list of running process instances, visually inspect the state of a specific process instances.
- Human task management: being able to get a list of all your current tasks (either assigned to you or that you might be able to claim), and completing tasks on your task list (using customizable task forms).

As of version 6.0, jBPM comes with a full-featured BAM tooling which allows non-technical users to visually compose business dashboards. With this brand new module, to develop business activity monitoring and reporting solutions on top of jBPM has never been so easy!
Key features:
Visual configuration of dashboards (Drag'n'drop).
Graphical representation of KPIs (Key Performance Indicators).
Configuration of interactive report tables.
Data export to Excel and CSV format.
Filtering and search, both in-memory or SQL based.
Data extraction from external systems, through different protocols.
Granular access control for different user profiles.
Look'n'feel customization tools.
Pluggable chart library architecture.
Chart libraries provided: NVD3 & OFC2.
Target users:
Managers / Business owners. Consumer of dashboards and reports.
IT / System architects. Connectivity and data extraction.
Analysts. Dashboard composition & configuration.
To get further information about the new and noteworthy BAM capabilities of jBPM please read the chapter Business Activity Monitoring.
The workbench is the web-based application that combines all of the above web-based tools into one configurable solution.
It supports the following:
- A repository service to store your business processes and related artefacts, using a Git repository, which supports versioning, remote accessing (as a file system), and using REST services.
- A web-based user interface to manage your business processes, targeted towards business users; it also supports the visualization (and editing) of your artifacts (the web-based editors like designer, data and form modeler are integrated here), but also categorisation, build and deployment, etc..
- Collaboration features to have multiple actors (for example business users and developers) work together on the same project.
Workbench application covers complete life cycle of BPM projects starting at authoring phase, going through implementation, execution and monitoring.
The Eclipse-based tools are a set of plugins to the Eclipse IDE and allow you to integrate your business processes in your development environment. It is targeted towards developers and has some wizards to get started, a graphical editor for creating your business processes (using drag and drop) and a lot of advanced testing and debugging capabilities.
It includes the following features:
- Wizard for creating a new jBPM project
- A graphical editor for BPMN 2.0 processes
- The ability to plug in your own domain-specific nodes
- Validation
- Runtime support (so you can select which version of jBPM you would like to use)
- Graphical debugging to see all running process instances of a selected session, to visualize the current state of one specific process instance, etc.
All releases can be downloaded from SourceForge. Select the version you want to download and then select which artifact you want:
bin: all the jBPM binaries (JARs) and their dependencies
src: the sources of the core components
docs: the documentation
examples: some jBPM examples, can be imported into Eclipse
installer: the jbpm-installer, downloads and installs a demo setup of jBPM
installer-full: the jbpm-installer, downloads and installs a demo setup of jBPM, already contains a number of dependencies prepackages (so they don't need to be downloaded separately)
If you like to take a quick tutorial that will guide you through most of the components using a simple example, take a look at the Installer chapter. This will teach you how to download and use the installer to create a demo setup, including most of the components. It uses a simple example to guide you through the most important features. Screencasts are available to help you out as well.
If you like to read more information first, the following chapters first focus on the core engine (API, BPMN 2.0, etc.). Further chapters will then describe the other components and other more complex topics like domain-specific processes, flexible processes, etc. After reading the core chapters, you should be able to jump to other chapters that you might find interesting.
You can also start playing around with some examples that are offered in a separate download. Check out the examples chapter to see how to start playing with these.
After reading through these chapters, you should be ready to start creating your own processes and integrate the engine with your application. These processes can be started from the installer or be started from scratch.
Here are a lot of useful links part of the jBPM community:
A feed of blog entries related to jBPM
A user forum for asking questions and giving answers
A JIRA bug tracking system for bugs, feature requests and roadmap
A continuous build server for getting the latest snapshots
Please feel free to join us in our IRC channel at chat.freenode.net #jbpm. This is where most of the real-time discussion about the project takes place and where you can find most of the developers most of their time as well. Don't have an IRC client installed? Simply go to http://webchat.freenode.net/, input your desired nickname, and specify #jbpm. Then click login to join the fun.
The jBPM code itself is using the Apache License v2.0.
Some other components we integrate with have their own license:
The new Eclipse BPMN2 plugin is Eclipse Public License (EPL) v1.0.
The web-based designer is based on Oryx/Wapama and is MIT License
The Drools project is Apache License v2.0.
jBPM now uses git for its source code version control system. The sources of the jBPM project can be found here (including all releases starting from jBPM 5.0-CR1):
https://github.com/droolsjbpm/jbpm
The source of some of the other components we integrate with can be found here:
If you're interested in building the source code, contributing, releasing, etc. make sure to read this README.
We are often asked "How do I get involved". Luckily the answer is simple, just write some code and submit it :) There are no hoops you have to jump through or secret handshakes. We have a very minimal "overhead" that we do request to allow for scalable project development. Below we provide a general overview of the tools and "workflow" we request, along with some general advice.
If you contribute some good work, don't forget to blog about it :)
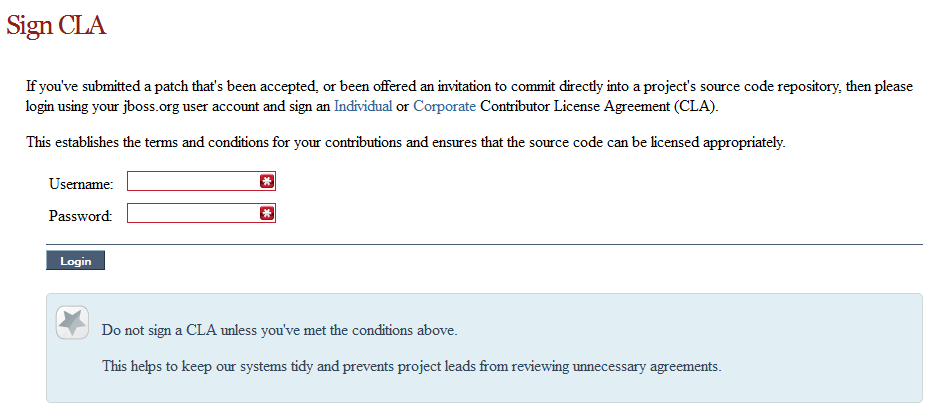
Signing to jboss.org will give you access to the JBoss wiki, forums and JIRA. Go to http://www.jboss.org/ and click "Register".

The only form you need to sign is the contributor agreement, which is fully automated via the web. As the image below says "This establishes the terms and conditions for your contributions and ensures that source code can be licensed appropriately"
To be able to interact with the core development team you will need to use JIRA, the issue tracker. This ensures that all requests are logged and allocated to a release schedule and all discussions captured in one place. Bug reports, bug fixes, feature requests and feature submissions should all go here. General questions should be undertaken at the mailing lists.
Minor code submissions, like format or documentation fixes do not need an associated JIRA issue created.
https://issues.jboss.org/browse/JBRULES (Drools)
https://issues.jboss.org/browse/JBPM
https://issues.jboss.org/browse/GUVNOR
With the contributor agreement signed and your requests submitted to JIRA you should now be ready to code :) Create a GitHub account and fork any of the Drools, jBPM or Guvnor repositories. The fork will create a copy in your own GitHub space which you can work on at your own pace. If you make a mistake, don't worry blow it away and fork again. Note each GitHub repository provides you the clone (checkout) URL, GitHub will provide you URLs specific to your fork.
When writing tests, try and keep them minimal and self contained. We prefer to keep the DRL fragments within the test, as it makes for quicker reviewing. If their are a large number of rules then using a String is not practical so then by all means place them in separate DRL files instead to be loaded from the classpath. If your tests need to use a model, please try to use those that already exist for other unit tests; such as Person, Cheese or Order. If no classes exist that have the fields you need, try and update fields of existing classes before adding a new class.
There are a vast number of tests to look over to get an idea, MiscTest is a good place to start.
When you commit, make sure you use the correct conventions. The commit must start with the JIRA issue id, such as JBRULES-220. This ensures the commits are cross referenced via JIRA, so we can see all commits for a given issue in the same place. After the id the title of the issue should come next. Then use a newline, indented with a dash, to provide additional information related to this commit. Use an additional new line and dash for each separate point you wish to make. You may add additional JIRA cross references to the same commit, if it's appropriate. In general try to avoid combining unrelated issues in the same commit.
Don't forget to rebase your local fork from the original master and then push your commits back to your fork.
With your code rebased from original master and pushed to your personal GitHub area, you can now submit your work as a pull request. If you look at the top of the page in GitHub for your work area their will be a "Pull Request" button. Selecting this will then provide a gui to automate the submission of your pull request.
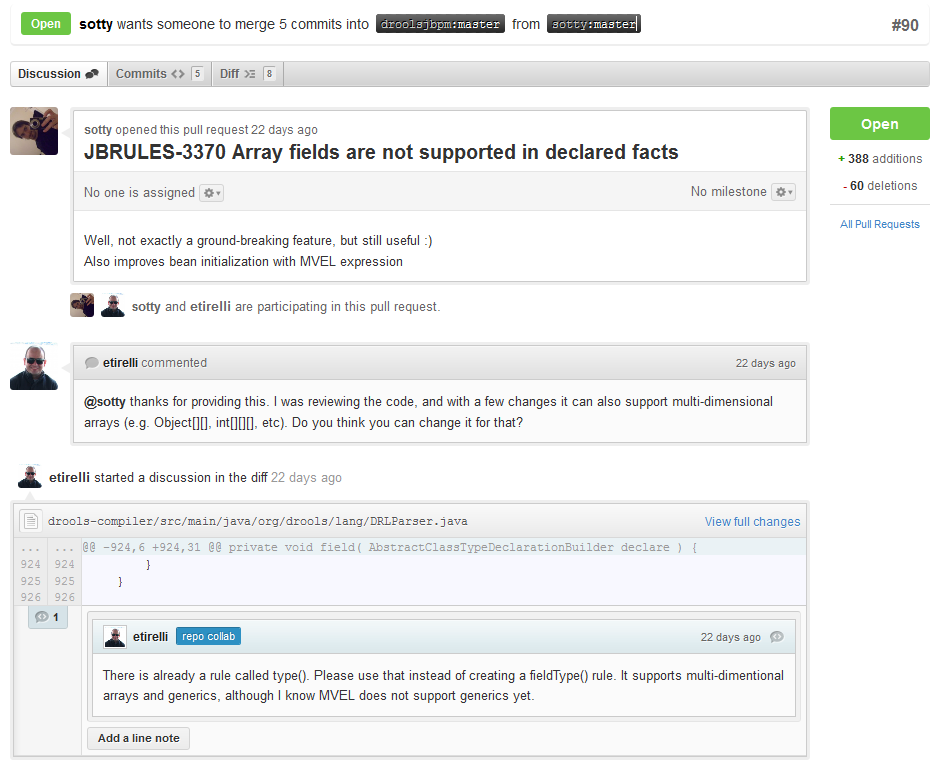
The pull request then goes into a queue for everyone to see and comment on. Below you can see a typical pull request. The pull requests allow for discussions and it shows all associated commits and the diffs for each commit. The discussions typically involve code reviews which provide helpful suggestions for improvements, and allows for us to leave inline comments on specific parts of the code. Don't be disheartened if we don't merge straight away, it can often take several revisions before we accept a pull request. Luckily GitHub makes it very trivial to go back to your code, do some more commits and then update your pull request to your latest and greatest.
It can take time for us to get round to responding to pull requests, so please be patient. Submitted tests that come with a fix will generally be applied quite quickly, where as just tests will often way until we get time to also submit that with a fix. Don't forget to rebase and resubmit your request from time to time, otherwise over time it will have merge conflicts and core developers will general ignore those.
You can always contact the jBPM community for assistance.
IRC: #jbpm at chat.freenode.net
This script assumes you have Java JDK 1.6+ (set as JAVA_HOME), and Ant 1.7+ installed. If you don't, use the following links to download and install them:
Java: http://java.sun.com/javase/downloads/index.jsp
Ant: http://ant.apache.org/bindownload.cgi
Tip
To check whether Java and Ant are installed correctly, type the following commands inside a command prompt:
java -version
ant -version
This should return information about which version of Java and Ant you are currently using.
First of all, you need to download the installer and unzip it to your local file system. There are two versions
full installer - which already contains a lot of the dependencies that are necessary during the installation
minimal installer - which only contains the installer and will download all dependencies
In general, it is probably best to download the full installer: jBPM-{version}-installer-full.zip
You can also find the latest snapshot release here (only minimal installer) here:
https://hudson.jboss.org/jenkins/job/jBPM/lastSuccessfulBuild/artifact/jbpm-distribution/target/
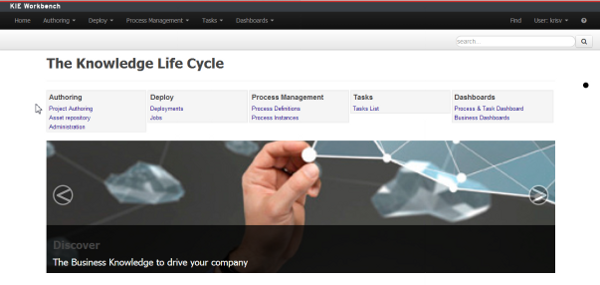
The easiest way to get started is to simply run the installation script to install the demo setup. The demo install will setup all the web tooling (on top of WildFly) and Eclipse tooling in a pre-configured setup. Go into the jbpm-installer folder where you unzipped the installer and (from a command prompt) run:
ant install.demoThis will:
Download WildFly application server
Configure and deploy the web tooling
Download Eclipse
Install the Drools and jBPM Eclipse plugin
Install the Eclipse BPMN 2.0 Modeler
Running this command could take a while (REALLY, not kidding, we are for example downloading an Eclipse installation, even if you downloaded the full installer, specifically for your operating system).
Tip
The script always shows which file it is downloading (you could for example check whether it is still downloading by checking the whether the size of the file in question in the jbpm-installer/lib folder is still increasing). If you want to avoid downloading specific components (because you will not be using them or you already have them installed somewhere else), check below for running only specific parts of the demo or directing the installer to an already installed component.
Once the demo setup has finished, you can start playing with the various components by starting the demo setup:
ant start.demoThis will:
Start H2 database server
Start WildFly application server
Start Eclipse
Now wait until the process management console comes up:
http://localhost:8080/jbpm-console
Note
It could take a minute to start up the application server and web application. If the web page doesn't show up after a while, make sure you don't have a firewall blocking that port, or another application already using the port 8080. You can always take a look at the server log jbpm-installer/wildfly-8.1.0.Final/standalone/log/server.log
Finally, if you also want to use the DashBuilder for reporting (which is implemented as a separate war), you can now also install this:
ant install.dashboard.into.jbossOnce everything is started, you can start playing with the Eclipse and web tooling, as explained in the following sections.
If you only want to try out the web tooling and do not wish to download and install the Eclipse tooling, you can use these alternative commands:
ant install.demo.noeclipse
ant start.demo.noeclipse
Similarly, if you only want to try out the Eclipse tooling and do not wish to download and install the web tooling, you can use these alternative commands:
ant install.demo.eclipse
ant start.demo.eclipse
Now continue with the 10-minute tutorials. Once you're done playing and you want to shut down the demo setup, you can use:
ant stop.demoIf at any point in time would like to start over with a clean demo setup - meaning all changes you did inside the web tooling and/or saved in the database will be lost, you can run the following command (after which you can run the installer again from scratch, note that this cannot be undone):
ant clean.demoOpen up the process management console:
http://localhost:8080/jbpm-console
Note
It could take a minute to start up the AS and web application. If the web page doesn't show up after a while, make sure you don't have a firewall blocking that port, or another application already using the port 8080. You can always take a look at the server log jbpm-installer/jboss-as-7.1.1.Final/standalone/log/server.log
Log in, using krisv / krisv as username / password.
Using a prebuilt Evaluation example, the following screencast gives an overview of how to manage your process instances. It shows you:
- How to build and deploy a process
- How to start a new process instance
- How to look up the current status of a running process instance
- How to look up your tasks
- How to complete a task
- How to generate reports to monitor your process execution
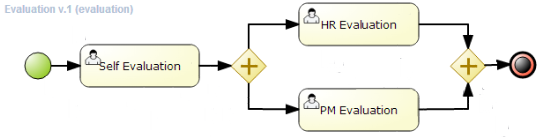
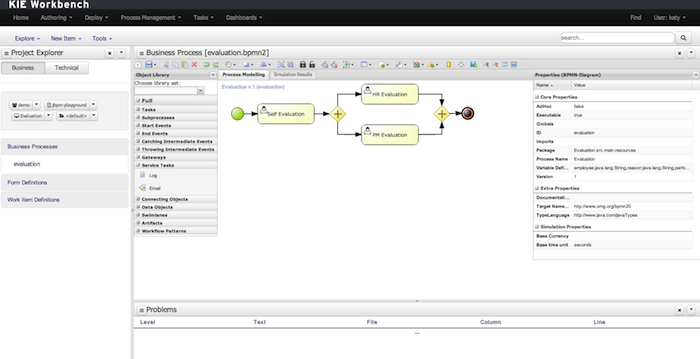
Figure 3.1.
The workbench supports the entire life cycle of your business processes: authoring, deployment, process management, tasks and dashboards.
- The project authoring perspective allows you to look at existing repositories, where each
project can contain business processes (but also business rules, data models, forms, etc.). By default,
the workbench will download two sample playground repositories, containing examples to look at.
- In this screencast, the Evaluation project inside the jbpm-playground repository is used.
- The project explorer shows all available artefacts:
- evaluation: business process describing the evaluation process as a sequence of tasks
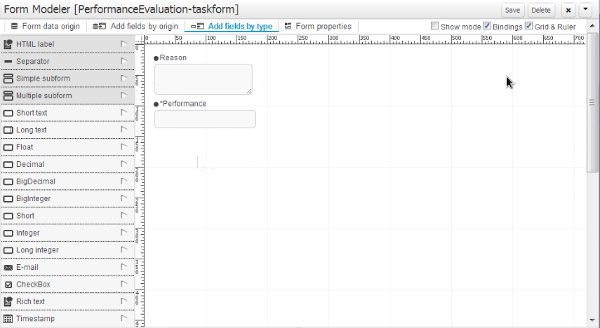
- evaluation-taskform: process form to start the evaluation process
- PerformanceEvaluation-taskform: task form to perform the evaluation tasks
- To make a process available for execution, you need to successfully build and deploy it first. To do so, open up the Project Editor (from the Tools menu) and click Build & Deploy.
- To manage your process definitions and instances, click on the "Process Management" menu option
at the top menu bar an select one of available options depending on you interest:
- Process Definitions - lists all available process definitions
- Process Instances - lists all active process instances (allows to show completed, aborted as well by changing filter criteria)
- Process definitions panel allow you to start a new process instance by clicking on the "Play"
button. The process form (as defined in the project) will be shown, where you need to fill in the
necessary information to start the process. In this case, you need to fill the user you want to start
an evaluation for (in this case use "krisv") and a reason for the request, after which you can complete
the form. Some details about the process instance that was just started will be shown in the process
instance details panel. From there you can access additional details:
The process instance that you just started is first requiring a self-evaluation of the user and is waiting until the user has completed this task.
- Process model - to visualize current state of the process
- Process variables - to see current values of process variables
- To see the tasks that have been assigned to you, choose the "Tasks" menu option on the top bar and select "Task List" (you may need to click refresh to update your task view). The personal tasks table should show a "Performance Evaluation" task reserved for you. After starting the task, you can complete the task, which will open up the task form related to this task. You can fill in the necessary data and then complete the form and close the window. After completing the task, you could check the "Process Instances" once more to check the progress of your process instance. You should be able to see that the process is now waiting for your HR manager and project manager to also perform an evaluation. You could log in as "john" / "john" and "mary" / "mary" to complete these tasks.
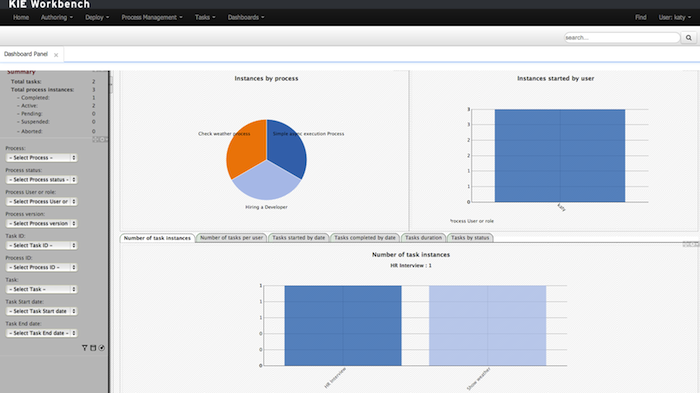
- After starting and/or completing a few process instances and human tasks, you can generate a report of what has happened so far. Under "Dashboards", select "Process & Task Dashboard". This is a set of see predefined charts that allow users to spot what is going on in the system. Charts can be fully customized as well, as explained in the Business Activity Monitoring chapter.
The following screencast gives an overview of how to use the Eclipse tooling. It shows you:
- How to import and execute the evaluation sample project
- Import the evaluation project (included in the jbpm-installer)
- Open the Evaluation.bpmn process
- Open the com.sample.ProcessTest Java class
- Execute the ProcessTest class to run the process
- How to create a new jBPM project (including sample process and JUnit test)
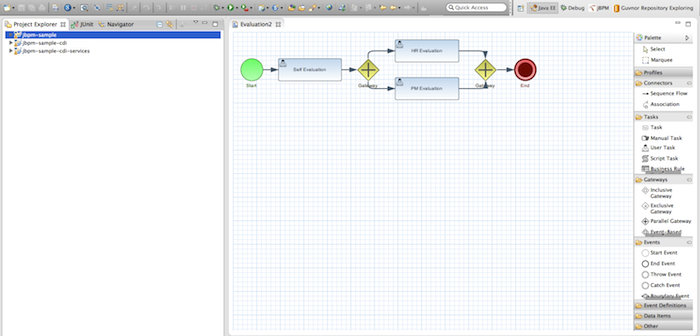
Figure 3.2.
You can import the evaluation project - a sample included in the jbpm-installer - by selecting "File -> Import ...", select "Existing Projects into Workspace" and browse to the jbpm-installer/sample/evaluation folder and click "Finish". You can open up the evaluation process and the ProcessTest class. To execute the class, right-click on it and select "Run as ... - Java Application". The console should show how the process was started and how the different actors in the process completed the tasks assigned to them, to complete the process instance.
You could also create a new project using the jBPM project wizard. The sample projects contain a process and an associated Java file to start the process. Select "File - New ... - Project ..." and under the "jBPM" category, select "jBPM project" and click "Next". Give the project a name and click "Next". You can choose from a simple HelloWorld example or a slightly more advanced example using persistence and human tasks. If you select the latter and click Finish, you should see a new project containing a "sample.bpmn" process and a "com.sample.ProcessTest" JUnit test class. You can open the BPMN2 process by double-clicking it. To execute the process, right-click on ProcessTest.java and select "Run As - Java Application".
The workbench by default brings two sample playground repositories (by cloning the jbpm-playground repository hosted on GitHub). In cases where this is not wanted (access to Internet might not be available or there might be a need to start with a completely clean installation of the workbench) this default behavior can be turned off. To do so, change the following system property in the start.jboss target to false in the build.xml:
-Dorg.kie.demo=falseNote that this will create a completely empty version of the workbench. To be able to start modeling processes, the following elements need to be created first:
- Organizational unit
- Repository (new or clone existing one)
- Project
The workbench web application is using the pre-installed other security domain for authenticating
and authorizing users (as specified in the WEB-INF/jboss-web.xml inside the WARs).
The application server uses by default property files based realms - Please note that this configuration is intended only for demo purposes (users, roles and passwords are stored in simple property files on the filesystem).
Authentication is configured in the standalone.xml file as follows:
    <security-domain name="other" cache-type="default">
      <authentication>
        <login-module code="Remoting" flag="optional">
          <module-option name="password-stacking" value="useFirstPass"/>
        </login-module>
        <login-module code="RealmDirect" flag="required">
          <module-option name="password-stacking" value="useFirstPass"/>
        </login-module>
      </authentication>
    </security-domain>
    <security-realm name="ApplicationRealm">
      <authentication>
        <local default-user="$local" allowed-users="*" skip-group-loading="true"/>
        <properties path="users.properties" relative-to="jboss.server.config.dir"/>
      </authentication>
      <authorization>
        <properties path="roles.properties" relative-to="jboss.server.config.dir"/>
      </authorization>
    </security-realm>
These are the default users:
Table 3.1. Default users
| Name | Password | Workbench roles | Task roles |
|---|---|---|---|
| admin | admin | admin,analyst | |
| krisv | krisv | admin,analyst | |
| john | john | analyst | Accounting,PM |
| mary | mary | analyst | HR |
| sales-rep | sales-rep | analyst | sales |
| jack | jack | analyst | IT |
| katy | katy | analyst | HR |
| salaboy | salaboy | admin,analyst | IT,HR,Accounting |
| kieserver | kieserver1! | kie-server |
Authentication can be customized by using any of the following options:
The users and groups management screens on the workbench web application.
Navigate into the workbench web application and use the menu
Home->User management/Group managemententries.The
add-userscript that comes by default on Wildfly/EAP.Example for Linux platforms - run the following command and follow the script instructions:
/bin/sh $JBOSS_HOME/bin/add-user.sh
          --user-properties $JBOSS_HOME/standalone/configuration/users.properties
          --group-properties $JBOSS_HOME/standalone/configuration/roles.properties
          --realm ApplicationRealm
jBPM uses the Java Persistence API specification (v2) to allow users to configure whatever
datasource they want to use to persist runtime data. As a result, the instructions below describe
how you should configure a datasource when using JPA on JBoss application server (e.g. AS7, EAP6
or Wildfly8) using a persistence.xml file and configuring your datasource and
driver in your application server's standalone.xml, similar to how you would
configure any other application using JPA on JBoss application server. The installer automates some
of this (like copying the right files to the right location after installation).
By default, the jbpm-installer uses an H2 database for persisting runtime data. In this section we will:
modify the persistence settings for runtime persistence of process instance state
test the startup with our new settings!
You will need a local instance of a database, in this case we will use MySQL.
In the MySQL database used in this quickstart, create a single user:
- user/schema "jbpm" with password "jbpm" (which will be used to persist all entities)
If you end up using different names for your user/schemas, please make a note of where we insert "jbpm" in the configuration files.
If you want to try this quickstart with another database, a section at the end of this quickstart describes what you may need to modify.
The following files define the persistence settings for the jbpm-installer demo:
- jbpm-installer/db/jbpm-persistence-JPA2.xml
- Application server configuration
- standalone-*.xml
Tip
There are multiple standalone.xml files available (depending on whether you are using JBoss AS7, JBoss EAP6 or Wildfly8 and whether you are running the normal or full profile). The full profile is required to use the JMS component for remote integration, so will be used by default by the installer. Best practice is to update all standalone.xml files to have consistent setup but most important is to have standalone-full-wildfly-8.1.0.Final.xml properly configured as this is used by default by the installer.
Do the following:
- Disable H2 default database and enable MySQL database in build.properties
You might want to update the db driver jar name and download url to whatever version of the jar matches your installation.# default is H2 # H2.version=1.3.168 # db.name=h2 # db.driver.jar.name=${db.name}.jar # db.driver.download.url=http://repo1.maven.org/maven2/com/h2database/h2/${H2.version}/h2-${H2.version}.jar #mysql db.name=mysql db.driver.module.prefix=com/mysql db.driver.jar.name=mysql-connector-java-5.1.18.jar db.driver.download.url=https://repository.jboss.org/nexus/service/local/repositories/central/content/mysql/mysql-connector-java/5.1.18/mysql-connector-java-5.1.18.jar db/jbpm-persistence-JPA2.xml:This is the JPA persistence file that defines the persistence settings used by jBPM for both the process engine information, the logging/BAM information and task service.
In this file, you will have to change the name of the hibernate dialect used for your database.
The original line is:
<property name="hibernate.dialect" value="org.hibernate.dialect.H2Dialect"/>In the case of a MySQL database, you need to change it to:
<property name="hibernate.dialect" value="org.hibernate.dialect.MySQLDialect"/>For those of you who decided to use another database, a list of the available hibernate dialect classes can be found here.
standalone-full-wildfly-8.1.0.Final.xml:Standalone.xmlandstandalone-full.xmlare the configuration for the standalone JBoss application server. When the installer installs the demo, it copies these files to thestandalone/configurationdirectory in the JBoss server directory. Since the installer uses Wildfly8 by default as application server, you probably need to changestandalone-full-wildfly-8.1.0.Final.xml.We need to change the datasource configuration in
standalone-full.xmlso that the jBPM process engine can use our MySQL database. The original file contains (something very similar to) the following lines:<datasource jta="true" jndi-name="java:jboss/datasources/jbpmDS" pool-name="H2DS" enabled="true" use-java-context="true" use-ccm="true"> <connection-url>jdbc:h2:tcp://localhost/~/jbpm-db;MVCC=TRUE</connection-url> <driver>h2</driver> <security> <user-name>sa</user-name> </security> </datasource> <drivers> <driver name="h2" module="com.h2database.h2"> <xa-datasource-class>org.h2.jdbcx.JdbcDataSource</xa-datasource-class> </driver> </drivers>Change the lines to the following:
<datasource jta="true" jndi-name="java:jboss/datasources/jbpmDS" pool-name="MySQLDS" enabled="true" use-java-context="true" use-ccm="true">
    <connection-url>jdbc:mysql://localhost:3306/jbpm</connection-url>
    <driver>mysql</driver>
    <security>
       <user-name>jbpm</user-name>
       <password>jbpm</password>
    </security>
</datasource>
and add an additional driver configuration:
<driver name="mysql" module="com.mysql">
    <xa-datasource-class>com.mysql.jdbc.jdbc2.optional.MysqlXADataSource</xa-datasource-class>
</driver>
To install driver jars in JBoss application server (Wildfly8, EAP6, etc.), it is recommended to install the driver jar as a module. The installer already takes care of this mostly: it will copy the driver jar (you specified in the
build.properties) to the right folder inside the modules directory of your server and put a matching module.xml next to it. For MySQL, this file is calleddb/mysql_module.xml. Open this file and make sure that the file name of the driver jar listed there is identical the driver jar name you specified in thebuild.properties(including the version). Note that, even if you simply uncommented the default MySQL configuration, you will still need to add the right version here.Starting the demoWe've modified all the necessary files at this point. Now would be a good time to make sure your database is started up as well!
The installer script copies this file into the jbpm-console WAR before the WAR is installed on the server. If you have already run the installer, it is recommended to stop the installer and clean it first using
ant stop.demoand
ant clean.demobefore continuing.
Run
ant install.demoto (re)install the wars and copy the necessary configuration files. Once you've done that, (re)start the demo using
ant start.demoProblems?If this isn't working for you, please try the following:
- Please double check the files you've modified: I wrote this, but still made mistakes when changing files!
- Please make sure that you don't secretly have another (unmodified) instance of JBoss AS running.
- If neither of those work (and you're using MySQL), please do then let us know.
If you decide to use a different database with this demo, you need to remember the following when going through the steps above:
- Configuring the jBPM datasource in
standalone.xml:- After locating the
java:jboss/datasources/jbpmDSdatasource, you need to provide the following properties specific to your database:For example:- Change url of your database
- Change the user-name and password
- Change the name of the driver (which you'll create next)
<datasource jta="true" jndi-name="java:jboss/datasources/jbpmDS" pool-name="PostgreSQLDS" enabled="true" use-java-context="true" use-ccm="true"> <connection-url>jdbc:postgresql://localhost:5432/jbpm</connection-url> <driver>postgresql</driver> <security> <user-name>jbpm</user-name> <password>jbpm</password> </security> </datasource> - Add an additional driver configuration:
For example:
- Change the name of the driver to match the name you specified when configuring the datasource in the previous step
- Change the module of the driver: the database driver jar should
be installed as a module (see below) and here you should reference the unique
name of the module. Since the installer can take care of automatically generating
this module for you (see below), this should match the
db.driver.module.prefixproperty inbuild.properties(where forward slashes are replaced by a point). In the example below, I used “org/postgresql” asdb.driver.module.prefixwhich means that I should then useorg.postgresqlas module name for the driver. - Fill in the correct name of the XA datasource class to use
<driver name="postgresql" module="org.postgresql">
    <xa-datasource-class>org.postgresql.xa.PGXADataSource</xa-datasource-class>
</driver>
- After locating the
- You need to change the dialect in
persistence.xmlto the dialect for your database, for example:<property name="hibernate.dialect" value="org.hibernate.dialect.PostgreSQLDialect"/> - In order to make sure your driver will be correctly installed in
the JBoss application server, there are typically multiple options, like install as a module or
as a deployment. It is recommended to install the driver as a module for AS7, EAP6 and Wildfly8.
For example, for AS7 both ways are explained
here.
If you choose to install driver as JBoss module (recommended), please do the following:
- Install the driver JAR as a module, which is what the install script does.
-
Otherwise, you can modify and install the downloaded JAR as a deployment.
In this case you will have to copy the JAR yourself to the
standalone/deploymentsdirectory.
- In
build.properties, disable the default H2 driver properties# default is H2 # H2.version=1.3.168 # db.name=h2 # db.driver.jar.name=h2-${H2.version}.jar # db.driver.download.url=http://repo1.maven.org/maven2/com/h2database/h2/${H2.version}/h2-${H2.version}.jar - Uncomment one of the other example configs (mysql or postgresql) or create your own:
#postgresql db.name=postgresql db.driver.module.prefix=org/postgresql db.driver.jar.name=postgresql-9.1-902.jdbc4.jar db.driver.download.url=https://repository.jboss.org/nexus/content/repositories/thirdparty-uploads/postgresql/postgresql/9.1-902.jdbc4/postgresql-9.1-902.jdbc4.jar- Change the
db.nameproperty inbuild.propertiesto a name for your database. - Change the
db.driver.module.prefixproperty to a name for the module of your driver. Note that this should match the module property when configuring the driver instandalone.xml(where forward slashes in the prefix here are replaced by a point). In the example above, I used “org/postgresql” asdb.driver.module.prefixwhich means that I should then useorg.postgresqlas module name for the driver. - Change the
db.driver.jar.nameproperty to the name of the jar that contains your database driver. - Change the
db.driver.download.urlproperty to where the driver jar can be downloaded. Alternatively, you could manually download the jar yourself, and place it in thedb/driversfolder, using the same name as you specified in thedb.driver.jar.nameproperty.
- Change the
- Lastly, you'll have to create the
db/${db.name}_module.xmlfile. As an example you can use db/mysql_module.xml, so just make a copy of it and:For example, the top of the file would look like:- Change the name of the module to match the driver module name above
- Change the name of the module resource path to the name of the
db.driver.jar.nameproperty.
<module xmlns="urn:jboss:module:1.0" name="org.postgresql">
   <resources>
     <resource-root path="postgresql-9.1-902.jdbc4.jar"/>
   </resources>
By default the demo setup makes use of Hibernate auto DDL generation capabilities to build up the complete database schema, including all tables, sequences, etc. This might not always be welcomed (by your database administrator), and thus the installer provides DDL scripts for most popular databases.
Table 3.2. DDL scripts
| Database name | Location |
|---|---|
| db2 | jbpm-installer/db/ddl-scripts/db2 |
| derby | jbpm-installer/db/ddl-scripts/derby |
| h2 | jbpm-installer/db/ddl-scripts/h2 |
| hsqldb | jbpm-installer/db/ddl-scripts/hsqldb |
| mysql5 | jbpm-installer/db/ddl-scripts/mysql5 |
| mysqlinnodb | jbpm-installer/db/ddl-scripts/mysqlinnodb |
| oracle | jbpm-installer/db/ddl-scripts/oracle |
| postgresql | jbpm-installer/db/ddl-scripts/postgresql |
| sqlserver | jbpm-installer/db/ddl-scripts/sqlserver |
| sqlserver2008 | jbpm-installer/db/ddl-scripts/sqlserver2008 |
DDL scripts are provided for both jBPM and Quartz schemas although Quartz schema DDL script is only required when the timer service should be configured with Quartz database job store. See the section on timers for additional details.
This can be used to initially create the database schema, but it can also serve as the basis for any\ optimization that needs to be applied - such as indexes, etc.
jBPM installer ant script performs most of the work automatically and usually does not require additional attention but in case it does, here is a list of available targets that might be needed to perform some of the steps manually.
Table 3.3. jBPM installer available targets
| Target | Description |
|---|---|
| clean.db | cleans up database used by jBPM demo (applies only to H2 database) |
| clean.demo | cleans up entire installation so new installation can be performed |
| clean.demo.noeclipse | same as clean.demo but does not remove Eclipse |
| clean.eclipse | removes Eclipse and its workspace |
| clean.generated.ddl | removes DDL scripts generated if any |
| clean.jboss | removes application server with all its deployments |
| clean.jboss.repository | removes repository content for demo setup (guvnor Maven repo, niogit, etc) |
| download.dashboard | downloads jBPM dashboard component (BAM) |
| download.db.driver | downloads DB driver configured in build.properties |
| download.ddl.dependencies | downloads all dependencies required to run DDL script generation tool |
| download.droolsjbpm.eclipse | downloads Drools and jBPM Eclipse plugin |
| download.eclipse | downloads Eclipse distribution |
| download.jboss | downloads JBoss Application Server |
| download.jBPM.bin | downloads jBPM binary distribution (jBPM libs and its dependencies) |
| download.jBPM.console | downloads jBPM console for JBoss AS |
| install.dashboard.into.jboss | installs jBPM dashboard into JBoss AS |
| install.db.files | installs DB driver as JBoss module |
| install.demo | installs complete demo environment |
| install.demo.eclipse | installs Eclipse with all jBPM plugins, no server installation |
| install.demo.noeclipse | similar to install.demo but skips Eclipse installation |
| install.dependencies | installs custom libraries (such as work item handlers, etc) into the jBPM console |
| install.droolsjbpm-eclipse.into.eclipse | installs droolsjbpm Eclipse plugin into Eclipse |
| install.eclipse | install Eclipse IDE |
| install.jboss | installs JBoss AS |
| install.jBPM-console.into.jboss | installs jBPM console application into JBoss AS |
Some common issues are explained below.
Q: What if the installer complains it cannot download component X?
A: Are you connected to the Internet? Do you have a firewall turned on? Do you require a proxy? It might be possible that one of the locations we're downloading the components from is temporarily offline. Try downloading the components manually (possibly from alternate locations) and put them in the jbpm-installer/lib folder.
Q: What if the installer complains it cannot extract / unzip a certain JAR/WAR/zip?
A: If your download failed while downloading a component, it is possible that the installer is trying to use an incomplete file. Try deleting the component in question from the jbpm-installer/lib folder and reinstall, so it will be downloaded again.
Q: What if I have been changing my installation (and it no longer works) and I want to start over again with a clean installation?
A: You can use ant clean.demo to remove all the installed components, so you end up with a fresh installation again.
Q: I sometimes see exceptions when trying to stop or restart certain services, what should I do?
A: If you see errors during shutdown, are you sure the services were still running? If you see exceptions during restart, are you sure the service you started earlier was successfully shutdown? Maybe try killing the services manually if necessary.
Q: Something seems to be going wrong when running Eclipse but I have no idea what. What can I do?
A: Always check the consoles for output like error messages or stack traces. You can also check the Eclipse Error Log for exceptions. Try adding an audit logger to your session to figure out what's happening at runtime, or try debugging your application.
Q: Something seems to be going wrong when running the a web-based application like the jbpm-console. What can I do?
A: You can check the server log for possible exceptions: jbpm-installer/jboss-as-{version}/standalone/log/server.log (for JBoss AS7).
For all other questions, try contacting the jBPM community as described in the Getting Started chapter.
The web-based workbench by default will install two sample repositories that contain various sample projects that help you getting started. This section shows different examples that can be found in the jbpm-playground repository (also available here: https://github.com/droolsjbpm/jbpm-playground). All these examples are high level and business oriented.
If you want to contribute with these examples please get in touch with any member of the jBPM/Drools Team.
To import the Human Resources example, as well as other examples, follow these steps:
Logging into Workbench
On the command line, change into the
$SERVER_HOME/bin/directory and execute the following command:for Unix environment:
./standalone.shfor Windows environment:
./standalone.bat
Once your server is up and running, open the following address in a web browser:
http://localhost:8080/business-centralThis opens the login page.
Log into Workbench with the user credentials created during installation.
Importing Projects Through Git
Click → .
Click → .
In the New Repository dialogue, enter following information:
Repository Name: for example, playground.
Organizational Unit: select your organizational unit, for example example.
Git URL: enter the Git URL you want to import, for example: https://github.com/droolsjbpm/jbpm-playground.
Click .
This will import a number of premade examples into your instance of jBPM.
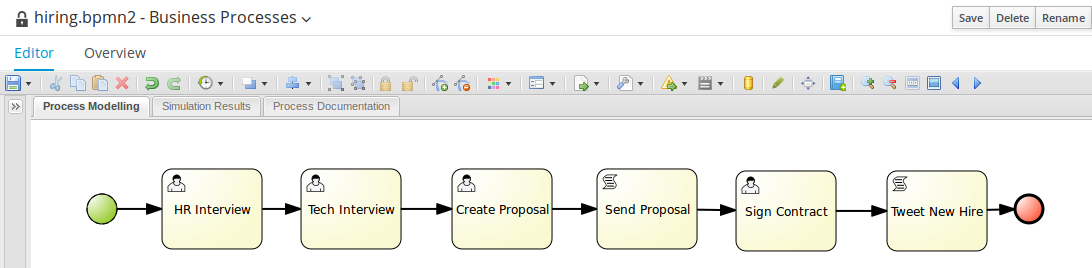
The Human Resource Example's use case can be described as follows: A company wants to hire new developers. In this process, three departments (that is the Human resources, IT, and Accounting) are involved. These departments are represented by three users: Katy, Jack, and John respectively.
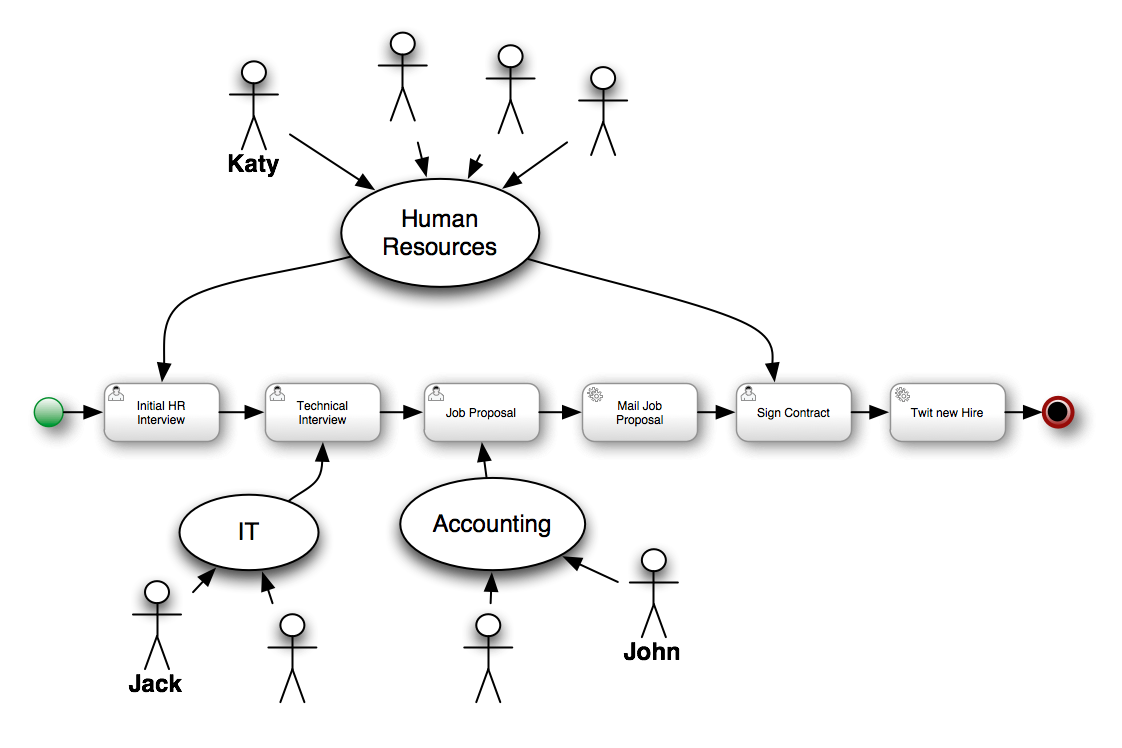
Note that only four out of the six defined activities within the business process are User Tasks. User Tasks require human interaction. The other two tasks are Service Tasks, which are automated and connected to other systems.
Each instance of the process will follow certain actions:
The human resources team performs the initial interview with the candidate.
The IT department team performs the technical interview.
Based on the output from the previous two steps, the accounting team creates a job proposal.
When the proposal has been drafted, it is automatically sent to the candidate via email.
If the candidate accepts the proposal, a new meeting to sign the contract is scheduled.
Finally, if the candidate accepts the proposal, the system posts a message about the new hire using Twitter service connector.
Note, that Jack, John, and Katy represent any employee within the company with appropriate role assigned.
To start exploring the project:
Click → .
Click → .
The authoring perspective contains the hiring.bpmn2 process and a set of forms for each human task. Click these assets to explore. Notice that different editors open for different types of assets.
To build the Project:
Click → .
Click .
Click → .
creates a new JAR artifact that is deployed to the runtime environment as a new deployment unit.
After successfully building and deploying your project, you can verify its presence in the Deployments tab. Click → to do so.

You can find all the deployed units in the Deployments tab. When you a project from the Project Editor, it is deployed using the default configurations. That means using the Singleton Strategy, the default Kie Base and the default Kie Session.
If you want a more advanced deployment, undeploy and re-deploy your artifacts using their GAV and selecting non-default settings. Then, you will be able to set a different strategy, or use a non-default Kie Base or Kie Session.
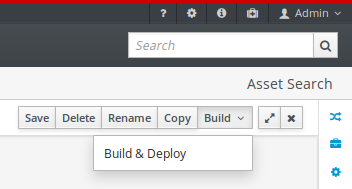
Once your artifact that contains the process definition is deployed, the Process Definition will become available in → .
To create new process instances:
Click → .
Start your instance:
Figure 4.3. Starting Process Instances
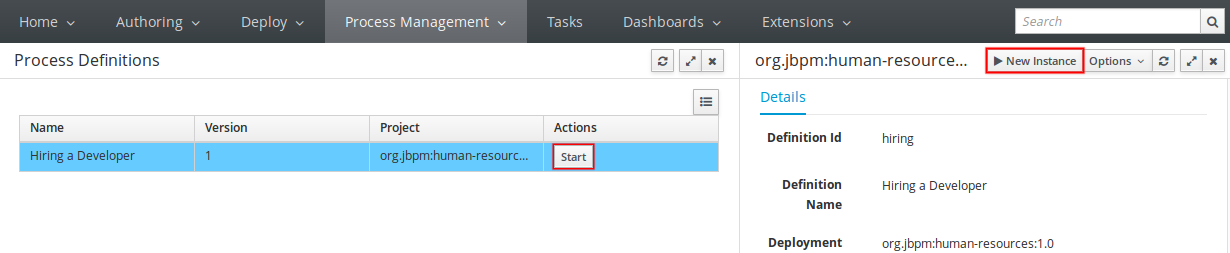
You can start process instances using any of the two highlighted options.
The Process Definitions tab contains all the available process definitions in the runtime environment. In order to add new process definitions, build and deploy a new project.
Most processes require additional information to create a new process instance. This is done through forms. For this project, fill in the name of the candidate that is to be interviewed.
When you click , you create a new process instance. This creates the first task, that is available for the Human Resources team. To see the task, you need to logout and log in as a user with the appropriate role assigned, that is someone from the Human Resources.
When you start the process, you can interact with the human tasks. To do so, click → .
Note that in order to see the tasks in the task list, you need to belong to specific user groups, for which the task is designed. For example, the HR Interview task is visible only for the members of the HR group, and the Tech Interview Task is visible only to the members of the IT group.
Using the jBPM Core Engine
Table of Contents
- 5. Core Engine API
- 6. Processes
- 7. Human Tasks
- 8. Persistence and Transactions
This chapter introduces the API you need to load processes and execute them. For more detail on how to define the processes themselves, check out the chapter on BPMN 2.0.
To interact with the process engine (for example, to start a process), you need to set up a session. This session will be used to communicate with the process engine. A session needs to have a reference to a knowledge base, which contains a reference to all the relevant process definitions. This knowledge base is used to look up the process definitions whenever necessary. To create a session, you first need to create a knowledge base, load all the necessary process definitions (this can be from various sources, like from classpath, file system or process repository) and then instantiate a session.
Once you have set up a session, you can use it to start executing processes. Whenever a process is started, a new process instance is created (for that process definition) that maintains the state of that specific instance of the process.
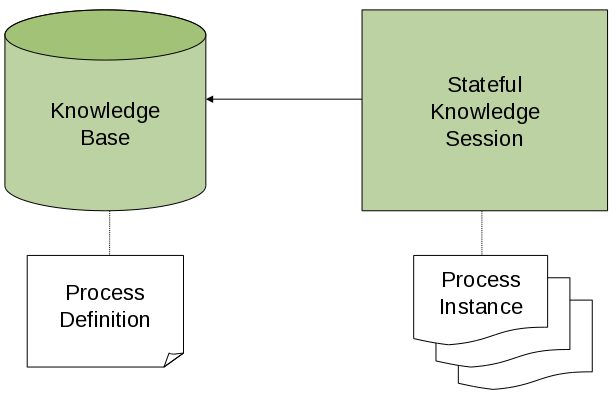
For example, imagine you are writing an application to process sales orders. You could then define one or more process definitions that define how the order should be processed. When starting up your application, you first need to create a knowledge base that contains those process definitions. You can then create a session based on this knowledge base so that, whenever a new sales order comes in, a new process instance is started for that sales order. That process instance contains the state of the process for that specific sales request.
A knowledge base can be shared across sessions and usually is only created once, at the start of the application (as creating a knowledge base can be rather heavy-weight as it involves parsing and compiling the process definitions). Knowledge bases can be dynamically changed (so you can add or remove processes at runtime).
Sessions can be created based on a knowledge base and are used to execute processes and interact with the engine. You can create as many independent session as you need and creating a session is considered relatively lightweight. How many sessions you create is up to you. In general, most simple cases start out with creating one session that is then called from various places in your application. You could decide to create multiple sessions if for example you want to have multiple independent processing units (for example, if you want all processes from one customer to be completely independent from processes for another customer, you could create an independent session for each customer) or if you need multiple sessions for scalability reasons. If you don't know what to do, simply start by having one knowledge base that contains all your process definitions and create one session that you then use to execute all your processes.
The jBPM project has a clear separation between the API the users should be interacting with and the actual implementation classes. The public API exposes most of the features we believe "normal" users can safely use and should remain rather stable across releases. Expert users can still access internal classes but should be aware that they should know what they are doing and that the internal API might still change in the future.
As explained above, the jBPM API should thus be used to (1) create a knowledge base that contains your process definitions, and to (2) create a session to start new process instances, signal existing ones, register listeners, etc.
The jBPM API allows you to first create a knowledge base. This knowledge base should include all your process definitions that might need to be executed by that session. To create a knowledge base, use a KieHelper to load processes from various resources (for example from the classpath or from the file system), and then create a new knowledge base from that helper. The following code snippet shows how to create a knowledge base consisting of only one process definition (using in this case a resource from the classpath).
  KieHelper kieHelper = new KieHelper();
  KieBase kieBase = kieHelper
                    .addResource(ResourceFactory.newClassPathResource("MyProcess.bpmn"))
                    .build();
The ResourceFactory has similar methods to load files from file system, from URL, InputStream, Reader, etc.
This is considered manual creation of knowledge base and while it is simple it is not recommended for real application development but more for try outs. Following you'll find recommended and much more powerful way of building knowledge base, knowledge session and more - RuntimeManager.
Once you've loaded your knowledge base, you should create a session to interact with the engine. This session can then be used to start new processes, signal events, etc. The following code snippet shows how easy it is to create a session based on the previously created knowledge base, and to start a process (by id).
KieSession ksession = kbase.newKieSession();
ProcessInstance processInstance = ksession.startProcess("com.sample.MyProcess");
The ProcessRuntime interface defines all the session methods
for interacting with processes, as shown below.
  /**
	 * Start a new process instance.  The process (definition) that should
	 * be used is referenced by the given process id.
	 *
	 * @param processId  The id of the process that should be started
	 * @return the ProcessInstance that represents the instance of the process that was started
	 */
    ProcessInstance startProcess(String processId);

    /**
	 * Start a new process instance.  The process (definition) that should
	 * be used is referenced by the given process id.  Parameters can be passed
	 * to the process instance (as name-value pairs), and these will be set
	 * as variables of the process instance.
     *
	 * @param processId  the id of the process that should be started
     * @param parameters  the process variables that should be set when starting the process instance
	 * @return the ProcessInstance that represents the instance of the process that was started
     */
    ProcessInstance startProcess(String processId,
                                 Map<String, Object> parameters);

    /**
     * Signals the engine that an event has occurred. The type parameter defines
     * which type of event and the event parameter can contain additional information
     * related to the event.  All process instances that are listening to this type
     * of (external) event will be notified.  For performance reasons, this type of event
     * signaling should only be used if one process instance should be able to notify
     * other process instances. For internal event within one process instance, use the
     * signalEvent method that also include the processInstanceId of the process instance
     * in question.
     *
     * @param type the type of event
     * @param event the data associated with this event
     */
    void signalEvent(String type,
                     Object event);

    /**
     * Signals the process instance that an event has occurred. The type parameter defines
     * which type of event and the event parameter can contain additional information
     * related to the event.  All node instances inside the given process instance that
     * are listening to this type of (internal) event will be notified.  Note that the event
     * will only be processed inside the given process instance.  All other process instances
     * waiting for this type of event will not be notified.
     *
     * @param type the type of event
     * @param event the data associated with this event
     * @param processInstanceId the id of the process instance that should be signaled
     */
    void signalEvent(String type,
                     Object event,
                     long processInstanceId);

    /**
     * Returns a collection of currently active process instances.  Note that only process
     * instances that are currently loaded and active inside the engine will be returned.
     * When using persistence, it is likely not all running process instances will be loaded
     * as their state will be stored persistently.  It is recommended not to use this
     * method to collect information about the state of your process instances but to use
     * a history log for that purpose.
     *
     * @return a collection of process instances currently active in the session
     */
    Collection<ProcessInstance> getProcessInstances();

    /**
     * Returns the process instance with the given id.  Note that only active process instances
     * will be returned.  If a process instance has been completed already, this method will return
     * null.
     *
     * @param id the id of the process instance
     * @return the process instance with the given id or null if it cannot be found
     */
    ProcessInstance getProcessInstance(long processInstanceId);

    /**
     * Aborts the process instance with the given id.  If the process instance has been completed
     * (or aborted), or the process instance cannot be found, this method will throw an
     * IllegalArgumentException.
     *
     * @param id the id of the process instance
     */
    void abortProcessInstance(long processInstanceId);

    /**
     * Returns the WorkItemManager related to this session.  This can be used to
     * register new WorkItemHandlers or to complete (or abort) WorkItems.
     *
     * @return the WorkItemManager related to this session
     */
    WorkItemManager getWorkItemManager();
The session provides methods for registering and removing listeners.
A ProcessEventListener can be used to listen to process-related events,
like starting or completing a process, entering and leaving a node, etc. Below,
the different methods of the ProcessEventListener class are shown.
An event object provides access to related information, like the process instance
and node instance linked to the event. You can use this API to register your own
event listeners.
public interface ProcessEventListener {

  void beforeProcessStarted( ProcessStartedEvent event );
  void afterProcessStarted( ProcessStartedEvent event );
  void beforeProcessCompleted( ProcessCompletedEvent event );
  void afterProcessCompleted( ProcessCompletedEvent event );
  void beforeNodeTriggered( ProcessNodeTriggeredEvent event );
  void afterNodeTriggered( ProcessNodeTriggeredEvent event );
  void beforeNodeLeft( ProcessNodeLeftEvent event );
  void afterNodeLeft( ProcessNodeLeftEvent event );
  void beforeVariableChanged(ProcessVariableChangedEvent event);
  void afterVariableChanged(ProcessVariableChangedEvent event);

}
A note about before and after events: these events typically act like a stack, which means that any events that occur as a direct result of the previous event, will occur between the before and the after of that event. For example, if a subsequent node is triggered as result of leaving a node, the node triggered events will occur inbetween the beforeNodeLeftEvent and the afterNodeLeftEvent of the node that is left (as the triggering of the second node is a direct result of leaving the first node). Doing that allows us to derive cause relationships between events more easily. Similarly, all node triggered and node left events that are the direct result of starting a process will occur between the beforeProcessStarted and afterProcessStarted events. In general, if you just want to be notified when a particular event occurs, you should be looking at the before events only (as they occur immediately before the event actually occurs). When only looking at the after events, one might get the impression that the events are fired in the wrong order, but because the after events are triggered as a stack (after events will only fire when all events that were triggered as a result of this event have already fired). After events should only be used if you want to make sure that all processing related to this has ended (for example, when you want to be notified when starting of a particular process instance has ended.
Also note that not all nodes always generate node triggered and/or node left events. Depending on the type of node, some nodes might only generate node left events, others might only generate node triggered events. Catching intermediate events for example are not generating triggered events (they are only generating left events, as they are not really triggered by another node, rather activated from outside). Similarly, throwing intermediate events are not generating left events (they are only generating triggered events, as they are not really left, as they have no outgoing connection).
jBPM out-of-the-box provides a listener that can be used to create an audit log (either to the console or the a file on the file system). This audit log contains all the different events that occurred at runtime so it's easy to figure out what happened. Note that these loggers should only be used for debugging purposes. The following logger implementations are supported by default:
Console logger: This logger writes out all the events to the console.
File logger: This logger writes out all the events to a file using an XML representation. This log file might then be used in the IDE to generate a tree-based visualization of the events that occurred during execution.
Threaded file logger: Because a file logger writes the events to disk only when closing the logger or when the number of events in the logger reaches a predefined level, it cannot be used when debugging processes at runtime. A threaded file logger writes the events to a file after a specified time interval, making it possible to use the logger to visualize the progress in realtime, while debugging processes.
The KieServices lets you add a KieRuntimeLogger to
your session, as shown below. When creating a console logger, the knowledge session
for which the logger needs to be created must be passed as an argument. The file
logger also requires the name of the log file to be created, and the threaded file
logger requires the interval (in milliseconds) after which the events should be saved.
You should always close the logger at the end of your application.
  import org.kie.api.KieServices;
  import org.kie.api.logger.KieRuntimeLogger;
  ...
  KieRuntimeLogger logger = KieServices.Factory.get().getLoggers().newFileLogger(ksession, "test");
  // add invocations to the process engine here,
  // e.g. ksession.startProcess(processId);
  ...
  logger.close();
The log file that is created by the file-based loggers contains an XML-based overview of all the events that occurred at runtime. It can be opened in Eclipse, using the Audit View in the Drools Eclipse plugin, where the events are visualized as a tree. Events that occur between the before and after event are shown as children of that event. The following screenshot shows a simple example, where a process is started, resulting in the activation of the Start node, an Action node and an End node, after which the process was completed.

A common requirement when working with processes is ability to assign a given process instance some sort of business identifier that can be later on referenced without knowing the actual (generated) id of the process instance. To provide such capabilities, jBPM allows to use CorrelationKey that is composed of CorrelationProperties. CorrelationKey can have either single property describing it (which is in most cases) but it can be represented as multi valued properties set.
Correlation capabilities are provided as part of interface
CorrelationAwareProcessRuntimethat exposes following methods:
      /**
      * Start a new process instance.  The process (definition) that should
      * be used is referenced by the given process id.  Parameters can be passed
      * to the process instance (as name-value pairs), and these will be set
      * as variables of the process instance.
      *
      * @param processId  the id of the process that should be started
      * @param correlationKey custom correlation key that can be used to identify process instance
      * @param parameters  the process variables that should be set when starting the process instance
      * @return the ProcessInstance that represents the instance of the process that was started
      */
      ProcessInstance startProcess(String processId, CorrelationKey correlationKey, Map<String, Object> parameters);

      /**
      * Creates a new process instance (but does not yet start it).  The process
      * (definition) that should be used is referenced by the given process id.
      * Parameters can be passed to the process instance (as name-value pairs),
      * and these will be set as variables of the process instance.  You should only
      * use this method if you need a reference to the process instance before actually
      * starting it.  Otherwise, use startProcess.
      *
      * @param processId  the id of the process that should be started
      * @param correlationKey custom correlation key that can be used to identify process instance
      * @param parameters  the process variables that should be set when creating the process instance
      * @return the ProcessInstance that represents the instance of the process that was created (but not yet started)
      */
      ProcessInstance createProcessInstance(String processId, CorrelationKey correlationKey, Map<String, Object> parameters);

      /**
      * Returns the process instance with the given correlationKey.  Note that only active process instances
      * will be returned.  If a process instance has been completed already, this method will return
      * null.
      *
      * @param correlationKey the custom correlation key assigned when process instance was created
      * @return the process instance with the given id or null if it cannot be found
      */
      ProcessInstance getProcessInstance(CorrelationKey correlationKey);
Correlation is usually used with long running processes and thus require persistence to be enabled to be able to permanently store correlation information.
In the following text, we will refer to two types of "multi-threading": logical and technical. Technical multi-threading is what happens when multiple threads or processes are started on a computer, for example by a Java or C program. Logical multi-threading is what we see in a BPM process after the process reaches a parallel gateway, for example. From a functional standpoint, the original process will then split into two processes that are executed in a parallel fashion.
Of course, the jBPM engine supports logical multi-threading: for example, processes that include a parallel gateway. We've chosen to implement logical multi-threading using one thread: a jBPM process that includes logical multi-threading will only be executed in one technical thread. The main reason for doing this is that multiple (technical) threads need to be be able to communicate state information with each other if they are working on the same process. This requirement brings with it a number of complications. While it might seem that multi-threading would bring performance benefits with it, the extra logic needed to make sure the different threads work together well means that this is not guaranteed. There is also the extra overhead incurred because we need to avoid race conditions and deadlocks.
In general, the jBPM engine executes actions in serial. For example,
when the engine encounters a script task in a process, it will synchronously
execute that script and wait for it to complete before continuing execution.
Similarly, if a process encounters a parallel gateway, it will sequentially
trigger each of the outgoing branches, one after the other. This is possible
since execution is almost always instantaneous, meaning that it is extremely
fast and produces almost no overhead. As a result, the user will usually
not even notice this. Similarly, action scripts in a process are also synchronously
executed, and the engine will wait for them to finish before continuing the
process. For example, doing a Thread.sleep(...) as part of
a script will not make the engine continue execution elsewhere but will
block the engine thread during that period.
The same principle applies to service tasks. When a service task is
reached in a process, the engine will also invoke the handler of this service
synchronously. The engine will wait for the completeWorkItem(...)
method to return before continuing execution. It is important that your
service handler executes your service asynchronously if its execution is
not instantaneous.
An example of this would be a service task that invokes an external service. Since the delay in invoking this service remotely and waiting for the results might be too long, it might be a good idea to invoke this service asynchronously. This means that the handler will only invoke the service and will notify the engine later when the results are available. In the mean time, the process engine then continues execution of the process.
Human tasks are a typical example of a service that needs to be invoked asynchronously, as we don't want the engine to wait until a human actor has responded to the request. The human task handler will only create a new task (on the task list of the assigned actor) when the human task node is triggered. The engine will then be able to continue execution on the rest of the process (if necessary) and the handler will notify the engine asynchronously when the user has completed the task.
RuntimeManager has been introduced to simplify and empower usage of knowledge API especially in context of processes. It provides configurable strategies that control actual runtime execution (how KieSessions are provided) and by default provides following:
- Singleton - runtime manager maintains single KieSession regardless of number of processes available
- Per Request - runtime manager delivers new KieSession for every request
- Per Process Instance - runtime manager maintains mapping between process instance and KieSession and always provides same KieSession whenever working with given process instance
Runtime Manager is primary responsible for managing and delivering instances of RuntimeEngine to the caller. In turn, RuntimeEngine encapsulates two the most important elements of jBPM engine:
KieSession
TaskService
Both of these components are already configured to work with each other smoothly without additional configuration from end user. No more need to register human task handler or keeping track if it's connected to the service or not.
public interface RuntimeManager {

	/**
	 * Returns <code>RuntimeEngine</code> instance that is fully initialized:
	 * <ul>
	 * 	<li>KiseSession is created or loaded depending on the strategy</li>
	 * 	<li>TaskService is initialized and attached to ksession (via listener)</li>
	 * 	<li>WorkItemHandlers are initialized and registered on ksession</li>
	 * 	<li>EventListeners (process, agenda, working memory) are initialized and added to ksession</li>
	 * </ul>
	 * @param context the concrete implementation of the context that is supported by given <code>RuntimeManager</code>
	 * @return instance of the <code>RuntimeEngine</code>
	 */
    RuntimeEngine getRuntimeEngine(Context<?> context);

    /**
     * Unique identifier of the <code>RuntimeManager</code>
     * @return
     */
    String getIdentifier();

    /**
     * Disposes <code>RuntimeEngine</code> and notifies all listeners about that fact.
     * This method should always be used to dispose <code>RuntimeEngine</code> that is not needed
     * anymore. <br/>
     * ksession.dispose() shall never be used with RuntimeManager as it will break the internal
     * mechanisms of the manager responsible for clear and efficient disposal.<br/>
     * Dispose is not needed if <code>RuntimeEngine</code> was obtained within active JTA transaction,
     * this means that when getRuntimeEngine method was invoked during active JTA transaction then dispose of
     * the runtime engine will happen automatically on transaction completion.
     * @param runtime
     */
    void disposeRuntimeEngine(RuntimeEngine runtime);

    /**
     * Closes <code>RuntimeManager</code> and releases its resources. Shall always be called when
     * runtime manager is not needed any more. Otherwise it will still be active and operational.
     */
    void close();

}
RuntimeEngine interface provides the most important methods to get access to engine components:
public interface RuntimeEngine {

	/**
	 * Returns <code>KieSession</code> configured for this <code>RuntimeEngine</code>
	 * @return
	 */
    KieSession getKieSession();

    /**
	 * Returns <code>TaskService</code> configured for this <code>RuntimeEngine</code>
	 * @return
	 */
    TaskService getTaskService();
}
RuntimeManager will ensure that regardless of the strategy it will provide same capabilities when it comes to initialization and configuration of the RuntimeEngine. That means
KieSession will be loaded with same factories (either in memory or JPA based)
WorkItemHandlers will be registered on every KieSession (either loaded from db or newly created)
Event listeners (Process, Agenda, WorkingMemory) will be registered on every KieSession (either loaded from db or newly created)
TaskService will be configured with:
JTA transaction manager
same entity manager factory as for the KieSession
UserGroupCallback from environment
On the other hand, RuntimeManager maintains the engine disposal as well by providing dedicated methods to dispose RuntimeEngine when it's no more needed to release any resources it might have acquired.
Note
RuntimeManager's identifier is used as "deploymentId" during runtime execution. For example, the identifier is persisted as "deploymentId" of a Task when the Task is persisted. Task's deploymentId is used to associate the RuntimeManager when the Task is completed and its process instance is resumed. The deploymentId is also persisted as "externalId" in history log tables. If you don't specify an identifier on RuntimeManager creation, a default value is applied (e.g. "default-per-pinstance" for PerProcessInstanceRuntimeManager). That means your application uses the same deployment in its lifecycle. If you maintain multiple RuntimeManagers in your application, you need to specify their identifiers. For example, jbpm-services (DeploymentService) maintains multiple RuntimeManagers with identifiers of kjar's GAV. kie-workbench web application too because it depends on jbpm-services.
Singleton strategy - instructs RuntimeManager to maintain single instance of RuntimeEngine (and in turn single instance of KieSession and TaskService). Access to the RuntimeEngine is synchronized and by that thread safe although it comes with a performance penalty due to synchronization. This strategy is similar to what was available by default in jBPM version 5.x and it's considered easiest strategy and recommended to start with.
It has following characteristics that are important to evaluate while considering it for given scenario:
small memory footprint - single instance of runtime engine and task service
simple and compact in design and usage
good fit for low to medium load on process engine due to synchronized access
due to single KieSession instance all state objects (such as facts) are directly visible to all process instances and vice versa
not contextual - meaning when retrieving instances of RuntimeEngine from singleton RuntimeManager Context instance is not important and usually EmptyContext.get() is used although null argument is acceptable as well
keeps track of id of KieSession used between RuntimeManager restarts to ensure it will use same session - this id is stored as serialized file on disc in temp location that depends on the environment can be one of following:
value given by jbpm.data.dir system property
value given by jboss.server.data.dir system property
value given by java.io.tmpdir system property
Per request strategy - instructs RuntimeManager to provide new instance of RuntimeEngine for every request. As request RuntimeManager will consider one or more invocations within single transaction. It must return same instance of RuntimeEngine within single transaction to ensure correctness of state as otherwise operation done in one call would not be visible in the other. This is sort of "stateless" strategy that provides only request scope state and once request is completed RuntimeEngine will be permanently destroyed - KieSession information will be removed from the database in case persistence was used.
It has following characteristics:
completely isolated process engine and task service operations for every request
completely stateless, storing facts makes sense only for the duration of the request
good fit for high load, stateless processes (no facts or timers involved that shall be preserved between requests)
KieSession is only available during life time of request and at the end is destroyed
not contextual - meaning when retrieving instances of RuntimeEngine from per request RuntimeManager Context instance is not important and usually EmptyContext.get() is used although null argument is acceptable as well
Per process instance strategy - instructs RuntimeManager to maintain a strict relationship between KieSession and ProcessInstance. That means that KieSession will be available as long as the ProcessInstance that it belongs to is active. This strategy provides the most flexible approach to use advanced capabilities of the engine like rule evaluation in isolation (for given process instance only), maximum performance and reduction of potential bottlenecks intriduced by synchronization; and at the same time reduces number of KieSessions to the actual number of process instances rather than number of requests (in contrast to per request strategy).
It has following characteristics:
most advanced strategy to provide isolation to given process instance only
maintains strict relationship between KieSession and ProcessInstance to ensure it will always deliver same KieSession for given ProcessInstance
merges life cycle of KieSession with ProcessInstance making both to be disposed on process instance completion (complete or abort)
allows to maintain data (such as facts, timers) in scope of process instance - only process instance will have access to that data
introduces bit of overhead due to need to look up and load KieSession for process instance
validates usage of KieSession so it cannot be (ab)used for other process instances, in such a case exception is thrown
is contextual - accepts following context instances:
EmptyContext or null - when starting process instance as there is no process instance id available yet
ProcessInstanceIdContext - used after process instance was created
CorrelationKeyContext - used as an alternative to ProcessInstanceIdContext to use custom (business) key instead of process instance id
Regular usage scenario for RuntimeManager is:
At application startup
build RuntimeManager and keep it for entire life time of the application, it's thread safe and can be (or even should be) accessed concurrently
At request
get RuntimeEngine from RuntimeManager using proper context instance dedicated to strategy of RuntimeManager
get KieSession and/or TaskService from RuntimeEngine
perform operations on KieSession and/or TaskService such as startProcess, completeTask, etc
once done with processing dispose RuntimeEngine using RuntimeManager.disposeRuntimeEngine method
At application shutdown
close RuntimeManager
Note
When RuntimeEngine is obtained from RuntimeManager within an active JTA transaction, then there is no need to dispose RuntimeEngine at the end, as RuntimeManager will automatically dispose the RuntimeEngine on transaction completion (regardless of the completion status commit or rollback).
Here is how you can build RuntimeManager and get RuntimeEngine (that encapsulates KieSession and TaskService) from it:
    // first configure environment that will be used by RuntimeManager
    RuntimeEnvironment environment = RuntimeEnvironmentBuilder.Factory.get()
    .newDefaultInMemoryBuilder()
    .addAsset(ResourceFactory.newClassPathResource("BPMN2-ScriptTask.bpmn2"), ResourceType.BPMN2)
    .get();

    // next create RuntimeManager - in this case singleton strategy is chosen
    RuntimeManager manager = RuntimeManagerFactory.Factory.get().newSingletonRuntimeManager(environment);

    // then get RuntimeEngine out of manager - using empty context as singleton does not keep track
    // of runtime engine as there is only one
    RuntimeEngine runtime = manager.getRuntimeEngine(EmptyContext.get());

    // get KieSession from runtime runtimeEngine - already initialized with all handlers, listeners, etc that were configured
    // on the environment
    KieSession ksession = runtimeEngine.getKieSession();

    // add invocations to the process engine here,
    // e.g. ksession.startProcess(processId);

    // and last dispose the runtime engine
    manager.disposeRuntimeEngine(runtimeEngine);
This example provides simplest (minimal) way of using RuntimeManager and RuntimeEngine although it provides few quite valuable information:
KieSession will be in memory only - by using newDefaultInMemoryBuilder
there will be single process available for execution - by adding it as an asset
TaskService will be configured and attached to KieSession via LocalHTWorkItemHandler to support user task capabilities within processes
The complexity of knowing when to create, dispose, register handlers, etc is taken away from the end user and moved to the runtime manager that knows when/how to perform such operations but still allows to have a fine grained control over this process by providing comprehensive configuration of the RuntimeEnvironment.
  public interface RuntimeEnvironment {

	/**
	 * Returns <code>KieBase</code> that shall be used by the manager
	 * @return
	 */
    KieBase getKieBase();

    /**
     * KieSession environment that shall be used to create instances of <code>KieSession</code>
     * @return
     */
    Environment getEnvironment();

    /**
     * KieSession configuration that shall be used to create instances of <code>KieSession</code>
     * @return
     */
    KieSessionConfiguration getConfiguration();

    /**
     * Indicates if persistence shall be used for the KieSession instances
     * @return
     */
    boolean usePersistence();

    /**
     * Delivers concrete implementation of <code>RegisterableItemsFactory</code> to obtain handlers and listeners
     * that shall be registered on instances of <code>KieSession</code>
     * @return
     */
    RegisterableItemsFactory getRegisterableItemsFactory();

    /**
     * Delivers concrete implementation of <code>UserGroupCallback</code> that shall be registered on instances
     * of <code>TaskService</code> for managing users and groups.
     * @return
     */
    UserGroupCallback getUserGroupCallback();

    /**
     * Delivers custom class loader that shall be used by the process engine and task service instances
     * @return
     */
    ClassLoader getClassLoader();

    /**
     * Closes the environment allowing to close all depending components such as ksession factories, etc
     */
    void close();
While RuntimeEnvironment interface provides mostly access to data kept as part of the environment and will be used by the RuntimeManager, users should take advantage of builder style class that provides fluent API to configure RuntimeEnvironment with predefined settings.
public interface RuntimeEnvironmentBuilder {

	public RuntimeEnvironmentBuilder persistence(boolean persistenceEnabled);

	public RuntimeEnvironmentBuilder entityManagerFactory(Object emf);

	public RuntimeEnvironmentBuilder addAsset(Resource asset, ResourceType type);

	public RuntimeEnvironmentBuilder addEnvironmentEntry(String name, Object value);

	public RuntimeEnvironmentBuilder addConfiguration(String name, String value);

	public RuntimeEnvironmentBuilder knowledgeBase(KieBase kbase);

	public RuntimeEnvironmentBuilder userGroupCallback(UserGroupCallback callback);

	public RuntimeEnvironmentBuilder registerableItemsFactory(RegisterableItemsFactory factory);

	public RuntimeEnvironment get();

	public RuntimeEnvironmentBuilder classLoader(ClassLoader cl);

	public RuntimeEnvironmentBuilder schedulerService(Object globalScheduler);
Instances of the RuntimeEnvironmentBuilder can be obtained via RuntimeEnvironmentBuilderFactory that provides preconfigured sets of builder to simplify and help users to build the environment for the RuntimeManager.
public interface RuntimeEnvironmentBuilderFactory {

	/**
     * Provides completely empty <code>RuntimeEnvironmentBuilder</code> instance that allows to manually
     * set all required components instead of relying on any defaults.
     * @return new instance of <code>RuntimeEnvironmentBuilder</code>
     */
    public RuntimeEnvironmentBuilder newEmptyBuilder();

    /**
     * Provides default configuration of <code>RuntimeEnvironmentBuilder</code> that is based on:
     * <ul>
     * 	<li>DefaultRuntimeEnvironment</li>
     * </ul>
     * @return new instance of <code>RuntimeEnvironmentBuilder</code> that is already preconfigured with defaults
     *
     * @see DefaultRuntimeEnvironment
     */
    public RuntimeEnvironmentBuilder newDefaultBuilder();

    /**
     * Provides default configuration of <code>RuntimeEnvironmentBuilder</code> that is based on:
     * <ul>
     * 	<li>DefaultRuntimeEnvironment</li>
     * </ul>
     * but it does not have persistence for process engine configured so it will only store process instances in memory
     * @return new instance of <code>RuntimeEnvironmentBuilder</code> that is already preconfigured with defaults
     *
     * @see DefaultRuntimeEnvironment
     */
    public RuntimeEnvironmentBuilder newDefaultInMemoryBuilder();

    /**
     * Provides default configuration of <code>RuntimeEnvironmentBuilder</code> that is based on:
     * <ul>
     * 	<li>DefaultRuntimeEnvironment</li>
     * </ul>
     * This one is tailored to works smoothly with kjars as the notion of kbase and ksessions
     * @param groupId group id of kjar
     * @param artifactId artifact id of kjar
     * @param version version number of kjar
     * @return new instance of <code>RuntimeEnvironmentBuilder</code> that is already preconfigured with defaults
     *
     * @see DefaultRuntimeEnvironment
     */
    public RuntimeEnvironmentBuilder newDefaultBuilder(String groupId, String artifactId, String version);

    /**
     * Provides default configuration of <code>RuntimeEnvironmentBuilder</code> that is based on:
     * <ul>
     * 	<li>DefaultRuntimeEnvironment</li>
     * </ul>
     * This one is tailored to works smoothly with kjars as the notion of kbase and ksessions
     * @param groupId group id of kjar
     * @param artifactId artifact id of kjar
     * @param version version number of kjar
     * @param kbaseName name of the kbase defined in kmodule.xml stored in kjar
     * @param ksessionName name of the ksession define in kmodule.xml stored in kjar
     * @return new instance of <code>RuntimeEnvironmentBuilder</code> that is already preconfigured with defaults
     *
     * @see DefaultRuntimeEnvironment
     */
    public RuntimeEnvironmentBuilder newDefaultBuilder(String groupId, String artifactId, String version, String kbaseName, String ksessionName);

    /**
     * Provides default configuration of <code>RuntimeEnvironmentBuilder</code> that is based on:
     * <ul>
     * 	<li>DefaultRuntimeEnvironment</li>
     * </ul>
     * This one is tailored to works smoothly with kjars as the notion of kbase and ksessions
     * @param releaseId <code>ReleaseId</code> that described the kjar
     * @return new instance of <code>RuntimeEnvironmentBuilder</code> that is already preconfigured with defaults
     *
     * @see DefaultRuntimeEnvironment
     */
    public RuntimeEnvironmentBuilder newDefaultBuilder(ReleaseId releaseId);

    /**
     * Provides default configuration of <code>RuntimeEnvironmentBuilder</code> that is based on:
     * <ul>
     * 	<li>DefaultRuntimeEnvironment</li>
     * </ul>
     * This one is tailored to works smoothly with kjars as the notion of kbase and ksessions
     * @param releaseId <code>ReleaseId</code> that described the kjar
     * @param kbaseName name of the kbase defined in kmodule.xml stored in kjar
     * @param ksessionName name of the ksession define in kmodule.xml stored in kjar
     * @return new instance of <code>RuntimeEnvironmentBuilder</code> that is already preconfigured with defaults
     *
     * @see DefaultRuntimeEnvironment
     */
    public RuntimeEnvironmentBuilder newDefaultBuilder(ReleaseId releaseId, String kbaseName, String ksessionName);

    /**
     * Provides default configuration of <code>RuntimeEnvironmentBuilder</code> that is based on:
     * <ul>
     * 	<li>DefaultRuntimeEnvironment</li>
     * </ul>
     * It relies on KieClasspathContainer that requires to have kmodule.xml present in META-INF folder which
     * defines the kjar itself.
     * Expects to use default kbase and ksession from kmodule.
     * @return new instance of <code>RuntimeEnvironmentBuilder</code> that is already preconfigured with defaults
     *
     * @see DefaultRuntimeEnvironment
     */
    public RuntimeEnvironmentBuilder newClasspathKmoduleDefaultBuilder();

    /**
     * Provides default configuration of <code>RuntimeEnvironmentBuilder</code> that is based on:
     * <ul>
     * 	<li>DefaultRuntimeEnvironment</li>
     * </ul>
     * It relies on KieClasspathContainer that requires to have kmodule.xml present in META-INF folder which
     * defines the kjar itself.
     * @param kbaseName name of the kbase defined in kmodule.xml
     * @param ksessionName name of the ksession define in kmodule.xml
     * @return new instance of <code>RuntimeEnvironmentBuilder</code> that is already preconfigured with defaults
     *
     * @see DefaultRuntimeEnvironment
     */
    public RuntimeEnvironmentBuilder newClasspathKmoduleDefaultBuilder(String kbaseName, String ksessionName);
Besides KieSession Runtime Manager provides access to TaskService too as integrated component of a RuntimeEngine that will always be configured and ready for communication between process engine and task service.
Since the default builder was used, it will already come with predefined set of elements that consists of:
Persistence unit name will be set to org.jbpm.persistence.jpa (for both process engine and task service)
Human Task handler will be automatically registered on KieSession
JPA based history log event listener will be automatically registered on KieSession
Event listener to trigger rule task evaluation (fireAllRules) will be automatically registered on KieSession
To extend it with your own handlers or listeners a dedicated mechanism is provided that comes as implementation of RegisterableItemsFactory
	/**
	 * Returns new instances of <code>WorkItemHandler</code> that will be registered on <code>RuntimeEngine</code>
	 * @param runtime provides <code>RuntimeEngine</code> in case handler need to make use of it internally
	 * @return map of handlers to be registered - in case of no handlers empty map shall be returned.
	 */
    Map<String, WorkItemHandler> getWorkItemHandlers(RuntimeEngine runtime);

    /**
	 * Returns new instances of <code>ProcessEventListener</code> that will be registered on <code>RuntimeEngine</code>
	 * @param runtime provides <code>RuntimeEngine</code> in case listeners need to make use of it internally
	 * @return list of listeners to be registered - in case of no listeners empty list shall be returned.
	 */
    List<ProcessEventListener> getProcessEventListeners(RuntimeEngine runtime);

    /**
	 * Returns new instances of <code>AgendaEventListener</code> that will be registered on <code>RuntimeEngine</code>
	 * @param runtime provides <code>RuntimeEngine</code> in case listeners need to make use of it internally
	 * @return list of listeners to be registered - in case of no listeners empty list shall be returned.
	 */
    List<AgendaEventListener> getAgendaEventListeners(RuntimeEngine runtime);

    /**
	 * Returns new instances of <code>WorkingMemoryEventListener</code> that will be registered on <code>RuntimeEngine</code>
	 * @param runtime provides <code>RuntimeEngine</code> in case listeners need to make use of it internally
	 * @return list of listeners to be registered - in case of no listeners empty list shall be returned.
	 */
    List<WorkingMemoryEventListener> getWorkingMemoryEventListeners(RuntimeEngine runtime);
A best practice is to just extend those that come out of the box and just add your own. Extensions are not always needed as the default implementations of RegisterableItemsFactory provides possibility to define custom handlers and listeners. Following is a list of available implementations that might be useful (they are ordered in the hierarchy of inheritance):
org.jbpm.runtime.manager.impl.SimpleRegisterableItemsFactory - simplest possible implementations that comes empty and is based on reflection to produce instances of handlers and listeners based on given class names
org.jbpm.runtime.manager.impl.DefaultRegisterableItemsFactory - extension of the Simple implementation that introduces defaults described above and still provides same capabilities as Simple implementation
org.jbpm.runtime.manager.impl.KModuleRegisterableItemsFactory - extension of default implementation that provides specific capabilities for kmodule and still provides same capabilities as Simple implementation
org.jbpm.runtime.manager.impl.cdi.InjectableRegisterableItemsFactory - extension of default implementation that is tailored for CDI environments and provides CDI style approach to finding handlers and listeners via producers
Alternatively, simple (stateless or requiring only KieSession) work item handlers might be registered in the well known way - defined as part of CustomWorkItem.conf file that shall be placed on class path. To use this approach do following:
create file "drools.session.conf" inside META-INF of the root of the class path, for web applications it will be WEB-INF/classes/META-INF
add following line to drools.session.conf file "drools.workItemHandlers = CustomWorkItemHandlers.conf"
create file "CustomWorkItemHandlers.conf" inside META-INF of the root of the class path, for web applications it will be WEB-INF/classes/META-INF
define custom work item handlers in MVEL style inside CustomWorkItemHandlers.conf
[
  "Log": new org.jbpm.process.instance.impl.demo.SystemOutWorkItemHandler(),
  "WebService": new org.jbpm.process.workitem.webservice.WebServiceWorkItemHandler(ksession),
  "Rest": new org.jbpm.process.workitem.rest.RESTWorkItemHandler(),
  "Service Task" : new org.jbpm.process.workitem.bpmn2.ServiceTaskHandler(ksession)
]
And that's it, now all these work item handlers will be registered for any KieSession created by that application, regardless if it uses RuntimeManager or not.
When using RuntimeManager in CDI environment there are dedicated interfaces that can be used to provide custom WorkItemHandlers and EventListeners to the RuntimeEngine.
public interface WorkItemHandlerProducer {

    /**
     * Returns map of (key = work item name, value work item handler instance) of work items
     * to be registered on KieSession
     * <br/>
     * Parameters that might be given are as follows:
     * <ul>
     *  <li>ksession</li>
     *  <li>taskService</li>
     *  <li>runtimeManager</li>
     * </ul>
     *
     * @param identifier - identifier of the owner - usually RuntimeManager that allows the producer to filter out
     * and provide valid instances for given owner
     * @param params - owner might provide some parameters, usually KieSession, TaskService, RuntimeManager instances
     * @return map of work item handler instances (recommendation is to always return new instances when this method is invoked)
     */
    Map<String, WorkItemHandler> getWorkItemHandlers(String identifier, Map<String, Object> params);
}
Event listener producer shall be annotated with proper qualifier to indicate what type of listeners they provide, so pick one of following to indicate they type:
@Process - for ProcessEventListener
@Agenda - for AgendaEventListener
@WorkingMemory - for WorkingMemoryEventListener
public interface EventListenerProducer<T> {

    /**
     * Returns list of instances for given (T) type of listeners
     * <br/>
     * Parameters that might be given are as follows:
     * <ul>
     *  <li>ksession</li>
     *  <li>taskService</li>
     *  <li>runtimeManager</li>
     * </ul>
     * @param identifier - identifier of the owner - usually RuntimeManager that allows the producer to filter out
     * and provide valid instances for given owner
     * @param params - owner might provide some parameters, usually KieSession, TaskService, RuntimeManager instances
     * @return list of listener instances (recommendation is to always return new instances when this method is invoked)
     */
    List<T> getEventListeners(String identifier, Map<String, Object>  params);
}
Implementations of these interfaces shall be packaged as bean archive (includes beans.xml inside META-INF) and placed on application classpath (e.g. WEB-INF/lib for web application). THat is enough for CDI based RuntimeManager to discover them and register on every KieSession that is created or loaded from data store.
Some parameters are provided to the producers to allow handlers/listeners to be more stateful and be able to do more advanced things with the engine - like signal of the engine or process instance in case of an error. Thus all components are provided:
KieSession
TaskService
RuntimeManager
Note
Whenever there is a need to interact with the process engine/task service from within handler or listener, recommended approach is to use RuntimeManager and retrieve RuntimeEngine (and then KieSession and/or TaskService) from it as that will ensure proper state managed according to strategy
In addition, some filtering can be applied based on identifier (that is given as argument to the methods) to decide if given RuntimeManager shall receive handlers/listeners or not.
On top of RuntimeManager API a set of high level services has been provided from jBPM version 6.2. These services are meant to be the easiest way to embed (j)BPM capabilities into custom application. A complete set of modules are delivered as part of these services. They are partitioned into several modules to ease thier adoptions in various environments.
jbpm-services-api
contains only api classes and interfaces
jbpm-kie-services
rewritten code implementation of services api - pure java, no framework dependencies
jbpm-services-cdi
CDI wrapper on top of core services implementation
jbpm-services-ejb-api
extension to services api for ejb needs
jbpm-services-ejb-impl
EJB wrappers on top of core services implementation
jbpm-services-ejb-timer
scheduler service based on EJB TimerService to support time based operations e.g. timer events, deadlines, etc
jbpm-services-ejb-client
EJB remote client implementation - currently only for JBoss
Service modules are grouped with its framework dependencies, so developers are free to choose which one is suitable for them and use only that.
As the name suggest, its primary responsibility is to deploy (and undeploy) units. Deployment unit is kjar that brings in business assets (like processes, rules, forms, data model) for execution. Deployment services allow to query it to get hold of available deployment units and even their RuntimeManager instances.
Note
there are some restrictions on EJB remote client to do not expose RuntimeManager as it won't make any sense on client side (after it was serialized).
So typical use case for this service is to provide dynamic behavior into your system so multiple kjars can be active at the same time and be executed simultaneously.
// create deployment unit by giving GAV
DeploymentUnit deploymentUnit = new KModuleDeploymentUnit(GROUP_ID, ARTIFACT_ID, VERSION);
// deploy
deploymentService.deploy(deploymentUnit);
// retrieve deployed unit
DeployedUnit deployed = deploymentService.getDeployedUnit(deploymentUnit.getIdentifier());
// get runtime manager
RuntimeManager manager = deployed.getRuntimeManager();
Complete DeploymentService interface is as follows:
public interface DeploymentService {

    void deploy(DeploymentUnit unit);

    void undeploy(DeploymentUnit unit);

    RuntimeManager getRuntimeManager(String deploymentUnitId);

    DeployedUnit getDeployedUnit(String deploymentUnitId);

    Collection<DeployedUnit> getDeployedUnits();

    void activate(String deploymentId);

    void deactivate(String deploymentId);

    boolean isDeployed(String deploymentUnitId);
}Upon deployment, every process definition is scanned using definition service that parses the process and extracts valuable information out of it. These information can provide valuable input to the system to inform users about what is expected. Definition service provides information about:
process definition - id, name, description
process variables - name and type
reusable subprocesses used in the process (if any)
service tasks (domain specific activities)
user tasks including assignment information
task data input and output information
So definition service can be seen as sort of supporting service that provides quite a few information about process definition that are extracted directly from BPMN2.
String processId = "org.jbpm.writedocument";

Collection<UserTaskDefinition> processTasks =
bpmn2Service.getTasksDefinitions(deploymentUnit.getIdentifier(), processId);

Map<String, String> processData =
bpmn2Service.getProcessVariables(deploymentUnit.getIdentifier(), processId);

Map<String, String> taskInputMappings =
bpmn2Service.getTaskInputMappings(deploymentUnit.getIdentifier(), processId, "Write a Document" );
While it usually is used with combination of other services (like deployment service) it can be used standalone as well to get details about process definition that do not come from kjar. This can be achieved by using buildProcessDefinition method of definition service.
public interface DefinitionService {

    ProcessDefinition buildProcessDefinition(String deploymentId, String bpmn2Content,
			ClassLoader classLoader, boolean cache) throws IllegalArgumentException;

    ProcessDefinition getProcessDefinition(String deploymentId, String processId);

    Collection<String> getReusableSubProcesses(String deploymentId, String processId);

    Map<String, String> getProcessVariables(String deploymentId, String processId);

    Map<String, String> getServiceTasks(String deploymentId, String processId);

    Map<String, Collection<String>> getAssociatedEntities(String deploymentId, String processId);

    Collection<UserTaskDefinition> getTasksDefinitions(String deploymentId, String processId);

    Map<String, String> getTaskInputMappings(String deploymentId, String processId, String taskName);

    Map<String, String> getTaskOutputMappings(String deploymentId, String processId, String taskName);

}Process service is the one that usually is of the most interest. Once the deployment and definition service was already used to feed the system with something that can be executed. Process service provides access to execution environment that allows:
start new process instance
work with existing one - signal, get details of it, get variables, etc
work with work items
At the same time process service is a command executor so it allows to execute commands (essentially on ksession) to extend its capabilities.
Important to note is that process service is focused on runtime operations so use it whenever there is a need to alter (signal, change variables, etc) process instance and not for read operations like show available process instances by looping though given list and invoking getProcessInstance method. For that there is dedicated runtime data service that is described below.
An example on how to deploy and run process can be done as follows:
KModuleDeploymentUnit deploymentUnit = new KModuleDeploymentUnit(GROUP_ID, ARTIFACT_ID, VERSION);

deploymentService.deploy(deploymentUnit);

long processInstanceId = processService.startProcess(deploymentUnit.getIdentifier(), "customtask");

ProcessInstance pi = processService.getProcessInstance(processInstanceId);
As you can see start process expects deploymentId as first argument. This is extremely powerful to enable service to easily work with various deployments, even with same processes but coming from different versions - kjar versions.
public interface ProcessService {

    Long startProcess(String deploymentId, String processId);

    Long startProcess(String deploymentId, String processId, Map<String, Object> params);

    void abortProcessInstance(Long processInstanceId);

    void abortProcessInstances(List<Long> processInstanceIds);

    void signalProcessInstance(Long processInstanceId, String signalName, Object event);

    void signalProcessInstances(List<Long> processInstanceIds, String signalName, Object event);

    ProcessInstance getProcessInstance(Long processInstanceId);

    void setProcessVariable(Long processInstanceId, String variableId, Object value);

    void setProcessVariables(Long processInstanceId, Map<String, Object> variables);

    Object getProcessInstanceVariable(Long processInstanceId, String variableName);

    Map<String, Object> getProcessInstanceVariables(Long processInstanceId);

    Collection<String> getAvailableSignals(Long processInstanceId);

    void completeWorkItem(Long id, Map<String, Object> results);

    void abortWorkItem(Long id);

    WorkItem getWorkItem(Long id);

    List<WorkItem> getWorkItemByProcessInstance(Long processInstanceId);

    public <T> T execute(String deploymentId, Command<T> command);

    public <T> T execute(String deploymentId, Context<?> context, Command<T> command);

}Runtime data service as name suggests, deals with all that refers to runtime information:
started process instances
executed node instances
executed node instances
and more
Use this service as main source of information whenever building list based UI - to show process definitions, process instances, tasks for given user, etc. This service was designed to be as efficient as possible and still provide all required information.
Some examples:
get all process definitions
Collection definitions = runtimeDataService.getProcesses(new QueryContext());get active process instances
Collection<processinstancedesc> instances = runtimeDataService.getProcessInstances(new QueryContext());get active nodes for given process instance
Collection<nodeinstancedesc> instances = runtimeDataService.getProcessInstanceHistoryActive(processInstanceId, new QueryContext());get tasks assigned to john
List<tasksummary> taskSummaries = runtimeDataService.getTasksAssignedAsPotentialOwner("john", new QueryFilter(0, 10));
There are two important arguments that the runtime data service operations supports:
QueryContext
QueryFilter - extension of QueryContext
These provide capabilities for efficient management result set like pagination, sorting and ordering (QueryContext). Moreover additional filtering can be applied to task queries to provide more advanced capabilities when searching for user tasks.
public interface RuntimeDataService {

    // Process instance information

    Collection<ProcessInstanceDesc> getProcessInstances(QueryContext queryContext);

    Collection<ProcessInstanceDesc> getProcessInstances(List<Integer> states, String initiator, QueryContext queryContext);

    Collection<ProcessInstanceDesc> getProcessInstancesByProcessId(List<Integer> states, String processId, String initiator, QueryContext queryContext);

    Collection<ProcessInstanceDesc> getProcessInstancesByProcessName(List<Integer> states, String processName, String initiator, QueryContext queryContext);

    Collection<ProcessInstanceDesc> getProcessInstancesByDeploymentId(String deploymentId, List<Integer> states, QueryContext queryContext);

    ProcessInstanceDesc getProcessInstanceById(long processInstanceId);

    Collection<ProcessInstanceDesc> getProcessInstancesByProcessDefinition(String processDefId, QueryContext queryContext);

    Collection<ProcessInstanceDesc> getProcessInstancesByProcessDefinition(String processDefId, List<Integer> states, QueryContext queryContext);


    // Node and Variable instance information

    NodeInstanceDesc getNodeInstanceForWorkItem(Long workItemId);

    Collection<NodeInstanceDesc> getProcessInstanceHistoryActive(long processInstanceId, QueryContext queryContext);

    Collection<NodeInstanceDesc> getProcessInstanceHistoryCompleted(long processInstanceId, QueryContext queryContext);

    Collection<NodeInstanceDesc> getProcessInstanceFullHistory(long processInstanceId, QueryContext queryContext);

    Collection<NodeInstanceDesc> getProcessInstanceFullHistoryByType(long processInstanceId, EntryType type, QueryContext queryContext);

    Collection<VariableDesc> getVariablesCurrentState(long processInstanceId);

    Collection<VariableDesc> getVariableHistory(long processInstanceId, String variableId, QueryContext queryContext);


    // Process information

    Collection<ProcessDefinition> getProcessesByDeploymentId(String deploymentId, QueryContext queryContext);

    Collection<ProcessDefinition> getProcessesByFilter(String filter, QueryContext queryContext);

    Collection<ProcessDefinition> getProcesses(QueryContext queryContext);

    Collection<String> getProcessIds(String deploymentId, QueryContext queryContext);

    ProcessDefinition getProcessById(String processId);

    ProcessDefinition getProcessesByDeploymentIdProcessId(String deploymentId, String processId);

	// user task query operations

    UserTaskInstanceDesc getTaskByWorkItemId(Long workItemId);

    UserTaskInstanceDesc getTaskById(Long taskId);

    List<TaskSummary> getTasksAssignedAsBusinessAdministrator(String userId, QueryFilter filter);

    List<TaskSummary> getTasksAssignedAsBusinessAdministratorByStatus(String userId, List<Status> statuses, QueryFilter filter);

    List<TaskSummary> getTasksAssignedAsPotentialOwner(String userId, QueryFilter filter);

    List<TaskSummary> getTasksAssignedAsPotentialOwner(String userId, List<String> groupIds, QueryFilter filter);

    List<TaskSummary> getTasksAssignedAsPotentialOwnerByStatus(String userId, List<Status> status, QueryFilter filter);

    List<TaskSummary> getTasksAssignedAsPotentialOwner(String userId, List<String> groupIds, List<Status> status, QueryFilter filter);

    List<TaskSummary> getTasksAssignedAsPotentialOwnerByExpirationDateOptional(String userId, List<Status> status, Date from, QueryFilter filter);

    List<TaskSummary> getTasksOwnedByExpirationDateOptional(String userId, List<Status> strStatuses, Date from, QueryFilter filter);

    List<TaskSummary> getTasksOwned(String userId, QueryFilter filter);

    List<TaskSummary> getTasksOwnedByStatus(String userId, List<Status> status, QueryFilter filter);

    List<Long> getTasksByProcessInstanceId(Long processInstanceId);

    List<TaskSummary> getTasksByStatusByProcessInstanceId(Long processInstanceId, List<Status> status, QueryFilter filter);

    List<AuditTask> getAllAuditTask(String userId, QueryFilter filter);

}User task service covers complete life cycle of individual task so it can be managed from start to end. It explicitly eliminates queries from it to provide scoped execution and moves all query operations into runtime data service. Besides lifecycle operations user task service allows:
modification of selected properties
access to task variables
access to task attachments
access to task comments
On top of that user task service is a command executor as well that allows to execute custom task commands.
Complete example with start process and complete user task done by services:
long processInstanceId =
processService.startProcess(deployUnit.getIdentifier(), "org.jbpm.writedocument");

List<Long> taskIds =
runtimeDataService.getTasksByProcessInstanceId(processInstanceId);

Long taskId = taskIds.get(0);

userTaskService.start(taskId, "john");
UserTaskInstanceDesc task = runtimeDataService.getTaskById(taskId);

Map<String, Object> results = new HashMap<String, Object>();
results.put("Result", "some document data");
userTaskService.complete(taskId, "john", results);
Note
The most important thing when working with services is that there is no more need to create your own implementations of Process service that simply wraps runtime manager, runtime engine, ksession usage. Services make use of RuntimeManager API best practices and thus eliminate various risks when working with that API.
QueryService provides advanced search capabilities that are based on Dashbuilder DataSets. The concept behind it is that users are given control over how to retrieve data from underlying data store. This includes complex joins with external tables such as JPA entities tables, custom systems data base tables etc.
QueryService is build around two parts:
Management operations
register query definition
replace query definition
unregister (remove) query definition
get query definition
get all registered query definitions
Runtime operations
query - with two flavors
simple based on QueryParam as filter provider
advanced based on QueryParamBuilder as filter provider
DashBuilder DataSets provide support for multiple data sources (CSV, SQL, elastic search, etc) while jBPM - since its backend is RDBMS based - focuses on SQL based data sets. So jBPM QueryService is a subset of DashBuilder DataSets capabilities to allow efficient queries with simple API.
Terminology
QueryDefinition - represents definion of the data set which consists of unique name, sql expression (the query) and source - JNDI name of the data source to use when performing queries
QueryParam - basic structure that represents individual query parameter - condition - that consists of: column name, operator, expected value(s)
QueryResultMapper - responsible for mapping raw data set data (rows and columns) into object representation
QueryParamBuilder - responsible for building query filters that will be applied on the query definition for given query invocation
While QueryDefinition and QueryParam is rather straight forward, QueryParamBuilder and QueryResultMapper is bit more advanced and require slightly more attention to make use of it in right way, and by that take advantage of their capabilities.
QueryResultMapper
Mapper as the name suggest, maps data taken out from data base (from data set) into object representation. Much like ORM providers such as hibernate maps tables to entities. Obviously there might be many object types that could be used for representing data set results so it's almost impossible to provide them out of the box. Mappers are rather powerful and thus are pluggable, you can implement your own that will transform the result into whatever type you like. jBPM comes with following mappers out of the box:
org.jbpm.kie.services.impl.query.mapper.ProcessInstanceQueryMapper
registered with name - ProcessInstances
org.jbpm.kie.services.impl.query.mapper.ProcessInstanceWithVarsQueryMapper
registered with name - ProcessInstancesWithVariables
org.jbpm.kie.services.impl.query.mapper.ProcessInstanceWithCustomVarsQueryMapper
registered with name - ProcessInstancesWithCustomVariables
org.jbpm.kie.services.impl.query.mapper.UserTaskInstanceQueryMapper
registered with name - UserTasks
org.jbpm.kie.services.impl.query.mapper.UserTaskInstanceWithVarsQueryMapper
registered with name - UserTasksWithVariables
org.jbpm.kie.services.impl.query.mapper.UserTaskInstanceWithCustomVarsQueryMapper
registered with name - UserTasksWithCustomVariables
org.jbpm.kie.services.impl.query.mapper.TaskSummaryQueryMapper
registered with name - TaskSummaries
org.jbpm.kie.services.impl.query.mapper.RawListQueryMapper
registered with name - RawList
Each QueryResultMapper is registered under given name to allow simple look up by name instead of referencing its class name - especially important when using EJB remote flavor of services where we want to reduce number of dependencies and thus not relying on implementation on client side. So to be able to reference QueryResultMapper by name, NamedQueryMapper should be used which is part of jbpm-services-api. That acts as delegate (lazy delegate) as it will look up the actual mapper when the query is actually performed.
queryService.query("my query def", new NamedQueryMapper<Collection<ProcessInstanceDesc>>("ProcessInstances"), new QueryContext());
QueryParamBuilder
QueryParamBuilder that provides more advanced way of building filters for our data sets. By default when using query method of QueryService that accepts zero or more QueryParam instances (as we have seen in above examples) all of these params will be joined with AND operator meaning all of them must match. But that's not always the case so that's why QueryParamBuilder has been introduced for users to build their on builders which will provide filters at the time the query is issued.
There is one QueryParamBuilder available out of the box and it is used to cover default QueryParams that are based on so called core functions. These core functions are SQL based conditions and includes following
IS_NULL
NOT_NULL
EQUALS_TO
NOT_EQUALS_TO
LIKE_TO
GREATER_THAN
GREATER_OR_EQUALS_TO
LOWER_THAN
LOWER_OR_EQUALS_TO
BETWEEN
IN
NOT_IN
QueryParamBuilder is simple interface that is invoked as long as its build method returns non null value before query is performed. So you can build up a complex filter options that could not be simply expressed by list of QueryParams. Here is basic implementation of QueryParamBuilder to give you a jump start to implement your own - note that it relies on DashBuilder Dataset API.
public class TestQueryParamBuilder implements QueryParamBuilder<ColumnFilter> {

    private Map<String, Object> parameters;
    private boolean built = false;
    public TestQueryParamBuilder(Map<String, Object> parameters) {
        this.parameters = parameters;
    }

    @Override
    public ColumnFilter build() {
        // return null if it was already invoked
        if (built) {
            return null;
        }

        String columnName = "processInstanceId";

        ColumnFilter filter = FilterFactory.OR(
                FilterFactory.greaterOrEqualsTo((Long)parameters.get("min")),
                FilterFactory.lowerOrEqualsTo((Long)parameters.get("max")));
        filter.setColumnId(columnName);

        built = true;
        return filter;
    }

}
Once you have query param builder implemented you simply use its instance when performing query via QueryService
queryService.query("my query def", ProcessInstanceQueryMapper.get(), new QueryContext(), paramBuilder);Typical usage scenario
First thing user needs to do is to define data set - view of the data you want to work with - so called QueryDefinition in services api.
SqlQueryDefinition query = new SqlQueryDefinition("getAllProcessInstances", "java:jboss/datasources/ExampleDS");
query.setExpression("select * from processinstancelog");
This is the simplest possible query definition as it can be:
constructor takes
a unique name that identifies it on runtime
data source JNDI name used when performing queries on this definition - in other words source of data
expression - the most important part - is the sql statement that builds up the view to be filtered when performing queries
Once we have the sql query definition we can register it so it can be used later for actual queries.
queryService.registerQuery(query);
From now on, this query definition can be used to perform actual queries (or data look ups to use terminology from data sets). Following is the basic one that collects data as is, without any filtering
Collection<ProcessInstanceDesc> instances = queryService.query("getAllProcessInstances", ProcessInstanceQueryMapper.get(), new QueryContext());
Above query was very simple and used defaults from QueryContext - paging and sorting. So let's take a look at one that changes the defaults of the paging and sorting
QueryContext ctx = new QueryContext(0, 100, "start_date", true);

Collection<ProcessInstanceDesc> instances = queryService.query("getAllProcessInstances", ProcessInstanceQueryMapper.get(), ctx);
Now let's take a look at how to do data filtering
// single filter param
Collection<ProcessInstanceDesc> instances = queryService.query("getAllProcessInstances", ProcessInstanceQueryMapper.get(), new QueryContext(), QueryParam.likeTo(COLUMN_PROCESSID, true, "org.jbpm%"));

// multiple filter params (AND)
Collection<ProcessInstanceDesc> instances = queryService.query("getAllProcessInstances", ProcessInstanceQueryMapper.get(), new QueryContext(),
 QueryParam.likeTo(COLUMN_PROCESSID, true, "org.jbpm%"),
 QueryParam.in(COLUMN_STATUS, 1, 3));
With that end user is put in driver seat to define what data and how they should be fetched. Not being limited by JPA provider nor anything else. Moreover this promotes use of tailored queries for your environment as in most of the case there will be single data base used and thus specific features of that data base can be used to increase performance.
Further examples can be found here.
ProcessInstanceMigrationService provides administrative utility to move given process instance(s) from one deployment to another or one process definition to another. It’s main responsibility is to allow basic upgrade of process definition behind given process instance. That might include mapping of currently active nodes to other nodes in new definition.
Migration does not deal with process or task variables, they are not affected by migration. Essentially process instance migration means a change of underlying process definition process engine uses to move on with process instance.
Even though process instance migration is available it’s recommended to let active process instances finish and then start new instances with new version whenever possible. In case that approach can’t be used, migration of active process instance needs to be carefully planned before its execution as it might lead to unexpected issues.Most important to take into account is:
is new process definition backward compatible?
are there any data changes (variables that could affect process instance decisions after migration)?
is there need for node mapping?
Answers to these questions might save a lot of headache and production problems after migration. Best is to always stick with backward compatible processes - like extending process definition rather than removing nodes. Though that’s not always possible and in some cases there is a need to remove certain nodes from process definition. In that situation, migration needs to be instructed how to map nodes that were removed in new definition in case active process instance is at the moment in such a node.
Node mapping is given as a map of node ids (UniqueIds that are set in the definition) where key is the source node id (from process definition used by process instance) to target node id (in new process definition).
Note
Node mapping can only be used to map same type of nodes e.g. user task to user task.
Again, process or task variables are not affected by process instance migration at the moment.
ProcessInstanceMigrationService comes with several flavors of migrate operation:
public interface ProcessInstanceMigrationService {
/**
* Migrates given process instance that belongs to source deployment, into target process id that belongs to target deployment.
* Following rules are enforced:
* <ul>
* <li>source deployment id must be there</li>
* <li>process instance id must point to existing and active process instance</li>
* <li>target deployment must exist</li>
* <li>target process id must exist in target deployment</li>
* </ul>
* Migration returns migration report regardless of migration being successful or not that needs to be examined for migration outcome.
* @param sourceDeploymentId deployment that process instance to be migrated belongs to
* @param processInstanceId id of the process instance to be migrated
* @param targetDeploymentId id of deployment that target process belongs to
* @param targetProcessId id of the process process instance should be migrated to
* @return returns complete migration report
*/
MigrationReport migrate(String sourceDeploymentId, Long processInstanceId, String targetDeploymentId, String targetProcessId);
/**
* Migrates given process instance (with node mapping) that belongs to source deployment, into target process id that belongs to target deployment.
* Following rules are enforced:
* <ul>
* <li>source deployment id must be there</li>
* <li>process instance id must point to existing and active process instance</li>
* <li>target deployment must exist</li>
* <li>target process id must exist in target deployment</li>
* </ul>
* Migration returns migration report regardless of migration being successful or not that needs to be examined for migration outcome.
* @param sourceDeploymentId deployment that process instance to be migrated belongs to
* @param processInstanceId id of the process instance to be migrated
* @param targetDeploymentId id of deployment that target process belongs to
* @param targetProcessId id of the process process instance should be migrated to
* @param nodeMapping node mapping - source and target unique ids of nodes to be mapped - from process instance active nodes to new process nodes
* @return returns complete migration report
*/
MigrationReport migrate(String sourceDeploymentId, Long processInstanceId, String targetDeploymentId, String targetProcessId, Map<String, String> nodeMapping);
/**
* Migrates given process instances that belong to source deployment, into target process id that belongs to target deployment.
* Following rules are enforced:
* <ul>
* <li>source deployment id must be there</li>
* <li>process instance id must point to existing and active process instance</li>
* <li>target deployment must exist</li>
* <li>target process id must exist in target deployment</li>
* </ul>
* Migration returns list of migration report - one per process instance, regardless of migration being successful or not that needs to be examined for migration outcome.
* @param sourceDeploymentId deployment that process instance to be migrated belongs to
* @param processInstanceIds list of process instance id to be migrated
* @param targetDeploymentId id of deployment that target process belongs to
* @param targetProcessId id of the process process instance should be migrated to
* @return returns complete migration report
*/
List<MigrationReport> migrate(String sourceDeploymentId, List<Long> processInstanceIds, String targetDeploymentId, String targetProcessId);
 /**
 * Migrates given process instances (with node mapping) that belong to source deployment, into target process id that belongs to target deployment.
 * Following rules are enforced:
 * <ul>
 * <li>source deployment id must be there</li>
 * <li>process instance id must point to existing and active process instance</li>
 * <li>target deployment must exist</li>
 * <li>target process id must exist in target deployment</li>
 * </ul>
 * Migration returns list of migration report - one per process instance, regardless of migration being successful or not that needs to be examined for migration outcome.
 * @param sourceDeploymentId deployment that process instance to be migrated belongs to
 * @param processInstanceIds list of process instance id to be migrated
 * @param targetDeploymentId id of deployment that target process belongs to
 * @param targetProcessId id of the process process instance should be migrated to
 * @param nodeMapping node mapping - source and target unique ids of nodes to be mapped - from process instance active nodes to new process nodes
 * @return returns list of migration reports one per each process instance
 */
 List<MigrationReport> migrate(String sourceDeploymentId, List<Long> processInstanceIds, String targetDeploymentId, String targetProcessId, Map<String, String> nodeMapping);
}
Migration can either be performed for single process instance or multiple process instances at the same time. Multiple process instances migration is a utility method on top of single instance, instead of calling it multiple times, users call it once and then service will take care of the migration of individual process instances.
Note
Multi instance migration does migrate each instance in separation (transaction) to secure that one won't affect the other and then produces dedicated migration reports for each process instance
Migration is always comcluded with migration report that is per each process instance. That migration report provides following information:
start and end date of the migration
outcome of the migration - success or failure
complete log entry - all steps performed during migration, entry can be INFO, WARN or ERROR - in case of ERROR there will be at most one as they are causing migration to be immedietely terminated.
When a new or modified task requires inputs which are not available in the migrated v2 process instance.
Modifying the tasks prior to the active task where the changes have an impact on the further processing.
Removing a human task which is currently active (can only be replaced - requires to be mapped to another human task)
Adding a new task parallel to the single active task (all branches in AND gateway are not activated - process will stuck)
Changing or removing the active recurring timer events (won’t be changed in DB)
Fixing or updating inputs and outputs in an active task (task data aren’t migrated)
Node mapping updates only the task node name and description! (other task fields won’t be mapped including the TaskName variable)
Following is an example of how to invoke the migration
protected static final String MIGRATION_ARTIFACT_ID = "test-migration";
 protected static final String MIGRATION_GROUP_ID = "org.jbpm.test";
 protected static final String MIGRATION_VERSION_V1 = "1.0.0";
 protected static final String MIGRATION_VERSION_V2 = "2.0.0";
 // first deploy both versions
 deploymentUnitV1 = new KModuleDeploymentUnit(MIGRATION_GROUP_ID, MIGRATION_ARTIFACT_ID, MIGRATION_VERSION_V1);
 deploymentService.deploy(deploymentUnitV1);
 // ... version 2
 deploymentUnitV2 = new KModuleDeploymentUnit(MIGRATION_GROUP_ID, MIGRATION_ARTIFACT_ID, MIGRATION_VERSION_V2);
 deploymentService.deploy(deploymentUnitV2);
 // next start process instance in version 1
 long processInstanceId = processService.startProcess(deploymentUnitV1.getIdentifier(), "processID-V1");
// and once the instance is active it can be migrated
MigrationReport report = migrationService.migrate(deploymentUnitV1.getIdentifier(), processInstanceId, deploymentUnitV2.getIdentifier(), "processID-V2");
// as last step check if the migration finished successfully
report.isSuccessful()Deployment Service provides convinient way to put business assets to an execution environment but there are cases that requires some additional management to make them available in right context.
Activation and Deactivation of deployments
Imagine situation where there are number of processes already running of given deployment and then new version of these processes comes into the runtime environment. With that administrator can decide that new instances of given process definition should be using new version only while already active instances should continue with the previous version.
To help with that deployment service has been equipped with following methods:
activate
allows to activate given deployment so it can be available for interaction meaning will show its process definition and allow to start new process instances of that project's processes
deactivate
allows to deactivate deployment which will disable option to see or start new process instances of that project's processes but will allow to continue working with already active process instances, e.g. signal, work with user task etc
This feature allows smooth transition between project versions whitout need of process instance migration.
Deployment synchronization
Prior to jBPM 6.2, jbpm services did not have deployment store by default. When embedded in jbpm-console/kie-wb they utilized sistem.git VFS repository to preserve deployed units across server restarts. While that works fine, it comes with some drawbacks:
not available for custom systems that use services
requires complex setup in cluster - zookeeper and helix
With version 6.2 jbpm services come with deployment synchronizer that stores available deployments into data base, including its deployment descriptor. At the same time it constantly monitors that table to keep it in sync with other installations that might be using same data source. This is especially important when running in cluster or when jbpm console runs next to custom application and both should be able to operate on the same artifacts.
By default synchronization must be configured (when runing as core services while it is automatically enabled for ejb and cdi extensions). To configure synchronization following needs to be configured:
TransactionalCommandService commandService = new TransactionalCommandService(emf);

DeploymentStore store = new DeploymentStore();
store.setCommandService(commandService);

DeploymentSynchronizer sync = new DeploymentSynchronizer();
sync.setDeploymentService(deploymentService);
sync.setDeploymentStore(store);

DeploymentSyncInvoker invoker = new DeploymentSyncInvoker(sync, 2L, 3L, TimeUnit.SECONDS);
invoker.start();
....
invoker.stop();
With this, deployments will be synchronized every 3 seconds with initial delay of two seconds.
Invoking latest version of project's processes
In case there is a need to always work with latest version of project's process, services allow to interact with various operations using deployment id with latest keyword. Let's go over an example to better understand the feature.
Initially deployed unit is org.jbpm:HR:1.0 which has the first version of an hiring process. After several weeks, new version is developed and deployed to the execution server - org.jbpm:HR.2.0 with version 2 of the hiring process.
To allow callers of the services to interact without being worried if they work with latest version, they can use following deployment id:
org.jbpm.HR:latestthis will alwyas find out latest available version of project that is identified by:
groupId: org.jbpm
artifactId: HR
version comparizon is based on Maven version numbers and relies on Maen based algorithm to find the latest one.
Note
This is only supported when process identifier remains the same in all project versions
Here is a complete example with deployment of multiple versions and interacting always with the latest:
KModuleDeploymentUnit deploymentUnitV1 = new KModuleDeploymentUnit("org.jbpm", "HR", "1.0");
deploymentService.deploy(deploymentUnitV1);

long processInstanceId = processService.startProcess("org.jbpm:HR:LATEST", "customtask");
ProcessInstanceDesc piDesc = runtimeDataService.getProcessInstanceById(processInstanceId);

// we have started process with project's version 1
assertEquals(deploymentUnitV1.getIdentifier(), piDesc.getDeploymentId());

// next we deploy version 1
KModuleDeploymentUnit deploymentUnitV2 = new KModuleDeploymentUnit("org.jbpm", "HR", "2.0");
deploymentService.deploy(deploymentUnitV2);

processInstanceId = processService.startProcess("org.jbpm:HR:LATEST", "customtask");
piDesc = runtimeDataService.getProcessInstanceById(processInstanceId);

// this time we have started process with project's version 2
assertEquals(deploymentUnitV2.getIdentifier(), piDesc.getDeploymentId());
As illustrated this provides very powerful feature when interacting with frequently chaning environment that allows to always be up to date when it comes to use of process definitions.
Note
This feature is also available in REST interface so whenever sending request with deployment id, it's enough to replace concrete version with LATEST keyword to make use of this feature.
There are several control parameters available to alter engine default behavior. This allows to fine tune the execution for the environment needs and actual requirements. All of these parameters are set as JVM system properties, usually with -D when starting program e.g. application server.
Table 5.1. Control parameters
| Name | Possible values | Default value | Description | |
|---|---|---|---|---|
| jbpm.ut.jndi.lookup | String | Alternative JNDI name to be used when there is no access to the default one (java:comp/UserTransaction) | ||
| jbpm.enable.multi.con | true|false | false | Enables multiple incoming/outgoing sequence flows support for activities | |
| jbpm.business.calendar.properties | String | /jbpm.business.calendar.properties | Allows to provide alternative classpath location of business calendar configuration file | |
| jbpm.overdue.timer.delay | Long | 2000 | Specifies delay for overdue timers to allow proper initialization, in milliseconds | |
| jbpm.process.name.comparator | String | Allows to provide alternative comparator class to empower start process by name feature, if not set NumberVersionComparator is used | ||
| jbpm.loop.level.disabled | true|false | true | Allows to enable or disable loop iteration tracking, to allow advanced loop support when using XOR gateways | |
| org.kie.mail.session | String | mail/jbpmMailSession | Allows to provide alternative JNDI name for mail session used by Task Deadlines | |
| jbpm.usergroup.callback.properties | String | /jbpm.usergroup.callback.properties | Allows to provide alternative classpath location for user group callback implementation (LDAP, DB) | |
| jbpm.user.group.mapping | String | ${jboss.server.config.dir}/roles.properties | Allows to provide alternative location of roles.properties for JBossUserGroupCallbackImpl | |
| jbpm.user.info.properties | String | /jbpm.user.info.properties | Allows to provide alternative classpath location of user info configuration (used by LDAPUserInfoImpl) | |
| org.jbpm.ht.user.separator | String | , | Allows to provide alternative separator of actors and groups for user tasks, default is comma (,) | |
| org.quartz.properties | String | Allows to provide location of the quartz config file to activate quartz based timer service | ||
| jbpm.data.dir | String | ${jboss.server.data.dir} is available otherwise ${java.io.tmpdir} | Allows to provide location where data files produced by jbpm should be stored | |
| org.kie.executor.pool.size | Integer | 1 | Allows to provide thread pool size for jbpm executor | |
| org.kie.executor.retry.count | Integer | 3 | Allows to provide number of retries attempted in case of error by jbpm executor | |
| org.kie.executor.interval | Integer | 3 | Allows to provide frequency used to check for pending jobs by jbpm executor, in seconds | |
| org.kie.executor.disabled | true|false | true | Enables or disable jbpm executor | |
| org.kie.store.services.class | String | org.drools.persistence.jpa.KnowledgeStoreServiceImpl | Fully qualified name of the class that implements KieStoreServices that will be responsible for bootstraping KieSession instances |
Note
"The primary goal of BPMN is to provide a notation that is readily understandable by all business users, from the business analysts that create the initial drafts of the processes, to the technical developers responsible for implementing the technology that will perform those processes, and finally, to the business people who will manage and monitor those processes."
The Business Process Model and Notation (BPMN) 2.0 specification is an OMG specification that not only defines a standard on how to graphically represent a business process (like BPMN 1.x), but now also includes execution semantics for the elements defined, and an XML format on how to store (and share) process definitions.
jBPM6 allows you to execute processes defined using the BPMN 2.0 XML format. That means that you can use all the different jBPM6 tooling to model, execute, manage and monitor your business processes using the BPMN 2.0 format for specifying your executable business processes. Actually, the full BPMN 2.0 specification also includes details on how to represent things like choreographies and collaboration. The jBPM project however focuses on that part of the specification that can be used to specify executable processes.
Executable processes in BPMN consist of a different types of nodes being connected to each other using sequence flows. The BPMN 2.0 specification defines three main types of nodes:
- Events: They are used to model the occurrence of a particular event. This could be a start event (that is used to indicate the start of the process), end events (that define the end of the process, or of that subflow) and intermediate events (that indicate events that might occur during the execution of the process).
- Activities: These define the different actions that need to be performed during the execution of the process. Different types of tasks exist, depending on the type of activity you are trying to model (e.g. human task, service task, etc.) and activities could also be nested (using different types of sub-processes).
- Gateways: Can be used to define multiple paths in the process. Depending on the type of gateway, these might indicate parallel execution, choice, etc.
jBPM6 does not implement all elements and attributes as defined in the BPMN 2.0 specification. We do however support a significant subset, including the most common node types that can be used inside executable processes. This includes (almost) all elements and attributes as defined in the "Common Executable" subclass of the BPMN 2.0 specification, extended with some additional elements and attributes we believe are valuable in that context as well. The full set of elements and attributes that are supported can be found below, but it includes elements like:
- Flow objects
- Events
- Start Event (None, Conditional, Signal, Message, Timer)
- End Event (None, Terminate, Error, Escalation, Signal, Message, Compensation)
- Intermediate Catch Event (Signal, Timer, Conditional, Message)
- Intermediate Throw Event (None, Signal, Escalation, Message, Compensation)
- Non-interrupting Boundary Event (Escalation, Signal, Timer, Conditional, Message)
- Interrupting Boundary Event (Escalation, Error, Signal, Timer, Conditional, Message, Compensation)
- Activities
- Script Task
- Task
- Service Task
- User Task
- Business Rule Task
- Manual Task
- Send Task
- Receive Task
- Reusable Sub-Process (Call Activity)
- Embedded Sub-Process
- Event Sub-Process
- Ad-Hoc Sub-Process
- Data-Object
- Gateways
- Diverging
- Exclusive
- Inclusive
- Parallel
- Event-Based
- Converging
- Exclusive
- Inclusive
- Parallel
- Diverging
- Lanes
- Events
- Data
- Java type language
- Process properties
- Embedded Sub-Process properties
- Activity properties
- Connecting objects
- Sequence flow
For example, consider the following "Hello World" BPMN 2.0 process, which does nothing more that writing out a "Hello World" statement when the process is started.

An executable version of this process expressed using BPMN 2.0 XML would look something like this:
<?xml version="1.0" encoding="UTF-8"?>
<definitions id="Definition"
             targetNamespace="http://www.example.org/MinimalExample"
             typeLanguage="http://www.java.com/javaTypes"
             expressionLanguage="http://www.mvel.org/2.0"
             xmlns="http://www.omg.org/spec/BPMN/20100524/MODEL"
             xmlns:xs="http://www.w3.org/2001/XMLSchema-instance"
             xs:schemaLocation="http://www.omg.org/spec/BPMN/20100524/MODEL BPMN20.xsd"
             xmlns:bpmndi="http://www.omg.org/spec/BPMN/20100524/DI"
             xmlns:dc="http://www.omg.org/spec/DD/20100524/DC"
             xmlns:di="http://www.omg.org/spec/DD/20100524/DI"
             xmlns:tns="http://www.jboss.org/drools">

  <process processType="Private" isExecutable="true" id="com.sample.HelloWorld" name="Hello World" >

    <!-- nodes -->
    <startEvent id="_1" name="StartProcess" />
    <scriptTask id="_2" name="Hello" >
      <script>System.out.println("Hello World");</script>
    </scriptTask>
    <endEvent id="_3" name="EndProcess" >
        <terminateEventDefinition/>
    </endEvent>

    <!-- connections -->
    <sequenceFlow id="_1-_2" sourceRef="_1" targetRef="_2" />
    <sequenceFlow id="_2-_3" sourceRef="_2" targetRef="_3" />

  </process>

  <bpmndi:BPMNDiagram>
    <bpmndi:BPMNPlane bpmnElement="Minimal" >
      <bpmndi:BPMNShape bpmnElement="_1" >
        <dc:Bounds x="15" y="91" width="48" height="48" />
      </bpmndi:BPMNShape>
      <bpmndi:BPMNShape bpmnElement="_2" >
        <dc:Bounds x="95" y="88" width="83" height="48" />
      </bpmndi:BPMNShape>
      <bpmndi:BPMNShape bpmnElement="_3" >
        <dc:Bounds x="258" y="86" width="48" height="48" />
      </bpmndi:BPMNShape>
      <bpmndi:BPMNEdge bpmnElement="_1-_2" >
        <di:waypoint x="39" y="115" />
        <di:waypoint x="75" y="46" />
        <di:waypoint x="136" y="112" />
      </bpmndi:BPMNEdge>
      <bpmndi:BPMNEdge bpmnElement="_2-_3" >
        <di:waypoint x="136" y="112" />
        <di:waypoint x="240" y="240" />
        <di:waypoint x="282" y="110" />
      </bpmndi:BPMNEdge>
    </bpmndi:BPMNPlane>
  </bpmndi:BPMNDiagram>

</definitions>
To create your own process using BPMN 2.0 format, you can
The jBPM Designer is an open-source web-based editor that supports the BPMN 2.0 format. We have embedded it into jbpm console for BPMN 2.0 process visualization and editing. You could use the Designer (either standalone or integrated) to create / edit BPMN 2.0 processes and then export them to BPMN 2.0 format or save them into repository and import them so they can be executed.
A new BPMN2 Eclipse plugin is being created to support the full BPMN2 specification.
You can always manually create your BPMN 2.0 process files by writing the XML directly. You can validate the syntax of your processes against the BPMN 2.0 XSD, or use the validator in the Eclipse plugin to check both syntax and completeness of your model.
Note
Drools Eclipse Process editor has been deprecated in favor of BPMN2 Modeler for process modeling. It can still be used for limited number of supported elements but should be faced out as it is not being developed any more.
Create a new Process file using the Drools Eclipse plugin wizard and in the last page of the wizard, make sure you select Drools 5.1 code compatibility. This will create a new process using the BPMN 2.0 XML format. Note however that this is not exactly a BPMN 2.0 editor, as it still uses different attributes names etc. It does however save the process using valid BPMN 2.0 syntax. Also note that the editor does not support all node types and attributes that are already supported in the execution engine.
The following code fragment shows you how to load a BPMN2 process into your knowledge base ...
private static KnowledgeBase createKnowledgeBase() throws Exception {
    KieHelper kieHelper = new KieHelper();
    KieBase kieBase = kieHelper
    .addResource(ResourceFactory.newClassPathResource("sample.bpmn2"))
    .build();

    return kieBase;
}
... and how to execute this process ...
KieBase kbase = createKnowledgeBase();
KieSession ksession = kbase.newKieSession();
ksession.startProcess("com.sample.HelloWorld");
For more detail, check out the chapter on the API and the basics.
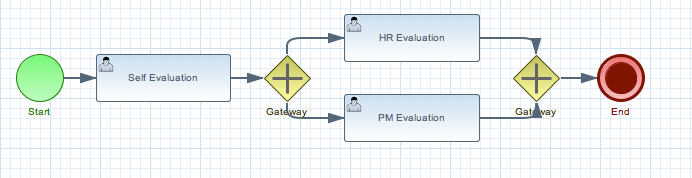
A business process is a graph that describes the order in which a series of steps need to be executed, using a flow chart. A process consists of a collection of nodes that are linked to each other using connections. Each of the nodes represents one step in the overall process while the connections specify how to transition from one node to the other. A large selection of predefined node types have been defined. This chapter describes how to define such processes and use them in your application.
Processes can be created by using one of the following three methods:
- Using the graphical process editor such as jBPM web designer or Eclipse BPMN2 modeler
- As an XML file, according to the XML process format as defined in the XML Schema Definition in the BPMN 2.0 specification.
- By directly creating a process using the Process API.
The graphical BPMN2 editor is an editor that allows you to create a process by dragging and dropping different nodes on a canvas and editing the properties of these nodes. The graphical BPMN2 modeler is an Eclipse plugin hosted on eclipse.org that provides number of contributors where one of them is jBPM project. Once you have set up a jBPM project (see the installer for creating a working Eclipse environment where you can start), you can start adding processes. When in a project, launch the "New" wizard (use Ctrl+N) or right-click the directory you would like to put your process in and select "New", then "File". Give the file a name and the extension bpmn (e.g. MyProcess.bpmn). This will open up the process editor (you can safely ignore the warning that the file could not be read, this is just because the file is still empty).
First, ensure that you can see the Properties View down the bottom of the Eclipse window, as it will be necessary to fill in the different properties of the elements in your process. If you cannot see the properties view, open it using the menu "Window", then "Show View" and "Other...", and under the "General" folder select the Properties View.
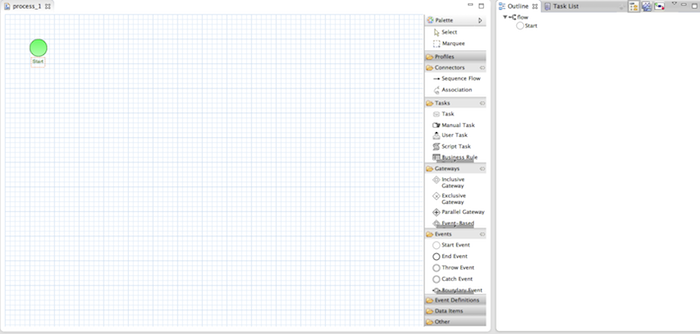
The process editor consists of a palette, a canvas and an outline view. To add new elements to the canvas, select the element you would like to create in the palette and then add them to the canvas by clicking on the preferred location. For example, click on the "End Event" icon in the palette of the GUI. Clicking on an element in your process allows you to set the properties of that element. You can connect the nodes (as long as it is permitted by the different types of nodes) by using "Sequence Flow" from the palette.
You can keep adding nodes and connections to your process until it represents the business logic that you want to specify.
It is also possible to specify processes using the underlying BPMN 2.0 XML directly. The syntax of these XML processes is defined using the BPMN 2.0 XML Schema Definition. For example, the following XML fragment shows a simple process that contains a sequence of a Start Event, a Script Task that prints "Hello World" to the console, and an End Event.
<?xml version="1.0" encoding="UTF-8"?>
<definitions id="Definition"
             targetNamespace="http://www.jboss.org/drools"
             typeLanguage="http://www.java.com/javaTypes"
             expressionLanguage="http://www.mvel.org/2.0"
             xmlns="http://www.omg.org/spec/BPMN/20100524/MODEL"Rule Task
             xmlns:xsi="http://www.w3.org/2001/XMLSchema-instance"
             xsi:schemaLocation="http://www.omg.org/spec/BPMN/20100524/MODEL BPMN20.xsd"
             xmlns:g="http://www.jboss.org/drools/flow/gpd"
             xmlns:bpmndi="http://www.omg.org/spec/BPMN/20100524/DI"
             xmlns:dc="http://www.omg.org/spec/DD/20100524/DC"
             xmlns:di="http://www.omg.org/spec/DD/20100524/DI"
             xmlns:tns="http://www.jboss.org/drools">

  <process processType="Private" isExecutable="true" id="com.sample.hello" name="Hello Process" >

    <!-- nodes -->
    <startEvent id="_1" name="Start" />
    <scriptTask id="_2" name="Hello" >
      <script>System.out.println("Hello World");</script>
    </scriptTask>
    <endEvent id="_3" name="End" >
        <terminateEventDefinition/>
    </endEvent>

    <!-- connections -->
    <sequenceFlow id="_1-_2" sourceRef="_1" targetRef="_2" />
    <sequenceFlow id="_2-_3" sourceRef="_2" targetRef="_3" />

  </process>

  <bpmndi:BPMNDiagram>
    <bpmndi:BPMNPlane bpmnElement="com.sample.hello" >
      <bpmndi:BPMNShape bpmnElement="_1" >
        <dc:Bounds x="16" y="16" width="48" height="48" />
      </bpmndi:BPMNShape>
      <bpmndi:BPMNShape bpmnElement="_2" >
        <dc:Bounds x="96" y="16" width="80" height="48" />
      </bpmndi:BPMNShape>
      <bpmndi:BPMNShape bpmnElement="_3" >
        <dc:Bounds x="208" y="16" width="48" height="48" />
      </bpmndi:BPMNShape>
      <bpmndi:BPMNEdge bpmnElement="_1-_2" >
        <di:waypoint x="40" y="40" />
        <di:waypoint x="136" y="40" />
      </bpmndi:BPMNEdge>
      <bpmndi:BPMNEdge bpmnElement="_2-_3" >
        <di:waypoint x="136" y="40" />
        <di:waypoint x="232" y="40" />
      </bpmndi:BPMNEdge>
    </bpmndi:BPMNPlane>
  </bpmndi:BPMNDiagram>

</definitions>
The process XML file consists of two parts, the top part (the "process" element) contains the definition of the different nodes and their properties, the lower part (the "BPMNDiagram" element) contains all graphical information, like the location of the nodes. The process XML consist of exactly one <process> element. This element contains parameters related to the process (its type, name, id and package name), and consists of three subsections: a header section (where process-level information like variables, globals, imports and lanes can be defined), a nodes section that defines each of the nodes in the process, and a connections section that contains the connections between all the nodes in the process. In the nodes section, there is a specific element for each node, defining the various parameters and, possibly, sub-elements for that node type.
A BPMN2 process is a flow chart where different types of nodes are linked using connections. The process itself exposes the following properties:
Id: The unique id of the process.
Name: The display name of the process.
Version: The version number of the process.
Package: The package (namespace) the process is defined in.
In addition to that following can be defined as well:
Represents a script that
should be executed in this process. A Script Task should have one incoming
connection and one outgoing connection. The associated action specifies what
should be executed, the dialect used for coding the action (i.e., Java, JavaScript or MVEL),
and the actual action code. This code can access any variables and globals.
There is also a predefined variable kcontext that references the
ProcessContext object (which can,
for example, be used to access the current ProcessInstance or
NodeInstance, and to get and set variables, or get access to the
ksession using kcontext.getKieRuntime()). When a Script Task
is reached in the process, it will execute the action and then continue with the
next node. It contains the following properties:
Id: The id of the node (which is unique within one node container).
Name: The display name of the node.
Action: The action script associated with this action node.
Note that you can write any valid Java code inside a script node. This basically allows you to do anything inside such a script node. There are some caveats however:
- When trying to create a higher-level business process, that should also be understood by business users, it is probably wise to avoid low-level implementation details inside the process, including inside these script tasks. A Script Task could still be used to quickly manipulate variables etc. but other concepts like a Service Task could be used to model more complex behaviour in a higher-level manner.
- Scripts should be immediate. They are using the engine thread to execute the script. Scripts that could take some time to execute should probably be modeled as an asynchronous Service Task.
- You should try to avoid contacting external services through a script node. Not only does this usually violate the first two caveats, it is also interacting with external services without the knowledge of the engine, which can be problematic, especially when using persistence and transactions. In general, it is probably wiser to model communication with an external service using a service task.
- Scripts should not throw exceptions. Runtime exceptions should be caught and for example managed inside the script or transformed into signals or errors that can then be handled inside the process.
Represents an (abstract) unit of work that should be executed in this process. All work that is executed outside the process engine should be represented (in a declarative way) using a Service Task. Different types of services are predefined, e.g., sending an email, logging a message, etc. Users can define domain-specific services or work items, using a unique name and by defining the parameters (input) and results (output) that are associated with this type of work. Check the chapter on domain-specific processes for a detailed explanation and illustrative examples of how to define and use work items in your processes. When a Service Task is reached in the process, the associated work is executed. A Service Task should have one incoming connection and one outgoing connection.
Id: The id of the node (which is unique within one node container).
Name: The display name of the node.
Parameter mapping: Allows copying the value of process variables to parameters of the work item. Upon creation of the work item, the values will be copied.
Result mapping: Allows copying the value of result parameters of the work item to a process variable. Each type of work can define result parameters that will (potentially) be returned after the work item has been completed. A result mapping can be used to copy the value of the given result parameter to the given variable in this process. For example, the "FileFinder" work item returns a list of files that match the given search criteria within the result parameter
Files. This list of files can then be bound to a process variable for use within the process. Upon completion of the work item, the values will be copied.On-entry and on-exit actions: Actions that are executed upon entry or exit of this node, respectively.
Additional parameters: Each type of work item can define additional parameters that are relevant for that type of work. For example, the "Email" work item defines additional parameters such as
From,To,SubjectandBody. The user can either provide values for these parameters directly, or define a parameter mapping that will copy the value of the given variable in this process to the given parameter; if both are specified, the mapping will have precedence. Parameters of typeStringcan use#{expression}to embed a value in the string. The value will be retrieved when creating the work item, and the substitution expression will be replaced by the result of callingtoString()on the variable. The expression could simply be the name of a variable (in which case it resolves to the value of the variable), but more advanced MVEL expressions are possible as well, e.g.,#{person.name.firstname}.
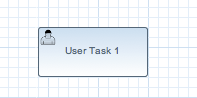
Processes can also involve tasks that need to be executed by human actors. A User Task represents an atomic task to be executed by a human actor. It should have one incoming connection and one outgoing connection. User Tasks can be used in combination with Swimlanes to assign multiple human tasks to similar actors. Refer to the chapter on human tasks for more details. A User Task is actually nothing more than a specific type of service node (of type "Human Task"). A User Task contains the following properties:
Id: The id of the node (which is unique within one node container).
Name: The display name of the node.
TaskName: The name of the human task.
Priority: An integer indicating the priority of the human task.
Comment: A comment associated with the human task.
ActorId: The actor id that is responsible for executing the human task. A list of actor id's can be specified using a comma (',') as separator.
GroupId: The group id that is responsible for executing the human task. A list of group id's can be specified using a comma (',') as separator.
Skippable: Specifies whether the human task can be skipped, i.e., whether the actor may decide not to execute the task.
Content: The data associated with this task.
Swimlane: The swimlane this human task node is part of. Swimlanes make it easy to assign multiple human tasks to the same actor. See the human tasks chapter for more detail on how to use swimlanes.
On entry and on exit actions: Action scripts that are executed upon entry and exit of this node, respectively.
Parameter mapping: Allows copying the value of process variables to parameters of the human task. Upon creation of the human tasks, the values will be copied.
Result mapping: Allows copying the value of result parameters of the human task to a process variable. Upon completion of the human task, the values will be copied. A human task has a result variable "Result" that contains the data returned by the human actor. The variable "ActorId" contains the id of the actor that actually executed the task.
A user task should define the type of task that needs to be executed (using properties like TaskName, Comment, etc.) and who needs to perform it (using either actorId or groupId). Note that if there is data related to this specific process instance that the end user needs when performing the task, this data should be passed as the content of the task. The task for example does not have access to process variables. Check out the chapter on human tasks to get more detail on how to pass data between human tasks and the process instance.
Represents the invocation of another process from within this process. A sub-process node should have one incoming connection and one outgoing connection. When a Reusable Sub-Process node is reached in the process, the engine will start the process with the given id. It contains the following properties:
Id: The id of the node (which is unique within one node container).
Name: The display name of the node.
ProcessId: The id of the process that should be executed.
Wait for completion (by default true): If this property is true, this sub-process node will only continue if the child process that was started has terminated its execution (completed or aborted); otherwise it will continue immediately after starting the subprocess (so it will not wait for its completion).
Independent (by default true): If this property is true, the child process is started as an independent process, which means that the child process will not be terminated if this parent process is completed (or this sub-process node is canceled for some other reason); otherwise the active sub-process will be canceled on termination of the parent process (or cancellation of the sub-process node). Note that you can only set independent to "false" only when "Wait for completion" is set to true.
On-entry and on-exit actions: Actions that are executed upon entry or exit of this node, respectively.
Parameter in/out mapping: A sub-process node can also define in- and out-mappings for variables. The variables given in the "in" mapping will be used as parameters (with the associated parameter name) when starting the process. The variables of the child process that are defined for the "out" mappings will be copied to the variables of this process when the child process has been completed. Note that you can use "out" mappings only when "Wait for completion" is set to true.
A Business Rule Task Represents a set of rules that need to be
evaluated. The rules are evaluated when the node is reached. A Rule
Task should have one incoming connection and one outgoing connection.
Rules are defined in separate files using the Drools rule format. Rules
can become part of a specific ruleflow group using the ruleflow-group
attribute in the header of the rule.
When a Rule Task is reached in the process, the engine will start executing rules that are part of the corresponding ruleflow-group (if any). Execution will automatically continue to the next node if there are no more active rules in this ruleflow group. As a result, during the execution of a ruleflow group, new activations belonging to the currently active ruleflow group can be added to the Agenda due to changes made to the facts by the other rules. Note that the process will immediately continue with the next node if it encounters a ruleflow group where there are no active rules at that time.
If the ruleflow group was already active, the ruleflow group will remain active and execution will only continue if all active rules of the ruleflow group has been completed. It contains the following properties:
Id: The id of the node (which is unique within one node container).
Name: The display name of the node.
RuleFlowGroup: The name of the ruleflow group that represents the set of rules of this RuleFlowGroup node.
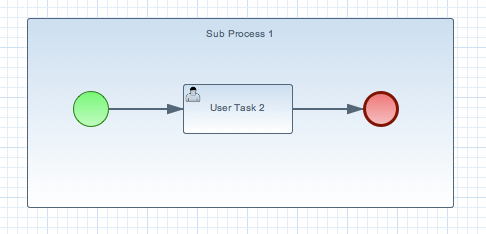
A Sub-Process is a node that can contain other nodes so that it acts as a node container. This allows not only the embedding of a part of the process within such a sub-process node, but also the definition of additional variables that are accessible for all nodes inside this container. A sub-process should have one incoming connection and one outgoing connection. It should also contain one start node that defines where to start (inside the Sub-Process) when you reach the sub-process. It should also contain one or more end events. Note that, if you use a terminating event node inside a sub-process, you are terminating just that sub-process. A sub-process ends when there are no more active nodes inside the sub-process. It contains the following properties:
Id: The id of the node (which is unique within one node container).
Name: The display name of the node.
Variables: Additional variables can be defined to store data during the execution of this node. See section “???” for details.
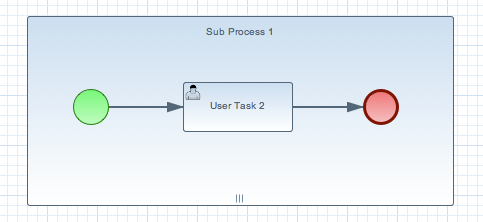
A Multiple Instance sub-process is a special kind of sub-process that allows you to execute the contained process segment multiple times, once for each element in a collection. A multiple instance sub-process should have one incoming connection and one outgoing connection. It waits until the embedded process fragment is completed for each of the elements in the given collection before continuing. It contains the following properties:
Id: The id of the node (which is unique within one node container).
Name: The display name of the node.
CollectionExpression: The name of a variable that represents the collection of elements that should be iterated over. The collection variable should be an array or of type
java.util.Collection. If the collection expression evaluates to null or an empty collection, the multiple instances sub-process will be completed immediately and follow its outgoing connection.VariableName: The name of the variable to contain the current element from the collection. This gives nodes within the composite node access to the selected element.
CollectionOutput: The name of a variable that represents collection of elements that will gather all output of the multi instance sub process
OutputVariableName: The name of the variable to contain the currentl output from the multi instance activitiy
CompletionCondition: MVEL expression that will be evaluated on each instance completion to check if given multi instance activity can already be completed. In case it evaluates to true all other remaining instances within multi instance activity will be canceled.
The start of the process. A process should have exactly one start node (none start node which does not have event definitions), which cannot have incoming connections and should have one outgoing connection. Whenever a process is started, execution will start at this node and automatically continue to the first node linked to this start event, and so on. It contains the following properties:
Id: The id of the node (which is unique within one node container).
Name: The display name of the node.
The end of the process. A process should have one or more end events. The End Event should have one incoming connection and cannot have any outgoing connections. It contains the following properties:
Id: The id of the node (which is unique within one node container).
Name: The display name of the node.
Terminate: An End Event can terminate the entire process or just the path. When a process instance is terminated, it means its state is set to completed and all other nodes that might still be active (on parallel paths) in this process instance are canceled. Non-terminating end events are simply end for this path (execution of this branch will end here), but other parallel paths can still continue. A process instance will automatically complete if there are no more active paths inside that process instance (for example, if a process instance reaches a non-terminating end node but there are no more active branches inside the process instance, the process instance will be completed anyway). Terminating end events are visualized using a full circle inside the event node, non-terminating event nodes are empty. Note that, if you use a terminating event node inside a sub-process, you are terminating just that sub-process and top level continues.

An Error Event can be used to signal an exceptional condition in the process. It should have one incoming connection and no outgoing connections. When an Error Event is reached in the process, it will throw an error with the given name. The process will search for an appropriate error handler that is capable of handling this kind of fault. If no error handler is found, the process instance will be aborted. An Error Event contains the following properties:
Id: The id of the node (which is unique within one node container).
Name: The display name of the node.
FaultName: The name of the fault. This name is used to search for appropriate exception handlers that are capable of handling this kind of fault.
FaultVariable: The name of the variable that contains the data associated with this fault. This data is also passed on to the exception handler (if one is found).
Error handlers can be specified using boundary events.

Represents a timer that can trigger one or multiple times after a given period of time. A Timer Event should have one incoming connection and one outgoing connection. The timer delay specifies how long the timer should wait before triggering the first time. When a Timer Event is reached in the process, it will start the associated timer. The timer is canceled if the timer node is canceled (e.g., by completing or aborting the enclosing process instance). Consult the section “???” for more information. The Timer Event contains the following properties:
Id: The id of the node (which is unique within one node container).
Name: The display name of the node.
Timer delay: The delay that the node should wait before triggering the first time. The expression should be of the form
[#d][#h][#m][#s][#[ms]]. This allows you to specify the number of days, hours, minutes, seconds and milliseconds (which is the default if you don't specify anything). For example, the expression "1h" will wait one hour before triggering the timer. The expression could also use #{expr} to dynamically derive the delay based on some process variable. Expr in this case could be a process variable, or a more complex expression based on a process variable (e.g. myVariable.getValue()). It does support CRON like expression as well.Timer period: The period between two subsequent triggers. If the period is 0, the timer should only be triggered once. The expression should be of the form
[#d][#h][#m][#s][#[ms]]. You can specify the number of days, hours, minutes, seconds and milliseconds (which is the default if you don't specify anything). For example, the expression "1h" will wait one hour before triggering the timer again. The expression could also use #{expr} to dynamically derive the period based on some process variable. Expr in this case could be a process variable, or a more complex expression based on a process variable (e.g. myVariable.getValue()).
Timer events could also be specified as boundary events on sub-processes and tasks that are not automatic tasks like script task that have no wait state as timer will not have a change to fire before task completion.

A Signal Event can be used to respond to internal or external events during the execution of the process. A Signal Event should have one incoming connections and one outgoing connection. It specifies the type of event that is expected. Whenever that type of event is detected, the node connected to this event node will be triggered. It contains the following properties:
Id: The id of the node (which is unique within one node container).
Name: The display name of the node.
EventType: The type of event that is expected.
VariableName: The name of the variable that will contain the data associated with this event (if any) when this event occurs.
A process instance can be signaled that a specific event occurred using
ksession.signalEvent(eventType, data, processInstanceId)This will trigger all (active) signal event nodes in the given process instance that are waiting for that event type. Data related to the event can be passed using the data parameter. If the event node specifies a variable name, this data will be copied to that variable when the event occurs.
It is also possible to use event nodes inside sub-processes. These event nodes will however only be active when the sub-process is active.
You can also generate a signal from inside a process instance. A script (in a script task or using on entry or on exit actions) can use
kcontext.getKieRuntime().signalEvent(eventType, data, kcontext.getProcessInstance().getId());
A throwing signal event could also be used to model the signaling of an event.

Allows you to create branches in your process. A Diverging Gateway should have one incoming connection and two or more outgoing connections. There are three types of gateway nodes currently supported:
AND or parallel means that the control flow will continue in all outgoing connections simultaneously.
XOR or exclusive means that exactly one of the outgoing connections will be chosen. The decision is made by evaluating the constraints that are linked to each of the outgoing connections. The constraint with the lowest priority number that evaluates to true is selected. Constraints can be specified using different dialects. Note that you should always make sure that at least one of the outgoing connections will evaluate to true at runtime (the engine will throw an exception at runtime if it cannot find at least one outgoing connection).
OR or inclusive means that all outgoing connections whose condition evaluates to true are selected. Conditions are similar to the exclusive gateway, except that no priorities are taken into account. Note that you should make sure that at least one of the outgoing connections will evaluate to true at runtime because the engine will throw an exception at runtime if it cannot determine an outgoing connection.
It contains the following properties:
Id: The id of the node (which is unique within one node container).
Name: The display name of the node.
Type: The type of the split node, i.e., AND, XOR or OR (see above).
Constraints: The constraints linked to each of the outgoing connections (in case of an exclusive or inclusive gateway).
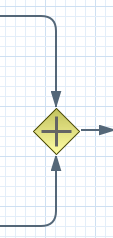
Allows you to synchronize multiple branches. A Converging Gateway should have two or more incoming connections and one outgoing connection. There are three types of splits currently supported:
AND or parallel means that is will wait until all incoming branches are completed before continuing.
XOR or exclusive means that it continues as soon as one of its incoming branches has been completed. If it is triggered from more than one incoming connection, it will trigger the next node for each of those triggers.
OR or inclusive means that it continues as soon as all direct active paths of its incoming branches has been completed. This is complex merge behaviour that is described in BPMN2 specification but in most cases it means that OR join will wait for all active flows that started in OR split. Some advanced cases (including other gateways in between or repeatable timers) will be causing different "direct active path" calculation.
It contains the following properties:
Id: The id of the node (which is unique within one node container).
Name: The display name of the node.
Type: The type of the Join node, i.e. AND, OR or XOR.
While the flow chart focuses on specifying the control flow of the process, it is usually also necessary to look at the process from a data perspective. Throughout the execution of a process, data can be retrieved, stored, passed on and used.
For storing runtime data, during the execution of the process, process variables can be used. A variable is defined by a name and a data type. This could be a basic data type, such as boolean, int, or String, or any kind of Object subclass (it must implement Serializable interface). Variables can be defined inside a variable scope. The top-level scope is the variable scope of the process itself. Subscopes can be defined using a Sub-Process. Variables that are defined in a subscope are only accessible for nodes within that scope.
Whenever a variable is accessed, the process will search for the appropriate variable scope that defines the variable. Nesting of variable scopes is allowed. A node will always search for a variable in its parent container. If the variable cannot be found, it will look in that one's parent container, and so on, until the process instance itself is reached. If the variable cannot be found, a read access yields null, and a write access produces an error message, with the process continuing its execution.
Variables can be used in various ways:
Process-level variables can be set when starting a process by providing a map of parameters to the invocation of the
startProcessmethod. These parameters will be set as variables on the process scope.Script actions can access variables directly, simply by using the name of the variable as a local parameter in their script. For example, if the process defines a variable of type "org.jbpm.Person" in the process, a script in the process could access this directly:
// call method on the process variable "person"
person.setAge(10);
Changing the value of a variable in a script can be done through the knowledge context:
kcontext.setVariable(variableName, value);Service tasks (and reusable sub-processes) can pass the value of process variables to the outside world (or another process instance) by mapping the variable to an outgoing parameter. For example, the parameter mapping of a service task could define that the value of the process variable x should be mapped to a task parameter y right before the service is being invoked. You can also inject the value of process variable into a hard-coded parameter String using
#{expression}. For example, the description of a human task could be defined asYou need to contact person #{person.getName()}(where person is a process variable), which will replace this expression by the actual name of the person when the service needs to be invoked. Similarly results of a service (or reusable sub-process) can also be copied back to a variable using a result mapping.Various other nodes can also access data. Event nodes for example can store the data associated to the event in a variable, etc. Check the properties of the different node types for more information.
Process variables can be accessed also from the Java code of your application. It is done by casting of
ProcessInstancetoWorkflowProcessInstance. See the following example:variable = ((WorkflowProcessInstance) processInstance).getVariable("variableName");To list all the process variables see the following code snippet:
org.jbpm.process.instance.ProcessInstance processInstance = ...;
VariableScopeInstance variableScope = (VariableScopeInstance) processInstance.getContextInstance(VariableScope.VARIABLE_SCOPE);
Map<String, Object> variables = variableScope.getVariables();
Note that when you use persistence then you have to use a command based approach to get all process variables:
Map<String, Object> variables = ksession.execute(new GenericCommand<Map<String, Object>>() {
    public Map<String, Object> execute(Context context) {
        KieSession ksession = ((KnowledgeCommandContext) context).getStatefulKnowledgesession();
        org.jbpm.process.instance.ProcessInstance processInstance = (org.jbpm.process.instance.ProcessInstance) ksession.getProcessInstance(piId);
        VariableScopeInstance variableScope = (VariableScopeInstance) processInstance.getContextInstance(VariableScope.VARIABLE_SCOPE);
        Map<String, Object> variables = variableScope.getVariables();
        return variables;
    }
});
Finally, processes (and rules) all have access to globals, i.e.
globally defined variables and data in the Knowledge Session. Globals are directly
accessible in actions just like variables. Globals need to be defined as part of the
process before they can be used. You can for example define globals by clicking the
globals button when specifying an action script in the Eclipse action property
editor. You can also set the value of a global from the outside using
ksession.setGlobal(name, value) or from inside process scripts using
kcontext.getKieRuntime().setGlobal(name,value);.
Action scripts can be used in different ways:
- Within a Script Task,
- As entry or exit actions, with a number of nodes.
Actions have access to globals and the variables that are defined
for the process and the predefined variable kcontext. This
variable is of type
ProcessContext and can be used for
several tasks:
Getting the current node instance (if applicable). The node instance could be queried for data, such as its name and type. You can also cancel the current node instance.
NodeInstance node = kcontext.getNodeInstance();
String name = node.getNodeName();
Getting the current process instance. A process instance can be queried for data (name, id, processId, etc.), aborted or signaled an internal event.
ProcessInstance proc = kcontext.getProcessInstance();
proc.signalEvent( type, eventObject );
Getting or setting the value of variables.
Accessing the Knowledge Runtime allows you do things like starting a process, signaling (external) events, inserting data, etc.
jBPM supports multiple dialects, like Java, JavaScript and MVEL.
Java actions should be valid Java code, same for JavaScript. MVEL actions can use the business
scripting language MVEL to express the action. MVEL accepts any valid Java
code but additionally provides support for nested accesses of parameters
(e.g., person.name instead of person.getName()),
and many other scripting improvements. Thus, MVEL expressions are more
convenient for the business user. For example, an action that prints out
the name of the person in the "requester" variable of the process would
look like this:
// Java dialect
System.out.println( person.getName() );

// JavaScript dialect
print(person.name + '\n);

//  MVEL dialect
System.out.println( person.name );
Constraints can be used in various locations in your processes, for example in a diverging gateway. jBPM supports two types of constraints:
Code constraints are boolean expressions, evaluated directly whenever they are reached. We support multiple dialects for expressing these code constraints: Java, JavaScript and MVEL. All code constraints have direct access to the globals and variables defined in the process. Here is an example of a valid Java code constraint,
personbeing a variable in the process:return person.getAge() > 20;A similar example of a valid MVEL code constraint is:
return person.age > 20;And for JavaScript:
person.age > 20Rule constraints are equals to normal Drools rule conditions. They use the Drools Rule Language syntax to express possibly complex constraints. These rules can, like any other rule, refer to data in the Working Memory. They can also refer to globals directly. Here is an example of a valid rule constraint:
Person( age > 20 )This tests for a person older than 20 being in the Working Memory.
Rule constraints do not have direct access to variables defined
inside the process. It is however possible to refer to the current process
instance inside a rule constraint, by adding the process instance to the
Working Memory and matching for the process instance in your rule
constraint. We have added special logic to make sure that a variable
processInstance of type WorkflowProcessInstance
will only match to the current process instance and not to other process
instances in the Working Memory. Note that you are however responsible
yourself to insert the process instance into the session and, possibly,
to update it, for example, using Java code or an on-entry or on-exit or
explicit action in your process. The following example of a rule
constraint will search for a person with the same name as the value
stored in the variable "name" of the process:
processInstance : WorkflowProcessInstance()
Person( name == ( processInstance.getVariable("name") ) )
# add more constraints here ...Timers wait for a predefined amount of time, before triggering, once or repeatedly. They can be used to trigger certain logic after a certain period, or to repeat some action at regular intervals.
A Timer node is set up with a delay and a period. The delay specifies the amount of time to wait after node activation before triggering the timer the first time. The period defines the time between subsequent trigger activations. A period of 0 results in a one-shot timer.
The (period and delay) expression should be of the form [#d][#h][#m][#s][#[ms]]. You can specify the amount of days, hours, minutes, seconds and milliseconds (which is the default if you don't specify anything). For example, the expression "1h" will wait one hour before triggering the timer (again).
Timer events can be configured with CRON like expression when timeCycle is used as timer event definition. Important is that the language attribute of timeCycle definition must be set to cron. With that such cycle of a timer is controlled in the same way as CRON jobs. CRON like expression is supported for:
start event timers
intermediate event timers
boundary event timers
Following is an example of a definition of a boundary timer with CRON like expression
<bpmn2:boundaryEvent id="1" name="Send Update Timer" attachedToRef="_77A94B54-8B7C-4F8A-84EE-C1D310A343A6" cancelActivity="false">
   <bpmn2:outgoing>2</bpmn2:outgoing>
   <bpmn2:timerEventDefinition id="_erIyiJZ7EeSDh8PHobjSSA">
     <bpmn2:timeCycle xsi:type="bpmn2:tFormalExpression" id="_erIyiZZ7EeSDh8PHobjSSA" language="cron">0/1 * * * * ?</bpmn2:timeCycle>
   </bpmn2:timerEventDefinition>
</bpmn2:boundaryEvent>
This timer will fire every second and will continue until activity this boundary event is attached to is active.
since version 6 timers can be configured with valid ISO8601 date format that supports both one shot timers and repeatable timers. Timers can be defined as date and time representation, time duration or repeating intervals
- Date - 2013-12-24T20:00:00.000+02:00 - fires exactly at Christmas Eve at 8PM
- Duration - PT1S - fires once after 1 second
- Repeatable intervals - R/PT1S - fires every second, no limit, alternatively R5/PT1S will fire 5 times every second
The timer service is responsible for making sure that timers get triggered at the appropriate times. Timers can also be canceled, meaning that the timer will no longer be triggered.
Timers can be used in two ways inside a process:
A Timer Event may be added to the process flow. Its activation starts the timer, and when it triggers, once or repeatedly, it activates the Timer node's successor. Subsequently, the outgoing connection of a timer with a positive period is triggered multiple times. Canceling a Timer node also cancels the associated timer, after which no more triggers will occur.
Timers can be associated with a Sub-Process or tasks as a boundary event.
In some cases timer that has been already scheduled should be rescheduled to accomodate new requirements (prolong or shorten timer expiration time, change delay, period or repeat limit).
As this involves several low level steps, jBPM comes with a dedicated command to perform these operations as atomic operation to make sure all is done within same transaction.
org.jbpm.process.instance.command.UpdateTimerCommandFollowing timer events are supported to be updated:
boundary timer event
intermediate timer event
Timers can be rescheduled by providing following information to the UpdateTimerCommand
processInstanceId - mandatory
timer node name - mandatory
Next one of following three parameters set needs to be used:
delay
period and repeatLimit
delay, period and repeatLimit
Example on how to updated timer event:
// first start process instance and record its id
long id = kieSession.startProcess(BOUNDARY_PROCESS_NAME).getId();

//set timer delay to 3s
kieSession.execute(new UpdateTimerCommand(id, BOUNDARY_TIMER_ATTACHED_TO_NAME, 3));
Important is that the update command is executed via ksession executor to ensure it's done in transaction (when persistence is used).
While it is recommended to define processes using the graphical editor or
the underlying XML (to shield yourself from internal APIs), it is also possible
to define a process using the Process API directly. The most important process
model elements are defined in the packages org.jbpm.workflow.core and
org.jbpm.workflow.core.node. A "fluent API" is provided that
allows you to easily construct processes in a readable manner using factories.
At the end, you can validate the process that you were constructing manually.
This is a simple example of a basic process with a script task only:
RuleFlowProcessFactory factory =
    RuleFlowProcessFactory.createProcess("org.jbpm.HelloWorld");
factory
    // Header
    .name("HelloWorldProcess")
    .version("1.0")
    .packageName("org.jbpm")
    // Nodes
    .startNode(1).name("Start").done()
    .actionNode(2).name("Action")
        .action("java", "System.out.println(\"Hello World\");").done()
    .endNode(3).name("End").done()
    // Connections
    .connection(1, 2)
    .connection(2, 3);
RuleFlowProcess process = factory.validate().getProcess();

KieServices ks = KieServices.Factory.get();
KieFileSystem kfs = ks.newKieFileSystem();
Resource resource = ks.getResources().newByteArrayResource(
    XmlBPMNProcessDumper.INSTANCE.dump(process).getBytes());
resource.setSourcePath("helloworld.bpmn2");
kfs.write(resource);
ReleaseId releaseId = ks.newReleaseId("org.jbpm", "helloworld", "1.0");
kfs.generateAndWritePomXML(releaseId);
ks.newKieBuilder(kfs).buildAll();
ks.newKieContainer(releaseId).newKieSession().startProcess("org.jbpm.HelloWorld");
You can see that we start by calling the static createProcess()
method from the RuleFlowProcessFactory class. This method creates
a new process with the given id and returns the RuleFlowProcessFactory
that can be used to create the process. A typical process consists of three parts.
The header part comprises global elements like the name of the process, imports,
variables, etc. The nodes section contains all the different nodes that are part of the
process. The connections section finally links these nodes to each other
to create a flow chart.
In this example, the header contains the name and the version of the process and the package name. After that, you can start adding nodes to the current process. If you have auto-completion you can see that you have different methods to create each of the supported node types at your disposal.
When you start adding nodes to the process, in this example by calling
the startNode(), actionNode() and endNode()
methods, you can see that these methods return a specific NodeFactory,
that allows you to set the properties of that node. Once you have finished
configuring that specific node, the done() method returns you to the
current RuleFlowProcessFactory so you can add more nodes, if necessary.
When you are finished adding nodes, you must connect them by creating
connections between them. This can be done by calling the method
connection, which will link previously created nodes.
Finally, you can validate the generated process by calling the
validate() method and retrieve the created
RuleFlowProcess object.
Even though business processes aren't code (we even recommend you to make them as high-level as possible and to avoid adding implementation details), they also have a life cycle like other development artefacts. And since business processes can be updated dynamically, testing them (so that you don't break any use cases when doing a modification) is really important as well.
When unit testing your process, you test whether the process behaves as expected in specific use cases, for example test the output based on the existing input. To simplify unit testing, jBPM includes a helper class called JbpmJUnitBaseTestCase (in the jbpm-test module) that you can use to greatly simplify your JUnit testing, by offering:
helper methods to create a new RuntimeManager and RuntimeEngine for a given (set of) process(es)
you can select whether you want to use persistence or not
assert statements to check
the state of a process instance (active, completed, aborted)
which node instances are currently active
which nodes have been triggered (to check the path that has been followed)
get the value of variables
For example, consider the following "hello world" process containing a start event, a script task and an end event. The following JUnit test will create a new session, start the process and then verify whether the process instance completed successfully and whether these three nodes have been executed.
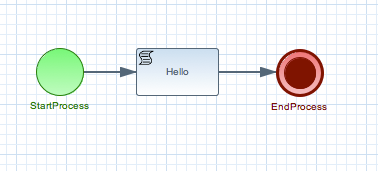
public class ProcessPersistenceTest extends JbpmJUnitBaseTestCase {

    public ProcessPersistenceTest() {
        // setup data source, enable persistence
        super(true, true);
    }

    @Test
    public void testProcess() {
        // create runtime manager with single process - hello.bpmn
        createRuntimeManager("hello.bpmn");

        // take RuntimeManager to work with process engine
        RuntimeEngine runtimeEngine = getRuntimeEngine();

        // get access to KieSession instance
        KieSession ksession = runtimeEngine.getKieSession();

        // start process
        ProcessInstance processInstance = ksession.startProcess("com.sample.bpmn.hello");

        // check whether the process instance has completed successfully
        assertProcessInstanceCompleted(processInstance.getId(), ksession);

        // check what nodes have been triggered
        assertNodeTriggered(processInstance.getId(), "StartProcess", "Hello", "EndProcess");
    }
}
JbpmJUnitBaseTestCase acts as base test case class that shall be used for jBPM related tests. It provides four usage areas:
JUnit life cycle methods
setUp: executed @Before and configures data source and EntityManagerFactory, cleans up Singleton's session id
tearDown: executed @After and clears out history, closes EntityManagerFactory and data source, disposes RuntimeEngines and RuntimeManager
Knowledge Base and KnowledgeSession management methods
createRuntimeManager creates RuntimeManager for given set of assets and selected strategy
disposeRuntimeManager disposes RuntimeManager currently active in the scope of test
getRuntimeEngine creates new RuntimeEngine for given context
Assertions
assertProcessInstanceCompleted
assertProcessInstanceAborted
assertProcessInstanceActive
assertNodeActive
assertNodeTriggered
assertProcessVarExists
assertNodeExists
assertVersionEquals
assertProcessNameEquals
Helper methods
getDs - returns currently configured data source
getEmf - returns currently configured EntityManagerFactory
getTestWorkItemHandler - returns test work item handler that might be registered in addition to what is registered by default
clearHistory - clears history log
setupPoolingDataSource - sets up data source
JbpmJUnitBaseTestCase supports all three predefined RuntimeManager strategies as part of the unit testing. It's enough to specify which strategy shall be used whenever creating runtime manager as part of single test:
public class ProcessHumanTaskTest extends JbpmJUnitBaseTestCase {

    private static final Logger logger = LoggerFactory.getLogger(ProcessHumanTaskTest.class);

    public ProcessHumanTaskTest() {
        super(true, false);
    }

    @Test
    public void testProcessProcessInstanceStrategy() {
        RuntimeManager manager = createRuntimeManager(Strategy.PROCESS_INSTANCE, "manager", "humantask.bpmn");
        RuntimeEngine runtimeEngine = getRuntimeEngine(ProcessInstanceIdContext.get());
        KieSession ksession = runtimeEngine.getKieSession();
        TaskService taskService = runtimeEngine.getTaskService();

        int ksessionID = ksession.getId();
        ProcessInstance processInstance = ksession.startProcess("com.sample.bpmn.hello");

        assertProcessInstanceActive(processInstance.getId(), ksession);
        assertNodeTriggered(processInstance.getId(), "Start", "Task 1");

        manager.disposeRuntimeEngine(runtimeEngine);
        runtimeEngine = getRuntimeEngine(ProcessInstanceIdContext.get(processInstance.getId()));

        ksession = runtimeEngine.getKieSession();
        taskService = runtimeEngine.getTaskService();

        assertEquals(ksessionID, ksession.getId());

        // let john execute Task 1
        List<TaskSummary> list = taskService.getTasksAssignedAsPotentialOwner("john", "en-UK");
        TaskSummary task = list.get(0);
        logger.info("John is executing task {}", task.getName());
        taskService.start(task.getId(), "john");
        taskService.complete(task.getId(), "john", null);

        assertNodeTriggered(processInstance.getId(), "Task 2");

        // let mary execute Task 2
        list = taskService.getTasksAssignedAsPotentialOwner("mary", "en-UK");
        task = list.get(0);
        logger.info("Mary is executing task {}", task.getName());
        taskService.start(task.getId(), "mary");
        taskService.complete(task.getId(), "mary", null);

        assertNodeTriggered(processInstance.getId(), "End");
        assertProcessInstanceCompleted(processInstance.getId(), ksession);
    }
}
Above is more complete example that uses PerProcessInstance runtime manager strategy and uses task service to deal with user tasks.
Real-life business processes typically include the invocation of external services (like for example a human task service, an email server or your own domain-specific services). One of the advantages of our domain-specific process approach is that you can specify yourself how to actually execute your own domain-specific nodes, by registering a handler. And this handler can be different depending on your context, allowing you to use testing handlers for unit testing your process. When you are unit testing your business process, you can register test handlers that then verify whether specific services are requested correctly, and provide test responses for those services. For example, imagine you have an email node or a human task as part of your process. When unit testing, you don't want to send out an actual email but rather test whether the email that is requested contains the correct information (for example the right to email, a personalized body, etc.).
A TestWorkItemHandler is provided by default that can be registered to collect all work items (a work item represents one unit of work, like for example sending one specific email or invoking one specific service and contains all the data related to that task) for a given type. This test handler can then be queried during unit testing to check whether specific work was actually requested during the execution of the process and that the data associated with the work was correct.
The following example describes how a process that sends out an email could be tested. This test case in particular will test whether an exception is raised when the email could not be sent (which is simulated by notifying the engine that the sending the email could not be completed). The test case uses a test handler that simply registers when an email was requested (and allows you to test the data related to the email like from, to, etc.). Once the engine has been notified the email could not be sent (using abortWorkItem(..)), the unit test verifies that the process handles this case successfully by logging this and generating an error, which aborts the process instance in this case.
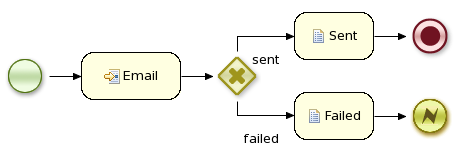
public void testProcess2() {

    // create runtime manager with single process - hello.bpmn
    createRuntimeManager("sample-process.bpmn");
    // take RuntimeManager to work with process engine
    RuntimeEngine runtimeEngine = getRuntimeEngine();

    // get access to KieSession instance
    KieSession ksession = runtimeEngine.getKieSession();

    // register a test handler for "Email"
    TestWorkItemHandler testHandler = getTestWorkItemHandler();

    ksession.getWorkItemManager().registerWorkItemHandler("Email", testHandler);

    // start the process
    ProcessInstance processInstance = ksession.startProcess("com.sample.bpmn.hello2");

    assertProcessInstanceActive(processInstance.getId(), ksession);
    assertNodeTriggered(processInstance.getId(), "StartProcess", "Email");

    // check whether the email has been requested
    WorkItem workItem = testHandler.getWorkItem();
    assertNotNull(workItem);
    assertEquals("Email", workItem.getName());
    assertEquals("me@mail.com", workItem.getParameter("From"));
    assertEquals("you@mail.com", workItem.getParameter("To"));

    // notify the engine the email has been sent
    ksession.getWorkItemManager().abortWorkItem(workItem.getId());
    assertProcessInstanceAborted(processInstance.getId(), ksession);
    assertNodeTriggered(processInstance.getId(), "Gateway", "Failed", "Error");

}You can configure whether you want to execute the JUnit tests using persistence or not. By default, the JUnit tests will use persistence, meaning that the state of all process instances will be stored in a (in-memory H2) database (which is started by the JUnit test during setup) and a history log will be used to check assertions related to execution history. When persistence is not used, process instances will only live in memory and an in-memory logger is used for history assertions.
Persistence (and setup of data source) is controlled by the super constructor and allows following
default, no arg constructor - the most simple test case configuration (does NOT initialize data source and does NOT configure session persistence) - this is usually used for in memory process management, without human task interaction
super(boolean, boolean) - allows to explicitly configure persistence and data source. This is the most common way of bootstrapping test cases for jBPM
super(true, false) - to execute with in memory process management with human tasks persistence
super(true, true) - to execute with persistent process management with human tasks persistence
super(boolean, boolean, string) - same as super(boolean, boolean) but allows to use another persistence unit name than default (org.jbpm.persistence.jpa)
public class ProcessHumanTaskTest extends JbpmJUnitBaseTestCase {

    private static final Logger logger = LoggerFactory.getLogger(ProcessHumanTaskTest.class);

    public ProcessHumanTaskTest() {
        // configure this tests to not use persistence for process engine but still use it for human tasks
        super(true, false);
    }
}An important aspect of business processes is human task management. While some of the work performed in a process can be executed automatically, some tasks need to be executed by human actors.
jBPM supports a special human task node inside processes for modeling this interaction with human users. This human task node allows process designers to define the properties related to the task that the human actor needs to execute, like for example the type of task, the actor(s), or the data associated with the task.
jBPM also includes a so-called human task service, a back-end service that manages the life cycle of these tasks at runtime. The jBPM implementation is based on the WS-HumanTask specification. Note however that this implementation is fully pluggable, meaning that users can integrate their own human task solution if necessary.
In order to have human actors participate in your processes, you first need to (1) include human task nodes inside your process to model the interaction with human actors, (2) integrate a task management component (like for example the WS-HumanTask based implementation provided by jBPM) and (3) have end users interact with a human task client to request their task list and claim and complete the tasks assigned to them. Each of these three elements will be discussed in more detail in the next sections.
jBPM supports the use of human tasks inside processes using a special User Task node defined by the BPMN2 Specification(as shown in the figure above). A User Task node represents an atomic task that needs to be executed by a human actor.
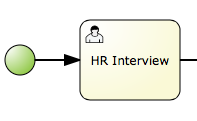
[Although jBPM has a special user task node for including human tasks inside a process, human tasks are considered the same as any other kind of external service that needs to be invoked and are therefore simply implemented as a domain-specific service. See the chapter on domain-specific processes to learn more about this.]
A User Task node contains the following core properties:
Actors: The actors that are responsible for executing the human task. A list of actor id's can be specified using a comma (',') as separator.
Group: The group id that is responsible for executing the human task. A list of group id's can be specified using a comma (',') as separator.
Name: The display name of the node.
TaskName: The name of the human task. This name is used to link the task to a Form. It also represent the internal name of the Task that can be used for other purposes.
DataInputSet: all the input variables that the task will receive to work on. Usually you will be interested in copying variables from the scope of the process to the scope of the task. (Look at the data mappings section for an example)
DataOutputSet: all the output variables that will be generated by the execution of the task. Here you specify all the name of the variables in the context of the task that you are interested to copy to the context of the process. (Look at the data mappings section for an example)
Assignments: here you specify which process variable will be linked to each Data Input and Data Output mapping. (Look at the data mappings section for an example)
You can edit these variables in the properties view (see below) when selecting the User Task node.
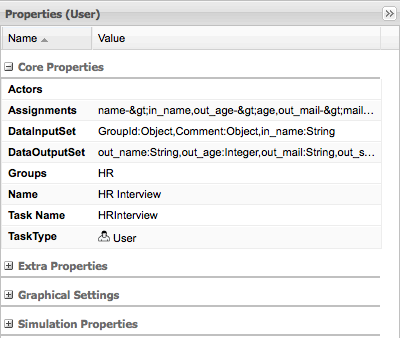
A User Task node also contains the following extra properties:
Comment: A comment associated with the human task. Here you can use expressions.
Content: The data associated with this task.
Priority: An integer indicating the priority of the human task.
Skippable: Specifies whether the human task can be skipped, i.e., whether the actor may decide not to execute the task.
On entry and on exit actions: Action scripts that are executed upon entry and exit of this node, respectively.
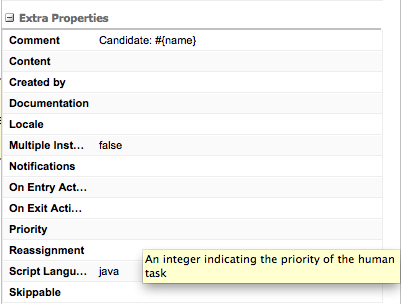
User tasks can be used in combination with swimlanes to assign multiple human tasks to the same actor. Whenever the first task in a swimlane is created, and that task has an actorId specified, that actorId will be assigned to (all other tasks of) that swimlane as well. Note that this would override the actorId of subsequent tasks in that swimlane (if specified), so only the actorId of the first human task in a swimlane will be taken into account, all others will then take the actorId as assigned in the first one.
Warning
ActorId assignment will work only when there is single actor specified. Since ActorId field can contain multiple actors (john,mary,peter) auto assignment for the first task will not be performed when multiple values are found.
Whenever a human task that is part of a swimlane is completed, the actorId of that swimlane is set to the actorId that executed that human task. This allows for example to assign a human task to a group of users, and to assign future tasks of that swimlame to the user that claimed the first task. This will also automatically change the assignment of tasks if at some point one of the tasks is reassigned to another user.
Human tasks typically present some data related to the task that needs to be performed to the actor that is executing the task and usually also request the actor to provide some result data related to the execution of the task. Task forms are typically used to present this data to the actor and request results.
The data that will be used by the Task needs to be specified when we define the User Task in our Process. In order to do that we need to define which data will be copied from the process context to the task context. Notice that the data is copied, so it can be modified inside the Task context but it will not affect the process variables unless we decide to copy back the value from the task to the process context.
Most of the times Forms are used to display data to the end user. Allowing them to generate/create new data that will be propagated to the process context to be used by future activities. In order to decide how the information flow from the process to a particular task and from the task to the process we need to define which pieces of information will be automatically copied by the process engine. The following sections shows how to do these mappings by configuring the DataInputSet, DataOutputSet and the Assignments properties of a User Task.
Let's start defining the Task DataInputSet:
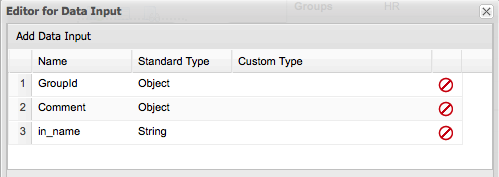
Both GroupId and Comment are automatically generated, so you don't need to worry about that. In this case the only user defined Data Input is called: in_name. This means that the task will be receiving information from the process context and internally this variable will be called in_name. The type is also specified here.
In the Data Outputs represent the data that will be generated by the tasks. In this case we have two variables of type String called: out_name and out_mail and two Integer variables called: out_age and out_score are defined. This means that inside the task context we will need to set the value to these variables.
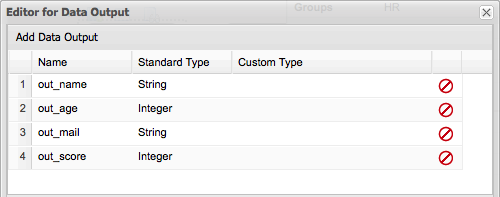
Finally all the connections with the process context needs to be done in the Data Assignments. The main idea here is to define how Data Inputs and Data Outputs will be associated with process variables.
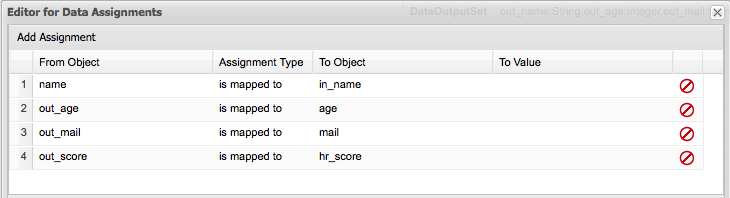
As shown in the previous screenshot, the assignments between the process variables (in this case (name, age, mail and hr_score)) and the Data Inputs and Outputs are done in the Data Assignments screen. Notice that the example uses a convention that makes it easy to know which is an internal Task variables (Data Input/Output) using the "in_" and "out_" prefix to the variable names. Using this convention you can quickly understand the Assignments screen. The first row maps the process variable called name to the data input called in_name. The second row maps the data output called out_mail to the process variable called mail, and so on.
These mappings at runtime will automatically copy the variables content from one context (process and task) to the other automatically for us.
From the perspective of a process, when a user task node is encountered during the execution, a human task is created. The process will then only leave the user task node when the associated human task has been completed or aborted.
The human task itself usually has a complete life cycle itself as well. For details beyond what is described below, please check out the WS-HumanTask specification. The following diagram is from the WS-HumanTask specification and describes the human task life cycle.
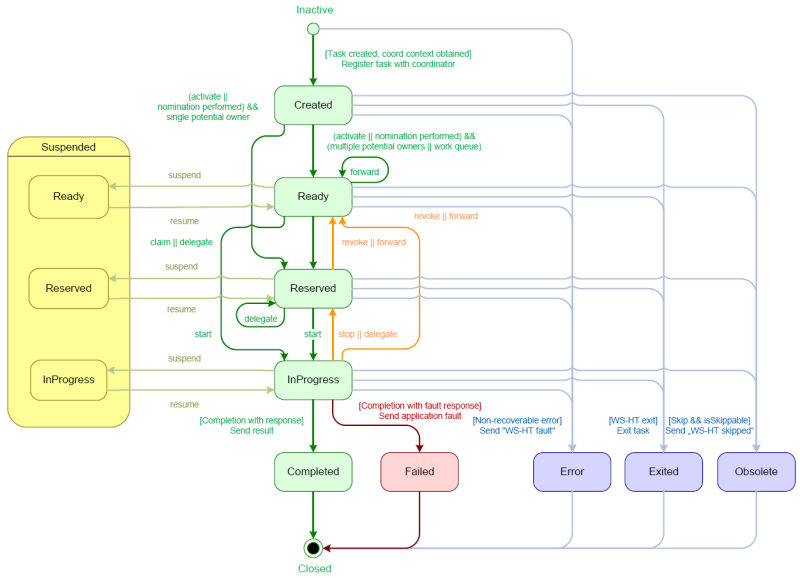
A newly created task starts in the "Created" stage. Usually, it will then automatically become "Ready", after which the task will show up on the task list of all the actors that are allowed to execute the task. The task will stay "Ready" until one of these actors claims the task, indicating that he or she will be executing it.
When a user then eventually claims the task, the status will change to "Reserved". Note that a task that only has one potential (specific) actor will automatically be assigned to that actor upon creation of the task. When the user who has claimed the task starts executing it, the task status will change from "Reserved" to "InProgress".
Lastly, once the user has performed and completed the task, the task status will change to "Completed". In this step, the user can optionally specify the result data related to the task. If the task could not be completed, the user could also indicate this by using a fault response, possibly including fault data, in which case the status would change to "Failed".
While the life cycle explained above is the normal life cycle, the specification also describes a number of other life cycle methods, including:
Delegating or forwarding a task, so that the task is assigned to another actor
Revoking a task, so that it is no longer claimed by one specific actor but is (re)available to all actors allowed to take it
Temporarly suspending and resuming a task
Stopping a task in progress
Skipping a task (if the task has been marked as skippable), in which case the task will not be executed
Only users associated with a specific task are allowed to modify or retrieve information about the task. This allows users to create a jBPM workflow with multiple tasks and yet still be assured of both the confidentiality and integrity of the task status and information associated with a task.
Some task operations will end up throwing a
org.jbpm.services.task.exception.PermissionDeniedException when used with
information about an unauthorized user. For example, when a user is trying to directly modify
the task (for example, by trying to claim or complete the task), the
PermissionDeniedException will be thrown if that user does not have the correct
role for that operation. Furthermore, a user will not be able to view or retrieve tasks that the
user is not involved with, especially if this is via the jBPM Console or KIE Workbench
applications.
User 'Administrator' and group 'Administrators' are automatically added to each Human Task.
The permisions matrix below summarizes the actions that specific user roles are allowed to do. On the left side, possible operations are listed while user roles are listed across the top of the matrix.
The cells of the permissions matrix contain one of three possible characters, each of which indicate the user role permissions for that operation:
a "
+indicates that the user role CAN do the specified operationa "
-" indicates that the user role MAY NOT do the specified operationa "
_" indicates that the user role MAY NOT do the specified operation, and that it is also not an operation that matches the user's role ("not applicable")
Furthermore, the following words or abbreviations in the table header refer to the following roles:
Table 7.1. Task roles in the permissions table
| Word | Role | Description |
|---|---|---|
|
Initiator |
Task Initiator |
The user who creates the task instance |
|
Stakeholder |
Task Stakeholder |
The user involved in the task: this user can influence the progress of a task, by performing administrative actions on the task instance |
|
Potential |
Potential Owner |
The user who can claim the task before it has been claimed, or after it has been released or forward: only tasks that have the status "Ready" may be claimed; a potential owner becomes the actual owner of a task by claiming the task |
|
Actual |
Actual Owner |
The user who has claimed the task and will progress the task to completion or failure |
|
Administrator |
Business Adminstrator |
A "super user" who may modify the status or progress of a task at any point in a task's lifecycle |
User roles are assigned to users by the definition of the task in the jBPM (BPMN2)
process definition.
Permissions Matrices. The following matrix describes the authorizations for all operations which modify a task:
Table 7.2. Main operations permissions matrix
| Operation\Role | Initiator | Stakeholder | Potential | Actual | Administrator |
|---|---|---|---|---|---|
activate | + | + | _ | _ | + |
claim | - | + | + | _ | + |
complete | - | + | _ | + | + |
delegate | + | + | + | + | + |
fail | - | + | _ | + | + |
forward | + | + | + | + | + |
nominate | + | + | + | + | + |
release | + | + | + | + | + |
remove | - | _ | _ | _ | + |
resume | + | + | + | + | + |
skip | + | + | + | + | + |
start | - | + | + | + | + |
stop | - | + | _ | + | + |
suspend | + | + | + | + | + |
The matrix below describes the authorizations used when retrieving task
information. In short, it says that all users which have any role with regards to the
specific task, are allowed to see the task. This applies to all operations that are used to
retrieve any type of information about the task.
Table 7.3. Retrieval operations permissions matrix
| Operation\Role | Initiator | Stakeholder | Potential | Actual | Administrator |
|---|---|---|---|---|---|
|
get | + | + | + | + | + |
As far as the jBPM engine is concerned, human tasks are similar to any other external service that needs to be invoked and are implemented as a domain-specific service. (For more on domain-specific services, see the chapter on them here.) Because a human task is an example of such a domain-specific service, the process itself only contains a high-level, abstract description of the human task to be executed and a work item handler that is responsible for binding this (abstract) task to a specific implementation.
Users can plug in any human task service implementation, such as the one that's provided by jBPM, or they may register their own implementation. In the next paragraphs, we will describe the human task service implementation provided by jBPM.
The jBPM project provides a default implementation of a human task service based on the WS-HumanTask specification. If you do not need to integrate jBPM with another existing implementation of a human task service, you can use this service. The jBPM implementation manages the life cycle of the tasks (creation, claiming, completion, etc.) and stores the state of all the tasks, task lists, and other associated information. It also supports features like internationalization, calendar integration, different types of assignments, delegation, escalation and deadlines. The code for the implementation itself can be found in the jbpm-human-task module.
The jBPM task service implementation is based on the WS-HumanTask (WS-HT) specification. This specification defines (in detail) the model of the tasks, the life cycle, and many other features. It is very comprehensive and the first version can be found here.
The human task service exposes a Java API for managing the life cycle of tasks. This allows clients to integrate (at a low level) with the human task service. Note that end users should probably not interact with this low-level API directly, but use one of the more user-friendly task clients (see below) instead. These clients offer a graphical user interface to request task lists, claim and complete tasks, and manage tasks in general. The task clients listed below use the Java API to internally interact with the human task service. Of course, the low-level API is also available so that developers can use it in their code to interact with the human task service directly.
A task service (interface org.kie.api.task.TaskService) offers the following methods (among others) for managing the life cycle of human tasks:
              ...

              void start( long taskId, String userId );

              void stop( long taskId, String userId );

              void release( long taskId, String userId );

              void suspend( long taskId, String userId );

              void resume( long taskId, String userId );

              void skip( long taskId, String userId );

              void delegate(long taskId, String userId, String targetUserId);

              void complete( long taskId, String userId, Map<String, Object> results );

              ...
If you take a look at the method signatures you will notice that almost all of these methods take the following arguments:
taskId: The id of the task that we are working with. This is usually extracted from the currently selected task in the user task list in the user interface.
userId: The id of the user that is executing the action. This is usually the id of the user that is logged in into the application.
There is also an internal interface that you should check for more methods to interact with the Task Service, this interface is internal until it gets tested. Future version of the External (public) interface can include some of the methods proposed in the InternalTaskService interface. If you want to make use of the methods provided by this interface you need to manually cast to InternalTaskService. One method that can be useful from this interface is getTaskContent():
Map<String, Object> getTaskContent( long taskId );
This method saves you from doing all the boiler plate of getting the ContentMarshallerContext to unmarshall the serialized version of the task content. If you only want to use the stable/public API's you can just copy what this method does:
              Task taskById = taskQueryService.getTaskInstanceById(taskId);
              Content contentById = taskContentService.getContentById(taskById.getTaskData().getDocumentContentId());
              ContentMarshallerContext context = getMarshallerContext(taskById);
              Object unmarshalledObject = ContentMarshallerHelper.unmarshall(contentById.getContent(), context.getEnvironment(), context.getClassloader());
              if (!(unmarshalledObject instanceof Map)) {
                  throw new IllegalStateException(" The Task Content Needs to be a Map in order to use this method and it was: "+unmarshalledObject.getClass());

              }
              Map<String, Object> content = (Map<String, Object>) unmarshalledObject;
              return content;
Because the content of the Task can be any Object, the previous method assume that you are storing a Map of objects to work. If you are storing other than a Map you should do the correspondent checks.
Task service supports task listeners to be invoked upon various life cycle events happening on given task instance. In majority of cases task event listeners are used to intercept certain operation to perform additional logic - like storing task information in separate tables for business activity monitoring needs.
Task event listeners are pluggable and users can provide their own implementation of org.kie.api.task.TaskLifeCycleEventListener interface. There are beforeTask* and afterTask* methods that are invoked upon given event occured on a task instance.
TaskEvent (org.kie.api.task.TaskEvent) is the only argument available to the listener that provides access to:
Task instance that the event correspond to
TaskContext that provides access to services for further processing needs such as TaskPersistenceContext
In many cases implementors of task event listener need to have access to task variables (either input or output or both) to perform required operations. It can be done as described above (using various services and content marshaller helper) though that in many cases leads to code duplication in multiple listeners thus an extended support was added in 6.5 to simply use TaskContext to obtain that information.
loadTaskVariables(Task task);Method loadTaskVariables can be used to populate both input and output variables of a given task by simple and single method call. That method is "no op" in case task variables are already set on a task.
To improve performance task variables are automatically set when they are available - usually given by caller on task service:
when task is created it usually has input variables, these variables are then set on Task instance so there is no need to use loadTaskVariables method as only task input variables are available when task is being created - applies to beforeTaskAdded and afterTaskAdded events handling
when task is completed it usually has output variables, these variables are set on a task so there is no need to use loadTaskVariables method if only task output variables are required.
Other than that loadTaskVariables should be used to populate task variables.
Note
It’s enough to call it once (like in beforeTask) method of the listener as they will be available to both beforeTask* and afterTask* methods then.
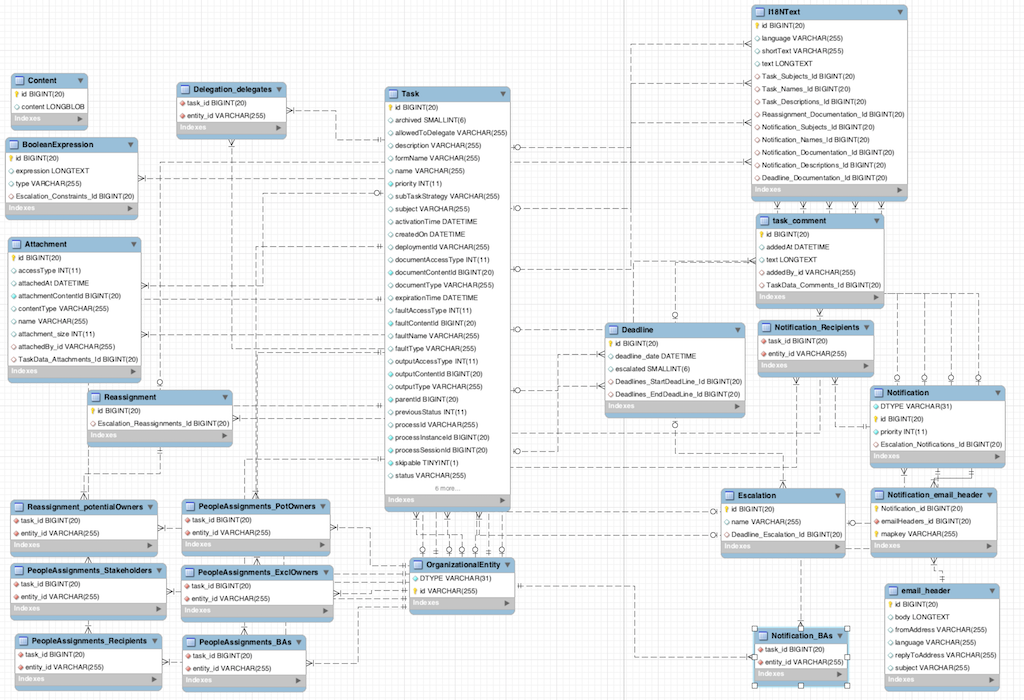
In order to get access to the Task Service API it is recommended to let the Runtime Manager to make sure that everything is setup correctly. Look at the Runtime Manager section for more information. From the API perspective you should be doing something like this:
              ...
              RuntimeEngine engine = runtimeManager.getRuntimeEngine(EmptyContext.get());
              KieSession kieSession = engine.getKieSession();
              // Start a process
              kieSession.startProcess("CustomersRelationship.customers", params);
              // Do Task Operations
              TaskService taskService = engine.getTaskService();
              List<TaskSummary> tasksAssignedAsPotentialOwner = taskService.getTasksAssignedAsPotentialOwner("mary", "en-UK");

              // Claim Task
              taskService.claim(taskSummary.getId(), "mary");
              // Start Task
              taskService.start(taskSummary.getId(), "mary");

              ...
If you use this approach, there is no need to register the Task Service with the Process Engine. The Runtime Manager will do that for you automatically. If you don't use the Runtime Manager, you will be responsible for setting the LocalHTWorkItemHandler in the session in order to get the Task Service notifying the Process Engine when a task is completed, or the Process Engine notifying that a task has been created.
In jBPM 6.x the Task Service runs locally to the Process and Rule Engine and for that reason multiple light clients can be created for different Process and Rule Engine's instances. All the clients will be sharing the same database (backend storage for the tasks).
jBPM allows the persistent storage of certain information. This chapter describes these different types of persistence, and how to configure them. An example of the information stored is the process runtime state. Storing the process runtime state is necessary in order to be able to continue execution of a process instance at any point, if something goes wrong. Also, the process definitions themselves, and the history information (logs of current and previous process states already) can also be persisted.
Whenever a process is started, a process instance is created, which represents the execution of the process in that specific context. For example, when executing a process that specifies how to process a sales order, one process instance is created for each sales request. The process instance represents the current execution state in that specific context, and contains all the information related to that process instance. Note that it only contains the (minimal) runtime state that is needed to continue the execution of that process instance at some later time, but it does not include information about the history of that process instance if that information is no longer needed in the process instance.
The runtime state of an executing process can be made persistent, for example, in a database. This allows to restore the state of execution of all running processes in case of unexpected failure, or to temporarily remove running instances from memory and restore them at some later time. jBPM allows you to plug in different persistence strategies. By default, if you do not configure the process engine otherwise, process instances are not made persistent.
If you configure the engine to use persistence, it will automatically store the runtime state into the database. You do not have to trigger persistence yourself, the engine will take care of this when persistence is enabled. Whenever you invoke the engine, it will make sure that any changes are stored at the end of that invocation, at so-called safe points. Whenever something goes wrong and you restore the engine from the database, you also should not reload the process instances and trigger them manually to resume execution, as process instances will automatically resume execution if they are triggered, like for example by a timer expiring, the completion of a task that was requested by that process instance, or a signal being sent to the process instance. The engine will automatically reload process instances on demand.
The runtime persistence data should in general be considered internal, meaning that you probably should not try to access these database tables directly and especially not try to modify these directly (as changing the runtime state of process instances without the engine knowing might have unexpected side-effects). In most cases where information about the current execution state of process instances is required, the use of a history log is mostly recommended (see below). In some cases, it might still be useful to for example query the internal database tables directly, but you should only do this if you know what you are doing.
jBPM uses a binary persistence mechanism, otherwise known as marshalling, which converts the state of the process instance into a binary dataset. When you use persistence with jBPM, this mechanism is used to save or retrieve the process instance state from the database. The same mechanism is also applied to the session state and any work item states.
When the process instance state is persisted, two things happen:
- First, the process instance information is transformed into a binary blob. For performance reasons, a custom serialization mechanism is used and not normal Java serialization.
- This blob is then stored, alongside other metadata about this process instance. This metadata includes, among other things, the process instance id, process id, and the process start date.
Apart from the process instance state, the session itself can
also store some state, such as the state of timer jobs, or the session
data that any business rules would be evaluated over.
This session state is stored separately as a binary blob, along with
the id of the session and some metadata. You can always restore session
state by reloading the session with the given id. The session id can
be retrieved using ksession.getId().
Note that the process instance binary datasets are usually relatively small, as they only contain the minimal execution state of the process instance. For a simple process instance, this usually contains one or a few node instances, i.e., any node that is currently executing, and any existing variable values.
As a result of jBPM using marshalling, the data model is both simple and small:
Figure 8.1. jBPM data model

The sessioninfo entity contains the state of the
(knowledge) session in which the jBPM process instance is running.
Table 8.1. SessionInfo
| Field | Description | Nullable |
|---|---|---|
id | The primary key. | NOT NULL |
lastmodificationdate | The last time that the entity was saved to the database | |
rulesbytearray | The binary dataset containing the state of the session | NOT NULL |
startdate | The start time of the session | |
optlock | The version field that serves as its optimistic lock value |
The processinstanceinfo entity contains the state
of the jBPM process instance.
Table 8.2. ProcessInstanceInfo
| Field | Description | Nullable |
|---|---|---|
instanceid | The primary key | NOT NULL |
lastmodificationdate | The last time that the entity was saved to the database | |
lastreaddate | The last time that the entity was retrieved (read) from the database | |
processid | The name (id) of the process | |
processinstancebytearray | This is the binary dataset containing the state of the process instance | NOT NULL |
startdate | The start time of the process | |
state | An integer representing the state of the process instance | NOT NULL |
optlock | The version field that serves as its optimistic lock value |
The eventtypes entity contains information
about events that a process instance will undergo or has undergone.
Table 8.3. EventTypes
| Field | Description | Nullable |
|---|---|---|
instanceid | This references the processinstanceinfo primary
key and there is a foreign key constraint on this column. | NOT NULL |
eventTypes | A text field related to an event that the process has undergone. |
The workiteminfo entity contains the state of a work item.
Table 8.4. WorkItemInfo
| Field | Description | Nullable |
|---|---|---|
workitemid | The primary key | NOT NULL |
creationDate | The name of the work item | |
name | The name of the work item | |
processinstanceid | The (primary key) id of the process: there is no foreign key constraint on this field. | NOT NULL |
state | An integer representing the state of the work item | NOT NULL |
optlock | The version field that serves as its optimistic lock value | |
workitembytearay | This is the binary dataset containing the state of the work item | NOT NULL |
The CorrelationKeyInfo entity contains information
about correlation keys assigned to given process instance - loose relationship as this
table is considered optional used only when correlation capabilities are required.
Table 8.5. CorrelationKeyInfo
| Field | Description | Nullable |
|---|---|---|
keyid | The primary key | NOT NULL |
name | assigned name of the correlation key | |
processinstanceid | The id of the process instance which is assigned to this correlation key | NOT NULL |
optlock | The version field that serves as its optimistic lock value |
The CorrelationPropertyInfo entity contains information
about correlation properties for given correlation key that is assigned to given process instance.
Table 8.6. CorrelationPropertyInfo
| Field | Description | Nullable |
|---|---|---|
propertyid | The primary key | NOT NULL |
name | The name of the property | |
value | The value of the property | NOT NULL |
optlock | The version field that serves as its optimistic lock value | |
correlationKey-keyid | Foregin key to map to correlation key | NOT NULL |
The ContextMappingInfo entity contains information
about contextual information mapped to ksession. This is an internal part of RuntimeManager
and can be considered optional when RuntimeManager is not used.
Table 8.7. ContextMappingInfo
| Field | Description | Nullable |
|---|---|---|
mappingid | The primary key | NOT NULL |
context_id | Identifier of the context | NOT NULL |
ksession_id | Identifier of the ksession mapped to this context | NOT NULL |
optlock | The version field that serves as its optimistic lock value |
The state of a process instance is stored at so-called "safe points" during the execution of the process engine. Whenever a process instance is executing (for example when it started or continuing from a previous wait state, the engine executes the process instance until no more actions can be performed (meaning that the process instance either has completed (or was aborted), or that it has reached a wait state in all of its parallel paths). At that point, the engine has reached the next safe state, and the state of the process instance (and all other process instances that might have been affected) is stored persistently.
In many cases it will be useful (if not necessary) to store information about the execution of process instances, so that this information can be used afterwards. For example, sometimes we want to verify which actions have been executed for a particular process instance, or in general, we want to be able to monitor and analyze the efficiency of a particular process.
However, storing history information in the runtime database can result in the database rapidly increasing in size, not to mention the fact that monitoring and analysis queries might influence the performance of your runtime engine. This is why process execution history information can be stored separately.
This history log of execution information is created based on events that the process engine generates during execution. This is possible because the jBPM runtime engine provides a generic mechanism to listen to events. The necessary information can easily be extracted from these events and then persisted to a database. Filters can also be used to limit the scope of the logged information.
The jbpm-audit module contains an event listener that stores process-related information in a database using JPA. The data model itself contains three entities, one for process instance information, one for node instance information, and one for (process) variable instance information.
The ProcessInstanceLog table contains the basic
log information about a process instance.
Table 8.8. ProcessInstanceLog
| Field | Description | Nullable |
|---|---|---|
id | The primary key and id of the log entity | NOT NULL |
duration | Actual duration of this process instance since its start date | |
end_date | When applicable, the end date of the process instance | |
externalId | Optional external identifier used to correlate to some elements - e.g. deployment id | |
user_identity | Optional identifier of the user who started the process instance | |
outcome | The outcome of the process instance, for instance error code in case of process instance was finished with error event | |
parentProcessInstanceId | The process instance id of the parent process instance if any | |
processid | The id of the process | |
processinstanceid | The process instance id | NOT NULL |
processname | The name of the process | |
processversion | The version of the process | |
start_date | The start date of the process instance | |
status | The status of process instance that maps to process instance state |
The NodeInstanceLog table contains more information about which
nodes were actually executed inside each process instance. Whenever a node instance
is entered from one of its incoming connections or is exited through one of its outgoing
connections, that information is stored in this table.
Table 8.9. NodeInstanceLog
| Field | Description | Nullable |
|---|---|---|
id | The primary key and id of the log entity | NOT NULL |
connection | Actual identifier of the sequence flow that led to this node instance | |
log_date | The date of the event | |
externalId | Optional external identifier used to correlate to some elements - e.g. deployment id | |
nodeid | The node id of the corresponding node in the process definition | |
nodeinstanceid | The node instance id | |
nodename | The name of the node | |
nodetype | The type of the node | |
processid | The id of the process that the process instance is executing | |
processinstanceid | The process instance id | NOT NULL |
type | The type of the event (0 = enter, 1 = exit) | NOT NULL |
workItemId | Optional - only for certain node types - The identifier of work item |
The VariableInstanceLog table contains information about changes
in variable instances. The default is to only generate log entries when (after) a variable
changes. It's also possible to log entries before the variable (value) changes.
Table 8.10. VariableInstanceLog
| Field | Description | Nullable |
|---|---|---|
id | The primary key and id of the log entity | NOT NULL |
externalId | Optional external identifier used to correlate to some elements - e.g. deployment id | |
log_date | The date of the event | |
processid | The id of the process that the process instance is executing | |
processinstanceid | The process instance id | NOT NULL |
oldvalue | The previous value of the variable at the time that the log is made | |
value | The value of the variable at the time that the log is made | |
variableid | The variable id in the process definition | |
variableinstanceid | The id of the variable instance |
The AuditTaskImpl table contains information about tasks that can be used for queries.
Table 8.11. AuditTaskImpl
| Field | Description | Nullable |
|---|---|---|
id | The primary key and id of the task log entity | |
activationTime | Time when this task was activated | |
actualOwner | Actual owner assigned to this task - only set when task is claimed | |
createdBy | User who created this task | |
createdOn | Date when task was created | |
deploymentId | Deployment id this task is part of | |
description | Description of the task | |
dueDate | Due date set on this task | |
name | Name of the task | |
parentId | Parent task id | |
priority | Priority of the task | |
processId | Process definition id that this task belongs to | |
processInstanceId | Process instance id that this task is associated with | |
processSessionId | KieSession id used to create this task | |
status | Current status of the task | |
taskId | Identifier of task | |
workItemId | Identifier of work item assigned on process side to this task id |
The BAMTaskSummary table that collects information about tasks
that is used by BAM engine to build charts and dashboards.
Table 8.12. BAMTaskSummary
| Field | Description | Nullable |
|---|---|---|
id | The primary key and id of the log entity | NOT NULL |
createdDate | Date whentask was created | |
duration | Duration since task was created | |
endDate | Date when task reached end state (complete, exit, fail, skip) | |
processinstanceid | The process instance id | |
startDate | Date when task was started | |
status | Current status of the task | |
taskId | Identifier of the task | |
taskName | Name of the task | |
userId | User id assigned to the task |
The TaskVariableImpl table contains information about task variable instances.
Table 8.13. TaskVariableImpl
| Field | Description | Nullable |
|---|---|---|
id | The primary key and id of the log entity | NOT NULL |
modificationDate | Date when the variable was modified last time | |
name | Name of the task | |
processid | The id of the process that the process instance is executing | |
processinstanceid | The process instance id | |
taskId | Identifier of the task | |
type | Type of the variable - either input or output of the task | |
value | Variable value |
The TaskEvent table contains information about changes
in task instances. Operations such as claim, start, stop etc are stored here to provide
time line view of events that happened to given task.
Table 8.14. TaskEvent
| Field | Description | Nullable |
|---|---|---|
id | The primary key and id of the log entity | NOT NULL |
logTime | LDate when this event was saved | |
message | Log event message | |
processinstanceid | The process instance id | |
taskId | Identifier of the task | |
type | Type of the event - corresponds to life cycle phases of the task | |
userId | User id assigned to the task | |
workItemId | Identifier of work item that the task is assigned to |
To log process history information in a database like this, you need to register the logger on your session like this:
EntityManagerFactory emf = ...;
StatefulKnowledgeSession ksession = ...;
AbstractAuditLogger auditLogger = AuditLoggerFactory.newJPAInstance(emf);
ksession.addProcessEventListener(auditLogger);

// invoke methods one your session here
To specify the database where the information should be stored,
modify the file persistence.xml file to include
the audit log classes as well (ProcessInstanceLog, NodeInstanceLog and
VariableInstanceLog), as shown below.
<?xml version="1.0" encoding="UTF-8" standalone="yes"?>


<persistence
  version="2.0"
  xsi:schemaLocation="http://java.sun.com/xml/ns/persistence http://java.sun.com/xml/ns/persistence/persistence_2_0.xsd
  http://java.sun.com/xml/ns/persistence/orm http://java.sun.com/xml/ns/persistence/orm_2_0.xsd"
  xmlns="http://java.sun.com/xml/ns/persistence"
  xmlns:orm="http://java.sun.com/xml/ns/persistence/orm"
  xmlns:xsi="http://www.w3.org/2001/XMLSchema-instance>

  <persistence-unit name="org.jbpm.persistence.jpa" transaction-type="JTA">
    <provider>org.hibernate.ejb.HibernatePersistence</provider>
    <jta-data-source>jdbc/jbpm-ds</jta-data-source>
    <mapping-file>META-INF/JBPMorm.xml</mapping-file>
    <class>org.drools.persistence.info.SessionInfo</class>
    <class>org.jbpm.persistence.processinstance.ProcessInstanceInfo</class>
    <class>org.drools.persistence.info.WorkItemInfo</class>
    <class>org.jbpm.persistence.correlation.CorrelationKeyInfo</class>
    <class>org.jbpm.persistence.correlation.CorrelationPropertyInfo</class>
    <class>org.jbpm.runtime.manager.impl.jpa.ContextMappingInfo</class>

    <class>org.jbpm.process.audit.ProcessInstanceLog</class>
    <class>org.jbpm.process.audit.NodeInstanceLog</class>
    <class>org.jbpm.process.audit.VariableInstanceLog</class>

    <properties>
      <property name="hibernate.dialect" value="org.hibernate.dialect.H2Dialect"/>
      <property name="hibernate.max_fetch_depth" value="3"/>
      <property name="hibernate.hbm2ddl.auto" value="update"/>
      <property name="hibernate.show_sql" value="true"/>
      <property name="hibernate.transaction.jta.platform"
      value="org.hibernate.service.jta.platform.internal.BitronixJtaPlatform"/>
    </properties>
  </persistence-unit>
</persistence>
All this information can easily be queried and used in a lot of different use cases, ranging from creating a history log for one specific process instance to analyzing the performance of all instances of a specific process.
This audit log should only be considered a default implementation. We don't know what information you need to store for analysis afterwards, and for performance reasons it is recommended to only store the relevant data. Depending on your use cases, you might define your own data model for storing the information you need, and use the process event listeners to extract that information.
Process events are stored in the database synchronously and within the same transaction as actual process instance execution. That obviously takes some time especially in highly loaded systems and might have some impact on the database when both history log and runtime data are kept in the same database. To provide an alternative option for storing process events, a JMS based logger has been provided. It can be configured to submit messages to JMS queue instead of directly persisting them in the database. It can be configured to be transactional as well to avoid issues with inconsistent data in case of process engine transaction is rolled back.
ConnectionFactory factory = ...;
Queue queue = ...;
StatefulKnowledgeSession ksession = ...;
Map<String, Object> jmsProps = new HashMap<String, Object>();
jmsProps.put("jbpm.audit.jms.transacted", true);
jmsProps.put("jbpm.audit.jms.connection.factory", factory);
jmsProps.put("jbpm.audit.jms.queue", queue);
AbstractAuditLogger auditLogger = AuditLoggerFactory.newInstance(Type.JMS, session, jmsProps);
ksession.addProcessEventListener(auditLogger);

// invoke methods one your session here
This is just one of possible ways to configure JMS audit logger, see javadocs for AuditLoggerFactory for more details.
Process and task variables are stored in autdit tables by default although there are stored in simplest possible way - by creating string representation of the variable - variable.toString(). In many cases this is enough as even for custom classes used as variables users can implement custom toString() method that produces expected "view" of the variable.
Though this might not cover all needs, especially when there is a need for efficient queries by variables (both task and process). Let's take as an example a Person object that has following structure:
public class Person implements Serializable{

    private static final long serialVersionUID = -5172443495317321032L;
    private String name;
    private int age;

    public Person(String name, int age) {
        this.name = name;
        this.age = age;
    }

    public String getName() {
        return name;
    }

    public void setName(String name) {
        this.name = name;
    }

    public int getAge() {
        return age;
    }

    public void setAge(int age) {
        this.age = age;
    }

    @Override
    public String toString() {
        return "Person [name=" + name + ", age=" + age + "]";
    }
}
while at first look this seems to be sufficient as the toString() methods provide human readable format it does not make it easy to be searched by. As searching through strings like "Person [name="john", age="34"] to find people with age 34 would make data base query very inefficient.
To solve the problem variable audit has been based on VariableIndexers that are responsible for extracting relevant parts of the variable that will be stored in audit log.
/**
 * Variable indexer that allows to transform variable instance into other representation (usually string)
 * to be able to use it for queries.
 *
 * @param <V> type of the object that will represent indexed variable
 */
public interface VariableIndexer<V> {

    /**
     * Tests if given variable shall be indexed by this indexer
     *
     * NOTE: only one indexer can be used for given variable
     *
     * @param variable variable to be indexed
     * @return true if variable should be indexed with this indexer
     */
    boolean accept(Object variable);

    /**
     * Performs index/transform operation of the variable. Result of this operation can be
     * either single value or list of values to support complex type separation.
     * For example when variable is of type Person that has name, address phone indexer could
     * build three entries out of it to represent individual fields:
     * person = person.name
     * address = person.address.street
     * phone = person.phone
     * that will allow more advanced queries to be used to find relevant entries.
     * @param name name of the variable
     * @param variable actual variable value
     * @return
     */
    List<V> index(String name, Object variable);
}
By default (indexer that takes the toString()) will prodce single audit entry for single variable, so it's one to one relationship. But that's not the only option. Indexers (as can be seen in the interface) returns list of objects that are the outcome of single variable indexation. To make our person queries more efficient we could build custom indexer that would take Person instance and index it into separate audit entries one representing name and the other representing age.
public class PersonTaskVariablesIndexer implements TaskVariableIndexer {

    @Override
    public boolean accept(Object variable) {
        if (variable instanceof Person) {
            return true;
        }
        return false;
    }

    @Override
    public List<TaskVariable> index(String name, Object variable) {

        Person person = (Person) variable;
        List<TaskVariable> indexed = new ArrayList<TaskVariable>();

        TaskVariableImpl personNameVar = new TaskVariableImpl();
        personNameVar.setName("person.name");
        personNameVar.setValue(person.getName());

        indexed.add(personNameVar);

        TaskVariableImpl personAgeVar = new TaskVariableImpl();
        personAgeVar.setName("person.age");
        personAgeVar.setValue(person.getAge()+"");

        indexed.add(personAgeVar);

        return indexed;
    }

}
That indexer will then be used to index Person class only and rest of variables will be indexed with default (toString()) indexer. Now when we want to find process instances or tasks that have person with age 34 we simple refer to it as
variable name: person.age
variable value: 34
there is not even need to use like based queries so data base can optimize the query and make it efficient even with big set of data.
Building and registering custom indexers
Indexers are supported for both process and task variables. though they are supported by different interfaces as they do produce different type of objects representing audit view of the variable. Following are the interfaces to be implemented to build custom indexers:
process variables: org.kie.internal.process.ProcessVariableIndexer
task variables: org.kie.internal.task.api.TaskVariableIndexer
Implementation is rather simple, just two methods to be implemented
accept - indicates what types are handled by given indexer - note that only one indexer can index given variable - so the first that accepts it will perform the work
index - actually does the work to index variables depending on custom requirements
Once the implementation is done, it should be packaged as jar file and following file needs to be included:
for process variables: META-INF/services/org.kie.internal.process.ProcessVariableIndexer with list of FQCN that represent the process variable indexers (single class name per line in that file)
for task variables: META-INF/services/org.kie.internal.task.api.TaskVariableIndexer with list of FQCN that represent the task variable indexers (single class name per line in that file)
Indexers are discovered by ServiceLoader mechanism and thus the META-INF/services files need. All found indexers will be examined whenever process or task variable is about to be indexed. Only the default (toString() based) indexer is not discovered but added explicitly as last indexer to allow custom ones to take the precedence over it.
The jBPM engine supports JTA transactions. It also supports local transactions only when using Spring. It does not support pure local transactions at the moment. For more information about using Spring to set up persistence, please see the Spring chapter in the Drools integration guide.
Whenever you do not provide transaction boundaries inside your application, the engine will automatically execute each method invocation on the engine in a separate transaction. If this behavior is acceptable, you don't need to do anything else. You can, however, also specify the transaction boundaries yourself. This allows you, for example, to combine multiple commands into one transaction.
You need to register a transaction manager at the environment before using user-defined transactions. The following sample code uses the Bitronix transaction manager. Next, we use the Java Transaction API (JTA) to specify transaction boundaries, as shown below:
// create the entity manager factory
EntityManagerFactory emf = EntityManagerFactoryManager.get().getOrCreate("org.jbpm.persistence.jpa");
TransactionManager tm = TransactionManagerServices.getTransactionManager();

// setup the runtime environment
RuntimeEnvironment environment = RuntimeEnvironmentBuilder.Factory.get()
.newDefaultBuilder()
.addAsset(ResourceFactory.newClassPathResource("MyProcessDefinition.bpmn2"), ResourceType.BPMN2)
    .addEnvironmentEntry(EnvironmentName.TRANSACTION_MANAGER, tm)
    .get();

// get the kie session
RuntimeManager manager = RuntimeManagerFactory.Factory.get().newPerRequestRuntimeManager(environment);
RuntimeEngine runtime = manager.getRuntimeEngine(ProcessInstanceIdContext.get());
KieSession ksession = runtime.getKieSession();

// start the transaction
UserTransaction ut = InitialContext.doLookup("java:comp/UserTransaction");
ut.begin();

// perform multiple commands inside one transaction
ksession.insert( new Person( "John Doe" ) );
ksession.startProcess("MyProcess");

// commit the transaction
ut.commit();
Note that, if you use Bitronix as the transaction manager, you should also add
a simple jndi.properties file in you root classpath to register the
Bitronix transaction manager in JNDI. If you are using the jbpm-test module, this is
already included by default. If not, create a file named jndi.properties
with the following content:
java.naming.factory.initial=bitronix.tm.jndi.BitronixInitialContextFactory
If you would like to use a different JTA transaction manager, you can change the
persistence.xml file to use your own transaction manager. For example,
when running inside JBoss Application Server v5.x or v7.x, you can use the JBoss transaction manager.
You need to change the transaction manager property in persistence.xml to:
<property name="hibernate.transaction.jta.platform" value="org.hibernate.transaction.JBossTransactionManagerLookup" />
Warning
Using the (runtime manager) Singleton strategy with JTA transactions
(UserTransaction or CMT) is not recommended because there is a race condition when
using this. This race condition can result in an IllegalStateException with a
message similar to "Process instance XXX is disconnected.".
This race conditation can be avoided by explicitly synchronizing around the
KieSession instance when invoking the transaction in the user application code.
synchronized (ksession) {
    try {
        tx.begin();

        // use ksession
        // application logic

        tx.commit();
    } catch (Exception e) {
        //...
    }
}Special consideration need to be taken when embedding jBPM inside an application that executes in Container Managed Transaction (CMT) mode, for instance EJB beans. This especially applies to application servers that does not allow accessing UserTransaction instance from JNDI when being part of container managed transaction, e.g. WebSphere Application Server. Since default implementation of transaction manager in jBPM is based on UserTransaction to get transaction status which is used to decide if transaction should be started or not, in environments that prevent accessing UserTrancation it won't do its job. To secure proper execution in CMT environments a dedicated transaction manager implementation is provided:
org.jbpm.persistence.jta.ContainerManagedTransactionManagerThis transaction manager expects that transaction is active and thus will always return ACTIVE when invoking getStatus method. Operations like begin, commit, rollback are no-op methods as transaction manager runs under managed transaction and can't affect it.
Note
To make sure that container is aware of any exceptions that happened during process instance execution, user needs to ensure that exceptions thrown by the engine are propagated up to the container to properly rollback transaction.
To configure this transaction manager following must be done:
- Insert transaction manager and persistence context manager into environment prior
to creating/loading session
Environment env = EnvironmentFactory.newEnvironment(); env.set(EnvironmentName.ENTITY_MANAGER_FACTORY, emf); env.set(EnvironmentName.TRANSACTION_MANAGER, new ContainerManagedTransactionManager()); env.set(EnvironmentName.PERSISTENCE_CONTEXT_MANAGER, new JpaProcessPersistenceContextManager(env)); env.set(EnvironmentName.TASK_PERSISTENCE_CONTEXT_MANAGER, new JPATaskPersistenceContextManager(env)); - configure JPA provider (example hibernate and WebSphere)
<property name="hibernate.transaction.factory_class" value="org.hibernate.transaction.CMTTransactionFactory"/>
<property name="hibernate.transaction.jta.platform" value="org.hibernate.service.jta.platform.internal.WebSphereJtaPlatform"/>
With following configuration jBPM should run properly in CMT environment.
Usually when running within container managed transaction disposing ksession directly will cause exceptions
on transaction completion as there are some transaction synchronization registered by jBPM to clean up
the state after invocation is finished. To overcome this problem specialized command has been provided
org.jbpm.persistence.jta.ContainerManagedTransactionDisposeCommand which allows to simply
execute this command instead of regular ksession.dispose which will ensure that ksession will
be disposed at the transaction completion.
By default, the engine does not save runtime data persistently. This means you can use the engine completely without persistence (so not even requiring an in memory database) if necessary, for example for performance reasons, or when you would like to manage persistence yourself. It is, however, possible to configure the engine to do use persistence by configuring it to do so. This usually requires adding the necessary dependencies, configuring a datasource and creating the engine with persistence configured.
You need to make sure the necessary dependencies are available in the classpath of your application if you want to user persistence. By default, persistence is based on the Java Persistence API (JPA) and can thus work with several persistence mechanisms. We are using Hibernate by default.
If you're using the Eclipse IDE and the jBPM Eclipse plugin, you should make sure the necessary JARs are added to your jBPM runtime directory. You don't really need to do anything (as the necessary dependencies should already be there) if you are using the jBPM runtime that is configured by default when using the jBPM installer, or if you downloaded and unzipped the jBPM runtime artifact (from the downloads) and pointed the jBPM plugin to that directory.
If you would like to manually add the necessary dependencies to your project, first of all,
you need the JAR file jbpm-persistence-jpa.jar,
as that contains code for saving the runtime state whenever necessary.
Next, you also need various other dependencies, depending on the
persistence solution and database you are using. For the default
combination with Hibernate as the JPA persistence provider and using an H2
in-memory database and Bitronix for JTA-based transaction management, the
following list of additional dependencies is needed:
- jbpm-persistence-jpa (org.jbpm)
- drools-persistence-jpa (org.drools)
- persistence-api (javax.persistence)
- hibernate-entitymanager (org.hibernate)
- hibernate-annotations (org.hibernate)
- hibernate-commons-annotations (org.hibernate)
- hibernate-core (org.hibernate)
- commons-collections (commons-collections)
- dom4j (dom4j)
- jta (javax.transaction)
- btm (org.codehaus.btm)
- javassist (javassist)
- slf4j-api (org.slf4j)
- slf4j-jdk14 (org.slf4j)
- h2 (com.h2database)
- jbpm-test (org.jbpm) for testing only, do not include it in the actual application
You can use the JPAKnowledgeService to create your knowledge session. This
is slightly more complex, but gives you full access to the underlying configurations. You can create
a new knowledge session using JPAKnowledgeService based on a knowledge base, a
knowledge session configuration (if necessary) and an environment. The environment
needs to contain a reference to your Entity Manager Factory. For example:
// create the entity manager factory and register it in the environment
EntityManagerFactory emf =
    Persistence.createEntityManagerFactory( "org.jbpm.persistence.jpa" );
Environment env = KnowledgeBaseFactory.newEnvironment();
env.set( EnvironmentName.ENTITY_MANAGER_FACTORY, emf );

// create a new knowledge session that uses JPA to store the runtime state
StatefulKnowledgeSession ksession = JPAKnowledgeService.newStatefulKnowledgeSession( kbase, null, env );
int sessionId = ksession.getId();

// invoke methods on your method here
ksession.startProcess( "MyProcess" );
ksession.dispose();
You can also use the JPAKnowledgeService to recreate
a session based on a specific session id:
// recreate the session from database using the sessionId
ksession = JPAKnowledgeService.loadStatefulKnowledgeSession(sessionId, kbase, null, env );
Note that we only save the minimal state that is needed to continue execution of the process instance at some later point. This means, for example, that it does not contain information about already executed nodes if that information is no longer relevant, or that process instances that have been completed or aborted are removed from the database. If you want to search for history-related information, you should use the history log, as explained later.
You need to add a persistence configuration to your classpath to
configure JPA to use Hibernate and the H2 database (or your own preference), called
persistence.xml in the META-INF directory, as shown below.
For more details on how to change this for your own configuration, we refer to
the JPA and Hibernate documentation for more information.
<?xml version="1.0" encoding="UTF-8" standalone="yes"?>
<persistence
      version="2.0"
      xsi:schemaLocation="http://java.sun.com/xml/ns/persistence http://java.sun.com/xml/ns/persistence/persistence_2_0.xsd
      http://java.sun.com/xml/ns/persistence/orm http://java.sun.com/xml/ns/persistence/orm_2_0.xsd"
      xmlns="http://java.sun.com/xml/ns/persistence"
      xmlns:orm="http://java.sun.com/xml/ns/persistence/orm"
      xmlns:xsi="http://www.w3.org/2001/XMLSchema-instance>

  <persistence-unit name="org.jbpm.persistence.jpa" transaction-type="JTA">
    <provider>org.hibernate.ejb.HibernatePersistence</provider>
    <jta-data-source>jdbc/jbpm-ds</jta-data-source>
    <mapping-file>META-INF/JBPMorm.xml</mapping-file>
    <class>org.drools.persistence.info.SessionInfo</class>
    <class>org.jbpm.persistence.processinstance.ProcessInstanceInfo</class>
    <class>org.drools.persistence.info.WorkItemInfo</class>
    <class>org.jbpm.persistence.correlation.CorrelationKeyInfo</class>
    <class>org.jbpm.persistence.correlation.CorrelationPropertyInfo</class>
    <class>org.jbpm.runtime.manager.impl.jpa.ContextMappingInfo</class>

    <properties>
      <property name="hibernate.dialect" value="org.hibernate.dialect.H2Dialect"/>
      <property name="hibernate.max_fetch_depth" value="3"/>
      <property name="hibernate.hbm2ddl.auto" value="update"/>
      <property name="hibernate.show_sql" value="true"/>
      <property name="hibernate.transaction.jta.platform"
                value="org.hibernate.service.jta.platform.internal.BitronixJtaPlatform"/>
    </properties>
  </persistence-unit>
</persistence>
This configuration file refers to a data source called "jdbc/jbpm-ds". If you run your application in an application server (like for example JBoss AS), these containers typically allow you to easily set up data sources using some configuration (like for example dropping a datasource configuration file in the deploy directory). Please refer to your application server documentation to know how to do this.
For example, if you're deploying to JBoss Application Server v5.x, you can create a datasource by dropping a configuration file in the deploy directory, for example:
<?xml version="1.0" encoding="UTF-8"?>
<datasources>
  <local-tx-datasource>
    <jndi-name>jdbc/jbpm-ds</jndi-name>
    <connection-url>jdbc:h2:tcp://localhost/~/test</connection-url>
    <driver-class>org.h2.jdbcx.JdbcDataSource</driver-class>
    <user-name>sa</user-name>
    <password></password>
  </local-tx-datasource>
</datasources>
If you are however executing in a simple Java environment, you can use the
JBPMHelper class to do this for you (see below for tests only) or the following code
fragment could be used to set up a data source (where we are using the H2 in-memory
database in combination with Bitronix in this case).
PoolingDataSource ds = new PoolingDataSource();
ds.setUniqueName("jdbc/jbpm-ds");
ds.setClassName("bitronix.tm.resource.jdbc.lrc.LrcXADataSource");
ds.setMaxPoolSize(3);
ds.setAllowLocalTransactions(true);
ds.getDriverProperties().put("user", "sa");
ds.getDriverProperties().put("password", "sasa");
ds.getDriverProperties().put("URL", "jdbc:h2:mem:jbpm-db");
ds.getDriverProperties().put("driverClassName", "org.h2.Driver");
ds.init();You need to configure the jBPM engine to use persistence, usually simply by using the appropriate constructor when creating your session. There are various ways to create a session (as we have tried to make this as easy as possible for you and have several utility classes for you, depending for example if you are trying to write a process JUnit test).
The easiest way to do this is to use the jbpm-test module that allows you to easily
create and test your processes. The JBPMHelper class has a method to create a session,
and uses a configuration file to configure this session, like whether you want to use persistence,
the datasource to use, etc. The helper class will then do all the setup and configuration
for you.
To configure persistence, create a jBPM.properties file and configure the following properties
(note that the example below are the default properties, using an H2 in-memory database with persistence
enabled, if you are fine with all of these properties, you don't need to add new properties file, as it
will then use these properties by default):
# for creating a datasource
persistence.datasource.name=jdbc/jbpm-ds
persistence.datasource.user=sa
persistence.datasource.password=
persistence.datasource.url=jdbc:h2:tcp://localhost/~/jbpm-db
persistence.datasource.driverClassName=org.h2.Driver

# for configuring persistence of the session
persistence.enabled=true
persistence.persistenceunit.name=org.jbpm.persistence.jpa
persistence.persistenceunit.dialect=org.hibernate.dialect.H2Dialect

# for configuring the human task service
taskservice.enabled=true
taskservice.datasource.name=org.jbpm.task
taskservice.usergroupcallback=org.jbpm.services.task.identity.JBossUserGroupCallbackImpl
taskservice.usergroupmapping=classpath:/usergroups.properties
If you want to use persistence, you must make sure that the datasource (that you specified
in the jBPM.properties file) is initialized correctly. This means that the database itself must
be up and running, and the datasource should be registered using the correct name. If you would like
to use an H2 in-memory database (which is usually very easy to do some testing), you can use the
JBPMHelper class to start up this database, using:
JBPMHelper.startH2Server();
To register the datasource (this is something you always need to do, even if you're not using H2 as your database, check below for more options on how to configure your datasource), use:
JBPMHelper.setupDataSource();
Next, you can use the JBPMHelper class to create your session (after creating your knowledge base,
which is identical to the case when you are not using persistence):
StatefulKnowledgeSession ksession = JBPMHelper.newStatefulKnowledgeSession(kbase);
Once you have done that, you can just call methods on this ksession (like startProcess)
and the engine will persist all runtime state in the created datasource.
You can also use the JBPMHelper class to recreate your session (by restoring its state
from the database, by passing in the session id (that you can retrieve using ksession.getId())):
StatefulKnowledgeSession ksession = JBPMHelper.loadStatefulKnowledgeSession(kbase, sessionId);
How to use the web-based Workbench
Table of Contents
- 9. Workbench (General)
- 10. Workbench Integration
- 10.1. REST
- 10.2. Keycloak SSO integration
- 10.2.1. Scenario
- 10.2.2. Install and setup a Keycloak server
- 10.2.3. Create and setup the demo realm
- 10.2.4. Install and setup jBPM Workbench
- 10.2.5. Securing workbench remote services via Keycloak
- 10.2.6. Securing workbench's file system services via Keycloak
- 10.2.7. Execution server
- 10.2.8. Consuming remote services
- 11. Workbench High Availability
- 12. Designer
- 13. Forms
- 14. Runtime Management
- 15. Process and Task Management
- 16. Business Activity Monitoring
- 17. Remote API
Use the war from the workbench distribution zip that corrsponds to your
application server. The differences between these war files are mainly
superficial. For example, some JARs might be excluded if the application server already
supplies them.
eap6_4: tailored for Red Hat JBoss Enterprise Application Platform 6.4tomcat7: tailored for Apache Tomcat 7Note
Apache Tomcat requires additional configuration to correctly install the Workbench. Please consult the
README.mdin thewarfor the most up to date procedure.was8: tailored for IBM WebSphere Application Server 8weblogic12: tailored for Oracle WebLogic Server 12cNote
Oracle WebLogic requires additional configuration to correctly install the Workbench. Please consult the
README.mdin thewarfor the most up to date procedure.wildfly8: tailored for Red Hat JBoss Wildfly 8
The workbench stores its data, by default in the directory
$WORKING_DIRECTORY/.niogit, for example
wildfly-8.0.0.Final/bin/.niogit, but it can be overridden with the system property
-Dorg.uberfire.nio.git.dir.
Note
In production, make sure to back up the workbench data directory.
Here's a list of all system properties:
org.uberfire.nio.git.dir: Location of the directory.niogit. Default: working directoryorg.uberfire.nio.git.daemon.enabled: Enables/disables git daemon. Default:trueorg.uberfire.nio.git.daemon.host: If git daemon enabled, uses this property as local host identifier. Default:localhostorg.uberfire.nio.git.daemon.port: If git daemon enabled, uses this property as port number. Default:9418org.uberfire.nio.git.ssh.enabled: Enables/disables ssh daemon. Default:trueorg.uberfire.nio.git.ssh.host: If ssh daemon enabled, uses this property as local host identifier. Default:localhostorg.uberfire.nio.git.ssh.port: If ssh daemon enabled, uses this property as port number. Default:8001org.uberfire.nio.git.ssh.cert.dir: Location of the directory.securitywhere local certificates will be stored. Default: working directoryorg.uberfire.nio.git.hooks: Location of the directory that contains Git hook scripts that are installed into each repository created (or cloned) in the Workbench. Default: N/Aorg.uberfire.nio.git.ssh.passphrase: Passphrase to access your Operating Systems public keystore when cloninggitrepositories withscpstyle URLs; e.g.git@github.com:user/repository.git.org.uberfire.metadata.index.dir: Place where Lucene.indexfolder will be stored. Default: working directoryorg.uberfire.cluster.id: Name of the helix cluster, for example:kie-clusterorg.uberfire.cluster.zk: Connection string to zookeeper. This is of the formhost1:port1,host2:port2,host3:port3, for example:localhost:2188org.uberfire.cluster.local.id: Unique id of the helix cluster node, note that ':' is replaced with '_', for example:node1_12345org.uberfire.cluster.vfs.lock: Name of the resource defined on helix cluster, for example:kie-vfsorg.uberfire.cluster.autostart: Delays VFS clustering until the application is fully initialized to avoid conflicts when all cluster members create local clones. Default:falseorg.uberfire.sys.repo.monitor.disabled: Disable configuration monitor (do not disable unless you know what you're doing). Default:falseorg.uberfire.secure.key: Secret password used by password encryption. Default:org.uberfire.adminorg.uberfire.secure.alg: Crypto algorithm used by password encryption. Default:PBEWithMD5AndDESorg.uberfire.domain: security-domain name used by uberfire. Default:ApplicationRealmorg.guvnor.m2repo.dir: Place where Maven repository folder will be stored. Default: working-directory/repositories/kieorg.guvnor.project.gav.check.disabled: Disable GAV checks. Default:falseorg.kie.example.repositories: Folder from where demo repositories will be cloned. The demo repositories need to have been obtained and placed in this folder. Demo repositories can be obtained from the kie-wb-6.2.0-SNAPSHOT-example-repositories.zip artifact. This System Property takes precedence over org.kie.demo and org.kie.example. Default: Not used.org.kie.demo: Enables external clone of a demo application from GitHub. This System Property takes precedence over org.kie.example. Default:trueorg.kie.example: Enables example structure composed by Repository, Organization Unit and Project. Default:falseorg.kie.build.disable-project-explorer: Disable automatic build of selected Project in Project Explorer. Default:false
To change one of these system properties in a WildFly or JBoss EAP cluster:
Edit the file
$JBOSS_HOME/domain/configuration/host.xml.Locate the XML elements
serverthat belong to themain-server-groupand add a system property, for example:<system-properties> <property name="org.uberfire.nio.git.dir" value="..." boot-time="false"/> ... </system-properties>
There have been reports that Firewalls in between the server and the browser can interfere with Server Sent Events (SSE) used by the Workbench.
The issue results in the "Loading..." spinner remaining visible and the Workbench failing to materialize.
The workaround is to disable the Workbench's use of Server Sent Events by adding file
/WEB-INF/classes/ErraiService.properties to the exploded WAR containing
the value errai.bus.enable_sse_support=false. Re-package the WAR and
re-deploy.
These steps help you get started with minimum of effort.
They should not be a substitute for reading the documentation in full.
Create a new repository to hold your project by selecting the Administration Perspective.
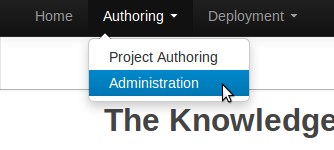
Select the "New repository" option from the menu.
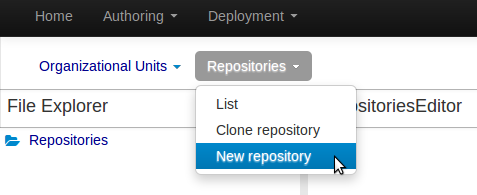
Enter the required information.
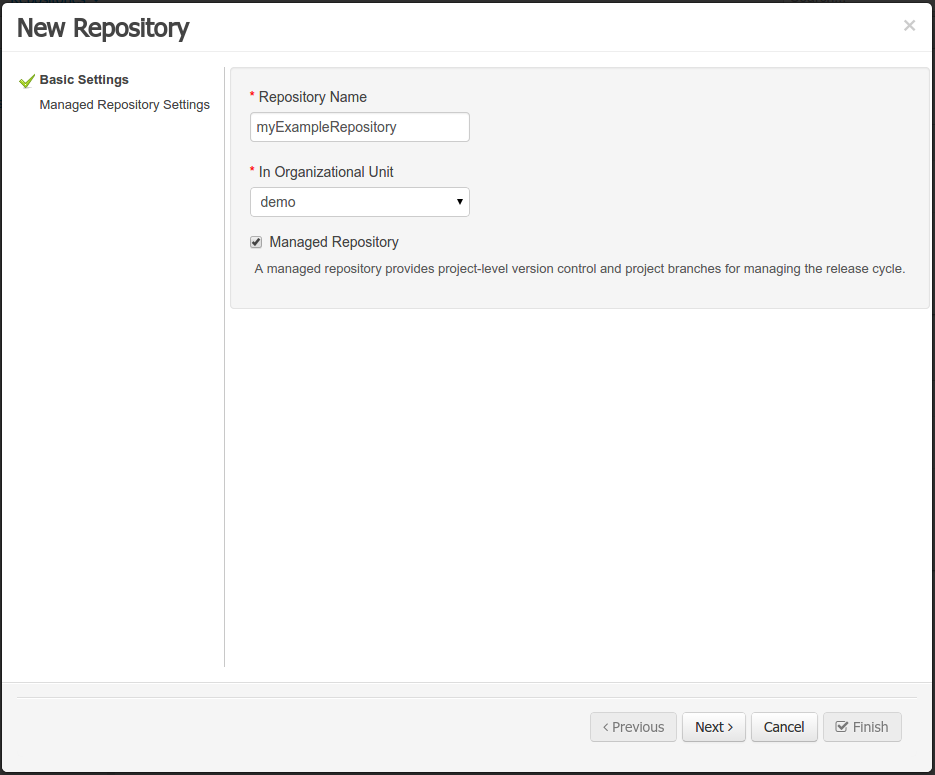
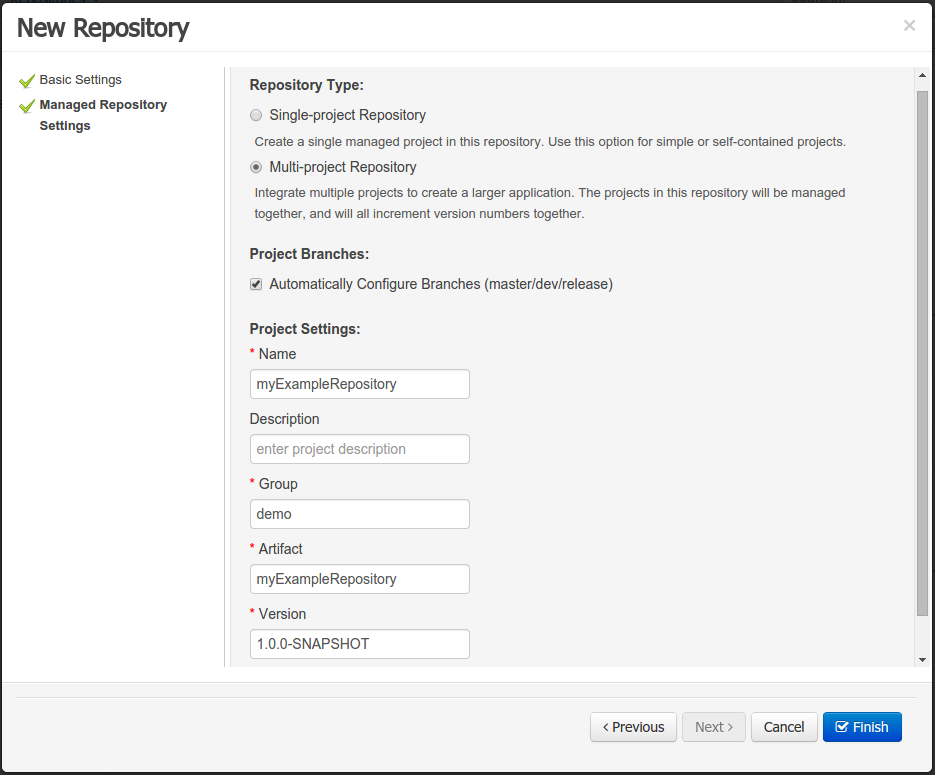
Select the Authoring Perspective to create a new project.
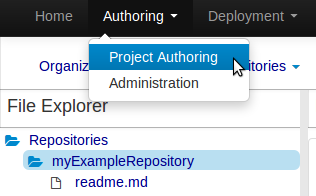
Select "Project" from the "New Item" menu.

Enter a project name first.
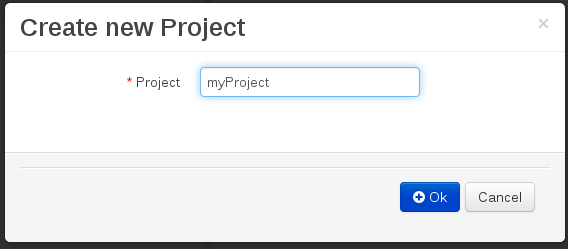
Enter the project details next.
Group ID follows Maven conventions.
Artifact ID is pre-populated from the project name.
Version is set as 1.0 by default.

After a project has been created you need to define Types to be used by your rules.
Select "Data Object" from the "New Item" menu.
Note
You can also use types contained in existing JARs.
Please consult the full documentation for details.
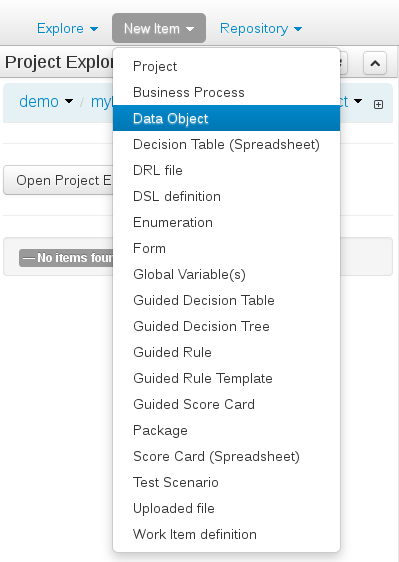
Set the name and select a package for the new type.
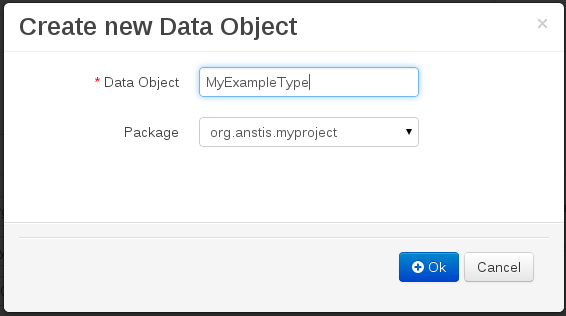
Set field name and type and click on "Create" to create a field for the type.
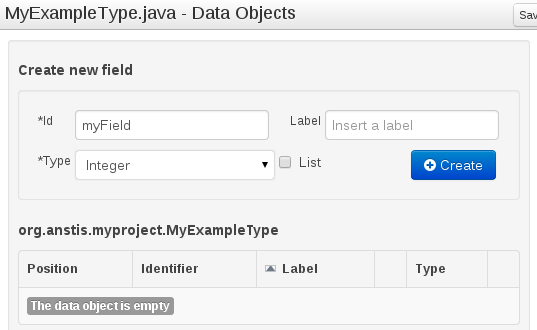
Click "Save" to update the model.
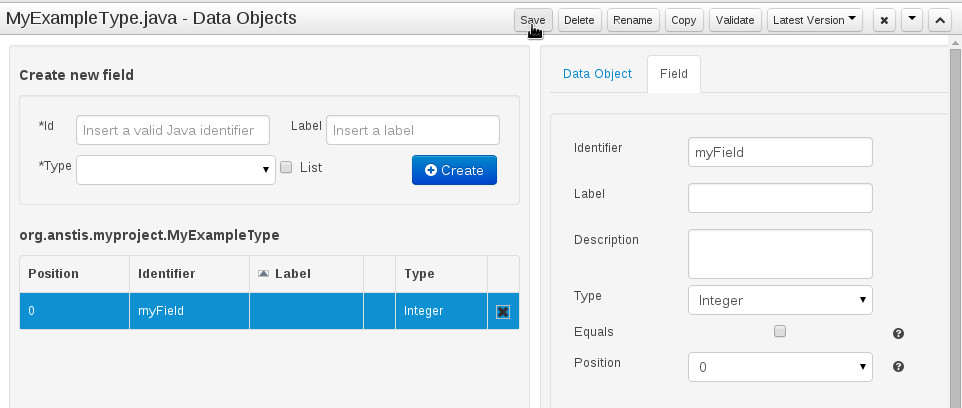
Select "DRL file" (for example) from the "New Item" menu.
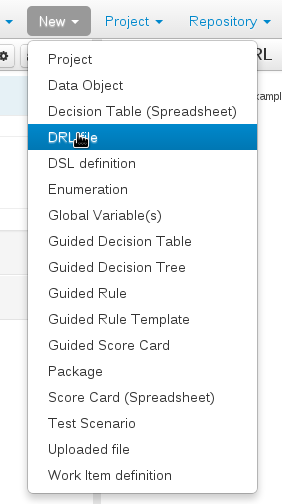
Enter a file name for the new rule.
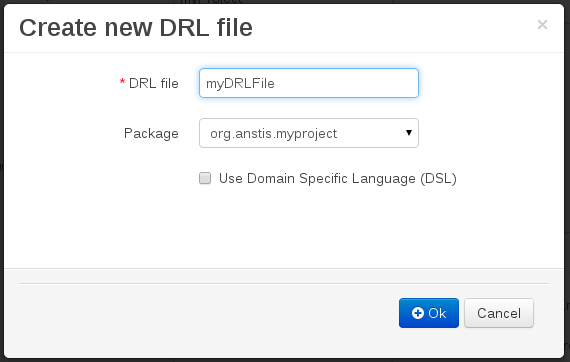
Enter a definition for the rule.
The definition process differs from asset type to asset type.
The full documentation has details about the different editors.
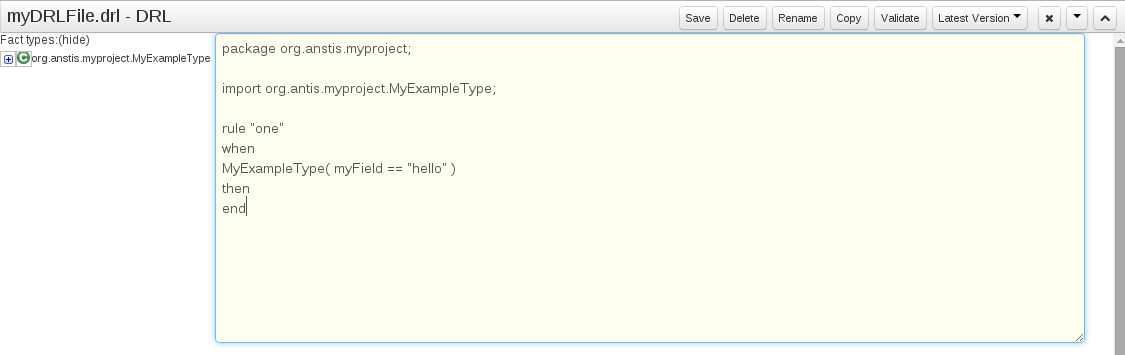
Once the rule has been defined it will need to be saved.

Once rules have been defined within a project; the project can be built and deployed to the Workbench's Maven Artifact Repository.
To build a project select the "Project Editor" from the "Project" menu.
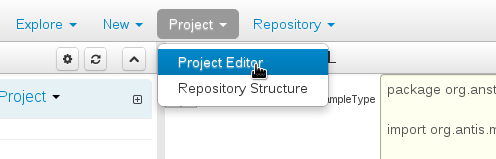
Click "Build and Deploy" to build the project and deploy it to the Workbench's Maven Artifact Repository.
When you select Build & Deploy the workbench will deploy to any repositories defined in the Dependency Management section of the pom in your workbench project. You can edit the pom.xml file associated with your workbench project under the Repository View of the project explorer. Details on dependency management in maven can be found here : http://maven.apache.org/guides/introduction/introduction-to-dependency-mechanism.html
If there are errors during the build process they will be reported in the "Problems Panel".

Now the project has been built and deployed; it can be referenced from your own projects as any other Maven Artifact.
The full documentation contains details about integrating projects with your own applications.
A workbench is structured with Organization Units, VFS repositories and projects:

Organization units are useful to model departments and divisions.
An organization unit can hold multiple repositories.
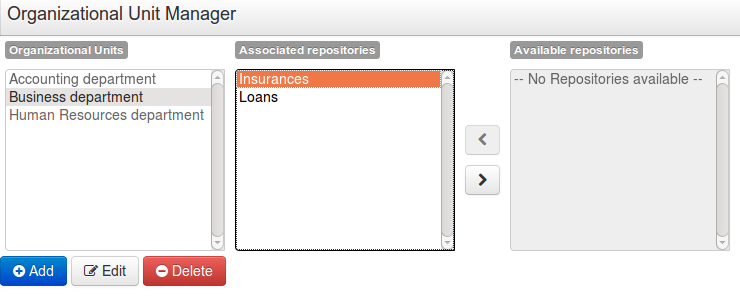
Repositories are the place where assets are stored and each repository is organized by projects and belongs to a single organization unit.
Repositories are in fact a Virtual File System based storage, that by default uses GIT as backend. Such setup allows workbench to work with multiple backends and, in the same time, take full advantage of backend specifics features like in GIT case versioning, branching and even external access.
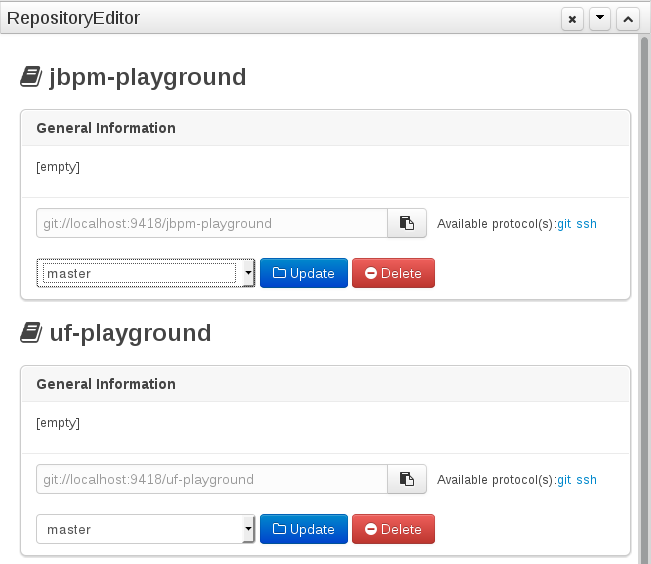
A new repository can be created from scratch or cloned from an existing repository.
One of the biggest advantages of using GIT as backend is the ability to clone a repository from external and use your preferred tools to edit and build your assets.
Warning
Never clone your repositories directly from .niogit directory. Use always the available protocol(s) displayed in repositories editor.
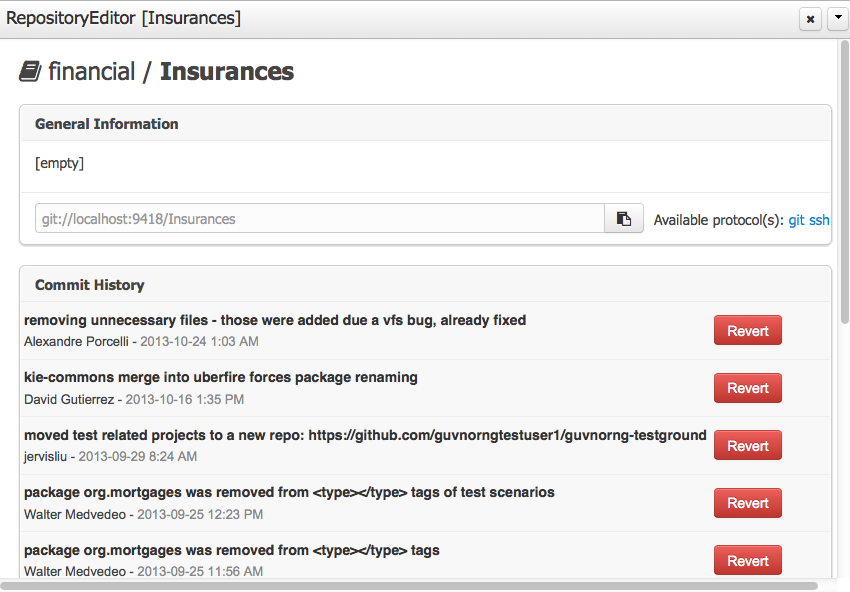
The workbench authenticates its users against the application server's authentication and authorization (JAAS).
On JBoss EAP and WildFly, add a user with the script $JBOSS_HOME/bin/add-user.sh (or
.bat):
$ ./add-user.sh
// Type: Application User
// Realm: empty (defaults to ApplicationRealm)
// Role: admin
There is no need to restart the application server.
The Workbench uses the following roles:
admin
analyst
developer
manager
user
Administrates the BPMS system.
Manages users
Manages VFS Repositories
Has full access to make any changes necessary
Developer can do almost everything admin can do, except clone repositories.
Manages rules, models, process flows, forms and dashboards
Manages the asset repository
Can create, build and deploy projects
Can use the JBDS connection to view processes
Analyst is a weaker version of developer and does not have access to the asset repository or the ability to deploy projects.
Daily user of the system to take actions on business tasks that are required for the processes to continue forward. Works primarily with the task lists.
Does process management
Handles tasks and dashboards
It is possible to restrict access to repositories using roles and organizational groups. To let an user access a repository.
The user either has to belong into a role that has access to the repository or to a role that belongs into an organizational group that has access to the repository. These restrictions can be managed with the command line config tool.
Provides capabilities to manage the system repository from command line. System repository contains the data about general workbench settings: how editors behave, organizational groups, security and other settings that are not editable by the user. System repository exists in the .niogit folder, next to all the repositories that have been created or cloned into the workbench.
Online (default and recommended) - Connects to the Git repository on startup, using Git server provided by the KIE Workbench. All changes are made locally and published to upstream when:
"push-changes" command is explicitly executed
"exit" is used to close the tool
Offline - Creates and manipulates system repository directly on the server (no discard option)
Table 9.1. Available Commands
| exit | Publishes local changes, cleans up temporary directories and quits the command line tool |
| discard | Discards local changes without publishing them, cleans up temporary directories and quits the command line tool |
| help | Prints a list of available commands |
| list-repo | List available repositories |
| list-org-units | List available organizational units |
| list-deployment | List available deployments |
| create-org-unit | Creates new organizational unit |
| remove-org-unit | Removes existing organizational unit |
| add-deployment | Adds new deployment unit |
| remove-deployment | Removes existing deployment |
| create-repo | Creates new git repository |
| remove-repo | Removes existing repository ( only from config ) |
| add-repo-org-unit | Adds repository to the organizational unit |
| remove-repo-org-unit | Removes repository from the organizational unit |
| add-role-repo | Adds role(s) to repository |
| remove-role-repo | Removes role(s) from repository |
| add-role-org-unit | Adds role(s) to organizational unit |
| remove-role-org-unit | Removes role(s) from organizational unit |
| add-role-project | Adds role(s) to project |
| remove-role-project | Removes role(s) from project |
| push-changes | Pushes changes to upstream repository (only in online mode) |
The tool can be found from kie-config-cli-${version}-dist.zip. Execute the kie-config-cli.sh script and by default it will start in online mode asking for a Git url to connect to ( the default value is ssh://localhost/system ). To connect to a remote server, replace the host and port with appropriate values, e.g. ssh://kie-wb-host/system.
./kie-config-cli.sh To operate in offline mode, append the offline parameter to the kie-config-cli.sh command. This will change the behaviour and ask for a folder where the .niogit (system repository) is. If .niogit does not yet exist, the folder value can be left empty and a brand new setup is created.
./kie-config-cli.sh offlineCreate a user with the role admin and log in with those credentials.
After successfully logging in, the account username is displayed at the top right. Click on it to review the roles of the current account.
After logging in, the home screen shows. The actual content of the home screen depends on the workbench variant (Drools, jBPM, ...).
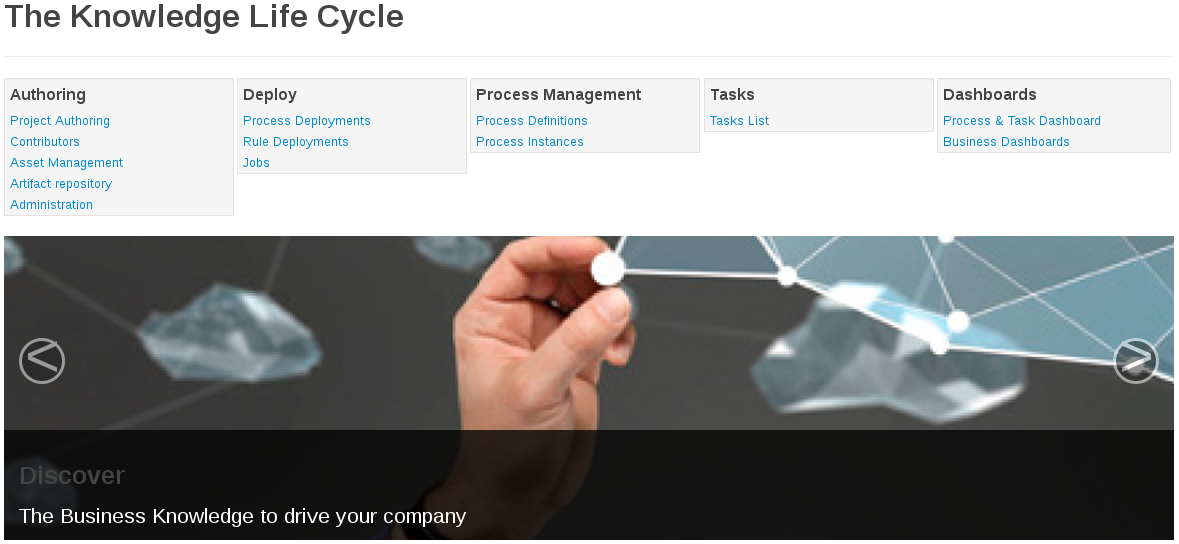
The Workbench is comprised of different logical entities:
Part
A Part is a screen or editor with which the user can interact to perform operations.
Example Parts are "Project Explorer", "Project Editor", "Guided Rule Editor" etc. Parts can be repositioned.
Panel
A Panel is a container for one or more Parts.
Panels can be resized.
Perspective
A perspective is a logical grouping of related Panels and Parts.
The user can switch between perspectives by clicking on one of the top-level menu items; such as "Home", "Authoring", "Deploy" etc.
The Workbench consists of three main sections to begin; however its layout and content can be changed.
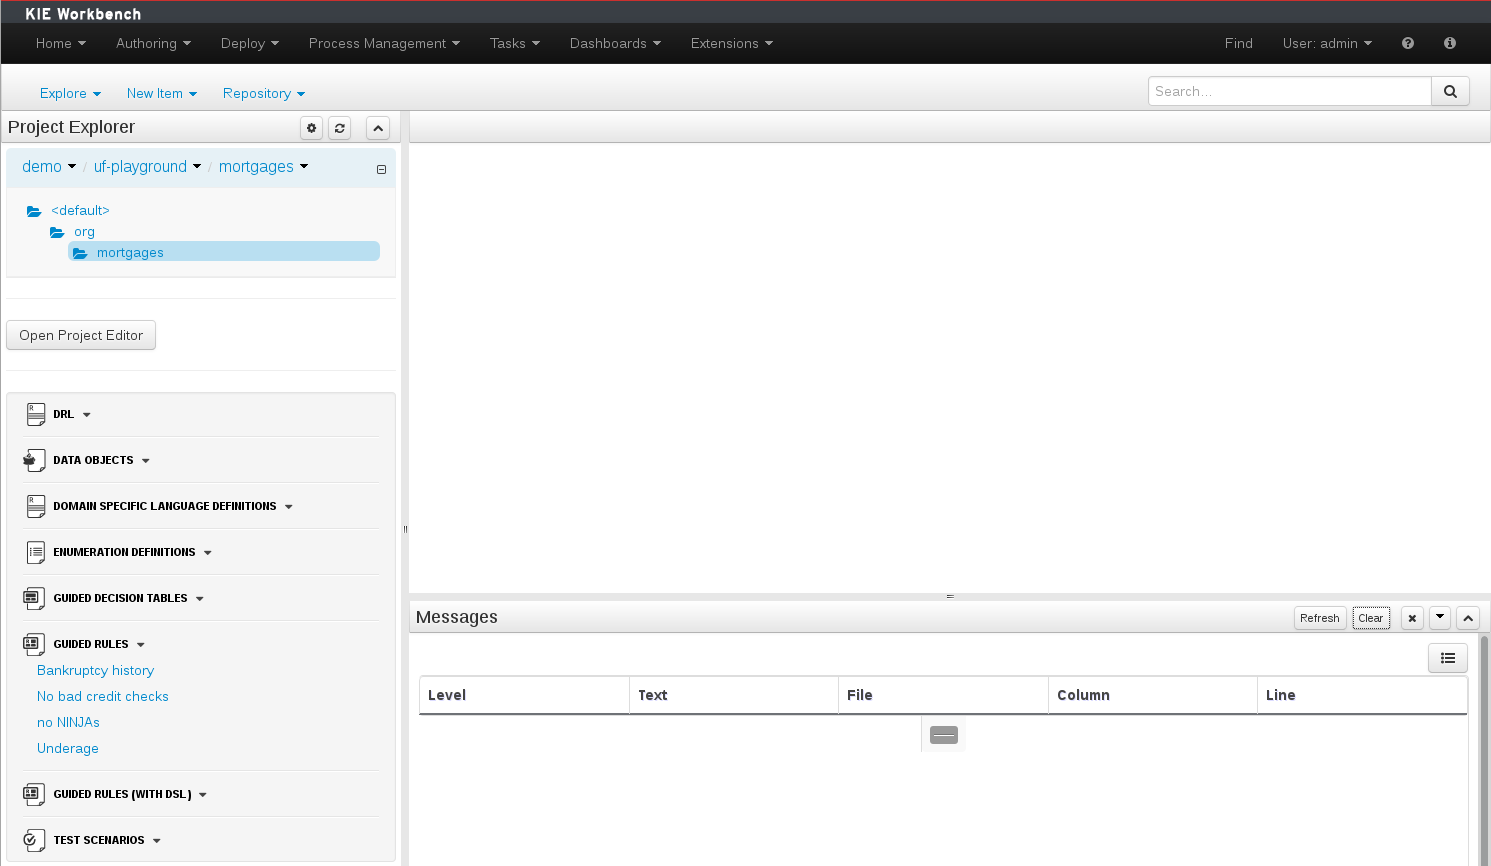
The initial Workbench shows the following components:-
Project Explorer
This provides the ability for the user to browse their configuration; of Organizational Units (in the above "example" is the Organizational Unit), Repositories (in the above "uf-playground" is the Repository) and Project (in the above "mortgages" is the Project).
Problems
This provides the user with real-time feedback about errors in the active Project.
Empty space
This empty space will contain an editor for assets selected from the Project Explorer.
Other screens will also occupy this space by default; such as the Project Editor.
The default layout may not be suitable for a user. Panels can therefore be either resized or repositioned.
This, for example, could be useful when running tests; as the test defintion and rule can be repositioned side-by-side.
The following screenshot shows a Panel being resized.
Move the mouse pointer over the panel splitter (a grey horizontal or vertical line in between panels).
The cursor will changing indicating it is positioned correctly over the splitter. Press and hold the left mouse button and drag the splitter to the required position; then release the left mouse button.
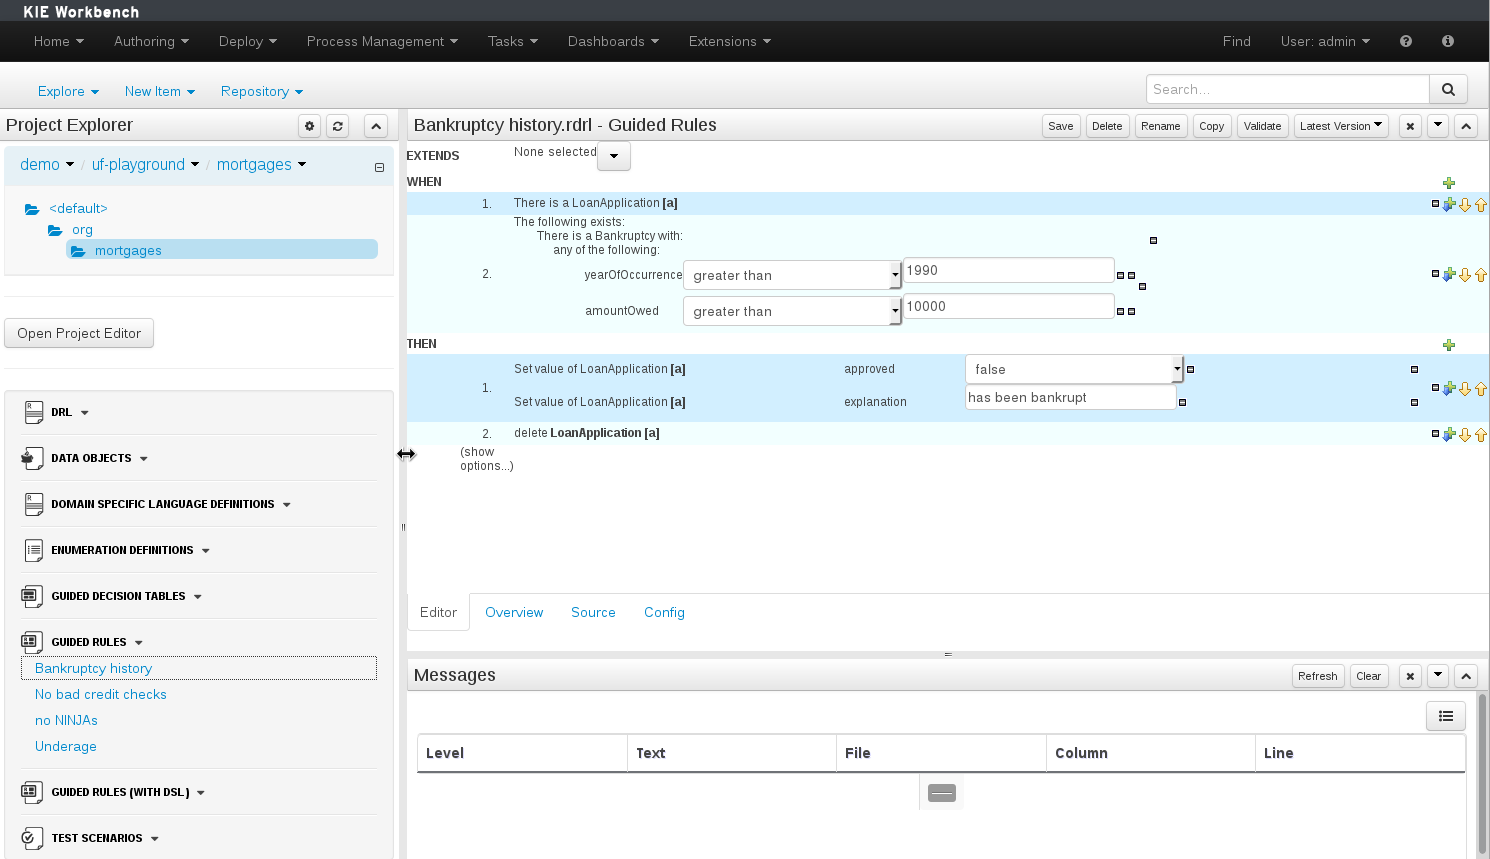
The following screenshot shows a Panel being repositioned.
Move the mouse pointer over the Panel title ("Guided Editor [No bad credit checks]" in this example).
The cursor will change indicating it is positioned correctly over the Panel title. Press and hold the left mouse button. Drag the mouse to the required location. The target position is indicated with a pale blue rectangle. Different positions can be chosen by hovering the mouse pointer over the different blue arrows.
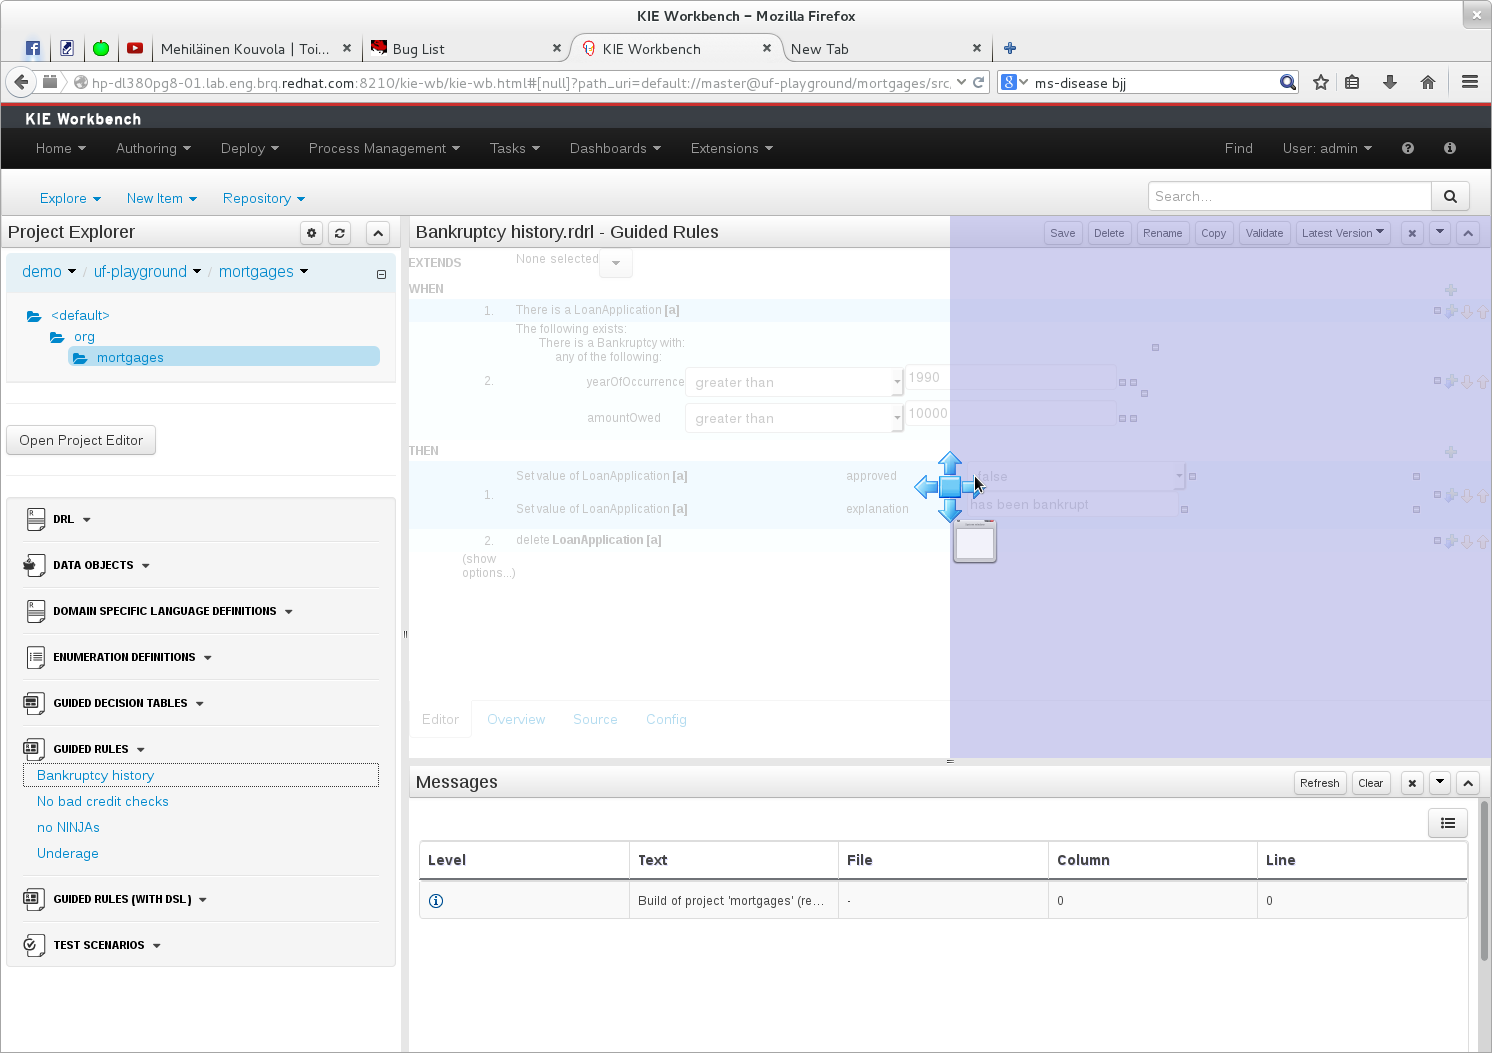

Projects often need external artifacts in their classpath in order to build, for example a domain model JARs. The artifact repository holds those artifacts.
The Artifact Repository is a full blown Maven repository. It follows the semantics of a Maven remote repository: all snapshots are timestamped. But it is often stored on the local hard drive.
By default the artifact repository is stored under $WORKING_DIRECTORY/repositories/kie, but
it can be overridden with the system property
-Dorg.guvnor.m2repo.dir. There is only 1 Maven repository per installation.
The Artifact Repository screen shows a list of the artifacts in the Maven repository:
To add a new artifact to that Maven repository, either:
Use the upload button and select a JAR. If the JAR contains a POM file under
META-INF/maven(which every JAR build by Maven has), no further information is needed. Otherwise, a groupId, artifactId and version need be given too.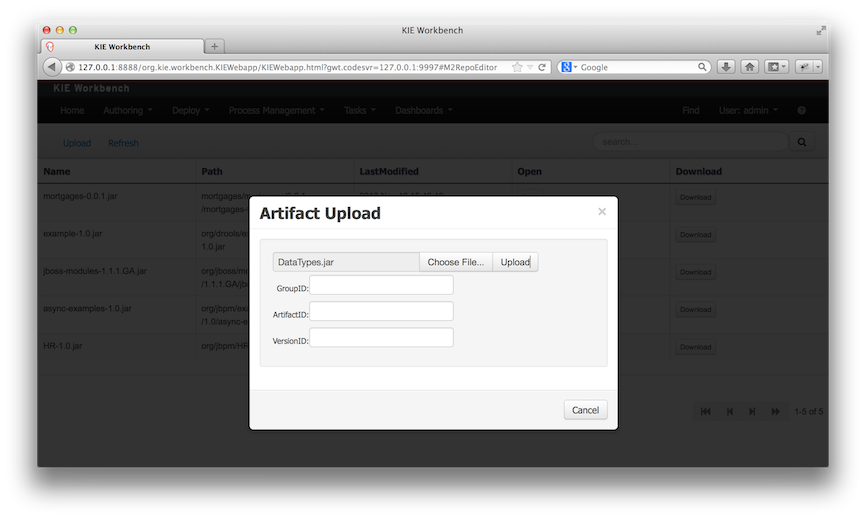
Using Maven,
mvn deployto that Maven repository. Refresh the list to make it show up.
Note
This remote Maven repository is relatively simple. It does not support proxying, mirroring, ... like Nexus or Archiva.
The Asset Editor is the principle component of the workbench User-Interface. It consists of two main views Editor and Overview.
The views
A : The editing area - exactly what form the editor takes depends on the Asset type. An asset can only be edited by one user at a time to avoid conflicts. When a user begins to edit an asset, a lock will automatically be acquired. This is indicated by a lock symbol appearing on the asset title bar as well as in the project explorer view (see Section 9.7.4, “Project Explorer” for details). If a user starts editing an already locked asset a pop-up notification will appear to inform the user that the asset can't currently be edited, as it is being worked on by another user. Changes will be prevented until the editing user saves or closes the asset, or logs out of the workbench. Session timeouts will also cause locks to be released. Every user further has the option to force a lock release, if required (see the Metadata section below).
B : This menu bar contains various actions for the Asset; such as Save, Rename, Copy etc. Note that saving, renaming and deleting are deactivated if the asset is locked by a different user.
C : Different views for asset content or asset information.
Editor shows the main editor for the asset
Overview contains the metadata and conversation views for this editor. Explained in more detail below.
Source shows the asset in plain DRL. Note: This tab is only visible if the asset content can be generated into DRL.
Data Objects contains the model available for authoring. By default only Data Objects that reside within the same package as the asset are available for authoring. Data Objects outside of this package can be imported to become available for authoring the asset.
Overview
A : General information about the asset and the asset's description.
"Type:" The format name of the type of Asset.
"Description:" Description for the asset.
"Used in projects:" Names the projects where this rule is used.
"Last Modified:" Who made the last change and when.
"Created on:" Who created the asset and when.
B : Version history for the asset. Selecting a version loads the selected version into this editor.
C : Meta data (from the "Dublin Core" standard)
D : Comments regarding the development of the Asset can be recorded here.
Metadata
A : Meta data:-
"Tags:" A tagging system for grouping the assets.
"Note:" A comment made when the Asset was last updated (i.e. why a change was made)
"URI:" URI to the asset inside the Git repository.
"Subject/Type/External link/Source" : Other miscellaneous meta data for the Asset.
"Lock status" : Shows the lock status of the asset and, if locked, allows to force unlocking the asset.
Locking
The Workbench supports pessimistic locking of assets. When one User starts editing an asset it is locked to change by other Users. The lock is held until a period of inactivity lapses, the Editor is closed or the application stopped and restarted. Locks can also be forcibly removed on the MetaData section of the Overview tab.
A "padlock" icon is shown in the Editor's title bar and beside the asset in the Project Explorer when an asset is locked.
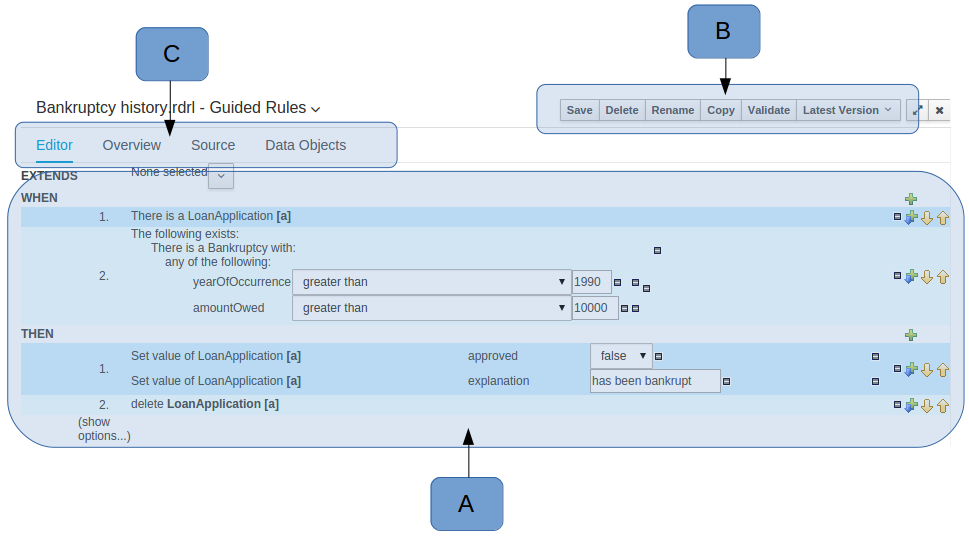

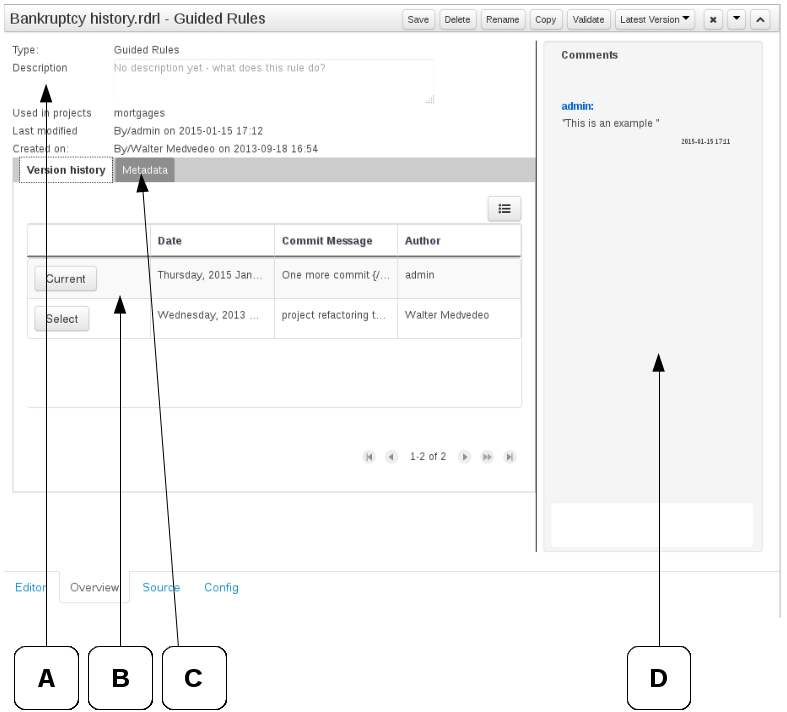
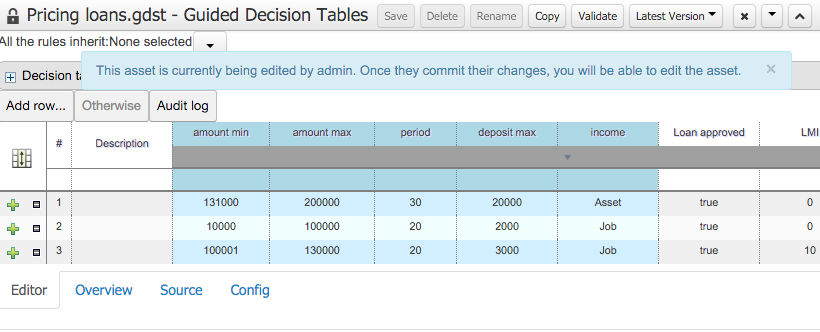
Tags allow assets to be labelled with any number of tags that you define. These tags can be used to filter assets on the Project Explorer enabling "Tag filtering".
To create tags you simply have to write them on the Tags input and press the "Add new Tag/s" button. The Tag Editor allows creating tags one by one or writing more than one separated with a white space.
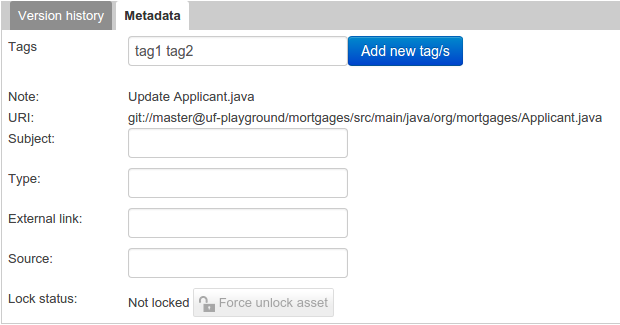
Once you created new Tags they will appear over the Editor allowing you to remove them by pressing on them if you want.
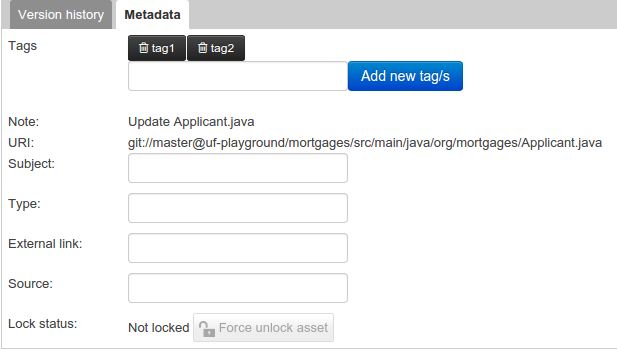
The Project Explorer provides the ability to browse different Organizational Units, Repositories, Projects and their files.
The initial view could be empty when first opened.
The user may have to select an Organizational Unit, Repository and Project from the drop-down boxes.
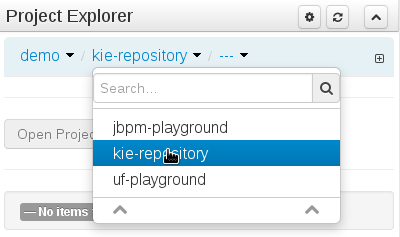
The default configuration hides Package details from view.
In order to reveal packages click on the icon as indicated in the following screen-shot.
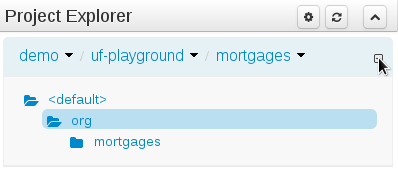
After a suitable combination of Organizational Unit, Repository, Project and Package have been selected the Project Explorer will show the contents. The exact combination of selections depends wholly on the structures defined within the Workbench installation and projects. Each section contains groups of related files. If a file is currently being edited by another user, a lock symbol will be displayed in front of the file name. The symbol is blue in case the lock is owned by the currently authenticated user, otherwise black. Moving the mouse pointer over the lock symbol will display a tooltip providing the name of the user who is currently editing the file (and therefore owning the lock). To learn more about locking see Section 9.7.2, “Asset Editor” for details.
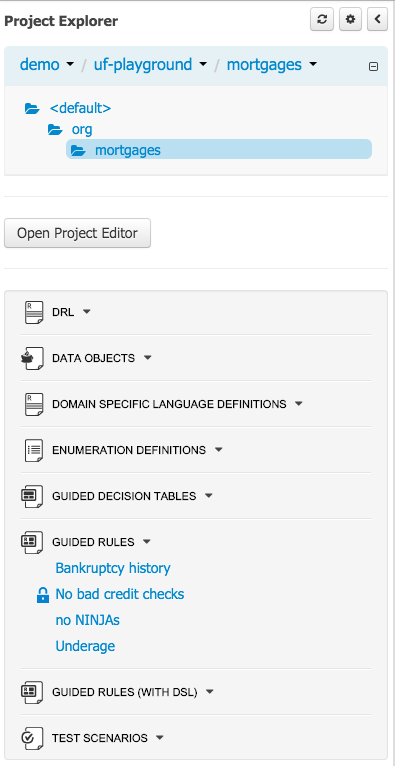
Project Explorer supports multiple views.
Project View
A simplified view of the underlying project structure. Certain system files are hidden from view.
Repository View
A complete view of the underlying project structure including all files; either user-defined or system generated.
Views can be selected by clicking on the icon within the Project Explorer, as shown below.
Both Project and Repository Views can be further refined by selecting either "Show as Folders" or "Show as Links".
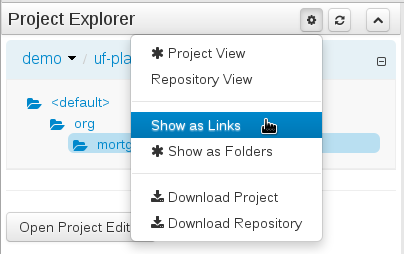
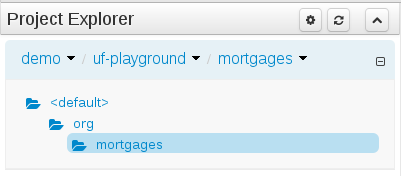
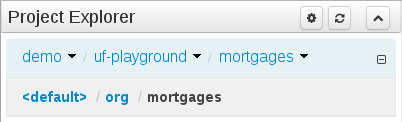
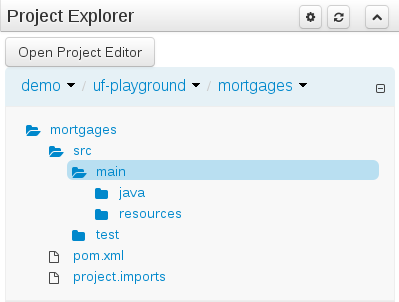
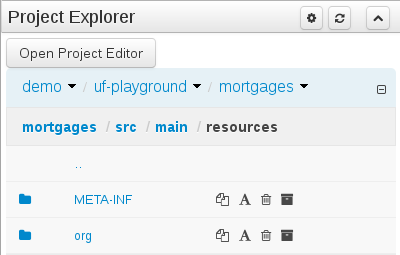
Download Project and Download Repository make it possible to download the project or repository as a zip file.
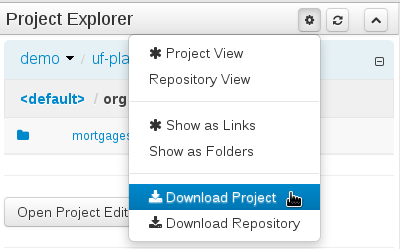
A branch selector will be visible if the repository has more than a single branch.
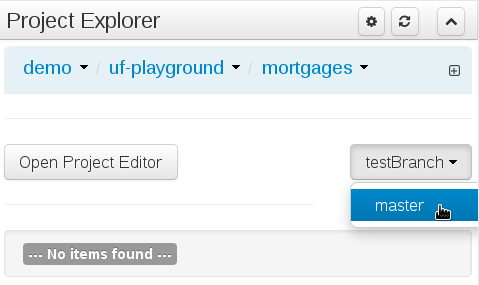
To make easy view the elements on packages that contain a lot of assets, is possible to enabling the Tag filter, which allows you to filter the assets by their tags.
To see how to add tags to an asset look at: Section 9.7.3, “Tags Editor”
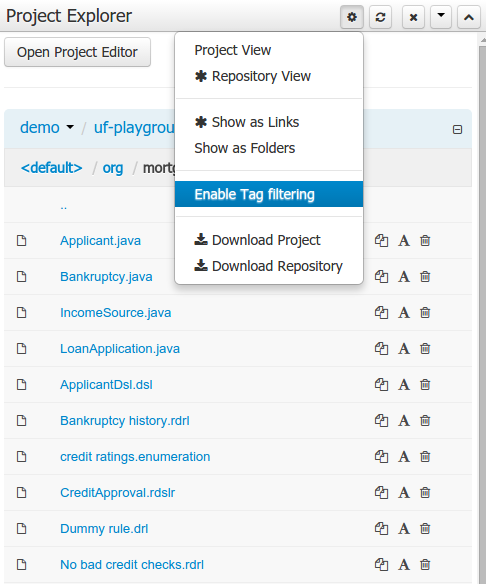
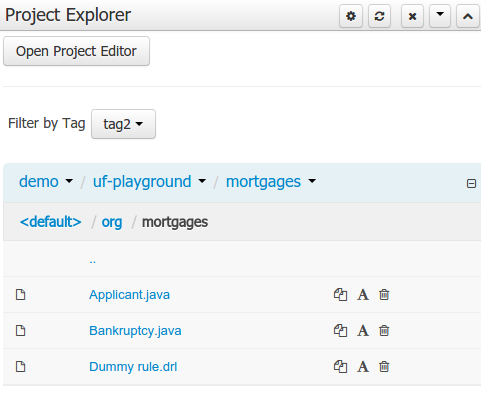
Copy, rename and delete actions are available on Links mode, for packages (in of Project View) and for files and directories as well (in Repository View). Download action is available for directories. Download downloads the selected directory as a zip file.
A : Copy
B : Rename
C : Delete
D : Download
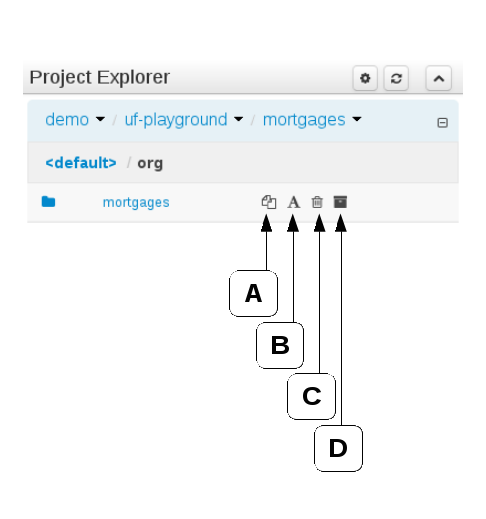

Warning
Workbench roadmap includes a refactoring and an impact analyses tools, but currently doesn't have it. Until both tools are provided make sure that your changes (copy/rename/delete) on packages, files or directories don't have a major impact on your project.
In cases that your change had an unexpected impact, Workbench allows you to restore your repository using the Repository editor.
Important
Files locked by other users as well as directories that contain such files cannot be renamed or deleted until the corresponding locks are released. If that is the case the rename and delete symbols will be deactivated. To learn more about locking see Section 9.7.2, “Asset Editor” for details.

The Project Editor screen can be accessed from Project Explorer. Project Editor shows the settings for the currently active project.
Unlike most of the workbench editors, project editor edits more than one file. Showing everything that is needed for configuring the KIE project in one place.
Build & Depoy builds the current project and deploys the KJAR into the workbench internal Maven repository.
Project Settings edits the pom.xml file used by Maven.
General settings provide tools for project name and GAV-data (Group, Artifact, Version). GAV values are used as identifiers to differentiate projects and versions of the same project.
The project may have any number of either internal or external dependencies. Dependency is a project that has been built and deployed to a Maven repository. Internal dependencies are projects built and deployed in the same workbench as the project. External dependencies are retrieved from repositories outside of the current workbench. Each dependency uses the GAV-values to specify the project name and version that is used by the project.
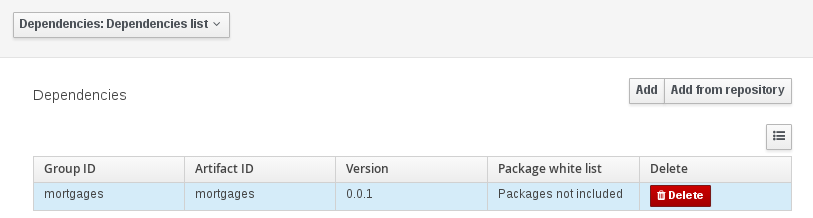
Classes and declared types in white listed packages show up as Data Objects that can be imported in assets. The full list is stored in package-name-white-list file that is stored in each project root.
Package white list has three modes:
All packages included: Every package defined in this jar is white listed.
Packages not included: None of the packages listed in this jar are white listed.
Some packages included: Only part of the packages in the jar are white listed.
Knowledge Base Settings edits the kmodule.xml file used by Drools.
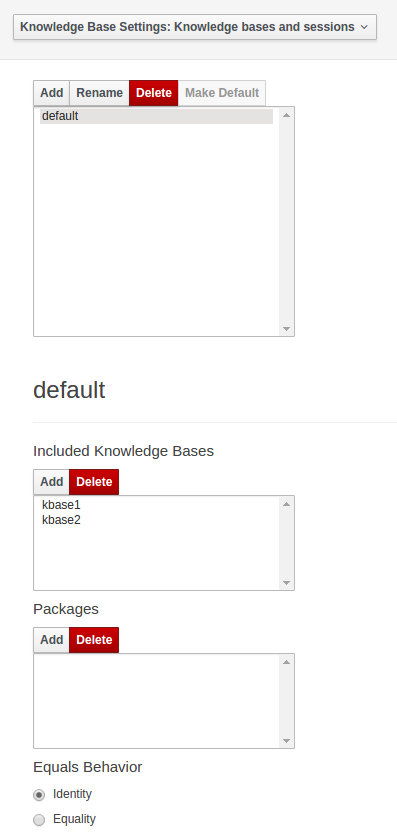
Note
For more information about the Knowledge Base properties, check the Drools Expert documentation for kmodule.xml.
Knowledge bases and sessions lists the knowledge bases and the knowledge sessions specified for the project.
Lists all the knowledge bases by name. Only one knowledge base can be set as default.
Knowledge base can include other knowledge bases. The models, rules and any other content in the included knowledge base will be visible and usable by the currently selected knowledge base.
Rules and models are stored in packages. The packages property specifies what packages are included into this knowledge base.
Equals behavior is explained in the Drools Expert part of the documentation.
Event processing mode is explained in the Drools Fusion part of the documentation.
Settings edits the project.imports file used by the workbench editors.
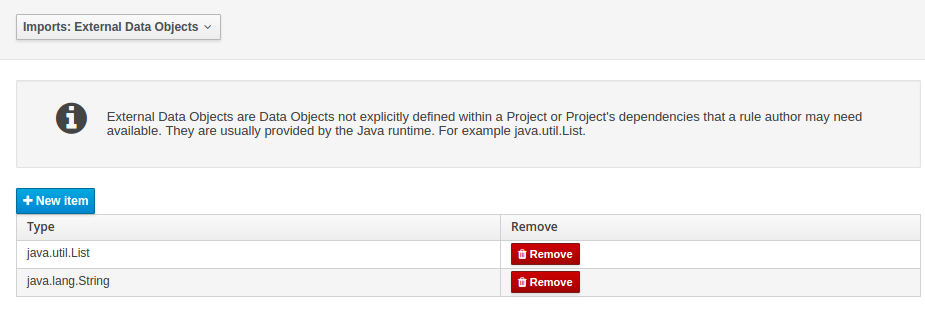
Data Objects provided by the Java Runtime environment may need to be registered to be available to rule authoring where such
Data Objects are not implicitly available as part of an existing Data Object defined within the Workbench or a Project dependency.
For example an Author may want to define a rule that checks for java.util.ArrayList in Working Memory. If a domain Data
Object has a field of type java.util.ArrayList there is no need create a registration.
When performing any of the following operations a check is now made against all Maven Repositories, resolved for the Project,
for whether the Project's GroupId, ArtifactId and Version pre-exist. If a clash is found the operation is prevented; although this can be overridden by Users
with the admin role.
Note
The feature can be disabled by setting the System Property org.guvnor.project.gav.check.disabled to true.
Resolved repositories are those discovered in:-
The Project's
POM<repositories>section (or any parentPOM).The Project's
POM<distributionManagement>section.Maven's global
settings.xmlconfiguration file.
Affected operations:-
Creation of new Managed Repositories.
Saving a Project defintion with the Project Editor.
Adding new Modules to a Managed Multi-Module Repository.
Saving the
pom.xmlfile.Build & installing a Project with the Project Editor.
Build & deploying a Project with the Project Editor.
Asset Management operations building, installing or deploying Projects.
RESToperations creating, installing or deploying Projects.
Users with the Admin role can override the list of Repositories checked using the "Repositories" settings in the Project Editor.
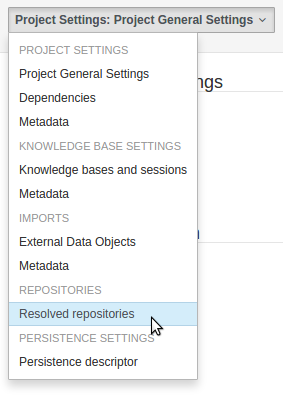
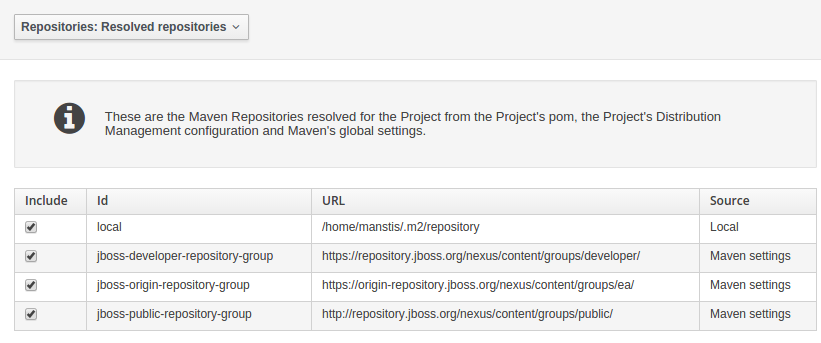
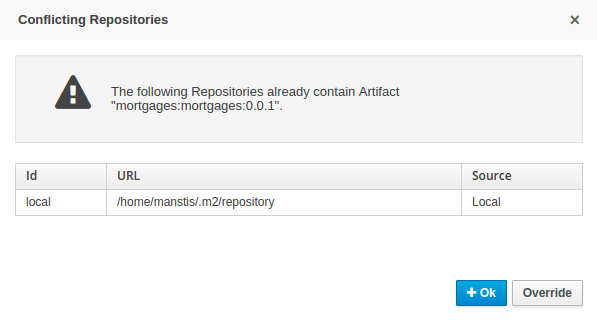
The Workbench provides a common and consistent service for users to understand whether files authored within the environment are valid.
The Problems Panel shows real-time validation results of assets within a Project.
When a Project is selected from the Project Explorer the Problems Panel will refresh with validation results of the chosen Project.
When files are created, saved or deleted the Problems Panel content will update to show either new validation errors, or remove existing if a file was deleted.
Figure 9.54. The Problems Panel
Here an invalid DRL file has been created and saved.
The Problems Panel shows the validation errors.
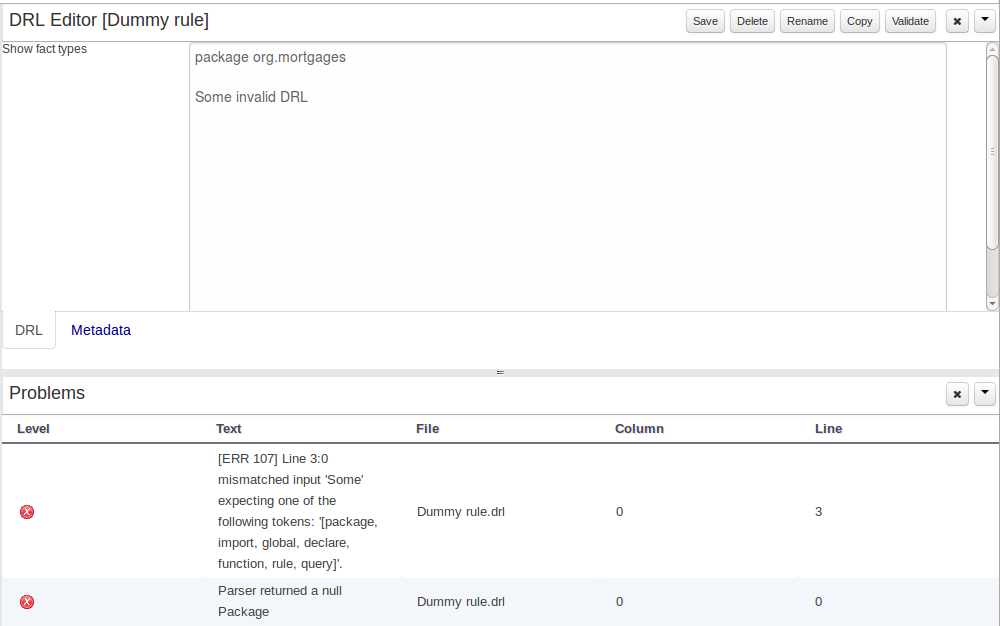
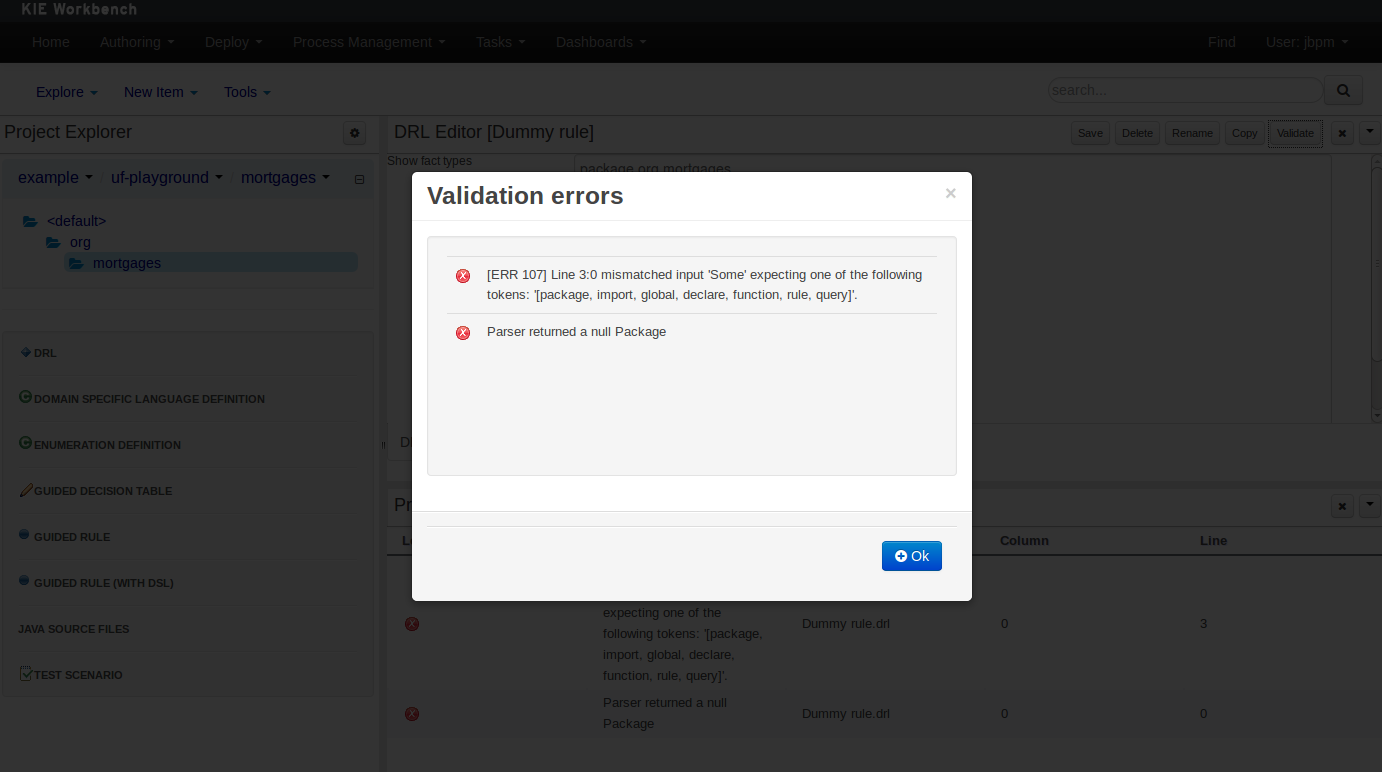
By default, a data model is always constrained to the context of a project. For the purpose of this tutorial, we will assume that a correctly configured project already exists and the authoring perspective is open.
To start the creation of a data model inside a project, take the following steps:
From the home panel, select the authoring perspective and use the project explorer to browse to the given project.
Open the Data Modeller tool by clicking on a Data Object file, or using the "New Item -> Data Object" menu option.
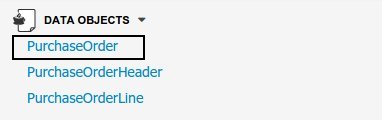
This will start up the Data Modeller tool, which has the following general aspect:
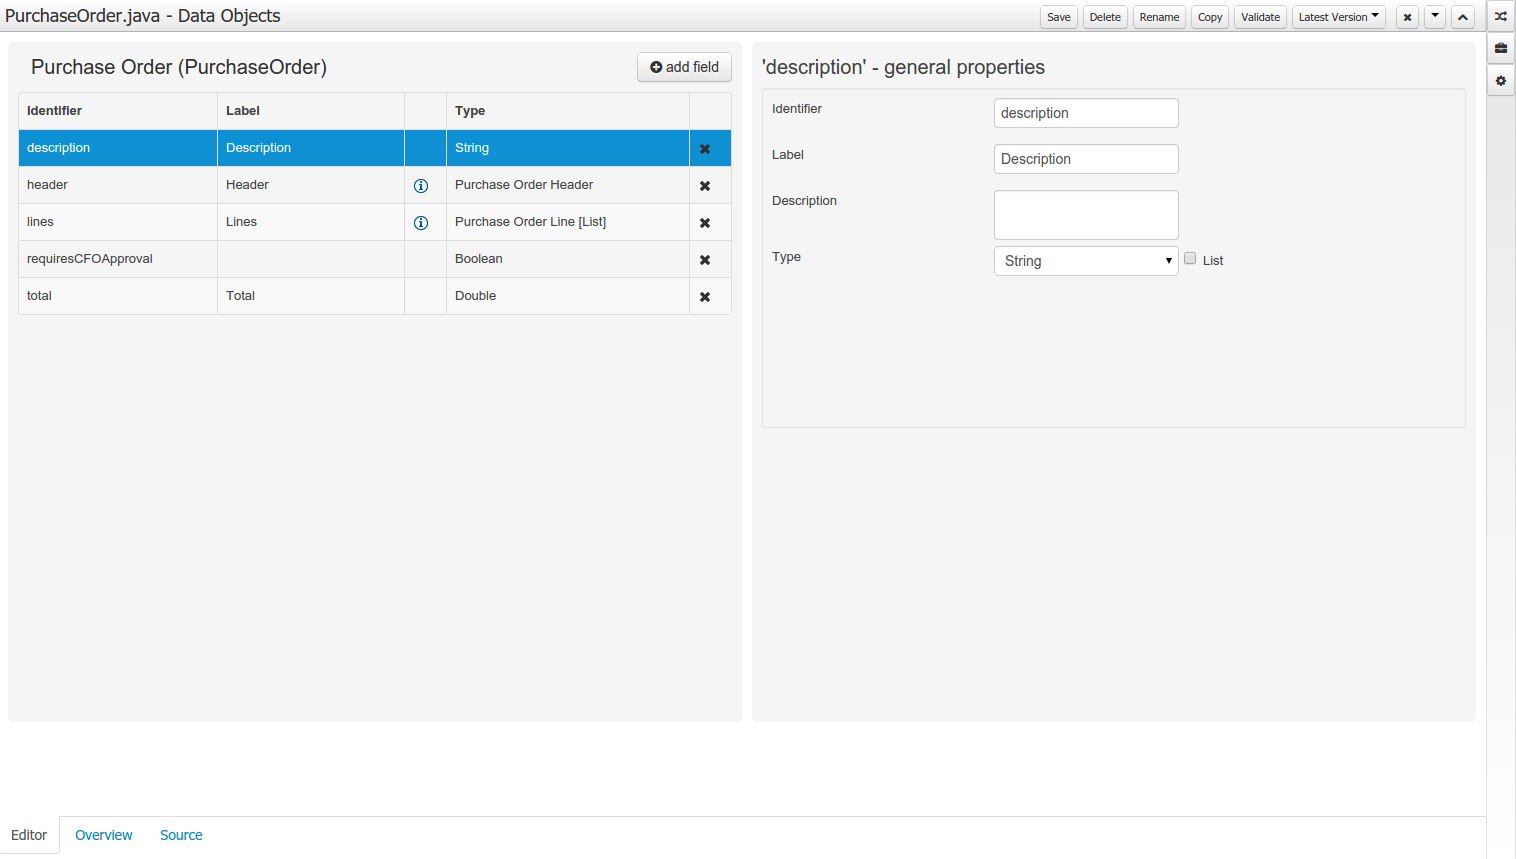
The "Editor" tab is divided into the following sections:
The new field section is dedicated to the creation of new fields, and is opened when the "add field" button is pressed.
The Data Object's "field browser" section displays a list with the data object fields.
The "Data Object / Field general properties" section. This is the rightmost section of the Data Modeller editor and visualizes the "Data Object" or "Field" general properties, depending on user selection.
Data Object general properties can be selected by clicking on the Data Object Selector.
Field general properties can be selected by clicking on a field.
On workbench's right side a new "Tool Bar" is provided that enables the selection of different context sensitive tool windows that will let the user do domain specific configurations. Currently four tool windows are provided for the following domains "Drools & jBPM", "OptaPlanner", "Persistence" and "Advanced" configurations.
Note
To see and use the OptaPlanner tool window, the user needs to have the role
plannermgmt.
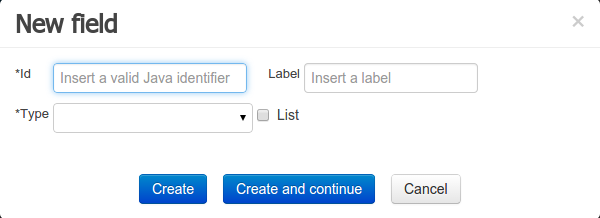
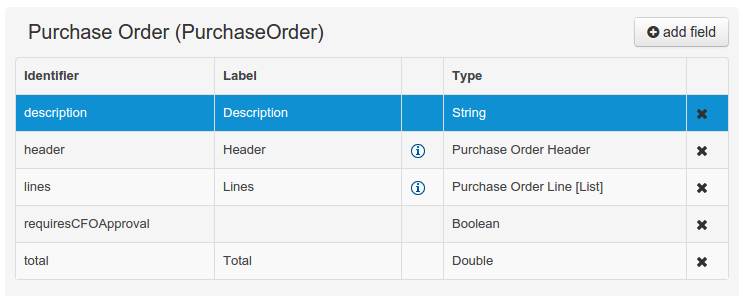
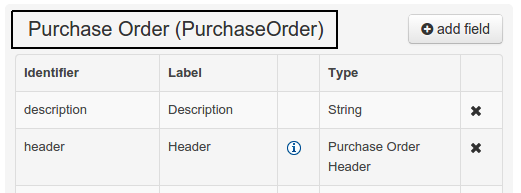
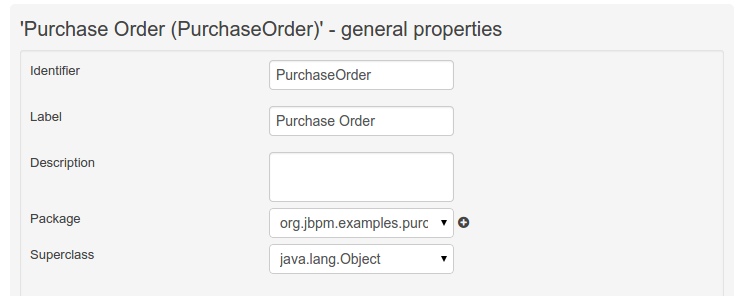
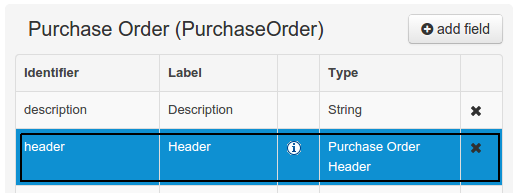
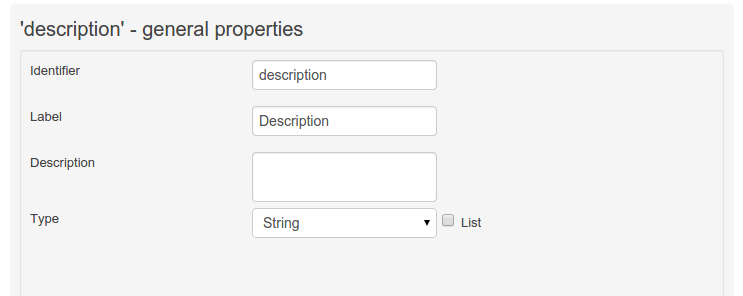

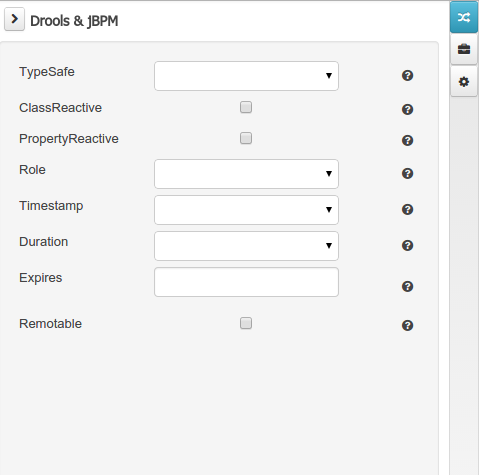
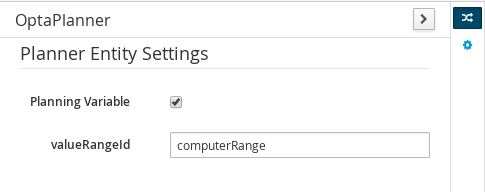
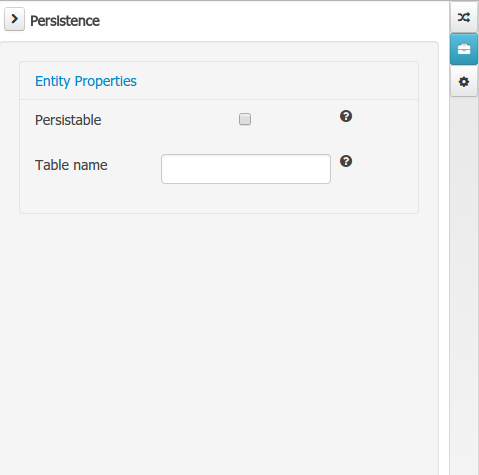
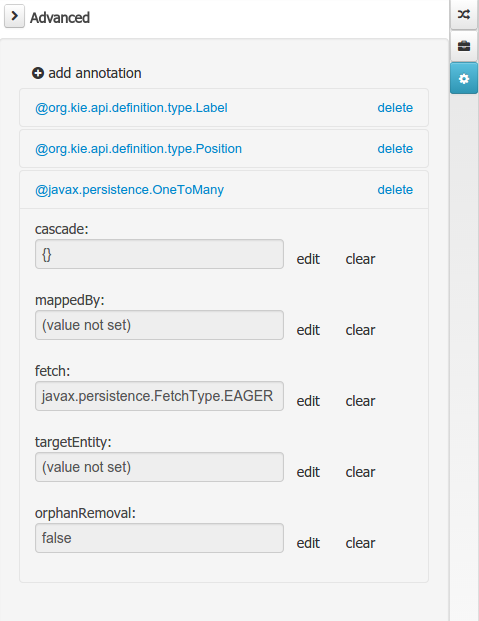
The "Source" tab shows an editor that allows the visualization and modification of the generated java code.
Round trip between the "Editor" and "Source" tabs is possible, and also source code preservation is provided. It means that no matter where the Java code was generated (e.g. Eclipse, Data modeller), the data modeller will only update the necessary code blocks to maintain the model updated.
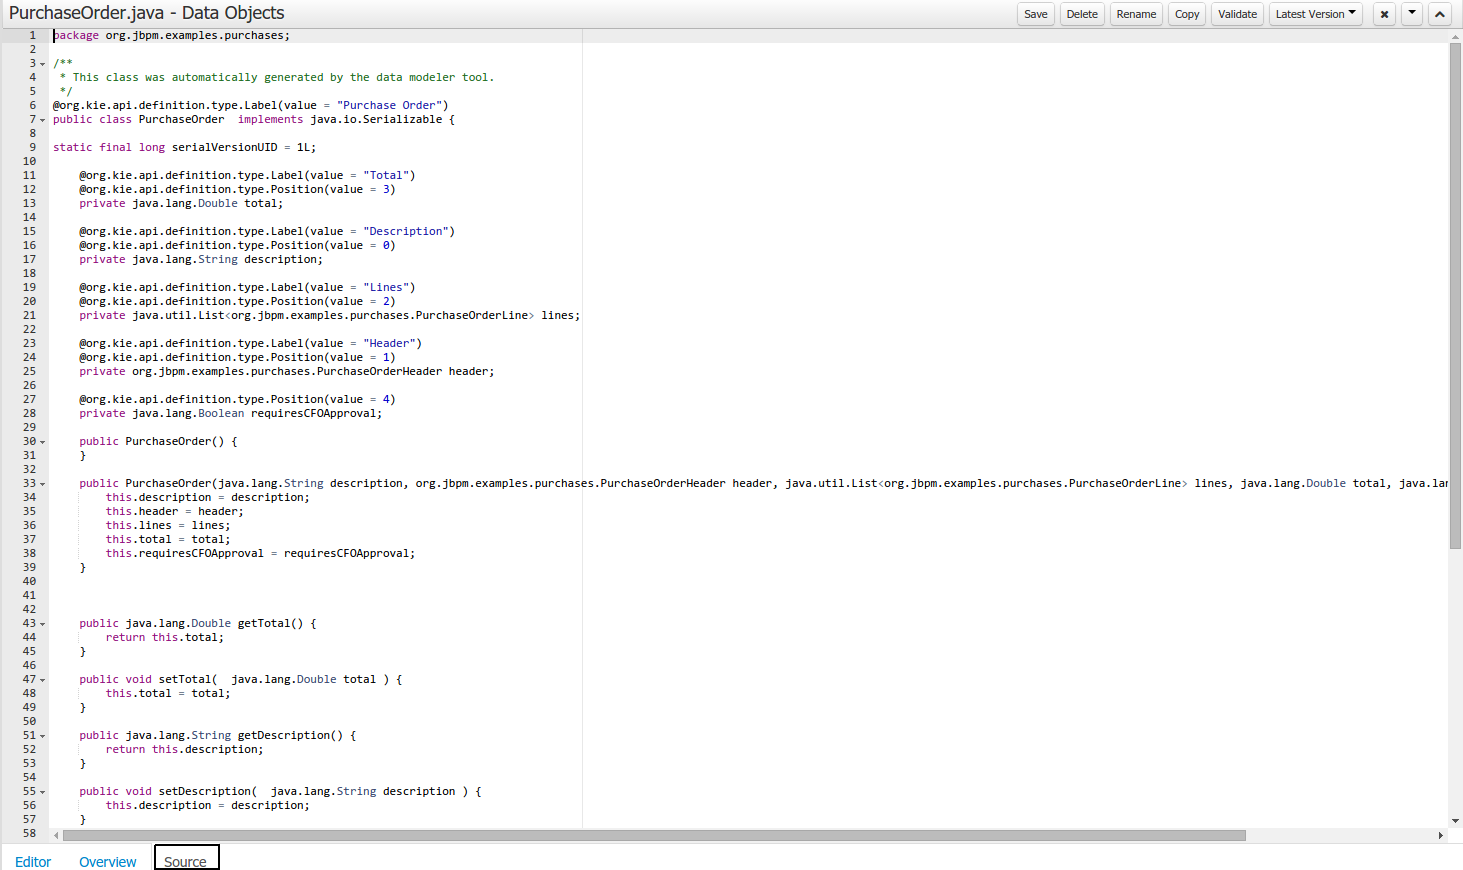
The "Overview" tab shows the standard metadata and version information as the other workbench editors.
A data model consists of data objects which are a logical representation of some real-world data. Such data objects have a fixed set of modeller (or application-owned) properties, such as its internal identifier, a label, description, package etc. Besides those, a data object also has a variable set of user-defined fields, which are an abstraction of a real-world property of the type of data that this logical data object represents.
Creating a data object can be achieved using the workbench "New Item - Data Object" menu option.
Both resource name and location are mandatory parameters. When the "Ok" button is pressed a new Java file will be created and a new editor instance will be opened for the file edition. The optional "Persistable" attribute will add by default configurations on the data object in order to make it a JPA entity. Use this option if your jBPM project needs to store data object's information in a data base.
Once the data object has been created, it now has to be completed by adding user-defined properties to its definition. This can be achieved by pressing the "add field" button. The "New Field" dialog will be opened and the new field can be created by pressing the "Create" button. The "Create and continue" button will also add the new field to the Data Object, but won't close the dialog. In this way multiple fields can be created avoiding the popup opening multiple times. The following fields can (or must) be filled out:
The field's internal identifier (mandatory). The value of this field must be unique per data object, i.e. if the proposed identifier already exists within current data object, an error message will be displayed.
A label (optional): as with the data object definition, the user can define a user-friendly label for the data object field which is about to be created. This has no further implications on how fields from objects of this data object will be treated. If a label is defined, then this is how the field will be displayed throughout the data modeller tool.
A field type (mandatory): each data object field needs to be assigned with a type.
This type can be either of the following:
A 'primitive java object' type: these include most of the object equivalents of the standard Java primitive types, such as Boolean, Short, Float, etc, as well as String, Date, BigDecimal and BigInteger.
A 'data object' type: any user defined data object automatically becomes a candidate to be defined as a field type of another data object, thus enabling the creation of relationships between them. A data object field can be created either in 'single' or in 'multiple' form, the latter implying that the field will be defined as a collection of this type, which will be indicated by selecting "List" checkbox.
A 'primitive java' type: these include java primitive types byte, short, int, long, float, double, char and boolean.

When finished introducing the initial information for a new field, clicking the 'Create' button will add the newly created field to the end of the data object's fields table below:
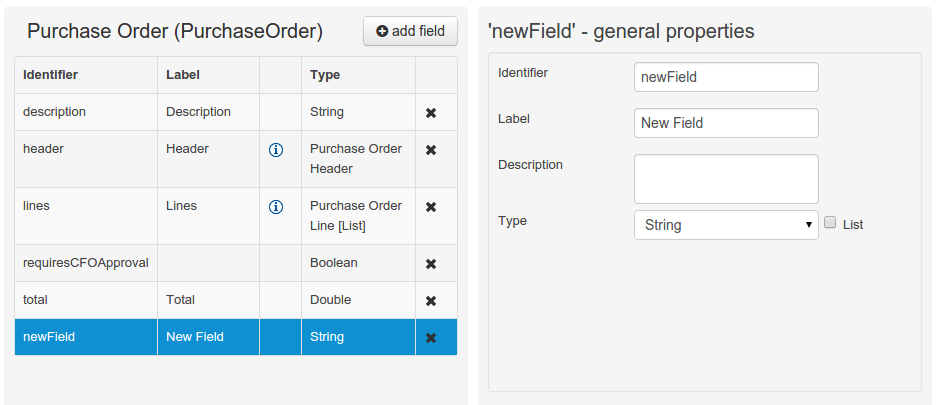
The new field will also automatically be selected in the data object's field list, and its properties will be shown in the Field general properties editor. Additionally the field properties will be loaded in the different tool windows, in this way the field will be ready for edition in whatever selected tool window.
At any time, any field (without restrictions) can be deleted from a data object definition by clicking on the corresponding 'x' icon in the data object's fields table.
As stated before, both Data Objects as well as Fields require some of their initial properties to be set upon creation. Additionally there are three domains of properties that can be configured for a given Data Object. A domain is basically a set of properties related to a given business area. Current available domains are, "Drools & jJBPM", "Persistence" and the "Advanced" domain. To work on a given domain the user should select the corresponding "Tool window" (see below) on the right side toolbar. Every tool window usually provides two editors, the "Data Object" level editor and the "Field" level editor, that will be shown depending on the last selected item, the Data Object or the Field.
The Drools & jBPM domain editors manages the set of Data Object or Field properties related to drools applications.
The Drools & jBPM object editor manages the object level drools properties
TypeSafe: this property allows to enable/disable the type safe behaviour for current type. By default all type declarations are compiled with type safety enabled. (See Drools for more information on this matter).
ClassReactive: this property allows to mark this type to be treated as "Class Reactive" by the Drools engine. (See Drools for more information on this matter).
PropertyReactive: this property allows to mark this type to be treated as "Property Reactive" by the Drools engine. (See Drools for more information on this matter).
Role: this property allows to configure how the Drools engine should handle instances of this type: either as regular facts or as events. By default all types are handled as a regular fact, so for the time being the only value that can be set is "Event" to declare that this type should be handled as an event. (See Drools Fusion for more information on this matter).
Timestamp: this property allows to configure the "timestamp" for an event, by selecting one of his attributes. If set the engine will use the timestamp from the given attribute instead of reading it from the Session Clock. If not, the engine will automatically assign a timestamp to the event. (See Drools Fusion for more information on this matter).
Duration: this property allows to configure the "duration" for an event, by selecting one of his attributes. If set the engine will use the duration from the given attribute instead of using the default event duration = 0. (See Drools Fusion for more information on this matter).
Expires: this property allows to configure the "time offset" for an event expiration. If set, this value must be a temporal interval in the form: [#d][#h][#m][#s][#[ms]] Where [ ] means an optional parameter and # means a numeric value. e.g.: 1d2h, means one day and two hours. (See Drools Fusion for more information on this matter).
Remotable: If checked this property makes the Data Object available to be used with jBPM remote services as REST, JMS and WS. (See jBPM for more information on this matter).
The Drools & jBPM object editor manages the field level drools properties
Equals: checking this property for a Data Object field implies that it will be taken into account, at the code generation level, for the creation of both the equals() and hashCode() methods in the generated Java class. We will explain this in more detail in the following section.
Position: this field requires a zero or positive integer. When set, this field will be interpreted by the Drools engine as a positional argument (see the section below and also the Drools documentation for more information on this subject).
The Persistence domain editors manages the set of Data Object or Field properties related to persistence.
Persistence domain object editor manages the object level persistence properties
Persistable: this property allows to configure current Data Object as persistable.
Table name: this property allows to set a user defined database table name for current Data Object.
The persistence domain field editor manages the field level persistence properties and is divided in three sections.
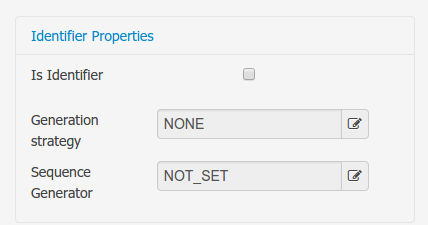
A persistable Data Object should have one and only one field defined as the Data Object identifier. The identifier is typically a unique number that distinguishes a given Data Object instance from all other instances of the same class.
Is Identifier: marks current field as the Data Object identifier. A persistable Data Object should have one and only one field marked as identifier, and it should be a base java type, like String, Integer, Long, etc. A field that references a Data Object, or is a multiple field can not be marked as identifier. And also composite identifiers are not supported in this version. When a persistable Data Object is created an identifier field is created by default with the properly initializations, it's strongly recommended to use this identifier.
Generation Strategy: the generation strategy establishes how the identifier values will be automatically generated when the Data Object instances are created and stored in a database. (e.g. by the forms associated to jBPM processes human tasks.) When the by default Identifier field is created, the generation strategy will be also automatically set and it's strongly recommended to use this configuration.
Sequence Generator: the generator represents the seed for the values that will be used by the Generation Strategy. When the by default Identifier field is created the Sequence Generator will be also automatically generated and properly configured to be used by the Generation Strategy.
The column properties section enables the customization of some properties of the database column that will store the field value.
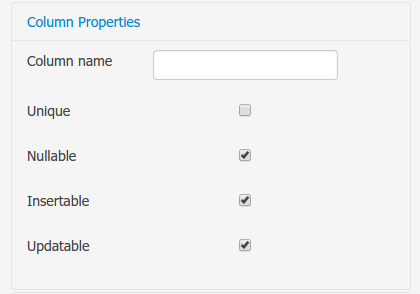
Column name: optional value that sets the database column name for the given field.
Unique: When checked the unique property establishes that current field value should be a unique key when stored in the database. (if not set the default value is false)
Nullable: When checked establishes that current field value can be null when stored in a database. (if not set the default value is true)
Insertable: When checked establishes that column will be included in SQL INSERT statements generated by the persistence provider. (if not set the default value is true)
Updatable: When checked establishes that the column will be included SQL UPDATE statements generated by the persistence provider. (if not set the default value is true)
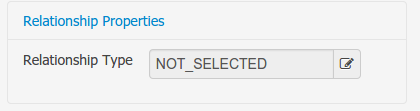
When the field's type is a Data Object type, or a list of a Data Object type a relationship type should be set in order to let the persistence provider to manage the relation. Fortunately this relation type is automatically set when such kind of fields are added to an already marked as persistable Data Object. The relationship type is set by the following popup.
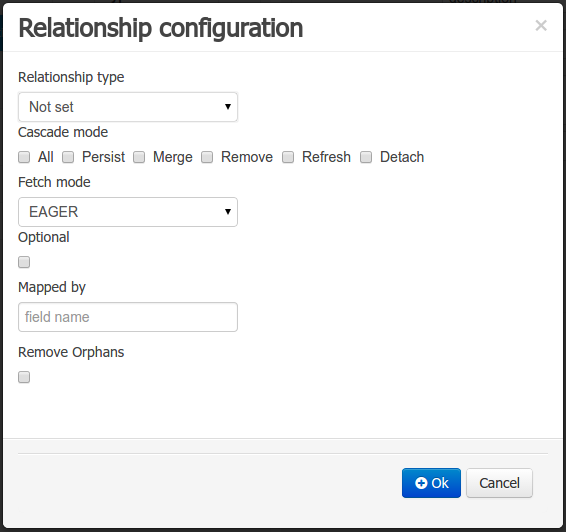
Relationship type: sets the type of relation from one of the following options:
One to one: typically used for 1:1 relations where "A is related to one instance of B", and B exists only when A exists. e.g. PurchaseOrder -> PurchaseOrderHeader (a PurchaseOrderHeader exists only if the PurchaseOrder exists)
One to many: typically used for 1:N relations where "A is related to N instances of B", and the related instances of B exists only when A exists. e.g. PurchaseOrder -> PurchaseOrderLine (a PurchaseOrderLine exists only if the PurchaseOrder exists)
Many to one: typically used for 1:1 relations where "A is related to one instance of B", and B can exist even without A. e.g. PurchaseOrder -> Client (a Client can exist in the database even without an associated PurchaseOrder)
Many to many: typically used for N:N relations where "A can be related to N instances of B, and B can be related to M instances of A at the same time", and both B an A instances can exits in the database independently of the related instances. e.g. Course -> Student. (Course can be related to N Students, and a given Student can attend to M courses)
When a field of type "Data Object" is added to a given persistable Data Object, the "Many to One" relationship type is generated by default.
And when a field of type "list of Data Object" is added to a given persistable Data Object , the "One to Many" relationship is generated by default.
Cascade mode: Defines the set of cascadable operations that are propagated to the associated entity. The value cascade=ALL is equivalent to cascade={PERSIST, MERGE, REMOVE, REFRESH}. e.g. when A -> B, and cascade "PERSIST or ALL" is set, if A is saved, then B will be also saved.
The by default cascade mode created by the data modeller is "ALL" and it's strongly recommended to use this mode when Data Objects are being used by jBPM processes and forms.
Fetch mode: Defines how related data will be fetched from database at reading time.
EAGER: related data will be read at the same time. e.g. If A -> B, when A is read from database B will be read at the same time.
LAZY: reading of related data will be delayed usually to the moment they are required. e.g. If PurchaseOrder -> PurchaseOrderLine the lines reading will be postponed until a method "getLines()" is invoked on a PurchaseOrder instance.
The default fetch mode created by the data modeller is "EAGER" and it's strongly recommended to use this mode when Data Objects are being used by jBPM processes and forms.
Optional: establishes if the right side member of a relationship can be null.
Mapped by: used for reverse relations.
The advanced domain enables the configuration of whatever parameter set by the other domains as well as the adding of arbitrary parameters. As it will be shown in the code generation section every "Data Object / Field" parameter is represented by a java annotation. The advanced mode enables the configuration of this annotations.
The advanced domain editor has the same shape for both Data Object and Field.
The following operations are available
delete: enables the deletion of a given Data Object or Field annotation.
clear: clears a given annotation parameter value.
edit: enables the edition of a given annotation parameter value.
add annotation: The add annotation button will start a wizard that will let the addition of whatever java annotation available in the project dependencies.
Add annotation wizard step #1: the first step of the wizard requires the entering of a fully qualified class name of an annotation, and by pressing the "search" button the annotation definition will be loaded into the wizard. Additionally when the annotation definition is loaded, different wizard steps will be created in order to enable the completion of the different annotation parameters. Required parameters will be marked with "*".
Whenever it's possible the wizard will provide a suitable editor for the given parameters.
A generic parameter editor will be provided when it's not possible to calculate a customized editor
When all required parameters have been entered and validated, the finish button will be enabled and the wizard can be completed by adding the annotation to the given Data Object or Field.
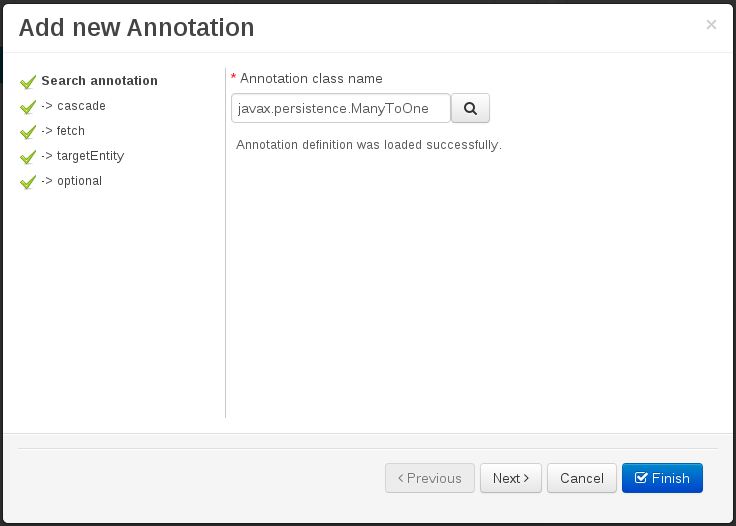
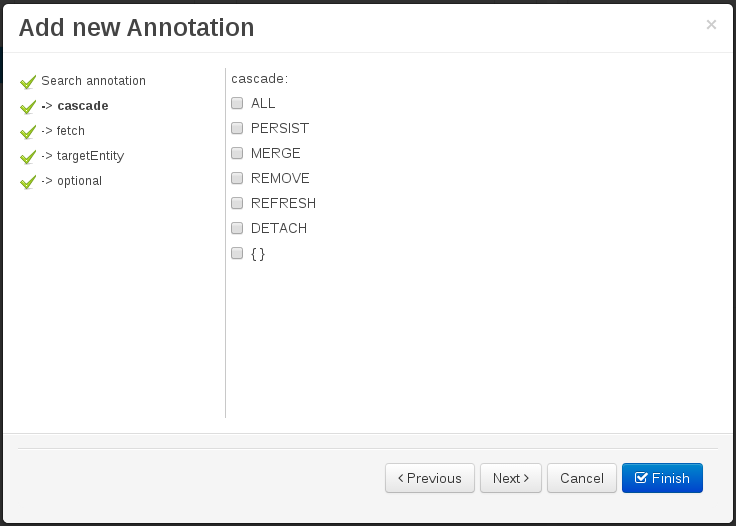
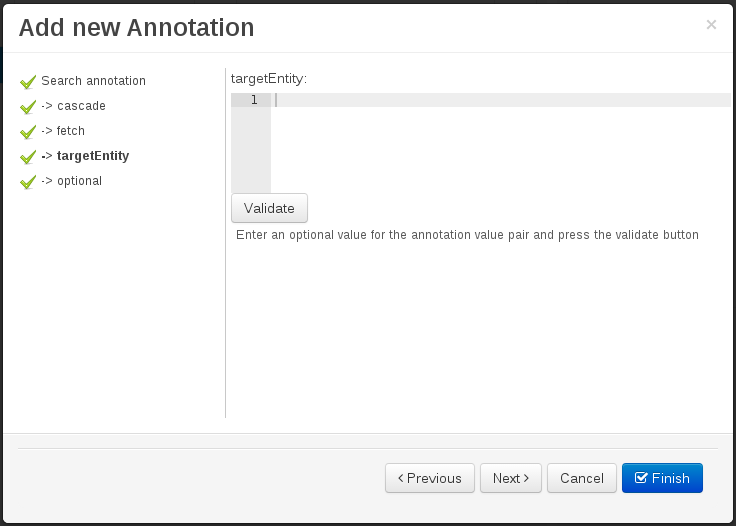
The data model in itself is merely a visual tool that allows the user to define high-level data structures, for them to interact with the Drools Engine on the one hand, and the jBPM platform on the other. In order for this to become possible, these high-level visual structures have to be transformed into low-level artifacts that can effectively be consumed by these platforms. These artifacts are Java POJOs (Plain Old Java Objects), and they are generated every time the data model is saved, by pressing the "Save" button in the top Data Modeller Menu. Additionally when the user round trip between the "Editor" and "Source" tab, the code is auto generated to maintain the consistency with the Editor view and vice versa.

The resulting code is generated according to the following transformation rules:
The data object's identifier property will become the Java class's name. It therefore needs to be a valid Java identifier.
The data object's package property becomes the Java class's package declaration.
The data object's superclass property (if present) becomes the Java class's extension declaration.
The data object's label and description properties will translate into the Java annotations "@org.kie.api.definition.type.Label" and "@org.kie.api.definition.type.Description", respectively. These annotations are merely a way of preserving the associated information, and as yet are not processed any further.
The data object's role property (if present) will be translated into the "@org.kie.api.definition.type.Role" Java annotation, that IS interpreted by the application platform, in the sense that it marks this Java class as a Drools Event Fact-Type.
The data object's type safe property (if present) will be translated into the "@org.kie.api.definition.type.TypeSafe Java annotation. (see Drools)
The data object's class reactive property (if present) will be translated into the "@org.kie.api.definition.type.ClassReactive Java annotation. (see Drools)
The data object's property reactive property (if present) will be translated into the "@org.kie.api.definition.type.PropertyReactive Java annotation. (see Drools)
The data object's timestamp property (if present) will be translated into the "@org.kie.api.definition.type.Timestamp Java annotation. (see Drools)
The data object's duration property (if present) will be translated into the "@org.kie.api.definition.type.Duration Java annotation. (see Drools)
The data object's expires property (if present) will be translated into the "@org.kie.api.definition.type.Expires Java annotation. (see Drools)
The data object's remotable property (if present) will be translated into the "@org.kie.api.remote.Remotable Java annotation. (see jBPM)
A standard Java default (or no parameter) constructor is generated, as well as a full parameter constructor, i.e. a constructor that accepts as parameters a value for each of the data object's user-defined fields.
The data object's user-defined fields are translated into Java class fields, each one of them with its own getter and setter method, according to the following transformation rules:
The data object field's identifier will become the Java field identifier. It therefore needs to be a valid Java identifier.
The data object field's type is directly translated into the Java class's field type. In case the field was declared to be multiple (i.e. 'List'), then the generated field is of the "java.util.List" type.
The equals property: when it is set for a specific field, then this class property will be annotated with the "@org.kie.api.definition.type.Key" annotation, which is interpreted by the Drools Engine, and it will 'participate' in the generated equals() method, which overwrites the equals() method of the Object class. The latter implies that if the field is a 'primitive' type, the equals method will simply compare its value with the value of the corresponding field in another instance of the class. If the field is a sub-entity or a collection type, then the equals method will make a method-call to the equals method of the corresponding data object's Java class, or of the java.util.List standard Java class, respectively.
If the equals property is checked for ANY of the data object's user defined fields, then this also implies that in addition to the default generated constructors another constructor is generated, accepting as parameters all of the fields that were marked with Equals. Furthermore, generation of the equals() method also implies that also the Object class's hashCode() method is overwritten, in such a manner that it will call the hashCode() methods of the corresponding Java class types (be it 'primitive' or user-defined types) for all the fields that were marked with Equals in the Data Model.
The position property: this field property is automatically set for all user-defined fields, starting from 0, and incrementing by 1 for each subsequent new field. However the user can freely change the position among the fields. At code generation time this property is translated into the "@org.kie.api.definition.type.Position" annotation, which can be interpreted by the Drools Engine. Also, the established property order determines the order of the constructor parameters in the generated Java class.
As an example, the generated Java class code for the Purchase Order data object, corresponding to its definition as shown in the following figure purchase_example.jpg is visualized in the figure at the bottom of this chapter. Note that the two of the data object's fields, namely 'header' and 'lines' were marked with Equals, and have been assigned with the positions 2 and 1, respectively).
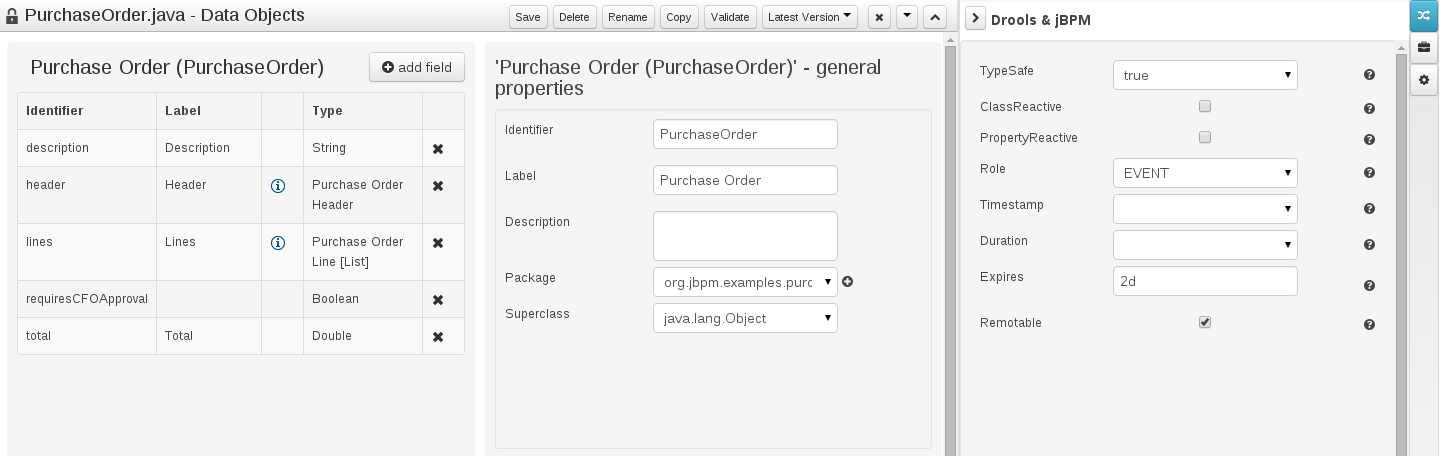
    package org.jbpm.examples.purchases;

    /**
    * This class was automatically generated by the data modeler tool.
    */
    @org.kie.api.definition.type.Label("Purchase Order")
    @org.kie.api.definition.type.TypeSafe(true)
    @org.kie.api.definition.type.Role(org.kie.api.definition.type.Role.Type.EVENT)
    @org.kie.api.definition.type.Expires("2d")
    @org.kie.api.remote.Remotable
    public class PurchaseOrder implements java.io.Serializable
    {

    static final long serialVersionUID = 1L;

    @org.kie.api.definition.type.Label("Total")
    @org.kie.api.definition.type.Position(3)
    private java.lang.Double total;

    @org.kie.api.definition.type.Label("Description")
    @org.kie.api.definition.type.Position(0)
    private java.lang.String description;

    @org.kie.api.definition.type.Label("Lines")
    @org.kie.api.definition.type.Position(2)
    @org.kie.api.definition.type.Key
    private java.util.List<org.jbpm.examples.purchases.PurchaseOrderLine> lines;

    @org.kie.api.definition.type.Label("Header")
    @org.kie.api.definition.type.Position(1)
    @org.kie.api.definition.type.Key
    private org.jbpm.examples.purchases.PurchaseOrderHeader header;

    @org.kie.api.definition.type.Position(4)
    private java.lang.Boolean requiresCFOApproval;

    public PurchaseOrder()
    {
    }

    public java.lang.Double getTotal()
    {
    return this.total;
    }

    public void setTotal(java.lang.Double total)
    {
    this.total = total;
    }

    public java.lang.String getDescription()
    {
    return this.description;
    }

    public void setDescription(java.lang.String description)
    {
    this.description = description;
    }

    public java.util.List<org.jbpm.examples.purchases.PurchaseOrderLine> getLines()
    {
    return this.lines;
    }

    public void setLines(java.util.List<org.jbpm.examples.purchases.PurchaseOrderLine> lines)
    {
    this.lines = lines;
    }

    public org.jbpm.examples.purchases.PurchaseOrderHeader getHeader()
    {
    return this.header;
    }

    public void setHeader(org.jbpm.examples.purchases.PurchaseOrderHeader header)
    {
    this.header = header;
    }

    public java.lang.Boolean getRequiresCFOApproval()
    {
    return this.requiresCFOApproval;
    }

    public void setRequiresCFOApproval(java.lang.Boolean requiresCFOApproval)
    {
    this.requiresCFOApproval = requiresCFOApproval;
    }

    public PurchaseOrder(java.lang.Double total, java.lang.String description,
    java.util.List<org.jbpm.examples.purchases.PurchaseOrderLine> lines,
    org.jbpm.examples.purchases.PurchaseOrderHeader header,
    java.lang.Boolean requiresCFOApproval)
    {
    this.total = total;
    this.description = description;
    this.lines = lines;
    this.header = header;
    this.requiresCFOApproval = requiresCFOApproval;
    }

    public PurchaseOrder(java.lang.String description,
    org.jbpm.examples.purchases.PurchaseOrderHeader header,
    java.util.List<org.jbpm.examples.purchases.PurchaseOrderLine> lines,
    java.lang.Double total, java.lang.Boolean requiresCFOApproval)
    {
    this.description = description;
    this.header = header;
    this.lines = lines;
    this.total = total;
    this.requiresCFOApproval = requiresCFOApproval;
    }

    public PurchaseOrder(
    java.util.List<org.jbpm.examples.purchases.PurchaseOrderLine> lines,
    org.jbpm.examples.purchases.PurchaseOrderHeader header)
    {
    this.lines = lines;
    this.header = header;
    }

    @Override
    public boolean equals(Object o)
    {
    if (this == o)
    return true;
    if (o == null || getClass() != o.getClass())
    return false;
    org.jbpm.examples.purchases.PurchaseOrder that = (org.jbpm.examples.purchases.PurchaseOrder) o;
    if (lines != null ? !lines.equals(that.lines) : that.lines != null)
    return false;
    if (header != null ? !header.equals(that.header) : that.header != null)
    return false;
    return true;
    }

    @Override
    public int hashCode()
    {
    int result = 17;
    result = 31 * result + (lines != null ? lines.hashCode() : 0);
    result = 31 * result + (header != null ? header.hashCode() : 0);
    return result;
    }

    }
Using an external model means the ability to use a set for already defined POJOs in current project context. In order to make those POJOs available a dependency to the given JAR should be added. Once the dependency has been added the external POJOs can be referenced from current project data model.
There are two ways to add a dependency to an external JAR file:
Dependency to a JAR file already installed in current local M2 repository (typically associated the the user home).
Dependency to a JAR file installed in current KIE Workbench/Drools Workbench "Guvnor M2 repository". (internal to the application)
To add a dependency to a JAR file in local M2 repository follow these steps.
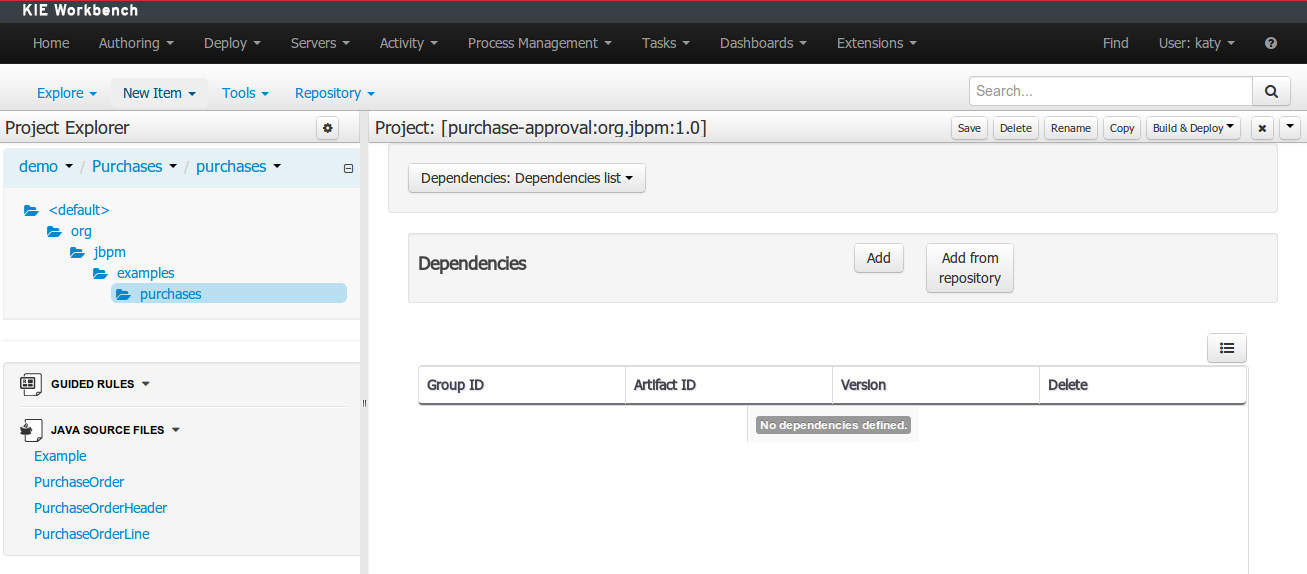

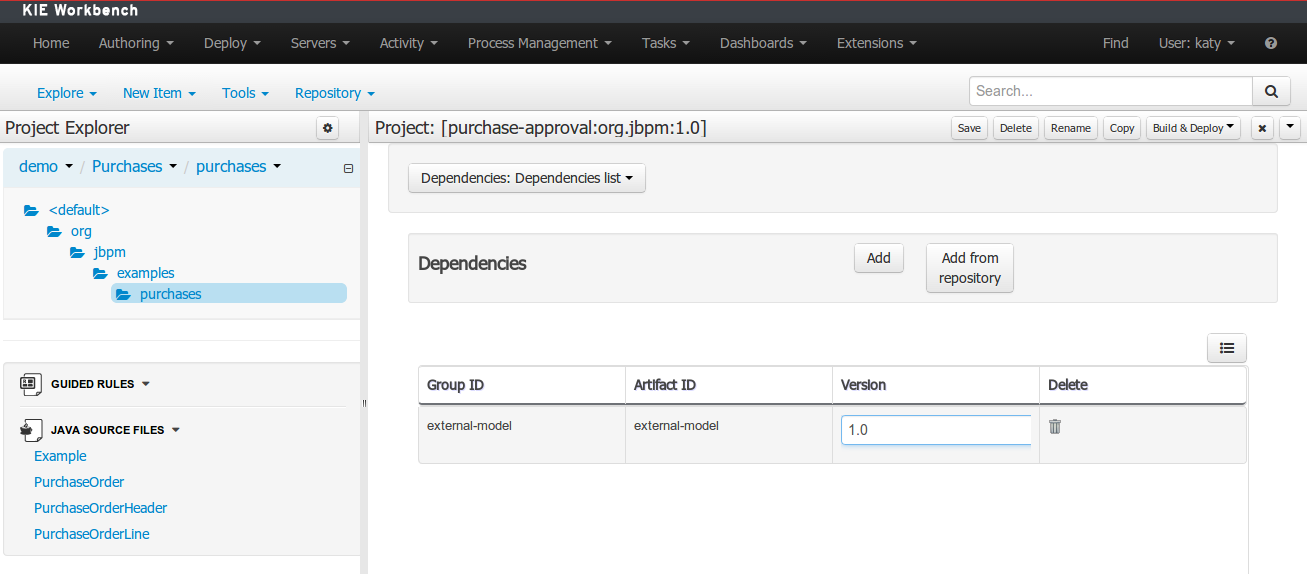
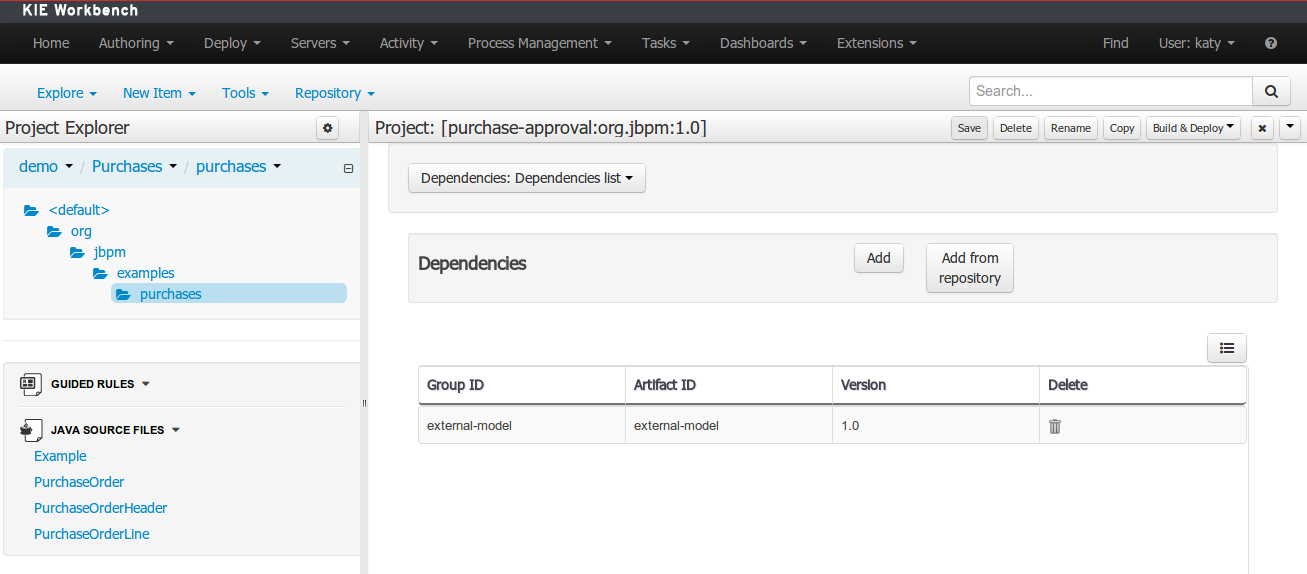
To add a dependency to a JAR file in current "Guvnor M2 repository" follow these steps.
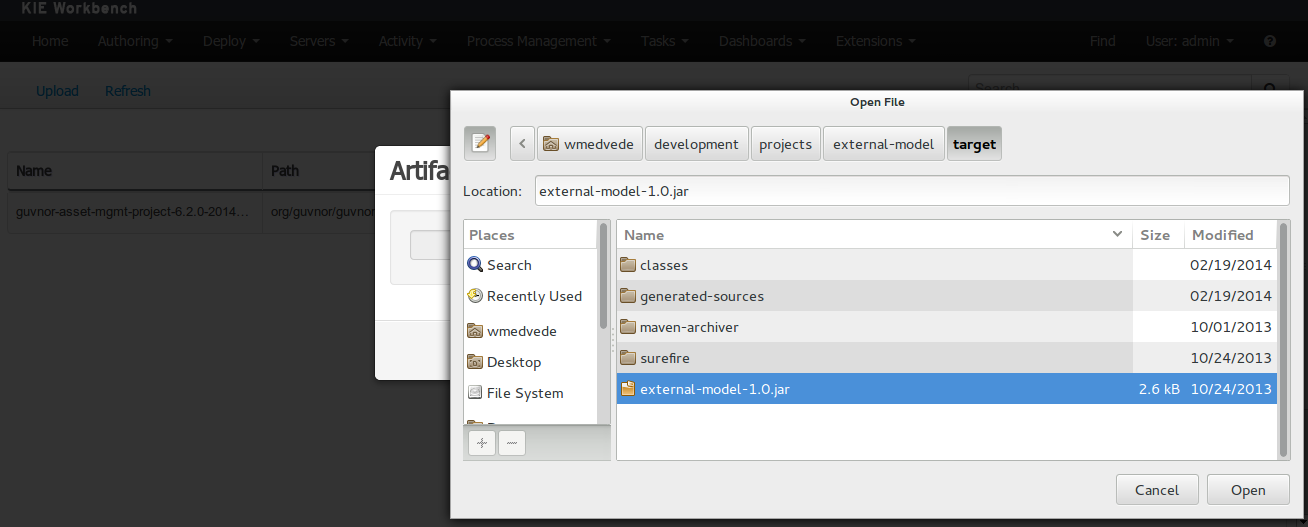
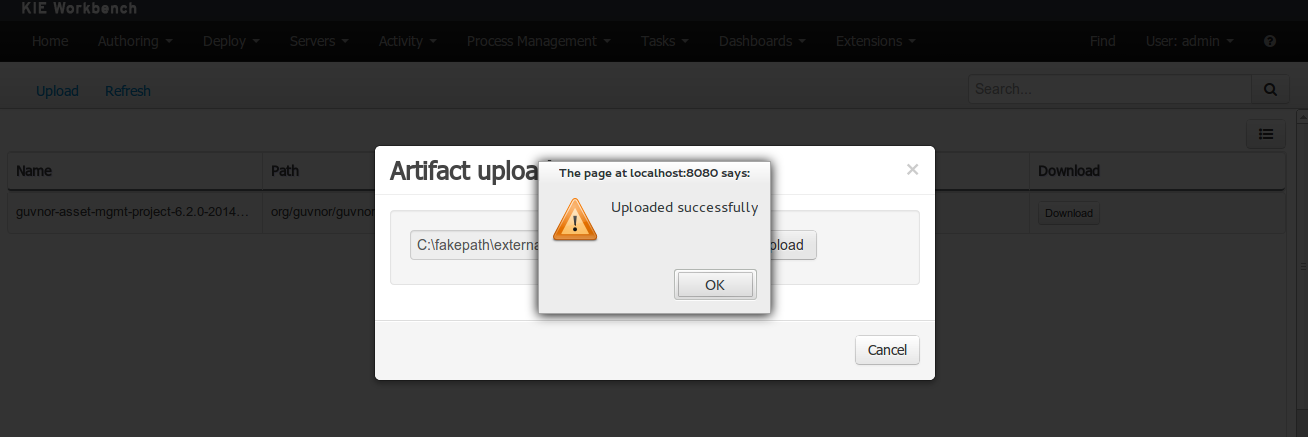
Once the file has been loaded it will be displayed in the repository files list.
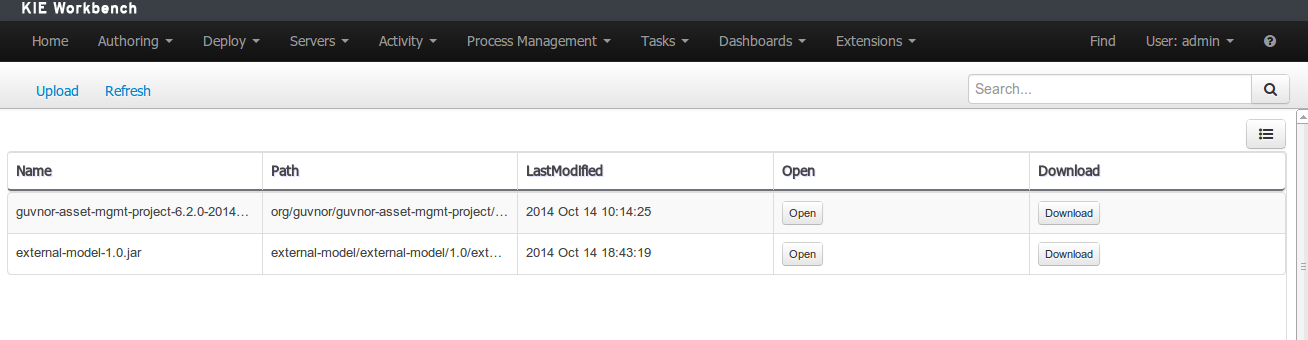
If the uploaded file is not a valid Maven JAR (don't have a pom.xml file) the system will prompt the user in order to provide a GAV for the file to be installed.
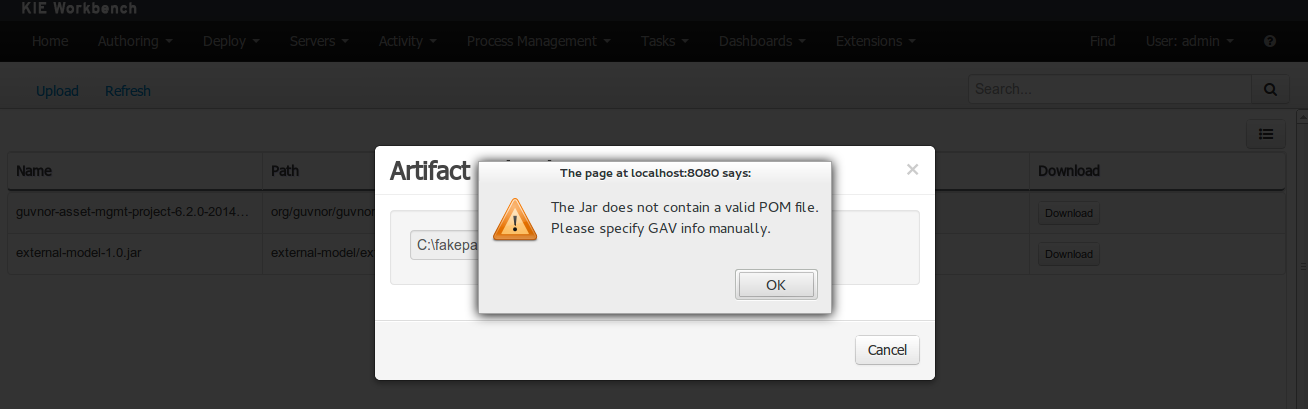
Open the project editor (see below) and click on the "Add from repository" button to open the JAR selector to see all the installed JAR files in current "Guvnor M2 repository". When the desired file is selected the project should be saved in order to make the new dependency available.
When a dependency to an external JAR has been set, the external POJOs can be used in the context of current project data model in the following ways:
External POJOs can be extended by current model data objects.
External POJOs can be used as field types for current model data objects.
The following screenshot shows how external objects are prefixed with the string " -ext- " in order to be quickly identified.
Current version implements roundtrip and code preservation between Data modeller and Java source code. No matter where the Java code was generated (e.g. Eclipse, Data modeller), the data modeller will only create/delete/update the necessary code elements to maintain the model updated, i.e, fields, getter/setters, constructors, equals method and hashCode method. Also whatever Type or Field annotation not managed by the Data Modeler will be preserved when the Java sources are updated by the Data modeller.
Aside from code preservation, like in the other workbench editors, concurrent modification scenarios are still possible. Common scenarios are when two different users are updating the model for the same project, e.g. using the data modeller or executing a 'git push command' that modifies project sources.
From an application context's perspective, we can basically identify two different main scenarios:
In this scenario the application user has basically just been navigating through the data model, without making any changes to it. Meanwhile, another user modifies the data model externally.
In this case, no immediate warning is issued to the application user. However, as soon as the user tries to make any kind of change, such as add or remove data objects or properties, or change any of the existing ones, the following pop-up will be shown:
The user can choose to either:
Re-open the data model, thus loading any external changes, and then perform the modification he was about to undertake, or
Ignore any external changes, and go ahead with the modification to the model. In this case, when trying to persist these changes, another pop-up warning will be shown:
The "Force Save" option will effectively overwrite any external changes, while "Re-open" will discard any local changes and reload the model.
Warning
"Force Save" overwrites any external changes!

The application user has made changes to the data model. Meanwhile, another user simultaneously modifies the data model from outside the application context.
In this alternative scenario, immediately after the external user commits his changes to the asset repository (or e.g. saves the model with the data modeller in a different session), a warning is issued to the application user:
As with the previous scenario, the user can choose to either:
Re-open the data model, thus losing any modifications that where made through the application, or
Ignore any external changes, and continue working on the model.
One of the following possibilities can now occur:
The user tries to persist the changes he made to the model by clicking the "Save" button in the data modeller top level menu. This leads to the following warning message:
The "Force Save" option will effectively overwrite any external changes, while "Re-open" will discard any local changes and reload the model.
A data set is basically a set of columns populated with some rows, a matrix of data composed of timestamps, texts and numbers. A data set can be stored in different systems: a database, an excel file, in memory or in a lot of other different systems. On the other hand, a data set definition tells the workbench modules how such data can be accessed, read and parsed.
Notice, it's very important to make crystal clear the difference between a data set and its definition since the workbench does not take care of storing any data, it just provides a standard way to define access to those data sets regardless where the data is stored.
Let's take for instance the data stored in a remote database. A valid data set could be, for example, an entire database table or the result of an SQL query. In both cases, the database will return a bunch of columns and rows. Now, imagine we want to get access to such data to feed some charts in a new workbench perspective. First thing is to create and register a data set definition in order to indicate the following:
where the data set is stored,
how can be accessed, read and parsed and
what columns contains and of which type.
This chapter introduces the available workbench tools for registering and handling data set definitions and how these definitions can be consumed in other workbench modules like, for instance, the Perspective Editor.
Note
For simplicity sake we will be using the term data set to refer to the actual data set definitions as Data set and Data set definition can be considered synonyms under the data set authoring context.
Everything related to the authoring of data sets can be found under the Data Set Authoring perspective which is accessible from the following top level menu entry: Extensions>Data Sets, as shown in the following screenshot.
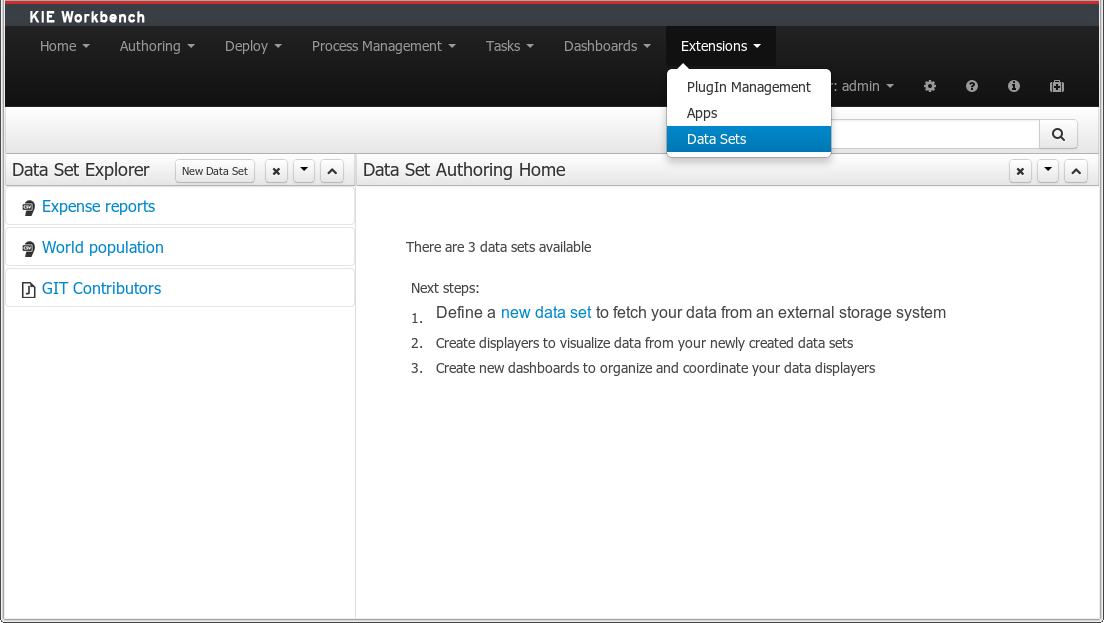
The center panel, shows a welcome screen, whilst the left panel contains the Data Set Explorer listing all the data sets available
Note
This perspective is only intended to Administrator users, since defining data sets can be considered a low level task.
The Data Set Explorer lists the data sets present in the system. Every time the user clicks on the data set it shows a brief summary alongside the following information:
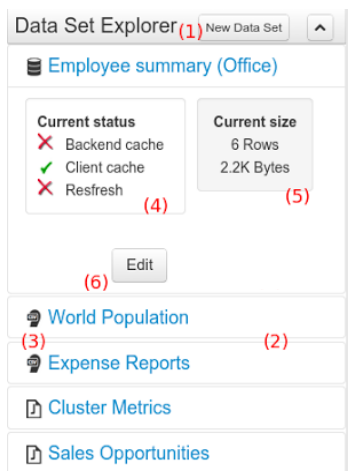
(1) A button for creating a new Data set
(2) The list of currently available Data sets
(3) An icon that represents the Data set's provider type (Bean, SQL, CSV, etc)
(4) Details of current cache and refresh policy status
(5) Details of current size on backend (unit as rows) and current size on client side (unit in bytes)
(6) The button for editing the Data set. Once clicked the Data set editor screen is opened on the center panel
The next sections explain how to create, edit and fine tune data set definitions.
Clicking on the New Data Set button opens a new screen from which the user is able to create a new data set definition in three steps:
Provider type selection
Specify the kind of the remote storage system (BEAN, SQL, CSV, ElasticSearch)
Provider configuration
Specify the attributes for being able to look up data from the remote system. The configuration varies depending on the data provider type selected.
Data set columns & filter
Live data preview, column types and initial filter configuration.
Allows the user's specify the type of data provider of the data set being created.
This screen lists all the current available data provider types and helper popovers with descriptions. Each data provider is represented with a descriptive image:
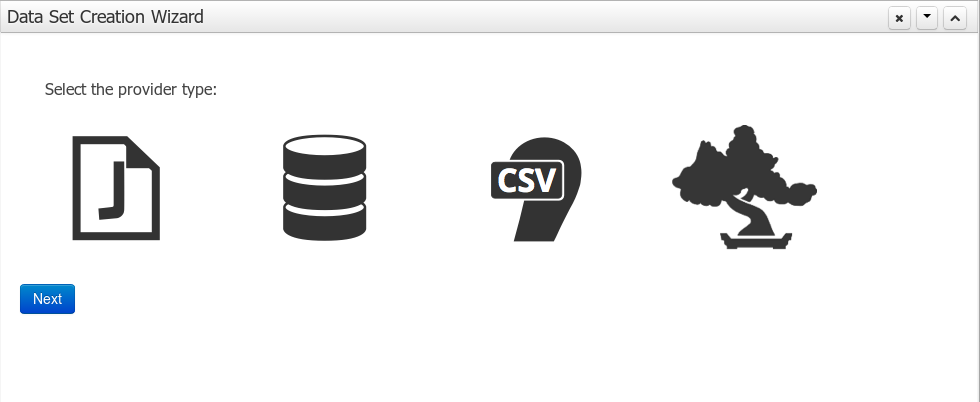
Four types are currently supported:
Bean (Java class) - To generate a data set directly from Java
SQL - For getting data from any ANSI-SQL compliant database
CSV - To upload the contents of a remote or local CSV file
Elastic Search - To query and get documents stored on Elastic Search nodes as data sets
Once a type is selected, click on Next button to continue with the next workflow step.
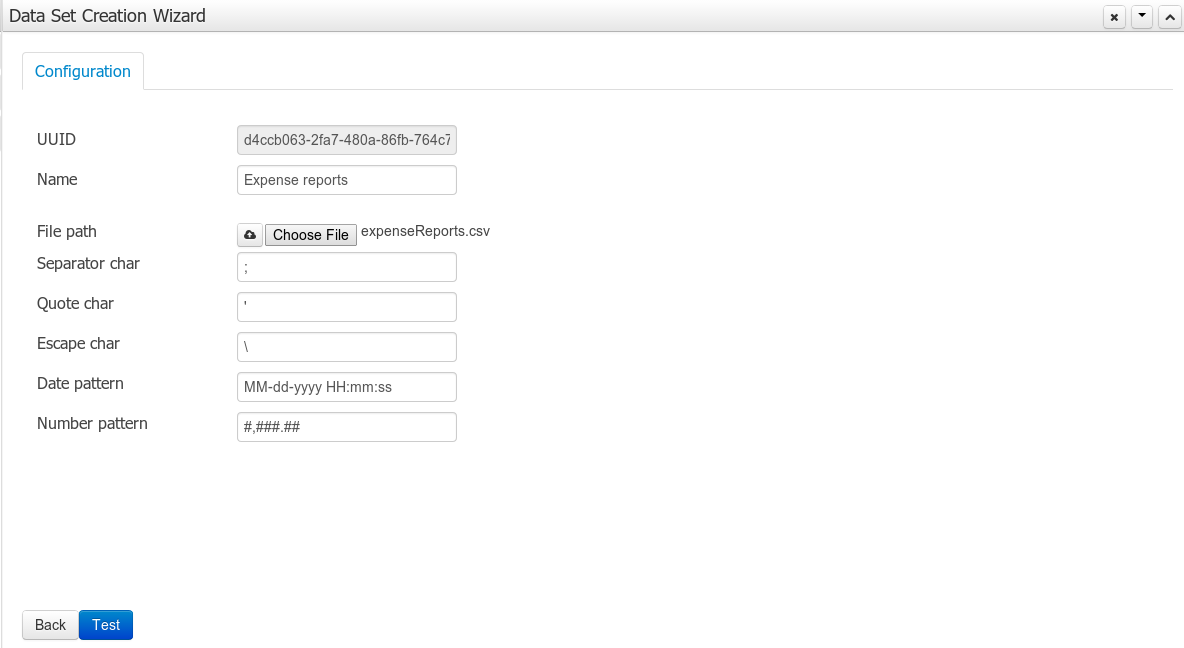
The provider type selected in the previous step will determine which configuration settings the system asks for.
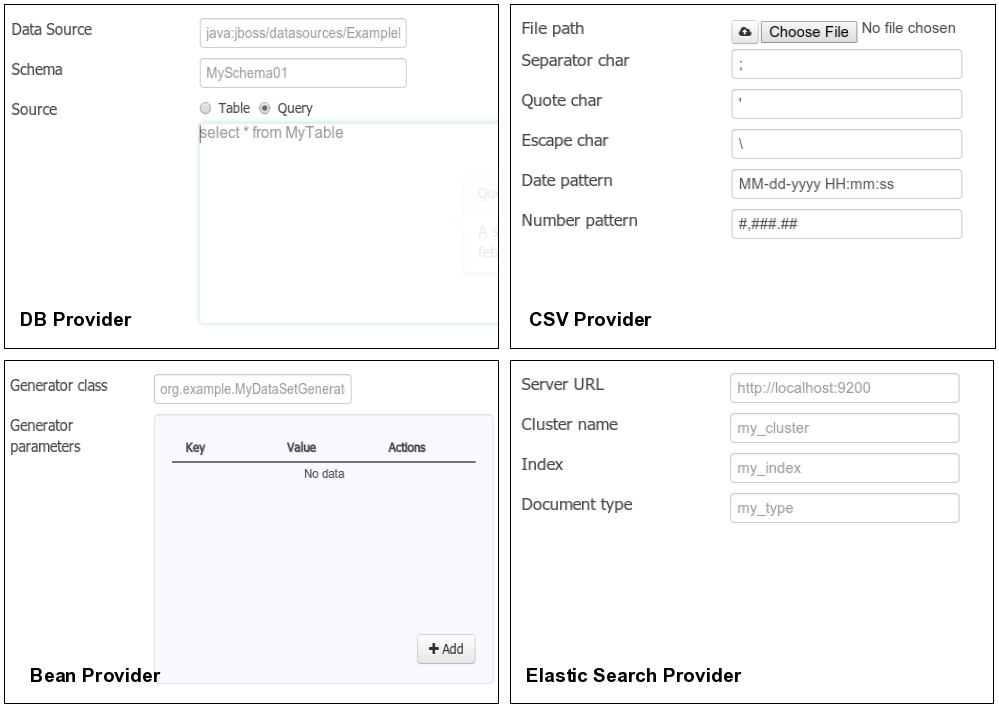
Note
The UUID attribute is a read only field as it's generated by the system. It's only intended for usage in API calls or specific operations.
After clicking on the Test button (see previous step), the system executes a data set lookup test call in order to check if the remote system is up and the data is available. If everything goes ok the user will see the following screen:

This screen shows a live data preview along with the columns the user wants to be part of the resulting data set. The user can also navigate through the data and apply some changes to the data set structure. Once finished, we can click on the Save button in order to register the new data set definition.
We can also change the configuration settings at any time just by going back to the configuration tab. We can repeat the Configuration>Test>Preview cycle as may times as needed until we consider it's ready to be saved.
Columns
In the Columns tab area the user can select what columns are part of the resulting data set definition.
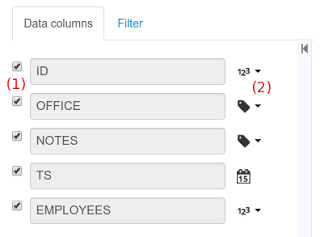
(1) To add or remove columns. Select only those columns you want to be part of the resulting data set
(2) Use the drop down image selector to change the column type
A data set may only contain columns of any of the following 4 types:
Label - For text values supporting group operations (similar to the SQL "group by" operator) which means you can perform data lookup calls and get one row per distinct value.
Text - For text values NOT supporting group operations. Typically for modeling large text columns such as abstracts, descriptions and the like.
Number - For numeric values. It does support aggregation functions on data lookup calls: sum, min, max, average, count, disctinct.
Date - For date or timestamp values. It does support time based group operations by different time intervals: minute, hour, day, month, year, ...
No matter which remote system you want to retrieve data from, the resulting data set will always return a set of columns of one of the four types above. There exists, by default, a mapping between the remote system column types and the data set types. The user is able to modify the type for some columns, depending on the data provider and the column type of the remote system. The system supports the following changes to column types:
Label <> Text - Useful when we want to enable/disable the categorization (grouping) for the target column. For instance, imagine a database table called "document" containing a large text column called "abstract". As we do not want the system to treat such column as a "label" we might change its column type to "text". Doing so, we are optimizing the way the system handles the data set and
Number <> Label - Useful when we want to treat numeric columns as labels. This can be used for instance to indicate that a given numeric column is not a numeric value that can be used in aggregation functions. Despite its values are stored as numbers we want to handle the column as a "label". One example of such columns are: an item's code, an appraisal id., ...
Note
BEAN data sets do not support changing column types as it's up to the developer to decide which are the concrete types for each column.
Filter
A data set definition may define a filter. The goal of the filter is to leave out rows the user does not consider necessary. The filter feature works on any data provider type and it lets the user to apply filter operations on any of the data set columns available.
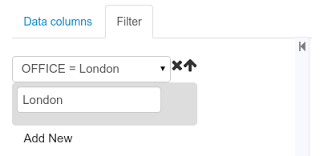
While adding or removing filter conditions and operations, the preview table on central area is updated with live data that reflects the current filter status.
There exists two strategies for filtering data sets and it's also important to note that choosing between the two have important implications. Imagine a dashboard with some charts feeding from a expense reports data set where such data set is built on top of an SQL table. Imagine also we only want to retrieve the expense reports from the "London" office. You may define a data set containing the filter "office=London" and then having several charts feeding from such data set. This is the recommended approach. Another option is to define a data set with no initial filter and then let the individual charts to specify their own filter. It's up to the user to decide on the best approach.
Depending on the case it might be better to define the filter at a data set level for reusing across other modules. The decision may also have impact on the performance since a filtered cached data set will have far better performance than a lot of individual non-cached data set lookup requests. (See the next section for more information about caching data sets).
Note
Notice, for SQL data sets, the user can use both the filter feature introduced or, alternatively, just add custom filter criteria to the SQL sentence. Although, the first approach is more appropriated for non technical users since they might not have the required SQL language skills.
To edit an existing data set definition go the data set explorer, expand the desired data set definition and click on the Edit button. This will cause a new editor panel to be opened and placed on the center of the screen, as shown in the next screenshot:
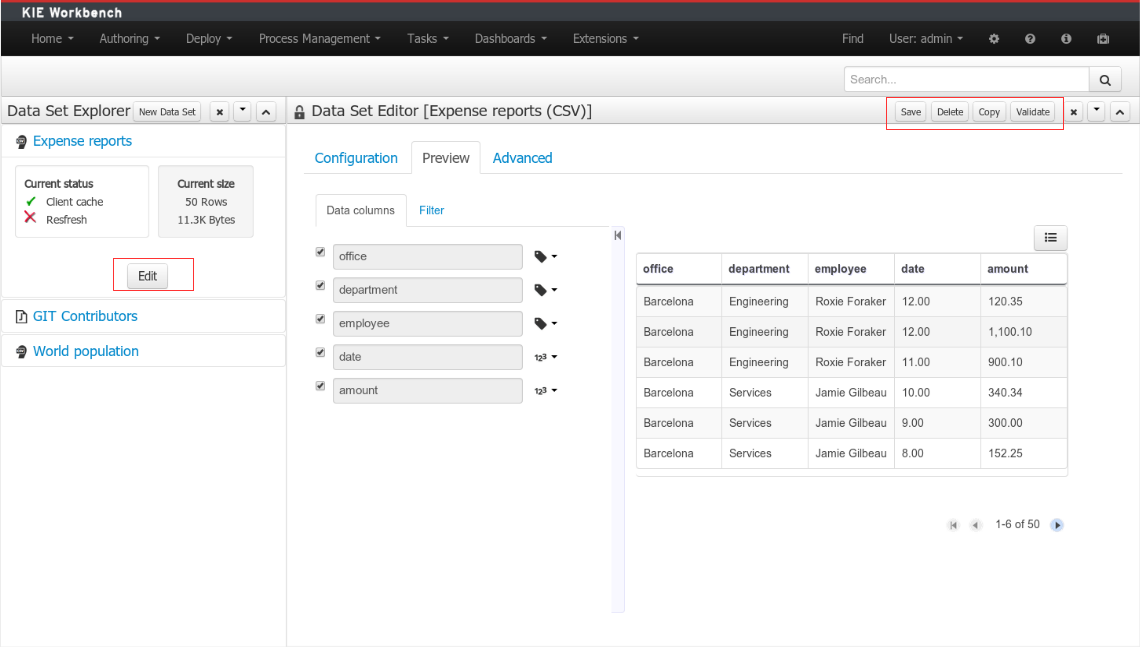
Every time we edit an item its editor is added to the center panel. We can navigate through the list of opened editors just by clicking on the down arrow icon placed at the editor's toolbar in the top right corner.

The editor provides all the features described in previous sections. We can change the configuration settings, test our data set definition and modify the resulting data set structure. Additionally, the editor provides some extra buttons in its toolbar:
Save - To validate the current changes and store the data set definition.
Delete - To remove permanently from storage the data set definition. Any client module referencing the data set may be affected.
Validate - To check that all the required parameters exist and are correct, as well as to validate the data set can be retrieved with no issues.
Copy - To create a brand new definition as a copy of the current one.
Note
Data set definitions are stored in the underlying GIT repository as JSON files. Any action performed is registered in the repository logs so it is possible to audit the change log later on.
In the Advanced settings tab area the user can specify caching and refresh settings. Those are very important for making the most of the system capabilities thus improving the performance and having better application responsive levels.
(1) To enable or disable the client cache and specify the maximum size (bytes).
(2) To enable or disable the backend cache and specify the maximum cache size (number of rows).
(3) To enable or disable automatic refresh for the Data set and the refresh period.
(4) To enable or disable the refresh on stale data setting.
Let's dig into more details about the meaning of these settings.
The system provides caching mechanisms out-of-the-box for holding data sets and performing data operations using in-memory strategies. The use of these features brings a lot of advantages, like reducing the network traffic, remote system payload, processing times etc. On the other hand, it's up to the user to fine tune properly the caching settings to avoid hitting performance issues.
Two cache levels are supported:
Client level
Backend level
The following diagram shows how caching is involved in any data set operation:
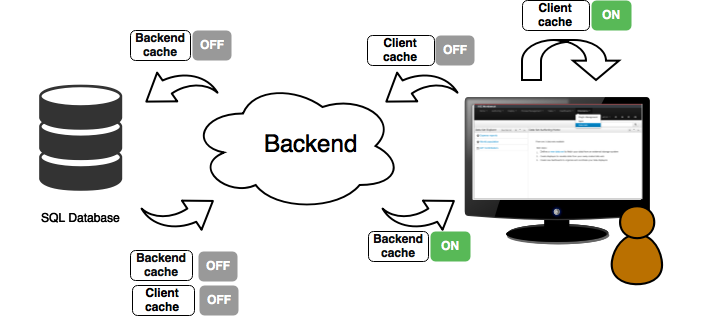
Any data look up call produces a resulting data set, so the use of the caching techniques determines where the data lookup calls are executed and where the resulting data set is located.
Client cache
If ON then the data set involved in a look up operation is pushed into the web browser so that all the components that feed from this data set do not need to perform any requests to the backend since data set operations are resolved at a client side:
The data set is stored in the web browser's memory
The client components feed from the data set stored in the browser
Data set operations (grouping, aggregations, filters and sort) are processed within the web browser, by means of a Javascript data set operation engine.
If you know beforehand that your data set will remain small, you can enable the client cache. It will reduce the number of backend requests, including the requests to the storage system. On the other hand, if you consider that your data set will be quite big, disable the client cache so as to not hitting with browser issues such as slow performance or intermittent hangs.
Backend cache
Its goal is to provide a caching mechanism for data sets on backend side.
This feature allows to reduce the number of requests to the remote storage system , by holding the data set in memory and performing group, filter and sort operations using the in-memory engine.
It's useful for data sets that do not change very often and their size can be considered acceptable to be held and processed in memory. It can be also helpful on low latency connectivity issues with the remote storage. On the other hand, if your data set is going to be updated frequently, it's better to disable the backend cache and perform the requests to the remote storage on each look up request, so the storage system is in charge of resolving the data set lookup request.
Note
BEAN and CSV data providers relies by default on the backend cache, as in both cases the data set must be always loaded into memory in order to resolve any data lookup operation using the in-memory engine. This is the reason why the backend settings are not visible in the Advanced settings tab.
The refresh feature allows for the invalidation of any cached data when certain conditions are meet.
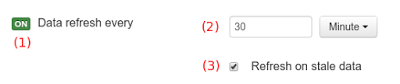
(1) To enable or disable the refresh feature.
(2) To specify the refresh interval.
(3) To enable or disable data set invalidation when the data is outdated.
The data set refresh policy is tightly related to data set caching, detailed in previous section. This invalidation mechanism determines the cache life-cycle.
Depending on the nature of the data there exist three main use cases:
Source data changes predictable - Imagine a database being updated every night. In that case, the suggested configuration is to use a "refresh interval = 1 day" and disable "refresh on stale data". That way, the system will always invalidate the cached data set every day. This is the right configuration when we know in advance that the data is going to change.
Source data changes unpredictable - On the other hand, if we do not know whether the database is updated every day, the suggested configuration is to use a "refresh interval = 1 day" and enable "refresh on stale data". If so the system, before invalidating any data, will check for modifications. On data modifications, the system will invalidate the current stale data set so that the cache is populated with fresh data on the next data set lookup call.
Real time scenarios - In real time scenarios caching makes no sense as data is going to be updated constantly. In this kind of scenarios the data sent to the client has to be constantly updated, so rather than enabling the refresh settings (remember this settings affect the caching, and caching is not enabled) it's up to the clients consuming the data set to decide when to refresh. When the client is a dashboard then it's just a matter of modifying the refresh settings in the Displayer Editor configuration screen and set a proper refresh period, "refresh interval = 1 second" for example.
This section describes a feature that allows the administration of the application's users and groups using an intuitive and friendly user interface that comes integrated in both jBPM and Drools Workbenches.

Before the installation, setup and usage of this feature, this section talks about some previous concepts that need to be completely understood for the further usage:
Security management providers and capabilities
Installation and setup
Usage
A security environment is usually provided by the use of a realm. Realms are used to restrict the access for the different application's resources. So realms contains information about the users, groups, roles, permissions and and any other related information.
In most of the typical scenarios the application's security is delegated to the container's security mechanism, which consumes a given realm at same time. It's important to consider that there exist several realm implementations, for example Wildfly provides a realm based on the application-users.properties/application-roles.properties files, Tomcat provides a realm based on the tomcat-users.xml file, etc. So keep in mind that there is no single security realm to rely on, it can be different in each installation.
The jBPM and Drools workbenches are not an exception, they're build on top Uberfire framework (aka UF), which delegates the authorization and authentication to the underlying container's security environment as well, so the consumed realm is given by the concrete deployment configuration.
Due to the potential different security environments that have to be supported, the users and groups management provides a well defined management services API with some default built-in security management providers. A security management provider is the formal name given to a concrete user and group management service implementation for a given realm.
At this moment, by default there are two security management providers available:
Wildfly / EAP security management provider - For Wildfly or EAP realms based on properties files.
Tomcat security management provider - For Tomcat realms based on XML files.
If the built-in providers do not fit with the application's security realm, it is easy to build and register your own security management provider.
Each security realm can provide support different operations. For example consider the use of a Wildfly's realm based on properties files, The contents for the applications-users.properties is like:
admin=207b6e0cc556d7084b5e2db7d822555c
salaboy=d4af256e7007fea2e581d539e05edd1b
maciej=3c8609f5e0c908a8c361ca633ed23844
kris=0bfd0f47d4817f2557c91cbab38bb92d
katy=fd37b5d0b82ce027bfad677a54fbccee
john=afda4373c6021f3f5841cd6c0a027244
jack=984ba30e11dda7b9ed86ba7b73d01481
director=6b7f87a92b62bedd0a5a94c98bd83e21
user=c5568adea472163dfc00c19c6348a665
guest=b5d048a237bfd2874b6928e1f37ee15e
kiewb=78541b7b451d8012223f29ba5141bcc2
kieserver=16c6511893651c9b4b57e0c027a96075
Note that it's based on key-value pairs where the key is the username, and the value is the hashed value for the user's password. So a user is just defined by the key, by its username, it does not have a name nor address or any other meta information.
On the other hand, consider the use of a realm provided by a Keycloak server. The information for a user is composed by more user meta-data, such as surname, address, etc, as in the following image:
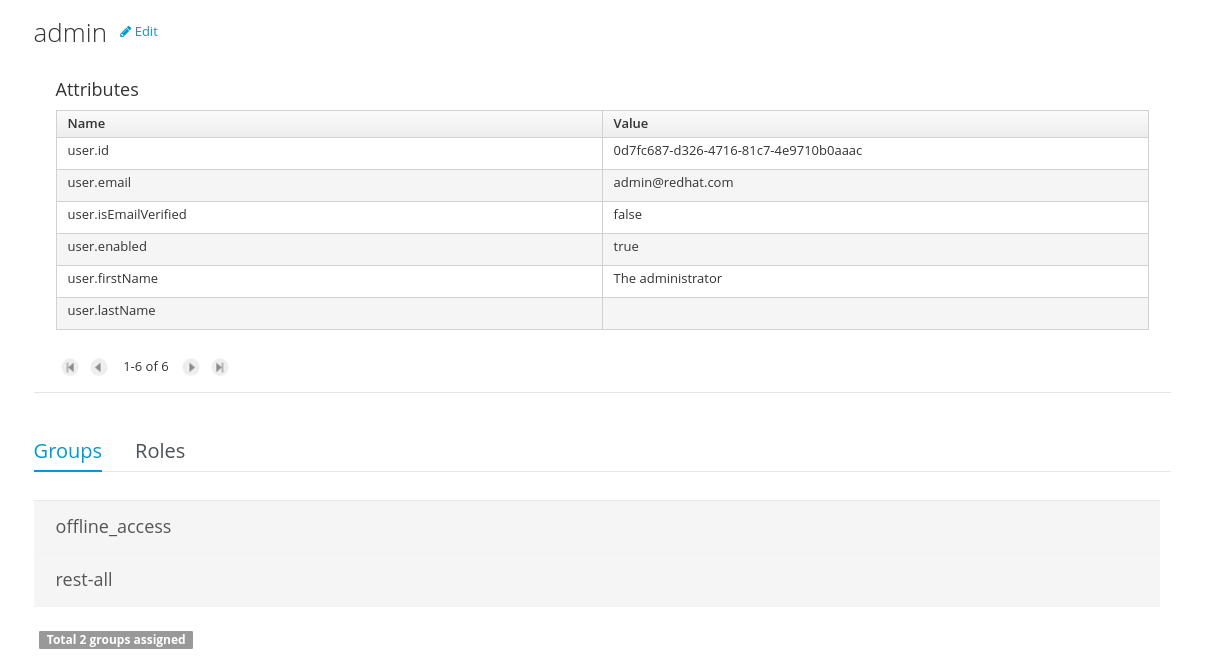
So the different services and client side components from the users and group management API are based on capabilities.Capabilities are used to expose or restrict the available functionality provided by the different services and client side components. Examples of capabilities are:
Create a user
Update a user
Delete a user
Update user's attributes
Create a group
Update a group
Assign groups to a user
Assign roles to a user
Each security management provider must specify a set of capabilities supported. From the previous examples you can note that the Wildfly security management provider does not support the capability for the management of the attributes for a user - the user is only composed by the user name. On the other hand the Keycloak provider does support this capability.
The different views and user interface components rely on the capabilities supported by each provider, so if a capability is not supported by the provider in use, the UI does not provide the views for the management of that capability. As an example, consider that a concrete provider does not support deleting users - the delete user button on the user interface will be not available.
Please take a look at the concrete service provider documentation to check all the supported capabilities for each one, the default ones can be found here.
Before considering the installation and setup steps please note the following Drools and jBPM distributions come with built-in, pre-installed security management providers by default:
Wildfly / EAP distribution - Both distributions use the Wildfly security management provider configured for the use of the default realm files application-users.properties and application-roles.properties
Tomcat distribution - It uses the Tomcat security management provider configured for the use of the default realm file tomcat-users.xml
Please read each provider's documentation in order to apply the concrete settings for the target deployment environment.
On the other hand, if using a custom security management provider or need to include it on an existing application, consider the following installation options:
Enable the security management feature on an existing WAR distribution
Setup and installation in an existing or new project
NOTE: If no security management provider is installed in the application, there will be no available user interface for managing the security realm. Once a security management provider is installed and setup, the user and group management user interfaces are automatically enabled and accessible from the main menu.
Given an existing WAR distribution of either Drools and jBPM workbenches, follow these steps in order to install and enable the user management feature:
Ensure the following libraries are present on WEB-INF/lib:
WEB-INF/lib/uberfire-security-management-api-6.4.0.Final..jar
WEB-INF/lib/uberfire-security-management-backend-6.4.0.Final..jar
Add the concrete library for the security management provider to use in WEB-INF/lib:
Eg: WEB-INF/lib/uberfire-security-management-wildfly-6.4.0.Final..jar
If the concrete provider you're using requires more libraries, add those as well. Please read each provider's documentation for more information
Replace the whole content for file WEB-INF/classes/security-management.properties, or if not present, create it. The settings present on this file depend on the concrete implementation you're using. Please read each provider's documentation for more information.
If you're deploying on Wildfly or EAP, please check if the WEB-INF/jboss-deployment-structure.xml requires any update. Please read each provider's documentation for more information.
If you're building an Uberfire based web application and you want to include the user and group management feature, please read this instructions.
The security management feature can be disabled, and thus no services or user interface will be available, by any of:
Uninstalling the security management provider from the application
When no concrete security management provider installed on the application, the user and group management feature will be disabled and no services or user interface will be presented to the user.
Removing or commenting the security management configuration file
Removing or commenting all the lines in the configuration file located at WEB-INF/classes/security-management.properties will disable the user and group management feature and no services or user interface will be presented to the user.
The user and group management feature is presented using two different perspectives that are available from the main Home menu (considering that the feature is enabled) as:
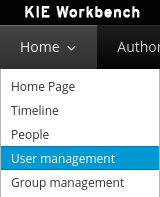
Read the following sections for using both user and group management perspectives.
The user management interface is available from the User management menu entry in the Home menu.
The interface is presented using two main panels: the users explorer on the west panel and the user editor on the center one:
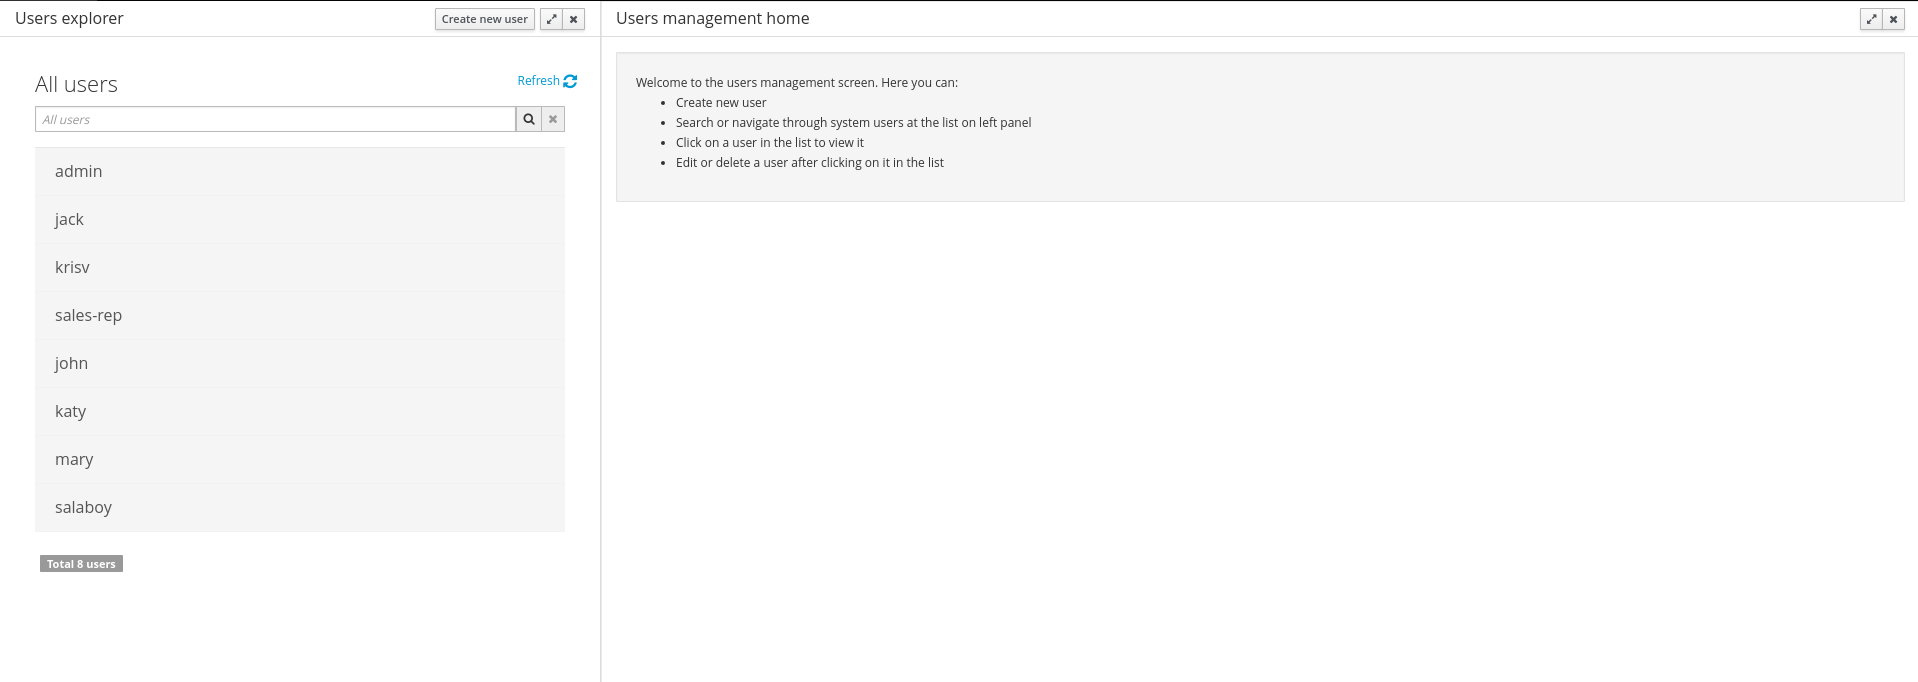
The users explorer, on west panel, lists by default all the users present on the application's security realm:
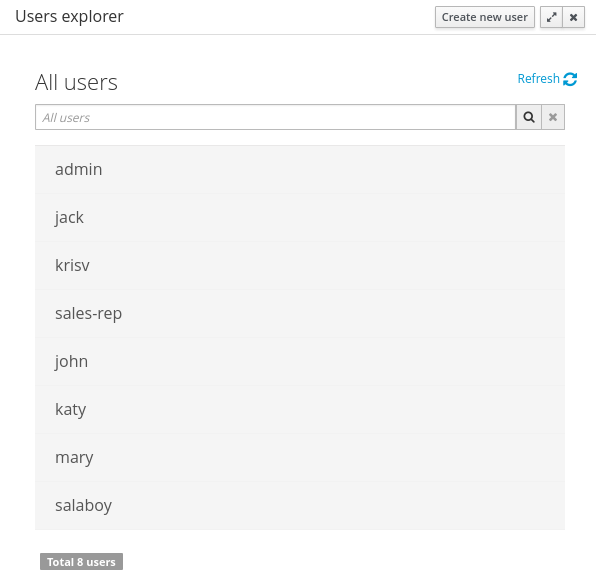
In addition to listing all users, the users explorer allows:
Searching for users
When specifying the search pattern in the search box the users list will be reduced and will display only the users that match the search pattern.
Search patterns depend on the concrete security management provider being used by the application's. Please read each provider's documentation for more information.
Creating new users
By clicking on the Create new user button, a new screen will be presented on the center panel to perform a new user creation.
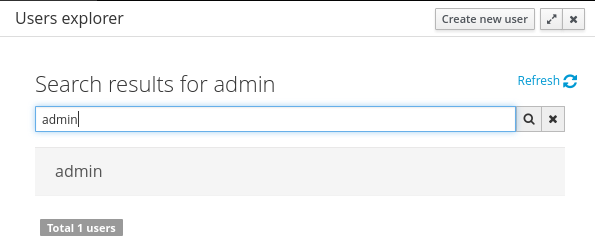

The user editor, on the center panel, is used to create, view, update or delete users. Once creating a new user o clicking an existing user on the users explorer, the user editor screen is opened.
To view an existing user, click on an existing user in the Users Explorer to open the User Editor screen. For example, viewing the admin user when using the Wildfly security management provider results in this screen:
Same admin user view operation but when using the Keycloak security management provider, instead of the Wildfly's one, results in this screen:
Note that the user editor, when using the Keycloak sec. management provider, includes the user attributes management section, but it's not present when using the Wildfly's one. So remember that the information and actions available on the user interface depends on each provider's capabilities (as explained in previous sections).
Viewing a user in the user editor provides the following information (if provider supports it):
The user name
The user's attributes
The assigned groups
The assigned roles
In order to update or delete an existing user, click on the Edit button present near to the username in the user editor screen:
Once the user editor presented in edit mode, different operations can be done (if the security management provider in use supports it):
Update the user's attributes
A group selection popup is presented when clicking on Add to groups button:
This popup screen allows the user to search and select or deselect the groups assigned for the user currently being edited.
Update assigned groups
A group selection popup is presented when clicking on Add to groups button:
This popup screen allows the user to search and select or deselect the groups assigned for the user currently being edited.
Update assigned roles
A role selection popup is presented when clicking on Add to roles button:
This popup screen allows the user to search and select or deselect the roles assigned for the user currently being edited.
Change user's password
A change password popup screen is presented when clicking on the Change password button:
Delete user
The user currently being edited can be deleted from the realm by clicking on the Delete button.

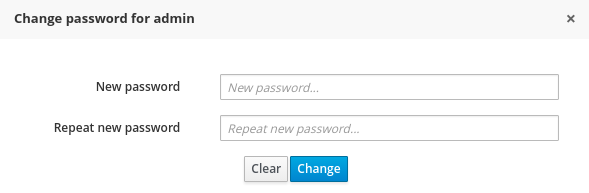
The group management interface is available from the Group management menu entry in the Home menu.
The interface is presented using two main panels: the groups explorer on the west panel and the group editor on the center one:
The groups explorer, on west panel, lists by default all the groups present on the application's security realm:
In addition to listing all groups, the groups explorer allows:
Searching for groups
When specifying the search pattern in the search box the users list will be reduced and will display only the users that match the search pattern.
Search patterns depend on the concrete security management provider being used by the application's. Please read each provider's documentation for more information.
Create new groups
By clicking on the Create new group button, a new screen will be presented on the center panel to perform a new group creation. Once the new group has been created, it allows to assign users to it:
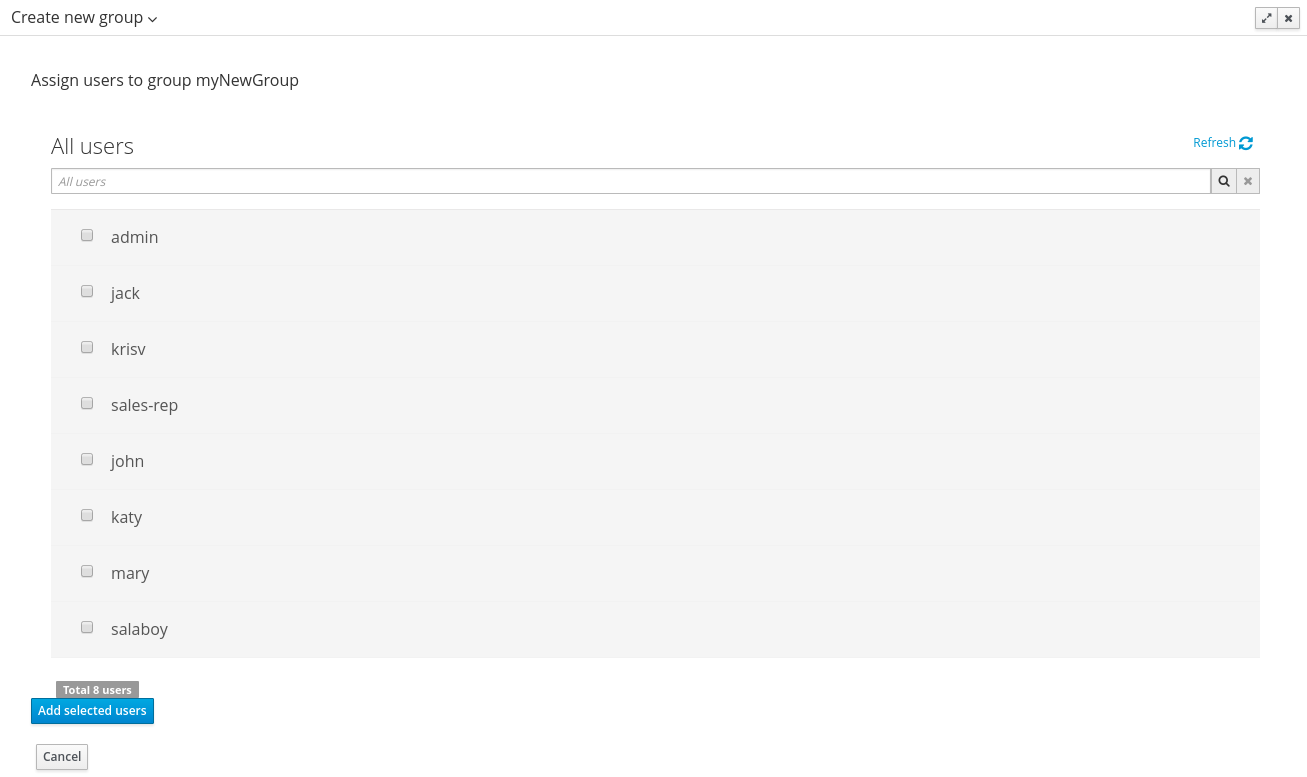
The group editor, on the center panel, is used to create, view or delete groups. Once creating a new group o clicking an existing group on the groups explorer, the group editor screen is opened.
To view an existing group, click on an existing user in the Groups Explorer to open the Group Editor screen. For example, viewing the sales group results in this screen:

To delete an existing group just click on the Delete button.
As we already know, Workbench provides a set of editors to author assets in different formats. According to asset’s format a specialized editor is used.
One additional feature provided by Workbench is the ability to embed it in your own (Web) Applications thru it's standalone mode. So, if you want to edit rules, processes, decision tables, etc... in your own applications without switch to Workbench, you can.
In order to embed Workbench in your application all you'll need is the Workbench application deployed and running in a web/application server and, from within your own web applications, an iframe with proper HTTP query parameters as described in the following table.
Table 9.2. HTTP query parameters for standalone mode
| Parameter Name | Explanation | Allow multiple values | Example |
|---|---|---|---|
| standalone | With just the presence of this parameter workbench will switch to standalone mode. | no | (none) |
| path | Path to the asset to be edited. Note that asset should already exists. | no | git://master@uf-playground/todo.md |
| perspective | Reference to an existing perspective name. | no | org.guvnor.m2repo.client.perspectives.GuvnorM2RepoPerspective |
| header | Defines the name of the header that should be displayed (useful for context menu headers). | yes | ComplementNavArea |
Note
Path and Perspective parameters are mutually exclusive, so can't be used together.
This section of the documentation describes the main features included that contribute to the Asset Management functionality provided in the KIE Workbench and KIE Drools Workbench. All the features described here are entirely optional, but the usage is recommended if you are planning to have multiple projects. All the Asset Management features try to impose good practices on the repository structure that will make the maintainace, versioning and distribution of the projects simple and based on standards. All the Asset Management features are implemented using jBPM Business Processes, which means that the logic can be reused for external applications as well as adapted for domain specific requirements when needed.
Note
You must set the "kiemgmt" role to your user to be able to use the Asset Management Features
Since the creation of the assets management features repositories can be classified into Managed or Unmanaged.
All new assets management features are available for this type of repositories. Additionally a managed repository can be "Single Project" or "Multi Project".
A "Single Project" managed repository will contain just one Project. And a "Multi Project" managed repository can contain multiple Projects. All of them related through the same parent, and they will share the same group and version information.
There are 4 main processes which represent the stages of the Asset Management feature: Configure Repository, Promote Changes, Build and Release.
The Configure Repository process is in charge of the post initialization of the repository. This process will be automatically triggered if the user selects to create a Managed Repository on the New repository wizzard. If they decide to use the governance feature the process will kick in and as soon as the repository is created. A new development and release branches will be created. Notice that the first time that this process is called, the master branch is picked and both branches (dev and release) will be based on it.
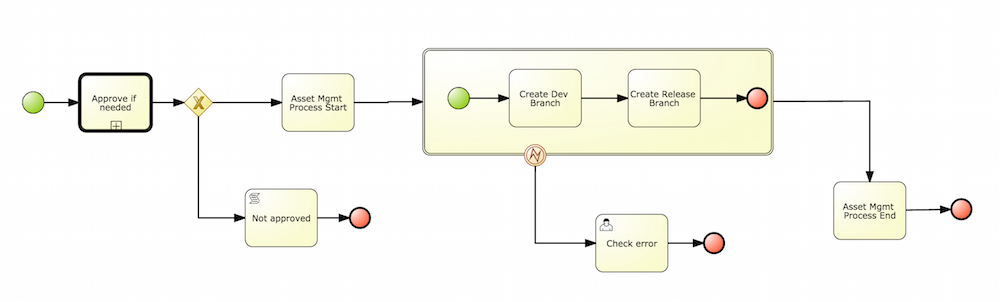
By default the asset management feature is not enabled so make sure to select Managed Repository on the New Repository Wizzard. When we work inside a managed repository, the development branch is selected for the users to work on. If multiple dev branches are created, the user will need to pick one.
When some work is done in the developments branch and the users reach a point where the changes needs to be tested before going into production, they will start a new Promote Changes process so a more technical user can decide and review what needs to be promoted. The users belonging to the "kiemgmt" group will see a new Task in their Group Task List which will contain all the files that had been changed. The user needs to select the assets that will be promoting via the UI. The underlying process will be cherry-picking the commits selected by the user to the release branch. The user can specify that a review is needed by a more technical user.
This process can be repeated multiple times if needed before creating the artifacts for the release.
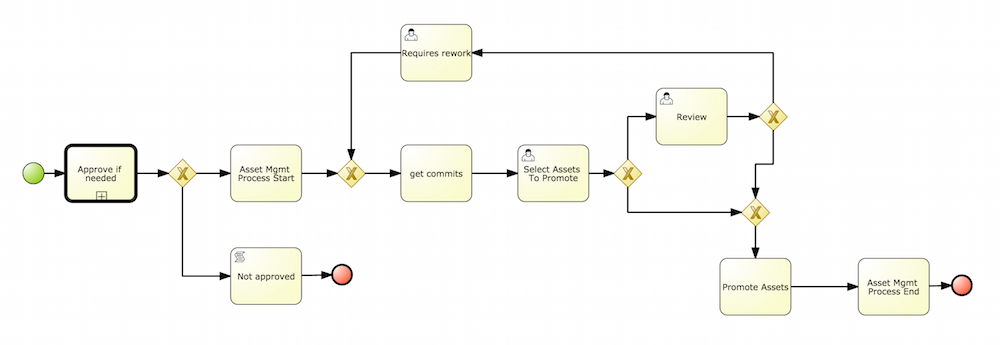
The Build process can be triggered to build our projects from different branches. This allows us to have a more flexible way to build and deploy our projects to different runtimes.
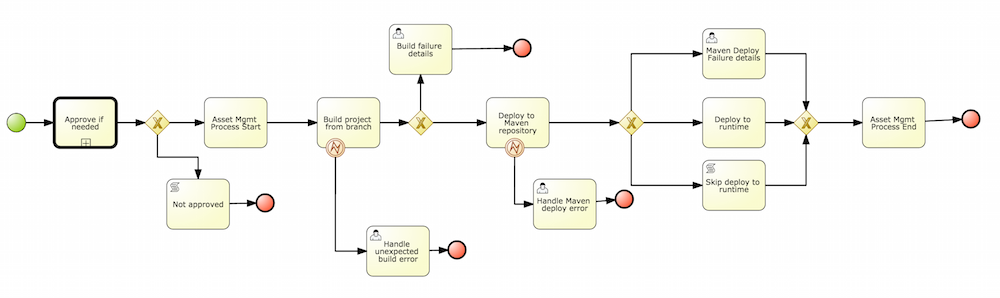
The release process is triggered at any time when the user decided that it is time to generate a release of the project that he/she is working on. This process will build the project (calling the Build Process) and it will update all the maven artifacts to the next version.
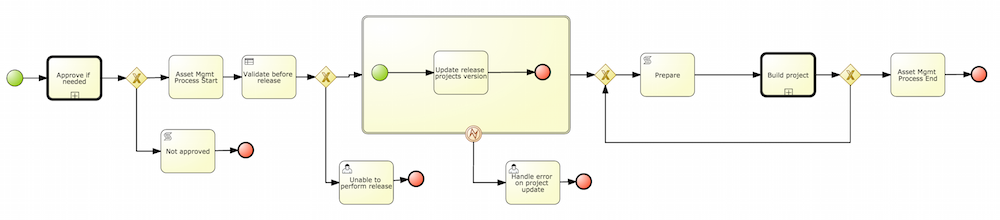
This section describes the common usage flow for the asset management features showing all the screens involved.
The first contact with the Asset Management features starts on the Repository creation.
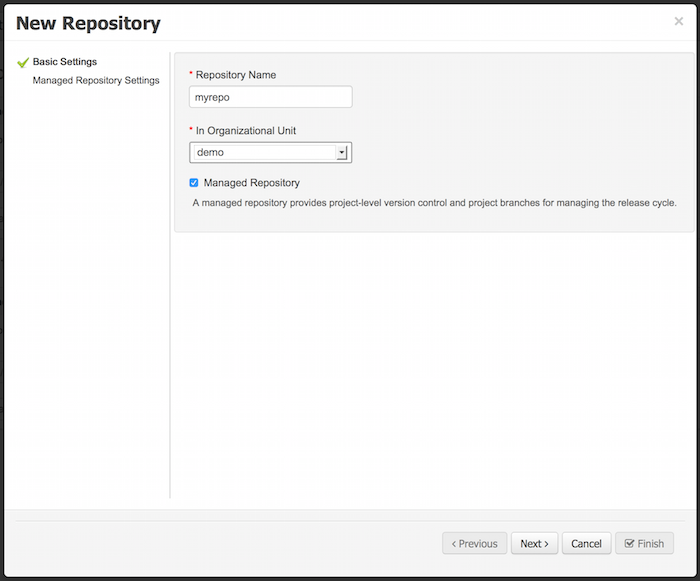
If the user chooses to create a Managed Respository a new page in the wizzard is enabled:

When a managed repository is created the assets management configuration process is automatically launched in order to create the repository branches, and the corresponding project structure is also created.
Once a repository has been created it can be managed through the Repository Structure Screen.
To open the Repository Structure Screen for a given repository open the Project Authoring Perspective, browse to the given repository and select the "Repository -> Repository Structure" menu option.

The following picture shows an example of a single project managed repository structure.
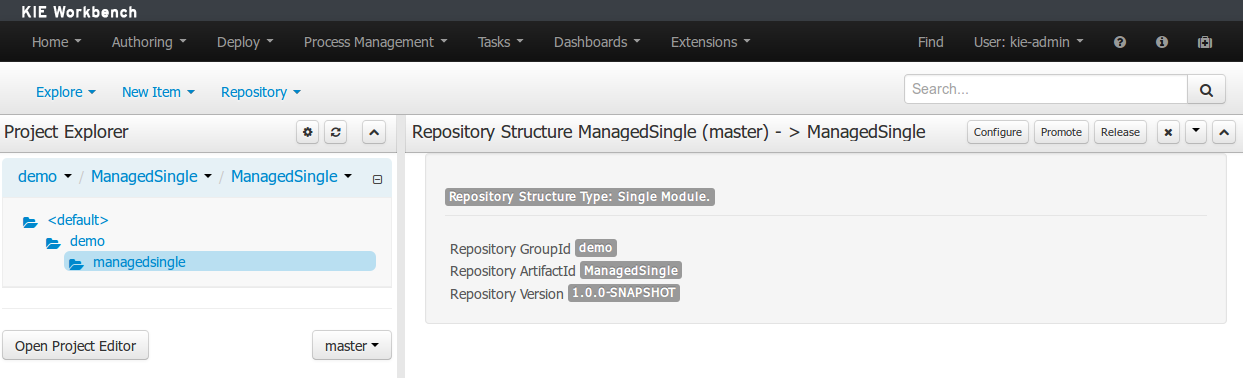
The following picture shows an example of a multi project managed repository structure.
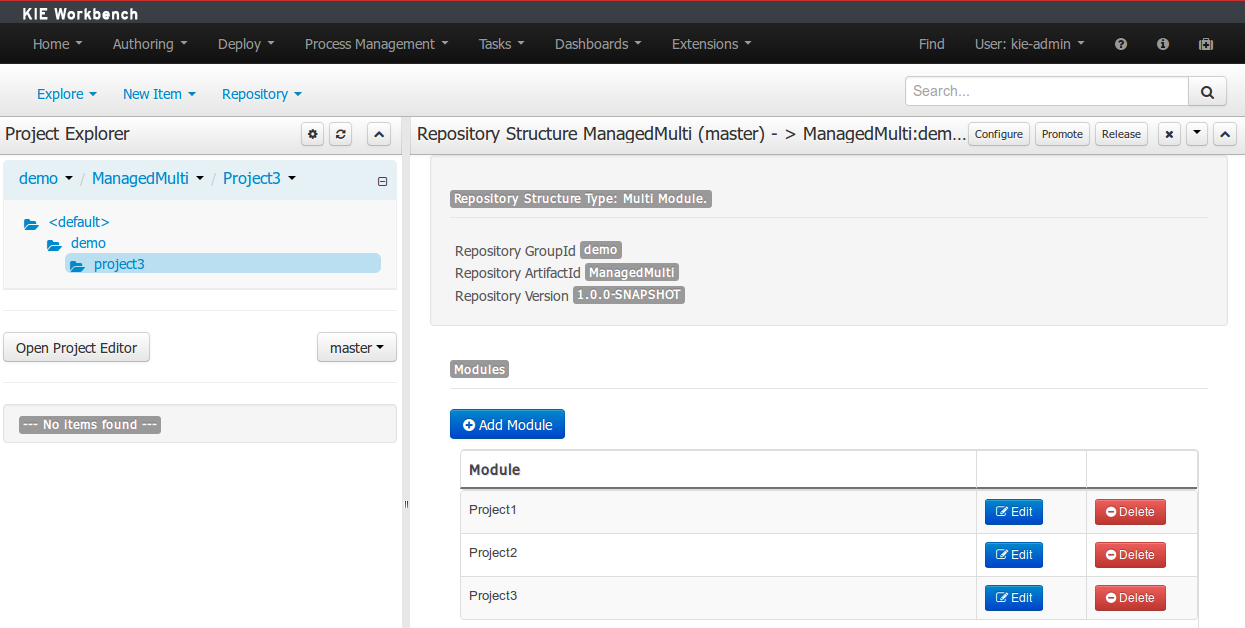
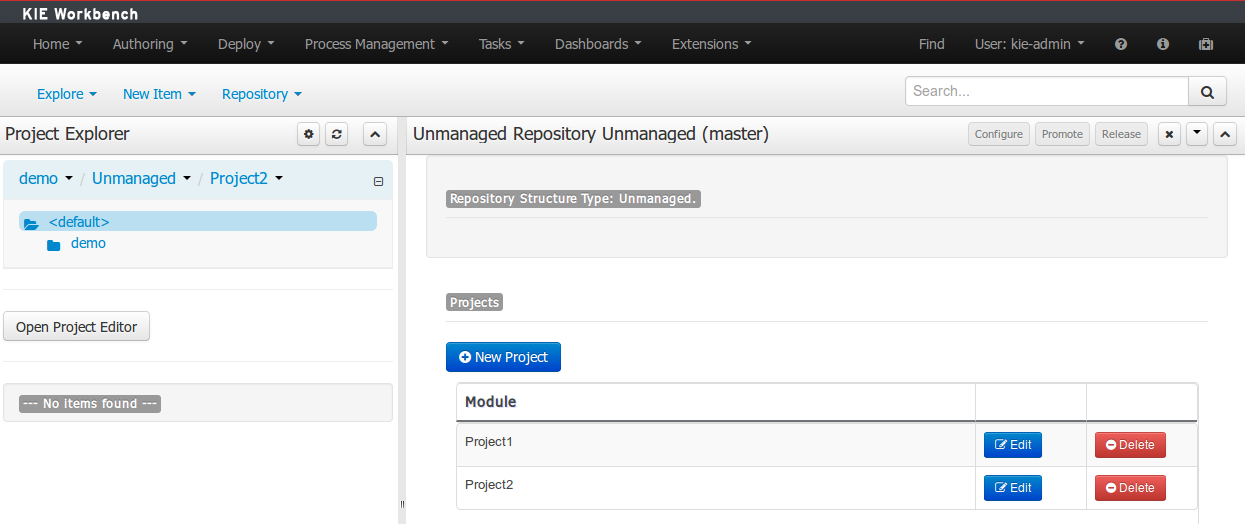
The following picture shows the screen areas related to managed repositories operations.
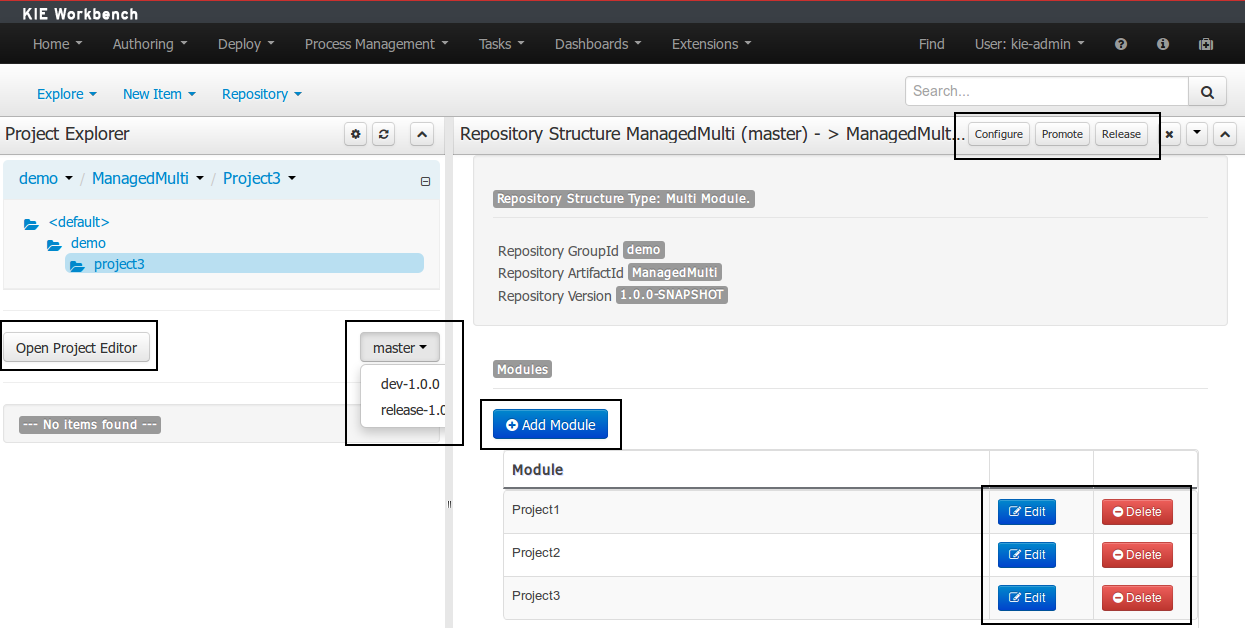
The branch selector lets to switch between the different branches created by the Configure Repository Process.
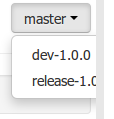
From the repository structure screen it's also possible to create, edit or delete projects from current repository.


The assets management processes can also be launched from the Project Structure Screen.

Filling the parameters bellow a new instance of the Configure Repository can be started. (see Configure Repository Process)
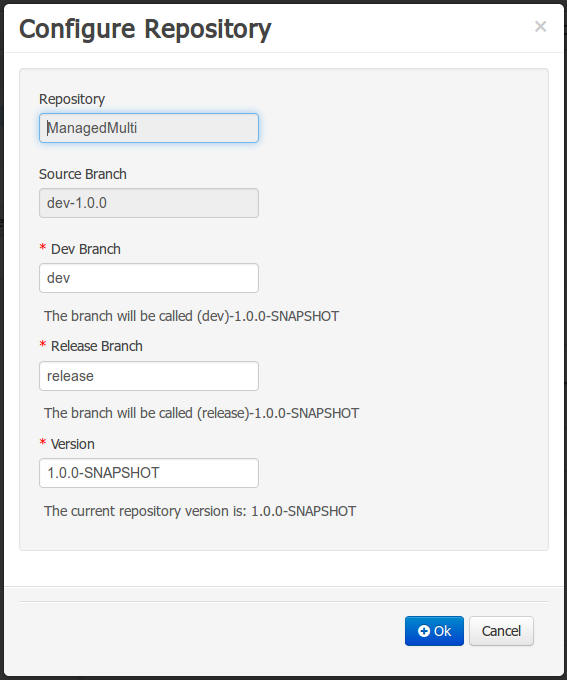
Filling the parameters bellow a new instance of the Promote Changes Process can be started. (see Promote Changes Process)
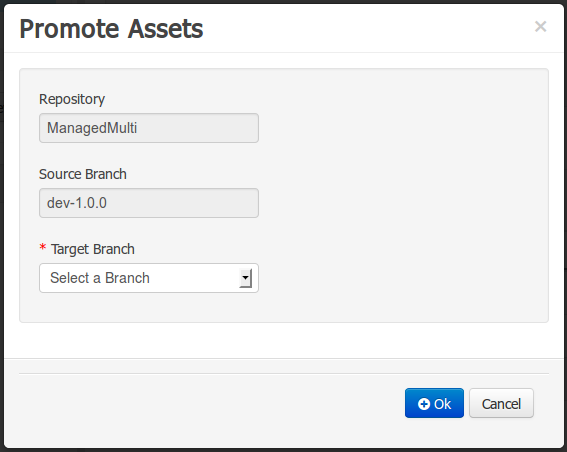
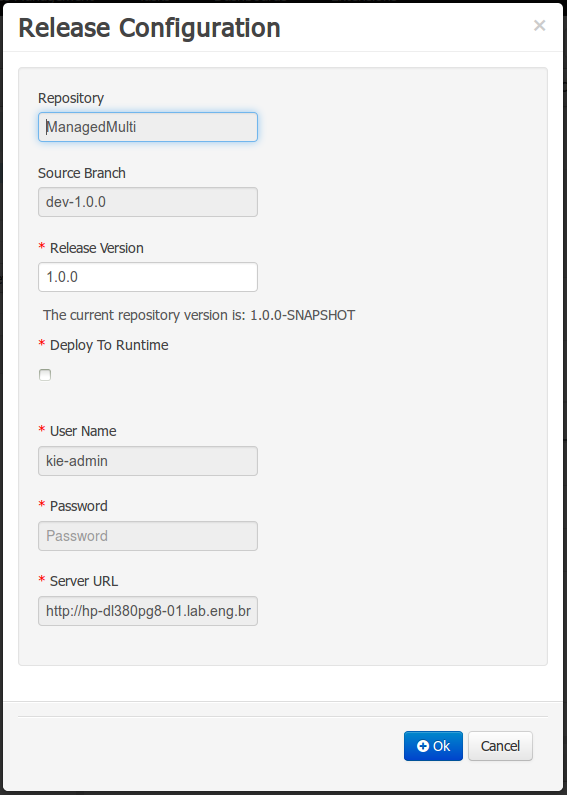
The Execution Server Management UI allows users create and modify Server Templates and Containers, it also allows users manage Remote Servers. This screen is available via Deploy -> Rule Deployments menu.

Note
The management UI is only available for KIE Managed Servers.
Server templates are used to define a common configuration that can be used for multiple servers, thus the name: Template.
Server Templates can be created directly from the management UI or it's automatically created when a server connects to controller and there isn't a template definition for that remote server. Server templates may have one or more capabilities, such capabilities can't be modified, if you need modify the capabilities you'll have to create a new template. Here is the list of current capabilities:
Rule (Drools)
Process (jBPM)
Planning (Optaplanner)
Note
For Planner capability it's mandatory to enable Rule's capability too.
In order to create a new Server Template you have to click at New Server Template button and follow the wizard. It's also possible to create a container during Wizard, but for now let's limit to just the template.
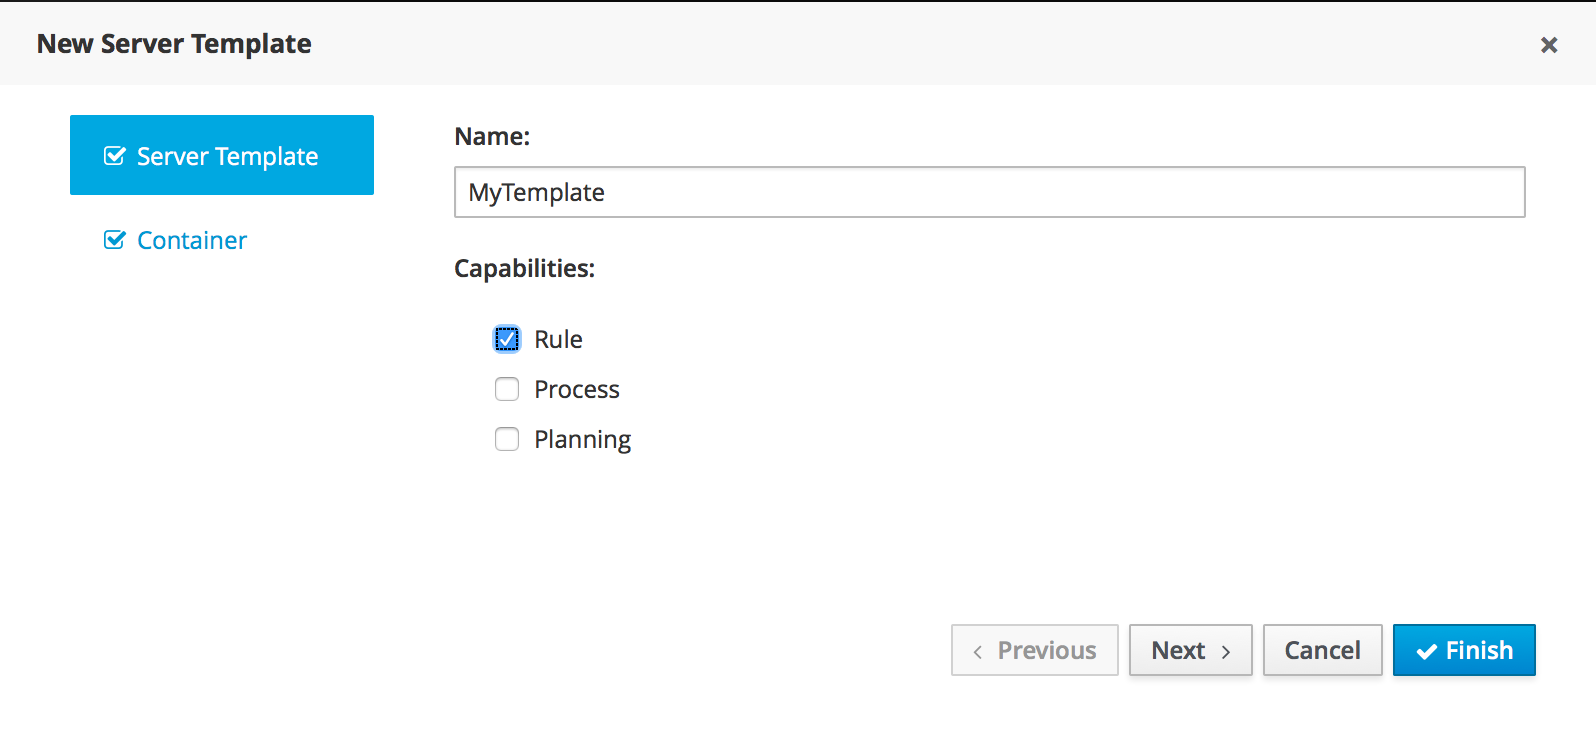
Once created you'll get the new Template listed on the left hand side, with the new Server Template highlighted. On the right hand side you get the 2nd level navigation that lists Containers and Remote Servers that are related to selected Server Template.
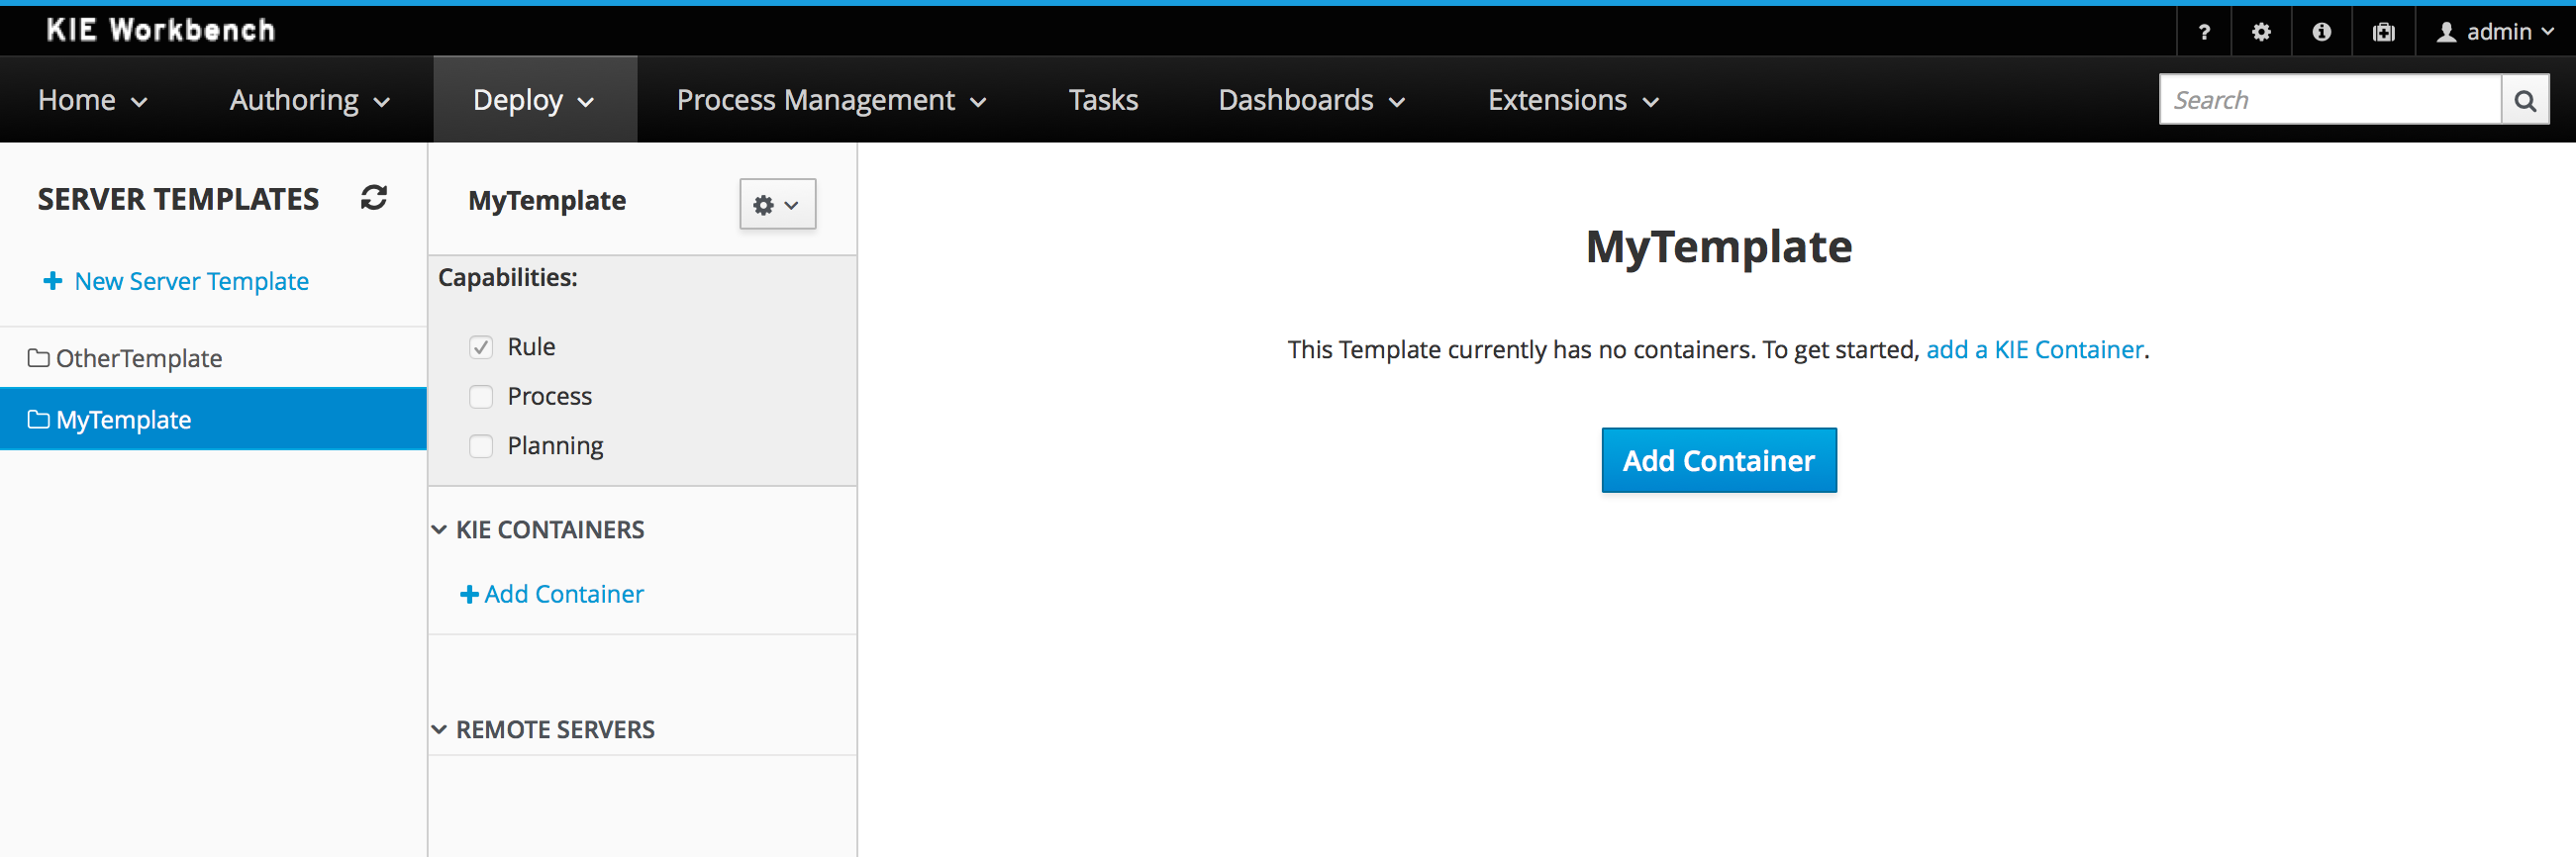
On top of the navigation is also possible to delete the current Server Template or create a copy of it.
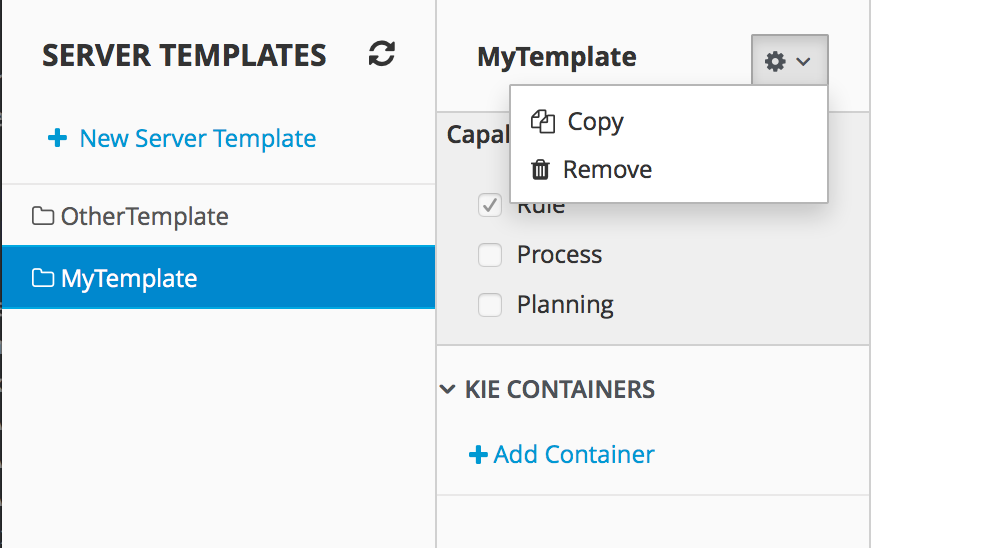
A Container is a KIE Container configuration of the Server Template. Click the Add Container button to create a new container for the current Server Template.
The search area can help users find an specific KJARs that they are looking for.
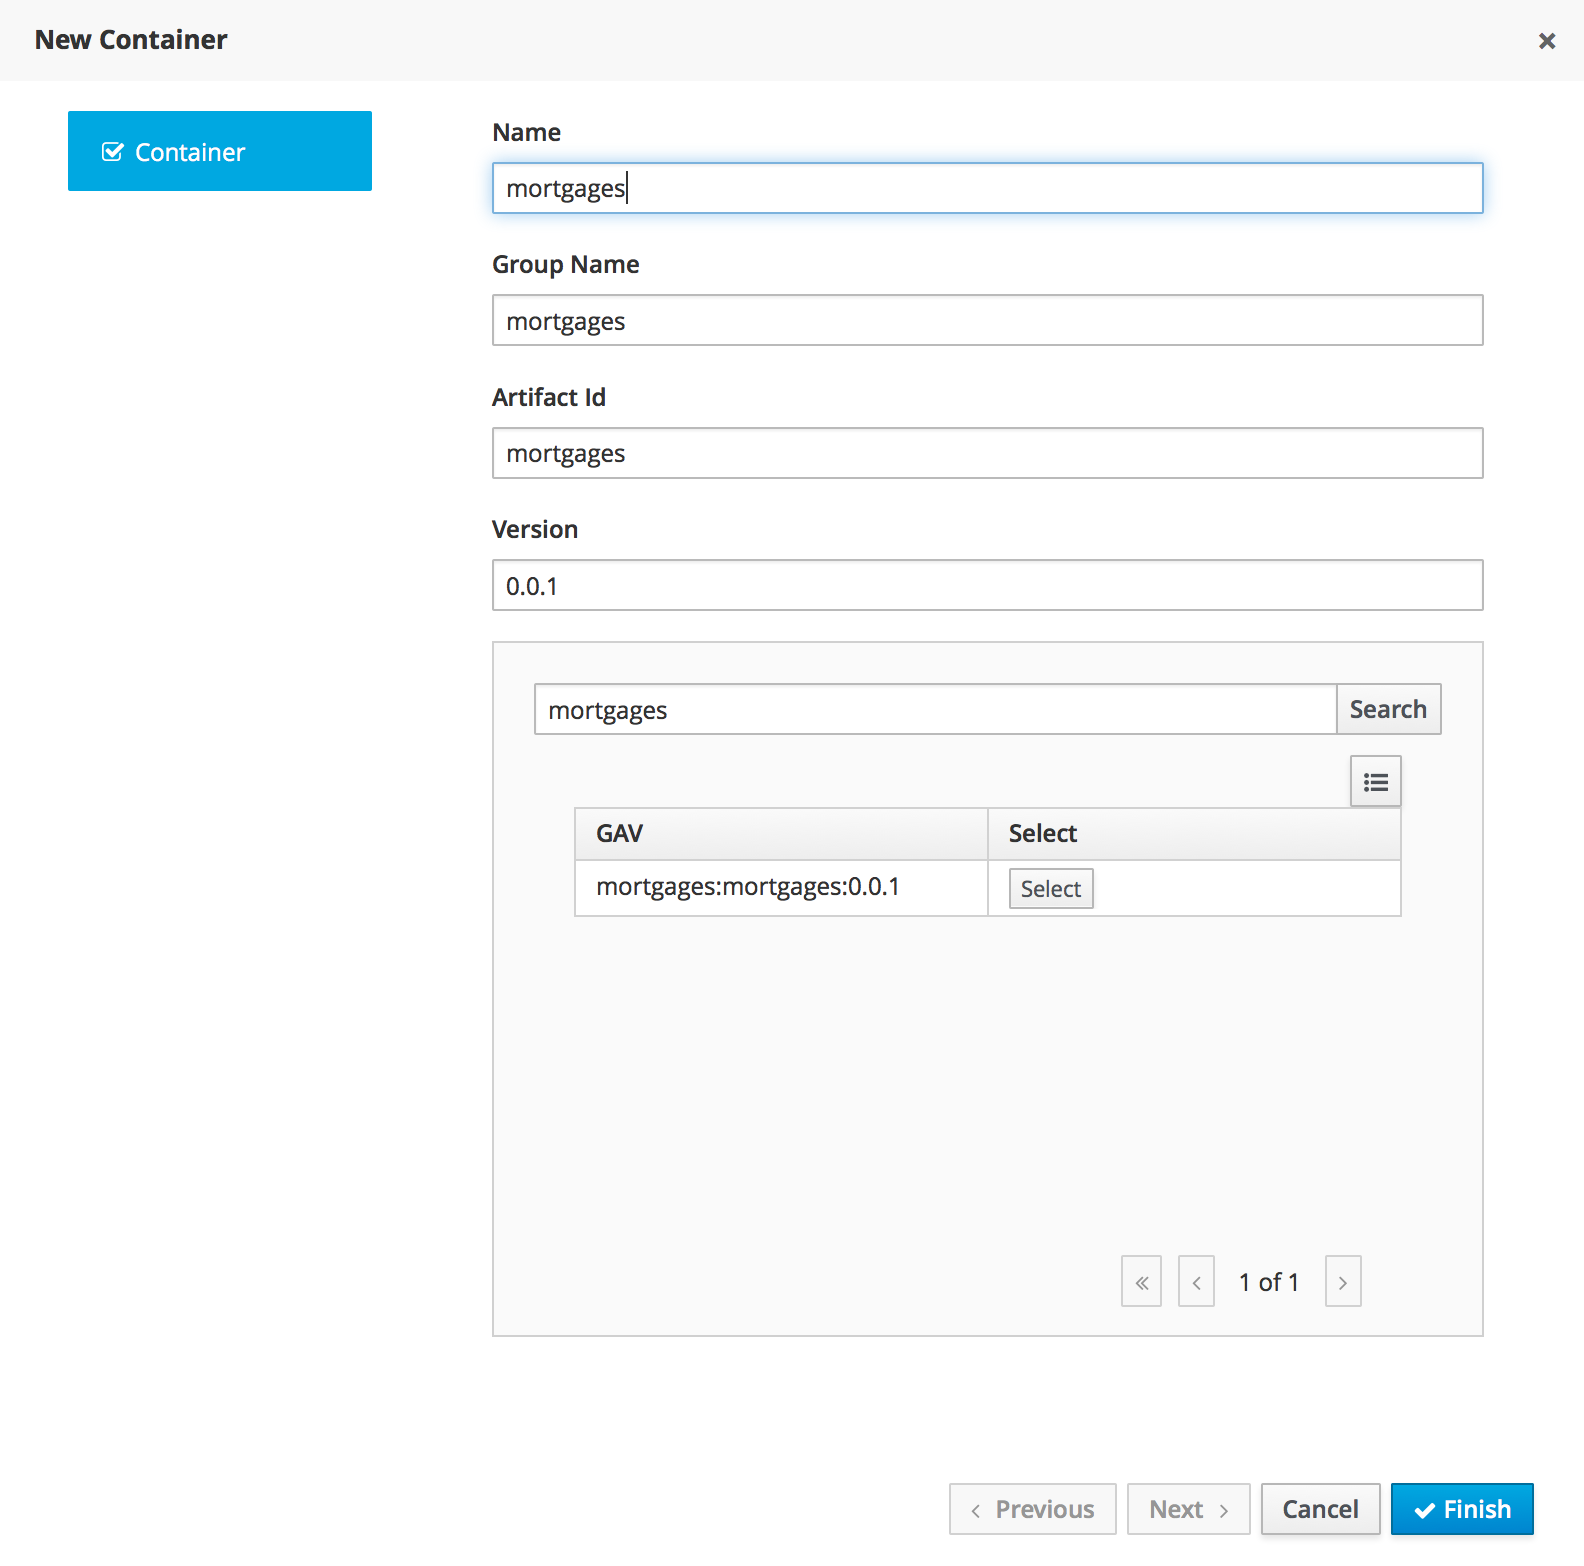
For Server Templates that have Process capabilities enabled, the Wizard has a 2nd optional step where users can configure some process related behaviors.
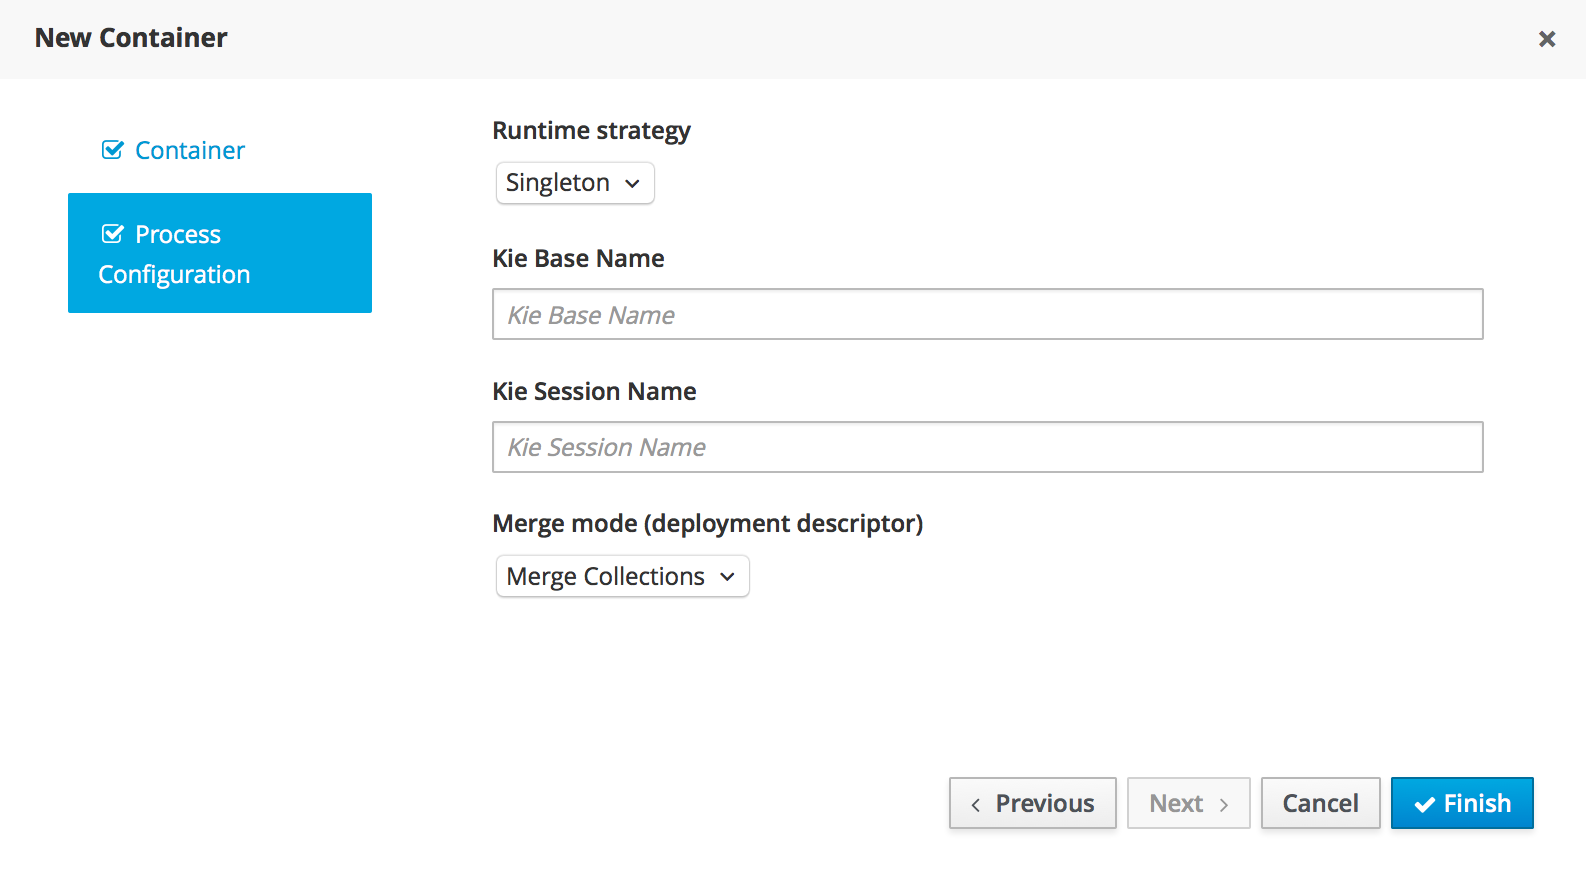
Once created the new Container will be displayed on the containers list just above the list of remote servers. Just after created a container is by default Stopped which is the only state that allows users to remove it.

A Container has the following tabs available for management and/or configuration:
Status
Version Configuration
Process Configuration
Status tab lists all the Remote Servers that are running the active Container. Each Remote Server is rendered as a Card, which displays to users status and endpoint.
Note
Only started Containers are deployed to remote servers.
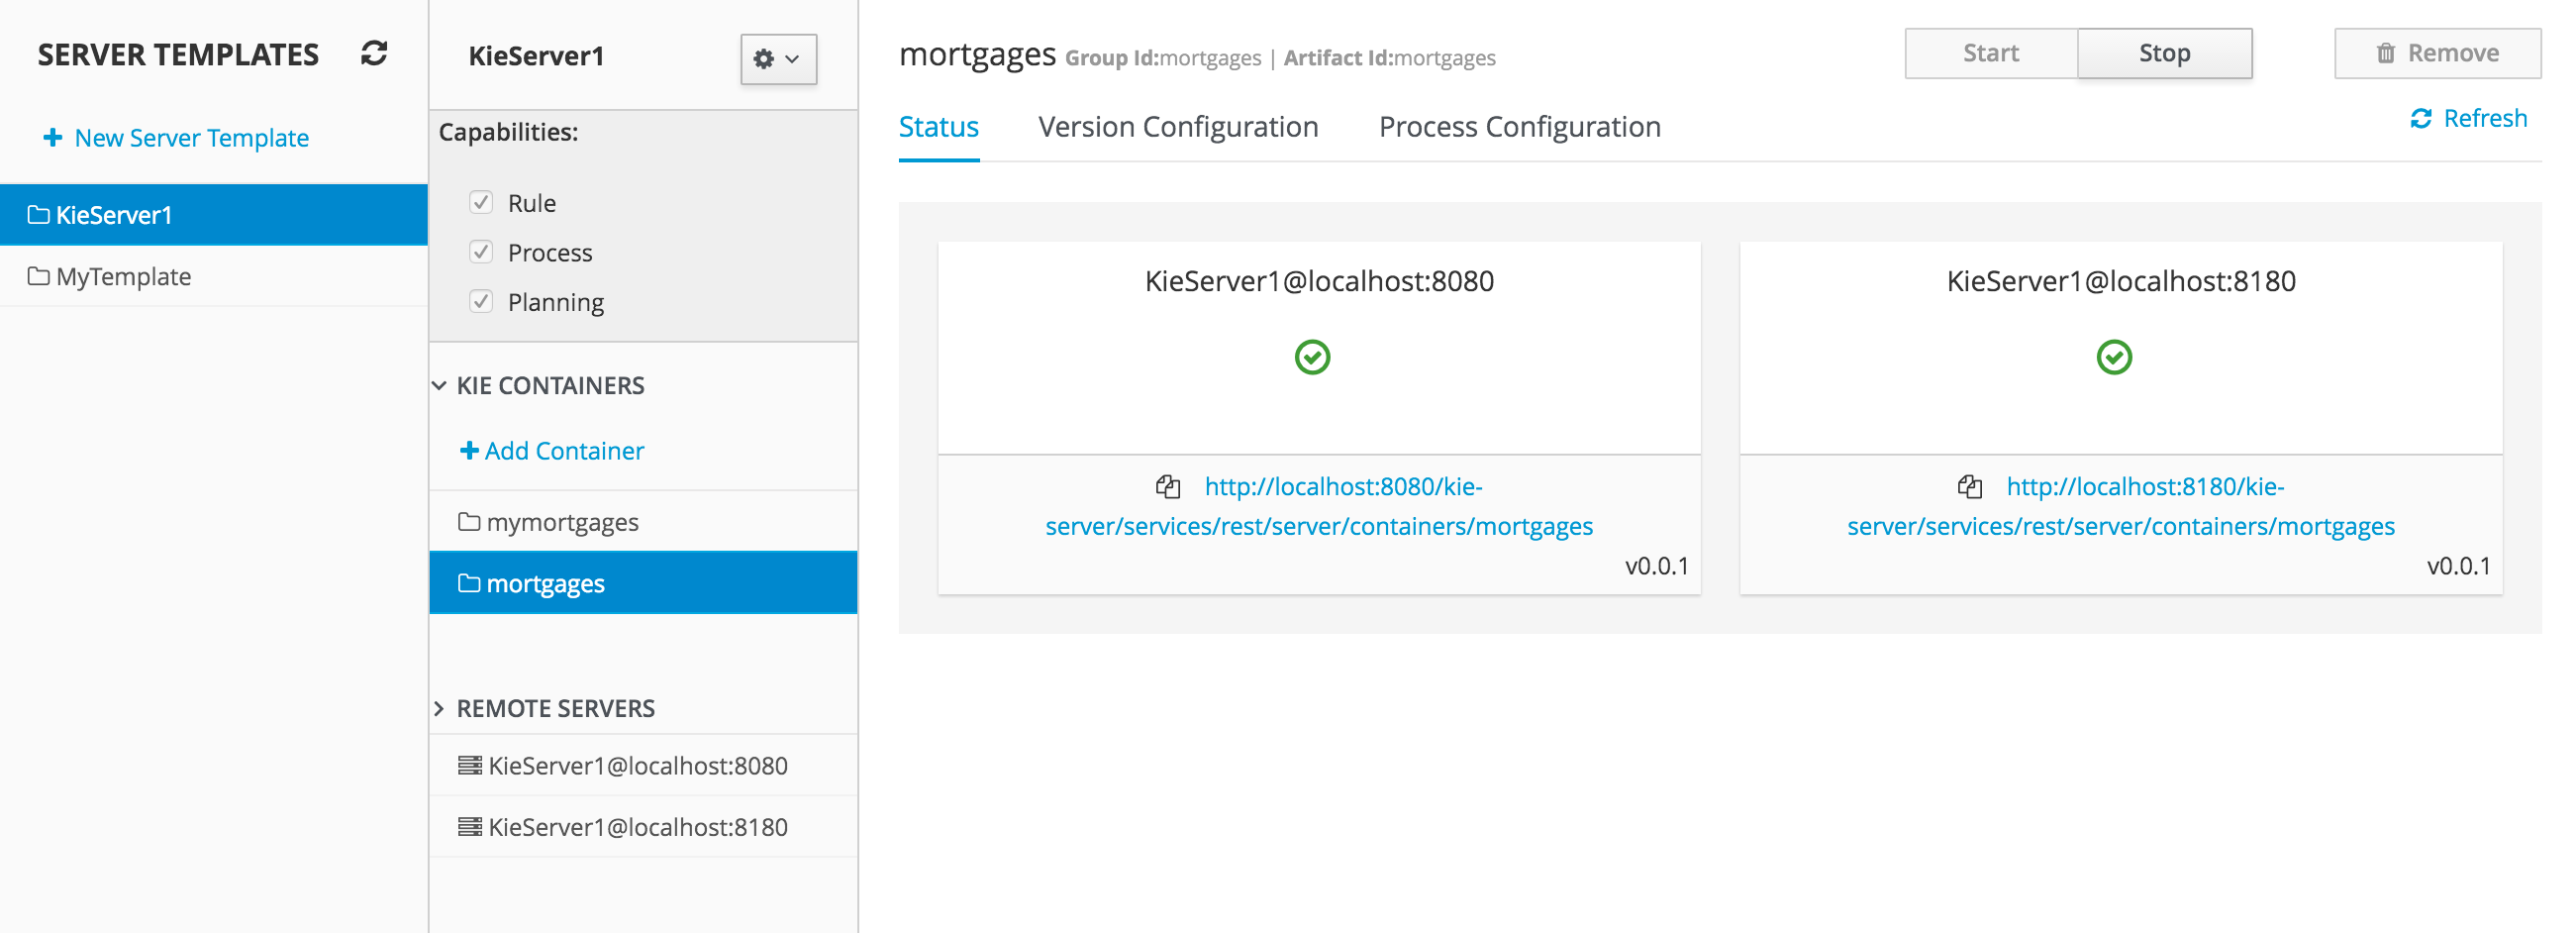
Version Configuration tab allow users change the current version of the Container. User's can upgrade manually to a specific version using the "Upgrade" button, or enable/disable the Scanner. It's also possible to execute a ScanNow operation, that will scan for new versions only once.

Process Configuration is the same form that is displayed during New Container Wizard for Template Servers that have Process Capability. If Template Server doesn't have such capability, the action buttons will be disabled.
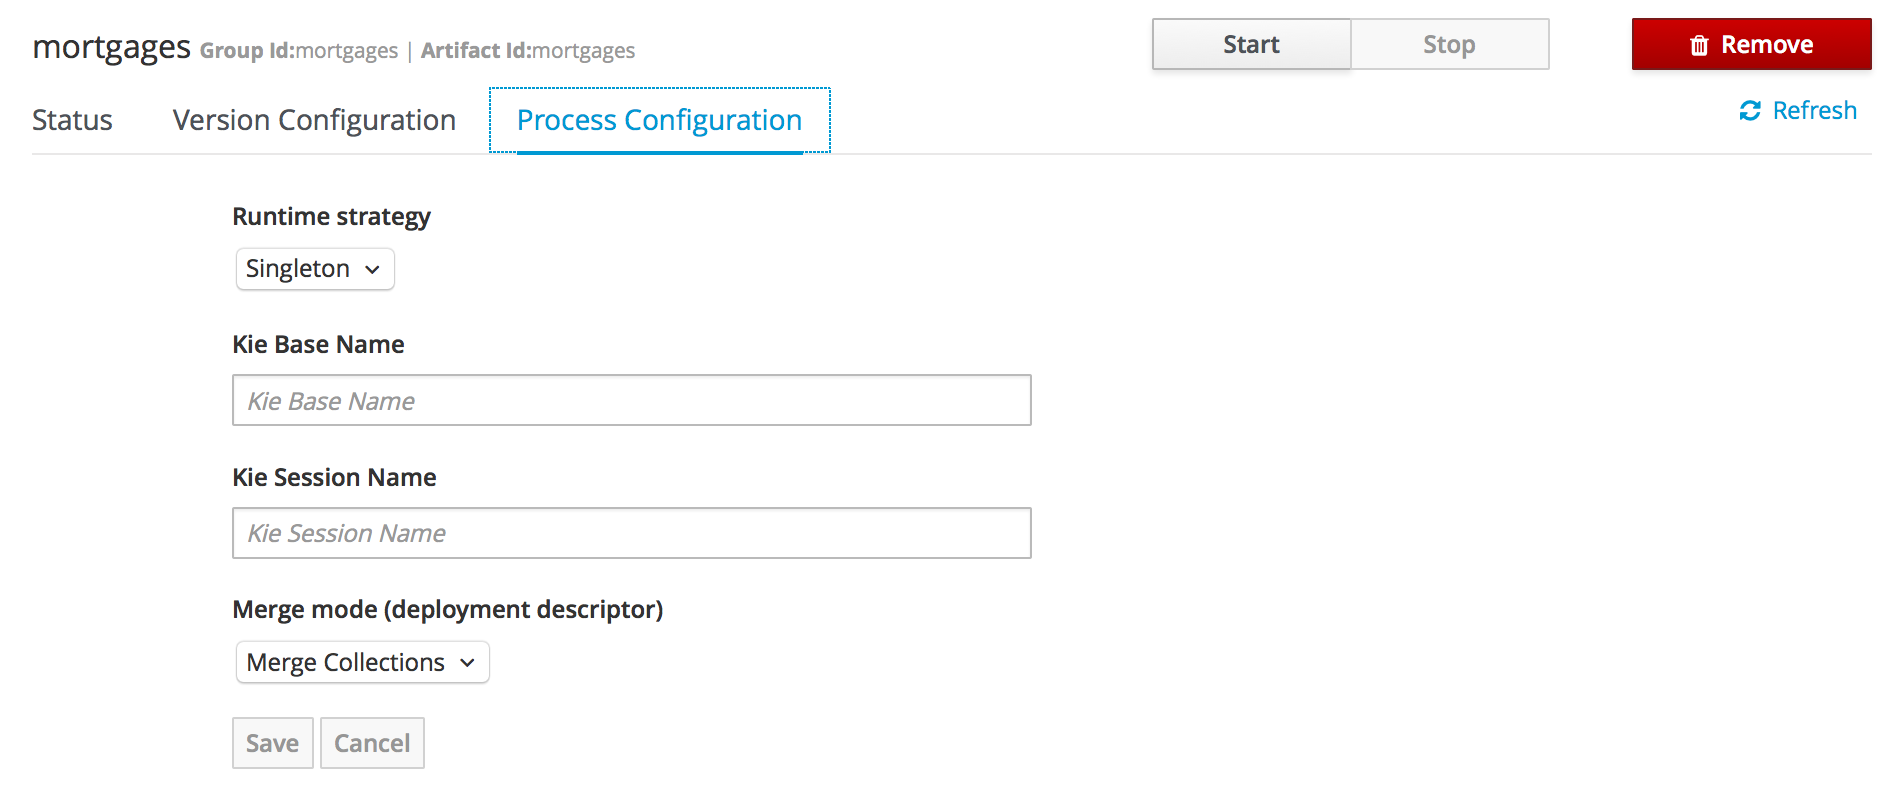
Remote Server is a Managed KIE Server instance running that has a controller configured.
Note
By default Workbench comes with a Controller embedded.
The list of Remote Servers are displayed just under the list of Containers. Once selected the screens reveals the Remote Server details and a list of cards, each card represents a running Container.
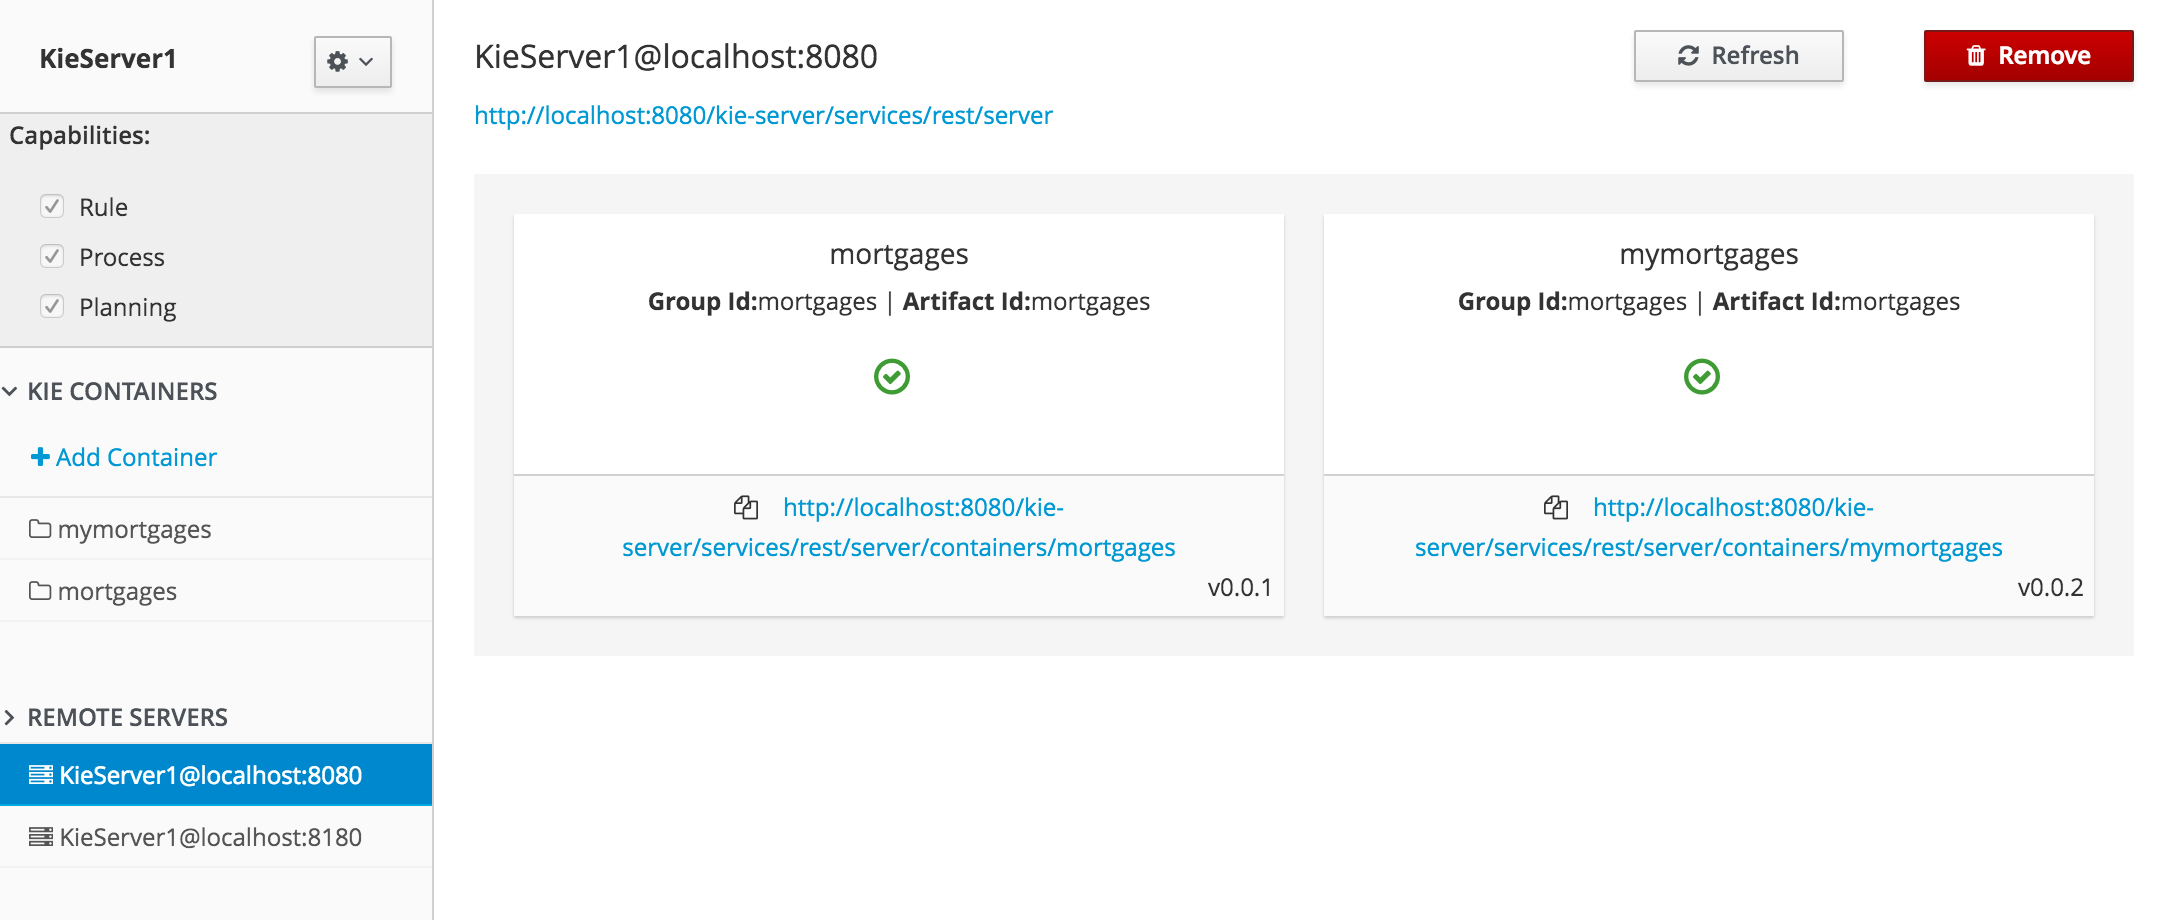
- 10.1. REST
- 10.2. Keycloak SSO integration
- 10.2.1. Scenario
- 10.2.2. Install and setup a Keycloak server
- 10.2.3. Create and setup the demo realm
- 10.2.4. Install and setup jBPM Workbench
- 10.2.5. Securing workbench remote services via Keycloak
- 10.2.6. Securing workbench's file system services via Keycloak
- 10.2.7. Execution server
- 10.2.8. Consuming remote services
REST API calls to Knowledge Store allow you to manage the Knowledge Store content and manipulate the static data in the repositories of the Knowledge Store. The calls are asynchronous, that is, they continue their execution after the call was performed as a job. The job ID is returned by every calls to allow after the REST API call was performed to request the job status and verify whether the job finished successfully. Parameters of these calls are provided in the form of JSON entities.
When using Java code to interface with the REST API, the classes used in POST operations
or otherwise returned by various operations can be found in the (org.kie.workbench.services:)kie-wb-common-services JAR. All
of the classes mentioned below can be found in the org.kie.workbench.common.services.shared.rest package in that JAR.
Every Knowledge Store REST call returns its job ID after it was sent. This is necessary as the calls are asynchronous and you need to be able to reference the job to check its status as it goes through its lifecycle. During its lifecycle, a job can have the following statuses:
ACCEPTED: the job was accepted and is being processedBAD_REQUEST: the request was not accepted as it contained incorrect contentRESOURCE_NOT_EXIST: the requested resource (path) does not existDUPLICATE_RESOURCE: the resource already existsSERVER_ERROR: an error on the server occurredSUCCESS: the job finished successfullyFAIL: the job failedDENIED: the job was deniedGONE: the job ID could not be foundA job can be GONE in the following cases:
The job was explicitly removed
The job finished and has been deleted from the status cache (the job is removed from status cache after the cache has reached its maximum capacity)
The job never existed
The following job calls are provided:
- [GET] /jobs/{jobID}
Returns the job status
Returns a
JobResultinstanceExample 10.1. An example (formatted) response body to the get job call on a repository clone request
"{ "status":"SUCCESS", "jodId":"1377770574783-27", "result":"Alias: testInstallAndDeployProject, Scheme: git, Uri: git://testInstallAndDeployProject", "lastModified":1377770578194,"detailedResult":null }"- [DELETE] /jobs/{jobID}
Removes the job: If the job is not yet being processed, this will remove the job from the job queue. However, this will not cancel or stop an ongoing job
Returns a
JobResultinstance
Repository calls are calls to the Knowledge Store that allow you to manage its Git repositories and their projects.
The following repositories calls are provided:
- [GET] /repositories
Gets information about the repositories in the Knowledge Store
Returns a
Collection<Map<String, String>>orCollection<RepositoryRequest>instance, depending on the JSON serialization library being used. The keys used in theMap<String, String>instance match the fields in theRepositoryRequestclassExample 10.2. An example (formatted) response body to the get repositories call
[ { "name":"wb-assets", "description":"generic assets", "userName":null, "password":null, "requestType":null, "gitURL":"git://bpms-assets" }, { "name":"loanProject", "description":"Loan processes and rules", "userName":null, "password":null, "requestType":null, "gitURL":"git://loansProject" } ]- [GET] /repositories/{repositoryName}
Gets information about a repository
Returns a
Map<String, String>orRepositoryRequestinstance, depending on the JSON serialization library being used. The keys used in theMap<String, String>instance match the fields in theRepositoryRequestclassExample 10.3. An example (formatted) response body to the get repository call
{ "name":"wb-assets", "description":"generic assets", "userName":null, "password":null, "requestType":null, "gitURL":"git://bpms-assets" }- [POST] /repositories
Creates a new empty repository or a new repository cloned from an existing (git) repository
Consumes a
RepositoryRequestinstanceReturns a
CreateOrCloneRepositoryRequestinstanceExample 10.4. An example (formatted) response body to the create repositories call
{ "name":"new-project-repo", "description":"repo for my new project", "userName":null,"password":null, "requestType":"new", "gitURL":null }- [DELETE] /repositories/{repositoryName}
Removes the repository from the Knowledge Store
Returns a
RemoveRepositoryRequestinstance- [POST] /repositories/{repositoryName}/projects/
Creates a project in the repository
Consumes an
EntityinstanceReturns a
CreateProjectRequestinstanceExample 10.5. An example (formatted) request body that defines the project to be created
{ "name":"myProject", "description": "my project" }- [DELETE] /repositories/{repositoryName}/projects/
Deletes the project in the repository
Returns a
DeleteProjectRequestinstance- [GET] /repositories/{repositoryName}/projects/
Gets information about the projects
Returns a
Collection<Map<String, String>>orCollection<ProjectResponse>instance, depending on the JSON serialization library being used. The keys used in theMap<String, String>instance match the fields in theProjectResponseclassExample 10.6. An example (formatted) response body to the get projects call
[
  {
    "name":"wb-assets",
    "description":"generic assets",
    "groupId":"org.test",
    "version":"1.0"
 },
 {
   "name":"loanProject",
   "description":"Loan processes and rules",
    "groupId":"com.bank",
    "version":"3.7"
 }
]
Organizational unit calls are calls to the Knowledge Store that allow you to manage its organizational units, so as to organize the connected Git repositories.
The following organizationalUnits calls are provided:
- [POST] /organizationalunits
Creates an organizational unit in the Knowledge Store
Consumes an
OrganizationalUnitinstanceReturns a
CreateOrganizationalUnitRequestinstanceExample 10.7. An example (formatted) request body defining a new organizational unit to be created
{ "name":"testgroup", "description":"", "owner":"tester", "repositories":["testGroupRepository"] }- [GET] /organizationalunits/{orgUnitName}
Creates an organizational unit
Consumes an
OrganizationalUnitinstanceReturns a
CreateOrganizationalUnitRequestinstanceExample 10.8. An example (formatted) request body defining a new organizational unit to be created
{ "name":"testgroup", "description":"", "owner":"tester", "repositories":["testGroupRepository"] }- [POST] /organizationalunits/{orgUnitName}
Creates an organizational unit in the Knowledge Store
Consumes an
UpdateOrganizationalUnitinstanceReturns a
UpdateOrganizationalUnitRequestinstanceExample 10.9. An example (formatted) request body defining a new organizational unit to be created
{ "name":"testgroup", "description":"", "owner":"tester", "repositories":["testGroupRepository"] }- [DELETE] /organizationalunits/{organizationalUnitName}
Deletes a organizational unit
Returns a
RemoveOrganizationalUnitRequestinstance- [POST] /organizationalunits/{organizationalUnitName}/repositories/{repositoryName}
Adds the repository to the organizational unit
Returns a
AddRepositoryToOrganizationalUnitRequestinstance- [DELETE] /organizationalunits/{organizationalUnitName}/repositories/{repositoryName}
Removes the repository from the organizational unit
Returns a
RemoveRepositoryFromOrganizationalUnitRequestinstance
Maven calls are calls to a Project in the Knowledge Store that allow you compile and deploy the Project resources.
The following maven calls are provided:
- [POST] /repositories/{repositoryName}/projects/{projectName}/maven/compile
Compiles the project (equivalent to
mvn compile)Consumes a
BuildConfiginstance. While this must be supplied, it's not needed for the operation and may be left blank.Returns a
CompileProjectRequestinstance- [POST] /repositories/{repositoryName}/projects/{projectName}/maven/install
Installs the project (equivalent to
mvn install)Consumes a
BuildConfiginstance. While this must be supplied, it's not needed for the operation and may be left blank.Returns a
InstallProjectRequestinstance- [POST] /repositories/{repositoryName}/projects/{projectName}/maven/test
Compiles the project runs a test as part of compilation
Consumes a
BuildConfiginstanceReturns a
TestProjectRequestinstance- [POST] /repositories/{repositoryName}/projects/{projectName}/maven/deploy
Deploys the project (equivalent to
mvn deploy)Consumes a
BuildConfiginstance. While this must be supplied, it's not needed for the operation and may be left blank.Returns a
DeployProjectRequestinstance
The URL templates in the table below are relative the following URL:
http://server:port/business-central/rest
Table 10.1. Knowledge Store REST calls
| URL Template | Type | Description |
|---|---|---|
| /jobs/{jobID} | GET | return the job status |
| /jobs/{jobID} | DELETE | remove the job |
| /organizationalunits | GET | return a list of organizational units |
| /organizationalunits | POST |
create an organizational unit in the Knowledge Store described by the JSON |
| /organizationalunits/{organizationalUnitName}/repositories/{repositoryName} | POST | add a repository to an organizational unit |
| /organizationalunits/{organizationalUnitName}/repositories/{repositoryName} | DELETE | remove a repository from an organizational unit |
| /repositories/ | POST |
add the repository to the organizational unit described by the JSON |
| /repositories | GET | return the repositories in the Knowledge Store |
| /repositories/{repositoryName} | DELETE | remove the repository from the Knowledge Store |
| /repositories/ | POST | create or clone the repository defined by the JSON RepositoryRequest entity |
| /repositories/{repositoryName}/projects/ | POST | create the project defined by the JSON entity in the repository |
| /repositories/{repositoryName}/projects/{projectName}/maven/compile/ | POST | compile the project |
| /repositories/{repositoryName}/projects/{projectName}/maven/install | POST | install the project |
| /repositories/{repositoryName}/projects/{projectName}/maven/test/ | POST |
compile the project and run tests as part of compilation |
| /repositories/{repositoryName}/projects/{projectName}/maven/deploy/ | POST | deploy the project |
Single Sign On (SSO) and related token exchange mechanisms are becoming the most common scenario for the authentication and authorization in different environments on the web, specially when moving into the cloud.
This section talks about the integration of Keycloak with jBPM or Drools applications in order to use all the features provided on Keycloak. Keycloak is an integrated SSO and IDM for browser applications and RESTful web services. Lean more about it in the Keycloak's home page.
The result of the integration with Keycloak has lots of advantages such as:
Provide an integrated SSO and IDM environment for different clients, including jBPM and Drools workbenches
Social logins - use your Facebook, Google, Linkedin, etc accounts
User session management
And much more...
Next sections cover the following integration points with Keycloak:
Workbench authentication through a Keycloak server
It basically consists of securing both web client and remote service clients through the Keycloak SSO. So either web interface or remote service consumers ( whether a user or a service ) will authenticate into trough KC.
Execution server authentication through a Keycloak server
Consists of securing the remote services provided by the execution server (as it does not provides web interface). Any remote service consumer ( whether a user or a service ) will authenticate trough KC.
Consuming remote services
This section describes how a third party clients can consume the remote service endpoints provided by both Workbench and Execution Server, such as the REST API or remote file system services.
Consider the following diagram as the environment for this document's example:
Keycloak is a standalone process that provides remote authentication, authorization and administration services that can be potentially consumed by one or more jBPM applications over the network.
Consider these main steps for building this environment:
Install and setup a Keycloak server
Create and setup a Realm for this example - Configure realm's clients, users and roles
Install and setup the SSO client adapter & jBPM application
Note: The resulting environment and the different configurations for this document are based on the jBPM (KIE) Workbench, but same ones can also be applied for the KIE Drools Workbench as well.
Keycloak provides an extensive documentation and several articles about the installation on different environments. This section describes the minimal setup for being able to build the integrated environment for the example. Please refer to the Keycloak documentation if you need more information.
Here are the steps for a minimal Keycloak installation and setup:
Download latest version of Keycloak from the Downloads section. This example is based on Keycloak 1.9.0.Final
Unzip the downloaded distribution of Keycloak into a folder, let's refer it as
$KC_HOMERun the KC server - This example is based on running both Keycloak and jBPM on same host. In order to avoid port conflicts you can use a port offset for the Keycloak's server as:
$KC_HOME/bin/standalone.sh -Djboss.socket.binding.port-offset=100
Create a Keycloak's administration user - Execute the following command to create an admin user for this example:
$KC_HOME/bin/add-user.sh -r master -u 'admin' -p 'admin'
The Keycloak administration console will be available at http://localhost:8180/auth/admin (use the admin/admin for login credentials).
Security realms are used to restrict the access for the different application's resources.
Once the Keycloak server is running next step is about creating a realm. This realm will provide the different users, roles, sessions, etc for the jBPM application/s.
Keycloak provides several examples for the realm creation and management, from the official examples to different articles with more examples.
Follow these steps in order to create the demo realm used later in this document:
Go to the Keycloak administration console and click on Add realm button. Give it the name demo.
Go to the Clients section (from the main admin console menu) and create a new client for the demo realm:
Client ID: kie
Client protocol: openid-connect
Acces type: confidential
Root URL: http://localhost:8080
Base URL: /kie-wb-6.4.0.Final
Redirect URIs: /kie-wb-6.4.0.Final/*
The resulting kie client settings screen:
Note: As you can see in the above settings it's being considered the value kie-wb-6.4.0.Final for the application's context path. If your jbpm application will be deployed on a different context path, host or port, just use your concrete settings here.
Last step for being able to use the demo realm from the jBPM workbench is create the application's user and roles:
Go to the Roles section and create the roles admin, kiemgmt and rest-all
Go to the Users section and create the admin user. Set the password with value "password" in the credentials tab, unset the temporary switch.
In the Users section navigate to the Role Mappings tab and assign the admin, kiemgmt and rest-all roles to the admin user
At this point a Keycloak server is running on the host, setup with a minimal configuration set. Let's move to the jBPM workbench setup.
For this tutorial let's use a Wildfly as the application server for the jBPM workbench, as the jBPM installer does by default.
Let's assume, after running the jBPM installer, the $JBPM_HOME as the root path for the Wildfly server where the application has been deployed.
In order to use the Keycloak's authentication and authorization modules from the jBPM application, the Keycloak adapter for Wildfly must be installed on our server at $JBPM_HOME. Keycloak provides multiple adapters for different containers out of the box, if you are using another container or need to use another adapter, please take a look at the adapters configuration from Keycloak docs. Here are the steps to install and setup the adapter for Wildfly 8.2.x:
Download the adapter from here
Execute the following commands on your shell:
cd $JBPM_HOME/unzip keycloak-wf8-adapter-dist.zip // Install the KC client adapter

cd $JBPM_HOME/bin
./standalone.sh -c standalone-full.xml // Setup the KC client adapter.

// ** Once server is up, open a new command line terminal and run:
cd $JBPM_HOME/bin
./jboss-cli.sh -c --file=adapter-install.cli
Once installed the KC adapter into Wildfly, next step is to configure the adapter in order to specify different settings such as the location for the authentication server, the realm to use and so on.
Keycloak provides two ways of configuring the adapter:
Per WAR configuration
Via Keycloak subsystem
In this example let's use the second option, use the Keycloak subsystem, so our WAR is free from this kind of settings. If you want to use the per WAR approach, please take a look here.
Edit the configuration file $JBPM_HOME/standalone/configuration/standalone-full.xml and locate the subsystem configuration section. Add the following content:
<subsystem xmlns="urn:jboss:domain:keycloak:1.1">
  <secure-deployment name="kie-wb-6.4.0-Final.war">
    <realm>demo</realm>
    <realm-public-key>MIIBIjANBgkqhkiG9w0BAQEFAAOCA...</realm-public-key>
    <auth-server-url>http://localhost:8180/auth</auth-server-url>
    <ssl-required>external</ssl-required>
    <resource>kie</resource>
    <enable-basic-auth>true</enable-basic-auth>
    <credential name="secret">925f9190-a7c1-4cfd-8a3c-004f9c73dae6</credential>
    <principal-attribute>preferred_username</principal-attribute>
  </secure-deployment>
</subsystem>
If you have imported the example json files from this document in step 2, you can just use same configuration as above by using your concrete deployment name . Otherwise please use your values for these configurations:
Name for the secure deployment - Use your concrete application's WAR file name
Realm - Is the realm that the applications will use, in our example, the demo realm created the previous step.
Realm Public Key - Provide here the public key for the demo realm. It's not mandatory, if it's not specified, it will be retrieved from the server. Otherwise, you can find it in the Keycloak admin console -> Realm settings ( for demo realm ) -> Keys
Authentication server URL - The URL for the Keycloak's authentication server
Resource - The name for the client created on step 2. In our example, use the value kie.
Enable basic auth - For this example let's enable Basic authentication mechanism as well, so clients can use both Token (Baerer) and Basic approaches to perform the requests.
Credential - Use the password value for the kie client. You can find it in the Keycloak admin console -> Clients -> kie -> Credentials tab -> Copy the value for the secret.
For this example you have to take care about using your concrete values for secure-deployment name, realm-public-key and credential password. You can find detailed information about the KC adapter configurations here.
At this point a Keycloak server is up and running on the host, and the KC adapter is installed and configured for the jBPM application server. You can run the application using:
$JBPM_HOME/bin/standalone.sh -c standalone-full.xml
You can navigate into the application once the server is up at:
http://localhost:8080/kie-wb-6.4.0.Final
Use your Keycloak's admin user credentials to login: admin/password.
Both jBPM and Drools workbenches provides different remote service endpoints that can be consumed by third party clients using the remote API.
In order to authenticate those services thorough Keycloak the BasicAuthSecurityFilter must be disabled, apply those modifications for the the WEB-INF/web.xml file (app deployment descriptor) from jBPM's WAR file:
Remove the following filter from the deployment descriptor:
<filter>
  <filter-name>HTTP Basic Auth Filter</filter-name>
  <filter-class>org.uberfire.ext.security.server.BasicAuthSecurityFilter</filter-class>
  <init-param>
    <param-name>realmName</param-name>
    <param-value>KIE Workbench Realm</param-value>
  </init-param>
</filter>

<filter-mapping>
  <filter-name>HTTP Basic Auth Filter</filter-name>
  <url-pattern>/rest/*</url-pattern>
  <url-pattern>/maven2/*</url-pattern>
  <url-pattern>/ws/*</url-pattern>
</filter-mapping>
Constraint the remote services URL patterns as:
<security-constraint>
  <web-resource-collection>
    <web-resource-name>remote-services</web-resource-name>
    <url-pattern>/rest/*</url-pattern>
    <url-pattern>/maven2/*</url-pattern>
    <url-pattern>/ws/*</url-pattern>
  </web-resource-collection>
  <auth-constraint>
    <role-name>rest-all</role-name>
  </auth-constraint>
</security-constraint>
Important note: The user that consumes the remote services must be member of role rest-all. As on described previous steps, the admin user in this example it's already a member of the rest-all role.
In order to consume other remote services such as the file system ones (e.g. remote GIT), a specific Keycloak login module must be used for the application's security domain in the $JBPM_HOME/standalone/configuration/standalone-full.xml file. By default the workbench uses the other security domain, so the resulting configuration on the $JBPM_HOME/standalone/configuration/standalone-full.xml should be such as:
      <security-domain name="other" cache-type="default">
        <authentication>
          <login-module code="org.keycloak.adapters.jaas.DirectAccessGrantsLoginModule" flag="required">
            <!-- Parameter value can be a file system absolute path or a classpath (e.g. "classpath:/some-path/kie-git.json")-->
            <module-option name="keycloak-config-file" value="$JBPM_HOME/kie-git.json"/>
          </login-module>
        </authentication>
      </security-domain>
Note that:
The login modules on the other security domain in the $JBPM_HOME/standalone/configuration/standalone-full.xml file must be REPLACED by the above given one.
Replace $JBPM_HOME/kie-git.json by the path (on file system) or the classpath (e.g. classpath:/some-path/kie-git.json) for the json configuration file used for the remote services client. Please continue reading in order to create this Keycloak client and how to obtain this json file.
At this point, remote services that use JAAS for the authentication process, such as the file system ones ( e.g. GIT ), are secured by Keycloak using the client specified in the above json configuration file. So let's create this client on Keycloak and generate the required JSON file:
Navigate to the KC administration console and create a new client for the demo realm using kie-git as name.
Enable Direct Access Grants Enabled option, disable Standard Flow Enabled and use a confidential access type for this client. See below image as example:
Go to the Installation tab in same kie-git client configuration screen and export using the Keycloak OIDC JSON type.
Finally copy this generated JSON file into an accessible directory on the server's file system or add it in the application's classpath. Use this path value as the keycloak-config-file argument for the above configuration of the org.keycloak.adapters.jaas.DirectAccessGrantsLoginModule login module.
More information about Keycloak JAAS Login modules can be found here.
At this point, the internal Git repositories can be cloned by all users authenticated via the Keycloak server. Command example:
git clone ssh://admin@localhost:8001/system
The KIE Execution Server provides a REST API than can be consumed for any third party clients,. This this section is about how to integration the KIE Execution Server with the Keycloak SSO in order to delegate the third party clients identity management to the SSO server.
Consider the above environment running, so consider having:
A Keycloak server running and listening on http://localhost:8180/auth
A realm named demo with a client named kie for the jBPM Workbench
A jBPM Workbench running at http://localhost:8080/kie-wb-6.4.0-Final
Follow these steps in order to add an execution server into this environment:
Create the client for the execution server on Keycloak
Install setup and the Execution server ( with the KC client adapter )
As per each execution server is going to be deployed, you have to create a new client on the demo realm in Keycloak.:
Go to the KC admin console -> Clients -> New client
Name: kie-execution-server
Root URL: http://localhost:8280/
Client protocol: openid-connect
Access type: confidential ( or public if you want so, but not recommended for production environments)
Valid redirect URIs: /kie-server-6.4.0.Final/*
Base URL: /kie-server-6.4.0.Final
In this example the admin user already created on previous steps is the one used for the client requests. So ensure that the admin user is member of the role kie-server in order to use the execution server's remote services. If the role does not exist, create it.
Note: This example considers that the execution server will be configured to run using a port offset of 200, so the HTTP port will be available at localhost:8280.
At this point, a client named kie-execution-server is ready on the KC server to use from the execution server.
Let's install, setup and deploy the execution server:
Install another Wildfly server to use for the execution server and the KC client adapter as well. You can follow above instructions for the Workbench or follow the official adapters documentation
Edit the standalone-full.xml file from the Wildfly server's configuration path and configure the KC subsystem adapter as:
<secure-deployment name="kie-server-6.4.0.Final.war">
    <realm>demo</realm>
    <realm-public-key>MIGfMA0GCSqGSIb...</realm-public-key>
    <auth-server-url>http://localhost:8180/auth</auth-server-url>
    <ssl-required>external</ssl-required>
    <resource>kie-execution-server</resource>
    <enable-basic-auth>true</enable-basic-auth>
    <credential name="secret">e92ec68d-6177-4239-be05-28ef2f3460ff</credential>
    <principal-attribute>preferred_username</principal-attribute>
</secure-deployment>
Consider your concrete environment settings if different from this example:
Secure deployment name -> use the name of the execution server war file being deployed
Public key -> Use the demo realm public key or leave it blank, the server will provide one if so
Resource -> This time, instead of the kie client used in the WB configuration, use the kie-execution-server client
Enable basic auth -> Up to you. You can enable Basic auth for third party service consumers
Credential -> Use the secret key for the kie-execution-server client. You can find it in the Credentialstab of the KC admin console
Just deploy the execution server in Wildfly using any of the available mechanisms. Run the execution server using this command:
$EXEC_SERVER_HOME/bin/standalone.sh -c standalone-full.xml -Djboss.socket.binding.port-offset=200 -Dorg.kie.server.id=<ID> -Dorg.kie.server.user=<USER> -Dorg.kie.server.pwd=<PWD> -Dorg.kie.server.location=<LOCATION_URL> -Dorg.kie.server.controller=<CONTROLLER_URL> -Dorg.kie.server.controller.user=<CONTROLLER_USER> -Dorg.kie.server.controller.pwd=<CONTOLLER_PASSWORD>
Example:
$EXEC_SERVER_HOME/bin/standalone.sh -c standalone-full.xml -Djboss.socket.binding.port-offset=200 -Dorg.kie.server.id=kieserver1 -Dorg.kie.server.user=admin -Dorg.kie.server.pwd=password -Dorg.kie.server.location=http://localhost:8280/kie-server-6.4.0.Final/services/rest/server -Dorg.kie.server.controller=http://localhost:8080/kie-wb-6.4.0.Final/rest/controller -Dorg.kie.server.controller.user=admin -Dorg.kie.server.controller.pwd=password
mportant note: The users that will consume the execution server remote service endpoints must have the role kie-server assigned. So create and assign this role in the KC admin console for the users that will consume the execution server remote services.
Once up, you can check the server status as (considered using Basic authentication for this request, see nextConsuming remote services for more information):
curl http://admin:password@localhost:8280/kie-server-6.4.0.Final/services/rest/server/
In order to use the different remote services provided by the Workbench or by an Execution Server, your client must be authenticated on the KC server and have a valid token to perform the requests.
Remember that in order to use the remote services, the authenticated user must have assigned:
The role rest-all for using the WB remote services
The role kie-server for using the Execution Server remote services
Please ensure necessary roles are created and assigned to the users that will consume the remote services on the Keycloak admin console.
You have two options to consume the different remove service endpoints:
Using basic authentication, if the application's client supports it
Using Bearer ( token) based authentication
If the KC client adapter configuration has the Basic authentication enabled, as proposed in this guide for both WB (step 3.2) and Execution Server, you can avoid the token grant/refresh calls and just call the services as the following examples.
Example for a WB remote repositories endpoint:
curl http://admin:password@localhost:8080/kie-wb-6.4.0.Final/rest/repositories
Example to check the status for the Execution Server:
curl http://admin:password@localhost:8280/kie-server-6.4.0.Final/services/rest/server/
First step is to create a new client on Keycloak that allows the third party remote service clients to obtain a token. It can be done as:
Go to the KC admin console and create a new client using this configuration:
Client id: kie-remote
Client protocol: openid-connect
Access type: public
Valid redirect URIs: http://localhost/
As we are going to manually obtain a token and invoke the service let's increase the lifespan of tokens slightly. In production access tokens should have a relatively low timeout, ideally less than 5 minutes:
Go to the KC admin console
Click on your Realm Settings
Click on Tokens tab
Change the value for Access Token Lifespan to 15 minutes ( That should give us plenty of time to obtain a token and invoke the service before it expires )
Once a public client for our remote clients has been created, you can now obtain the token by performing an HTTP request to the KC server's tokens endpoint. Here is an example for command line:
RESULT=`curl --data "grant_type=password&client_id=kie-remote&username=admin&passwordpassword=<the_client_secret>" http://localhost:8180/auth/realms/demo/protocol/openid-connect/token`
TOKEN=`echo $RESULT | sed 's/.*access_token":"//g' | sed 's/".*//g'`
At this point, if you echo the $TOKEN it will output the token string obtained from the KC server, that can be now used to authorize further calls to the remote endpoints. For exmple, if you want to check the internal jBPM repositories:
curl -H "Authorization: bearer $TOKEN" http://localhost:8080/kie-wb-6.4.0.Final/rest/repositories
The VFS repositories (usually git repositories) stores all the assets (such as rules, decision tables, process definitions, forms, etc). If that VFS resides on each local server, then it must be kept in sync between all servers of a cluster.
Use Apache Zookeeper and Apache Helix to accomplish this. Zookeeper glues all the parts together. Helix is the cluster management component that registers all cluster details (nodes, resources and the cluster itself). Uberfire (on top of which Workbench is build) uses those 2 components to provide VFS clustering.
To create a VFS cluster:
Download Apache Zookeeper and Apache Helix.
Install both:
Unzip Zookeeper into a directory (
$ZOOKEEPER_HOME).In
$ZOOKEEPER_HOME, copyzoo_sample.conftozoo.confEdit
zoo.conf. Adjust the settings if needed. Usually only these 2 properties are relevant:# the directory where the snapshot is stored. dataDir=/tmp/zookeeper # the port at which the clients will connect clientPort=2181Unzip Helix into a directory (
$HELIX_HOME).
Configure the cluster in Zookeeper:
Go to its
bindirectory:$ cd $ZOOKEEPER_HOME/binStart the Zookeeper server:
$ sudo ./zkServer.sh startIf the server fails to start, verify that the
dataDir(as specified inzoo.conf) is accessible.To review Zookeeper's activities, open
zookeeper.out:$ cat $ZOOKEEPER_HOME/bin/zookeeper.out
Configure the cluster in Helix:
Go to its
bindirectory:$ cd $HELIX_HOME/binCreate the cluster:
$ ./helix-admin.sh --zkSvr localhost:2181 --addCluster kie-clusterThe
zkSvrvalue must match the used Zookeeper server. The cluster name (kie-cluster) can be changed as needed.Add nodes to the cluster:
# Node 1
$ ./helix-admin.sh --zkSvr localhost:2181 --addNode kie-cluster nodeOne:12345
# Node 2
$ ./helix-admin.sh --zkSvr localhost:2181 --addNode kie-cluster nodeTwo:12346
...
Usually the number of nodes a in cluster equal the number of application servers in the cluster. The node names (
nodeOne:12345, ...) can be changed as needed.Note
nodeOne:12345is the unique identifier of the node, which will be referenced later on when configuring application servers. It is not a host and port number, but instead it is used to uniquely identify the logical node.Add resources to the cluster:
$ ./helix-admin.sh --zkSvr localhost:2181 --addResource kie-cluster vfs-repo 1 LeaderStandby AUTO_REBALANCEThe resource name (
vfs-repo) can be changed as needed.Rebalance the cluster to initialize it:
$ ./helix-admin.sh --zkSvr localhost:2181 --rebalance kie-cluster vfs-repo 2Start the Helix controller to manage the cluster:
$ ./run-helix-controller.sh --zkSvr localhost:2181 --cluster kie-cluster 2>&1 > /tmp/controller.log &
Configure the security domain correctly on the application server. For example on WildFly and JBoss EAP:
Edit the file
$JBOSS_HOME/domain/configuration/domain.xml.For simplicity sake, presume we use the default domain configuration which uses the profile
fullthat defines two server nodes as part ofmain-server-group.Locate the profile
fulland add a new security domain by copying the other security domain already defined there by default:<security-domain name="kie-ide" cache-type="default"> <authentication> <login-module code="Remoting" flag="optional"> <module-option name="password-stacking" value="useFirstPass"/> </login-module> <login-module code="RealmDirect" flag="required"> <module-option name="password-stacking" value="useFirstPass"/> </login-module> </authentication> </security-domain>Important
The security-domain name is a magic value.
Configure the system properties for the cluster on the application server. For example on WildFly and JBoss EAP:
Edit the file
$JBOSS_HOME/domain/configuration/host.xml.Locate the XML elements
serverthat belong to themain-server-groupand add the necessary system property.For example for nodeOne:
<system-properties>
  <property name="jboss.node.name" value="nodeOne" boot-time="false"/>
  <property name="org.uberfire.nio.git.dir" value="/tmp/kie/nodeone" boot-time="false"/>
  <property name="org.uberfire.metadata.index.dir" value="/tmp/kie/nodeone" boot-time="false"/>
  <property name="org.uberfire.cluster.id" value="kie-cluster" boot-time="false"/>
  <property name="org.uberfire.cluster.zk" value="localhost:2181" boot-time="false"/>
  <property name="org.uberfire.cluster.local.id" value="nodeOne_12345" boot-time="false"/>
  <property name="org.uberfire.cluster.vfs.lock" value="vfs-repo" boot-time="false"/>
  <!-- If you're running both nodes on the same machine: -->
  <property name="org.uberfire.nio.git.daemon.port" value="9418" boot-time="false"/>
</system-properties>
And for nodeTwo:
<system-properties>
  <property name="jboss.node.name" value="nodeTwo" boot-time="false"/>
  <property name="org.uberfire.nio.git.dir" value="/tmp/kie/nodetwo" boot-time="false"/>
  <property name="org.uberfire.metadata.index.dir" value="/tmp/kie/nodetwo" boot-time="false"/>
  <property name="org.uberfire.cluster.id" value="kie-cluster" boot-time="false"/>
  <property name="org.uberfire.cluster.zk" value="localhost:2181" boot-time="false"/>
  <property name="org.uberfire.cluster.local.id" value="nodeTwo_12346" boot-time="false"/>
  <property name="org.uberfire.cluster.vfs.lock" value="vfs-repo" boot-time="false"/>
  <!-- If you're running both nodes on the same machine: -->
  <property name="org.uberfire.nio.git.daemon.port" value="9419" boot-time="false"/>
</system-properties>
Make sure the cluster, node and resource names match those configured in Helix.
In addition to the information above, jBPM clustering requires additional configuration. See this blog post to configure the database etc correctly.
Designer is a graphical web-based BPMN2 editor. It allows users to model and simulate executable BPMN2 processes. The main goal of Designe is to provide intuitive means to both technical and non-technical users to quickly create their executable business processes. This chapter intends to describe all feature Designer offers currently.
Designer targets the following business process modelling scenarios:
View and/or edit existing BPMN2 processes: Designer allows you to open existing BPMN2 processes (for example created using the BPMN2 Eclipse editor or any other tooling that exports BPMN2 XML).
Create fully executable BPMN2 processes: A user can create a new BPMN2 process in the Designer and use the editing capabilities (drag and drop and filling in properties in the properties panel) to fill in the details. This for example allows business users to create complete business processes all inside a a browser. The integration with Drools Guvnor allows for your business processes as wells as other business assets such as business rules, process forms/images, etc. to be stored and versioned inside a content repository.
View and/or edit Human Task forms during process modelling (using the in-line form editor or the Form Modeller).
Simulate your business process models. Busines Process Simulation is based on the BPSIM 1.0 specification.
Designer supports all BPMN2 elements that are also supported by jBPM as well as all jBPM-specific BPMN2 extension elements and attributes.
Designer UI is composed of a number of sections as shown below:
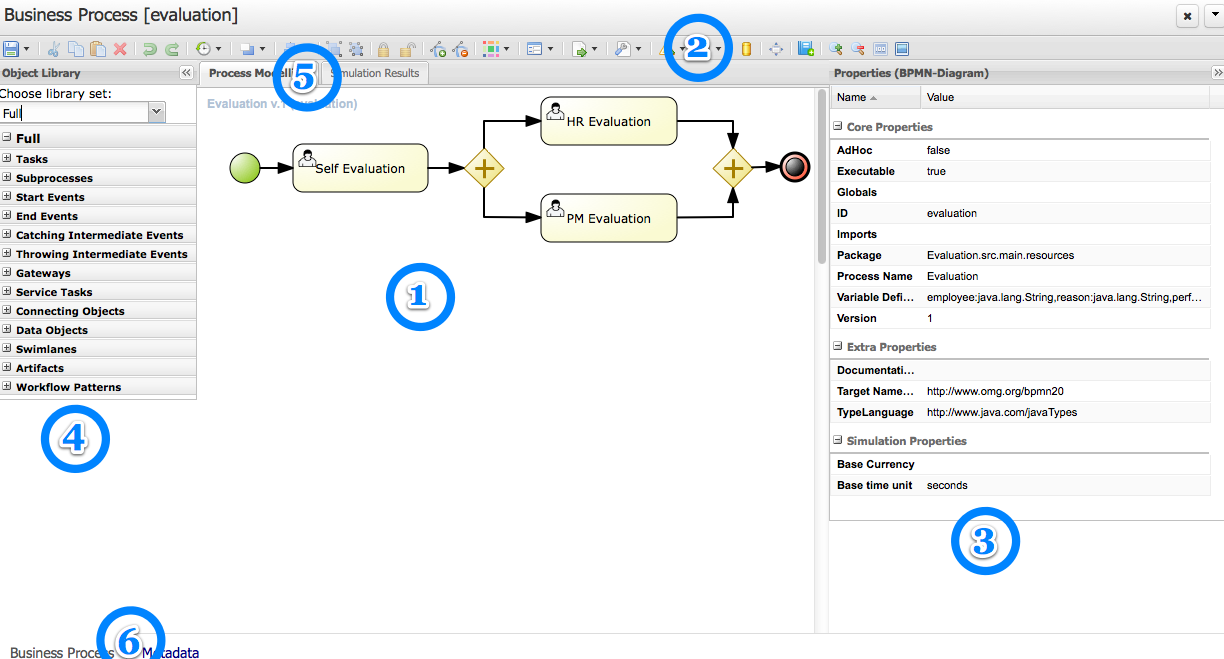
(1) Modelling Canvas - this is your process drawing board. After dropping different shapes onto the canvas, you can move them around, connect them, etc. Clicking on a shape on the canvas allows you to set its properties in the expandable Properties Window (3) (as well as create connecting shapes and morph the shape into other shapes).
(2) Toolbar - the toolbar contains a vast number of functions offered by Designer (described later). These includes operations that can be performed on shapes present on the Canvas. Individual operations are disabled or enabled depending on what is selected. For example, if no shapes are selected, the Cut/Paste/Delete operations are disabled, and become enabled once you select a shape. Hovering over the icons in the Toolbar displays the description text of the operation.
(3) Properties Panel - this expandable section on the right side of Designer allows you to set both process and shape properties. It is divided in four sections, namely "Core properties", and "Extra Properties, "Graphical Settings", and "Simulation Properties" are is expandable. When clicking on a shape in the Canvas, this panel is reloaded to show properties specific to the shape type. If you click on the canvas itself (not on a shape) the section shows your general process properties.
(4) Object Repository Panel - the expandable section on the left side of Designer shows the jBPM BPMN2 (default) shape repository tree. It includes all shapes of the jBPM BPMN2 stencil set which can be used to assemble your processes. If you expand each section sub-group you can see the BPMN2 elements that can be placed onto the Designer Canvas (1) by dragging and dropping the shape onto it.
(5) View Tabs - currently Designer offers functionality tabs for Process Modelling and Simulation. Process Modelling is the default tab. When users run process simulation, its results are presented in the Simulation tab.
(6) Info Tabls - On the bottom Designer shows two different Info tabs. The Business Process tab includes the process modeling while the Metadata tab displays the process metadata such as created by and last modified information.
The Object Repository panel provide means for users to select and drag/drop BPMN2 shapes onto the modelling canvas. Shapes are divided into sections as shown below:
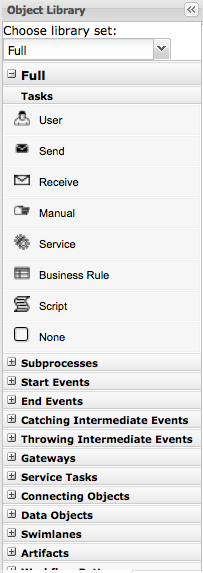
Once a shape is dropped onto the canvas users have a much faster way of continuing modelling without having to go back to the Object Repository panel. This is realized through the shape morphing menu which is presented when a shape on the drawing canvas is clicked on. This menu allows users to either select a connecting shape (next shape) or morph the selected node into another node type. In addition this menu includes means to store the shape name as a dictionary item (explained later), view the specific BPMN2 code of the selected shape, as well as create/edit the task form (in the case of user tasks only).
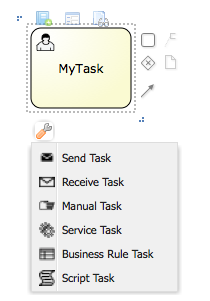
When connecting shapes Designer applies connection rules that follow the BPMN2 specification. The connection shapes presented in the morphing menu only show shapes that are allowed to be connections. Similarly same rules are applied when dropping a shape from the Object Library from the canvas and trying to connect an existing shape to it. Additional connection rules for boundary events are also available (explained later) and applied when for example moving an intermediate event node onto the edge of a task node.
Users can give names to every shape on the drawing canvas. This is done by double-clicking onto the shape as shown below.
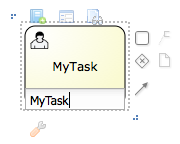
The name of a shape can be pulled from the Process Dictionary. If terms are set up in the dictionary, auto-complete can be used for the node names:
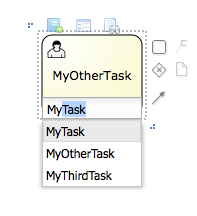
Designer also shows three buttons on top of a clicked shape as shown below.
These include:
(1) Add To Dictionary - this option allows users to add the name of the task to the Process Dictionary (explained in more details later)
(2) Edit Task Form - allows users to create/edit the Task Form. This option is only available for User Tasks
(3) View shape sources - shows the BPMN2 for this particular shape only.
The section should get you started with creating simple business process models by dragging/dropping BPMN2 shapes onto the drawing canvas. Next sections will dive deeper into many other aspects of Designer.
The Designer toolbar contains many different functions which can be used during process modelling.

We will now go through each of the buttons in the Designer Toolbar and give a brief overview of what it does.
(1) Save - allows users to save, copy, rename and delete the business process model. In addition users can turn on auto-save which will automatically save the business process within a defined time interval.
(2) Cut - enabled when a portion of the model is selected.
(3) Copy - enabled when a portion of the model is selected.
(4) Paste - paste the copied portion of the model onto the drawing board.
(5) Delete - enabled when there is a portion of the model is selected and removes it.
(6, 7) Undo/Redo - undo the last performed operation on the drawing canvas.
(8) Local History - local history allows continuous storage of your business process onto your browsers internal storage. Stored version of the business process can persist internet outages or browser crashes so your work will not be lost. This feature is disabled by default and must be enabled by users. Once local history has been enabled users are able to view all previously stored snapshots of their business model, clear local history, configure the snapshot interval, or disable local history. Note that local history will only take a snapshot of your business process on the set storing interval if there were some changes done in the model. If at the end of the snapshot interval Designer detects that there were no changes since the last local history save, no new snapshot will be created.
The Local History results screen allows users to select a stored snapshot of the model and
view its process image, and restore it back onto their drawing board.

(9) Object positioning - allows users to position one or more nodes in the business. Note that at last one shape must be selected first, otherwise these options are disable. Contains options "Bring to Front", "Bring to back", "Bring forward", and "Bring Backward"
(10) Alignment: enabled when a portion of the model is selected. Includes options "Align Bottom", "Align Middle", "Align Top", "Align Left", "Align Center", "Align Right", and "Align Same Size".
(11, 12) Group and Ungroup - allows grouping and ungrouping of selected shapes on the drawing board.
(13, 14) Locking and Unlocking - allows parts of the business model to be locked and unlocked. Locked parts of the model cannot be edited (visual display and properties are both locked). Locked nodes are displayed in a light blue color. This feature fosters collaboration of process modelling by allowing users to set parts of their model as "completed" and preventing any further changes to that portion. Other parts of the model can continue to be edited.
(15, 16) Add/Remove Docker - this allows users to add or remove Dockers, or edge points, to sequence flows in the model. Enables when a sequence flow (connector) is selected. It allows users to create very customized connection points from one shape to another. Users can add and remove as many dockers as they would like on a single sequence flow.
(17) Color Themes - Colors are a big part or process modelling as they help with expressing intent as well as help allowing visually impaired users to better view the model. Designer provides two default color themes out of the box named "jBPM" and "High Contrast". The jBPM theme is the default theme used for all new business processes created. Users can switch color themes and the changes will be applied to all nodes that are currently on the model, as well as any new shapes added. Users have the ability to add new custom color themes by adding their own definitions in the Designer themes.json file. Color theme selection is persisted over browser close or possible crash/internet loss.
(18) Process and Task forms - here users have the ability to generate/edit process and task forms. When no user task is selected the default enabled options are "Edit Process Form" and "Generate all Forms". Generate all forms will apply the current model information such as process variables, data objects, and the user tasks data input/output parameters and associations to generate default executable input forms. Upon editing a process and task form, users have the choice between two form editors, the jBPM Form Modeler, and the Designer in-line meta editor. The Designer meta editor is targeted more to technical users as it is text based with the ability for live preview. When the user selects an user task in the model, the "Edit Task Form" and "Generate Task Form" options are enabled which allow users to edit the particular task form, or choose to apply the same generation logic to create a task form for the selected task only. Users have the ability to extend the default form generation templates in designer to create fully customized templates. Node that in the case of the Designer meta editor for forms, generating forms will overwrite existing forms for the process and user tasks. In the case of Form Modeler form generation, a merging algorithm is applied when generating.
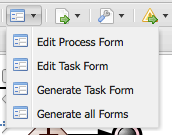
When selecting a task, users have the ability to edit the selected tasks form via the form button shown above the user task node.
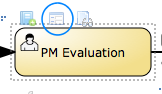
When editing forms, users are asked to choose between the Form Modeler and the Designer in-line meta editor. If the user selects Form Modeler the form is shown in a new asset tab separately from Designer. Designer meta editor is in-line and part of the Designer application.
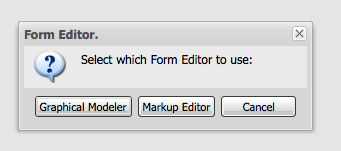
The Designer in-line meta form editor is a powerful text-based editor with a live preview feature as well as auto-completion on process variables and user task data inputs/outputs.
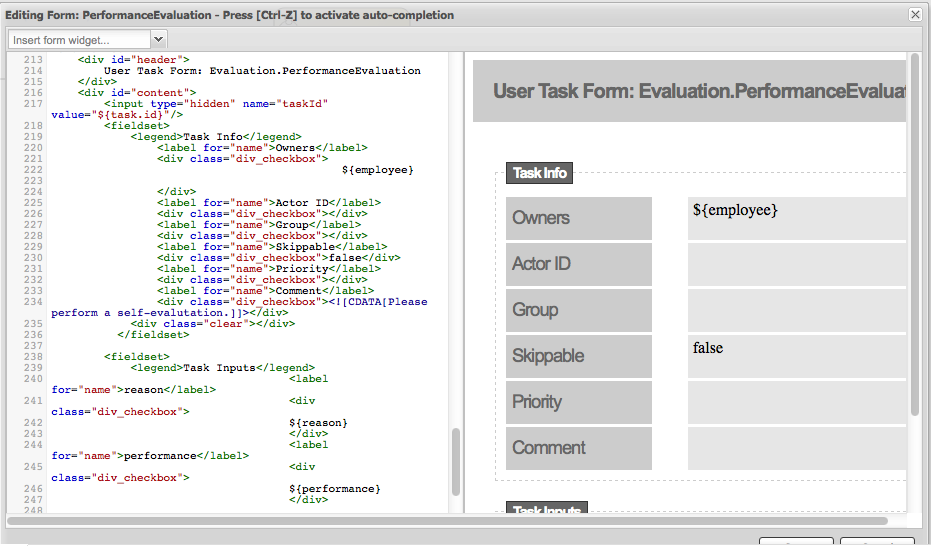
(19) Process Information Sharing - this section includes many functions that help with sharing information of your model. These include:
Share process image - generates a stand-alone HTML image tag which contains a Base64 encoded image source of the current model on the canvas. This link can be shared to team members or other parties and embedded in any HTML content or email that allows HTML content embedding.
Share process PDF - generates a stand-alone HTML object tag which contains a Base64 encoded PDF source of the current model on the canvas. This can similarly be shared and embedded in any HTML content.
Download process PNG - generates a PNG image of the current process on the drawing board which users can download and share.
Download process PDF - generates a PDF of the current process on the drawing board which can be downloaded and shared.
View Process Sources - displays the current process sources in various formats, namely BPMN2, JSON, SVG, and ERDF. Also has the option to download the BPMN2 sources.
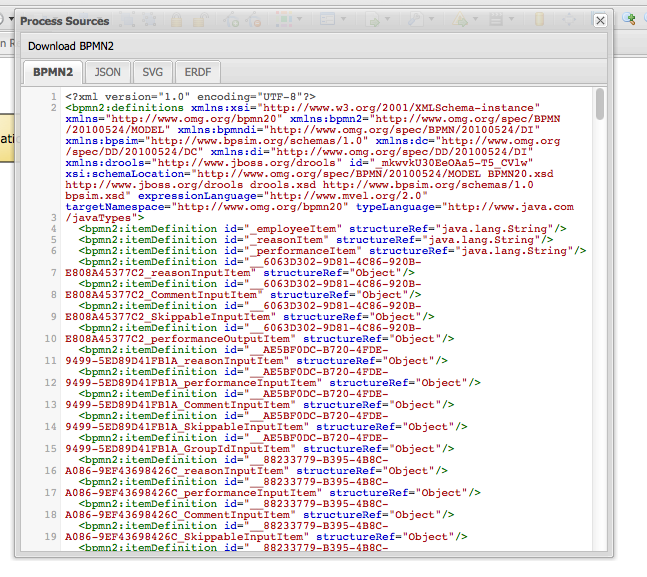
(20) Extra tooling - this section allows users to import their existing BPMN2 processes into designer as well as be able to migrate their old jPDL based processes to BPMN2. For BPMN2 or JSON imports users can choose to add the import ontop of the existing model on the drawing board or choose to replace the current one with the import.
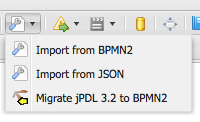
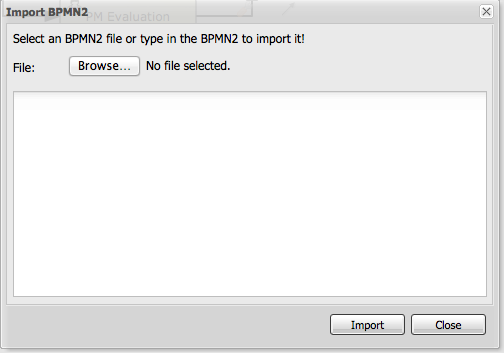
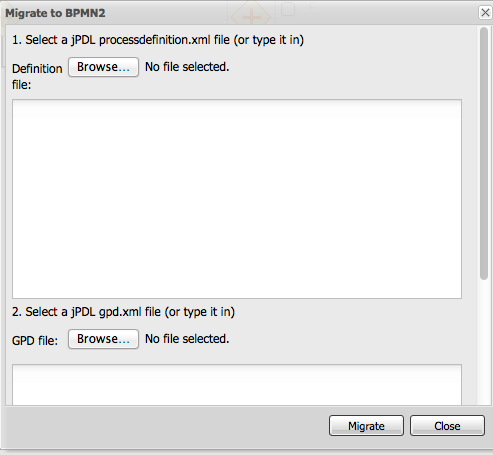
(21) Visual Validation - Designer includes over 100 validation checks and this list is growing. It allows users to view validation issues in real-time as they are modelling their business process. Users can enable visual validation, disable it, as well as view all validation issues at once. If Visual Validation is turned on, Designer with set the shape border of shapes that do not pass validation to red color. Users can then click on that particular shape to view the validation issues for that particular shape only. Alternatively "View All Issues" present a combined list of all validation errors currently found. Note that you do not have to periodically save your business process in order for validation to update. It will do so on its own short intervals during modelling. Users can extend the list of validation issues to include their own types of validation on certain elements of their business model.
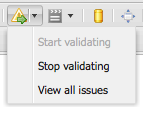
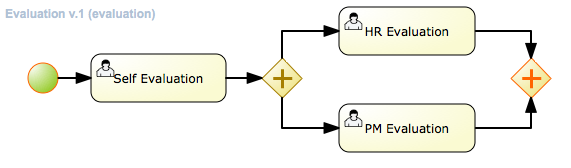
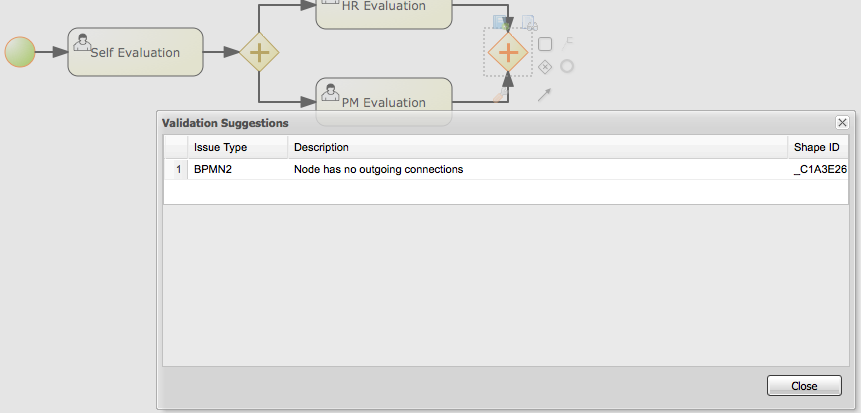
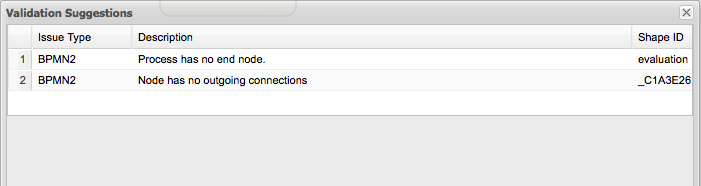
(22) Process Simulation - Business Process Simulation deals with statistical analysis of process models over time. It's main goals include
Pre-execution and post-execution optimization
Reducing the risk of change in business processes
Predict business process performance
Foster continuous improvements of performance, quality and resource utilization of business processes
Designer includes a powerful simulation engine which is based on jBPM and Drools and a graphical user interface to view and interpret simulation results. In addition users are able to view all process paths included in their current model on the drawing board. Designer Process Simulation is based on the BPSim 1.0 specification. Details of Process Simulation capabilities in Designer are can be found in its Simulation documentation chapter. Here we just give a brief overview of all features it contains.
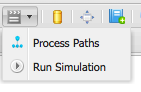
When selecting Process Paths, the simulation engine find all possible paths in the business model. Users can choose certain found paths and choose to display them. The chosen path is marked with given colors as shown below.
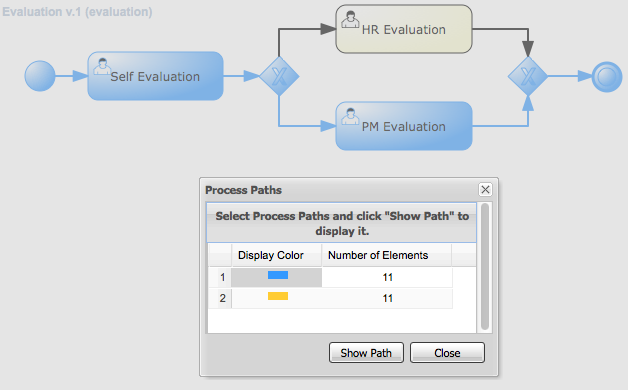
When selecting "Run Simulation", users have to enter in simulation runtime properties. These include the number of instances of this business process to simulate and the interval time and units. This interval is the time in-between consecutive simulation.
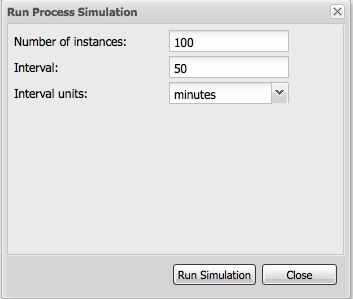
Each shape on the drawing board includes Simulation properties (properties panel) where users can set numerous simulation properties for that particular shape. More info on each of these properties can be found in the Simulation chapter of the documentation.
Designer pre-sets some defaults for new processes, which allows business processes to be simulated by default without any modifications of these properties. Note however that the results of the default settings
may not be optimal or targeted for the users particular needs.
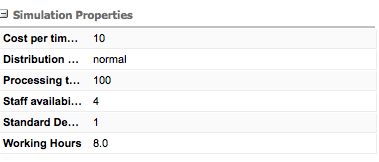
Once the simulation runtime has completed, users are shown the simulation results in the "Simulation Results" tab of Designer. The results default to the process results. Users can switch to results for each particular shape in their business process to see more specific detauls. In addition,
the results contain process paths simulation results for each path in the business process.
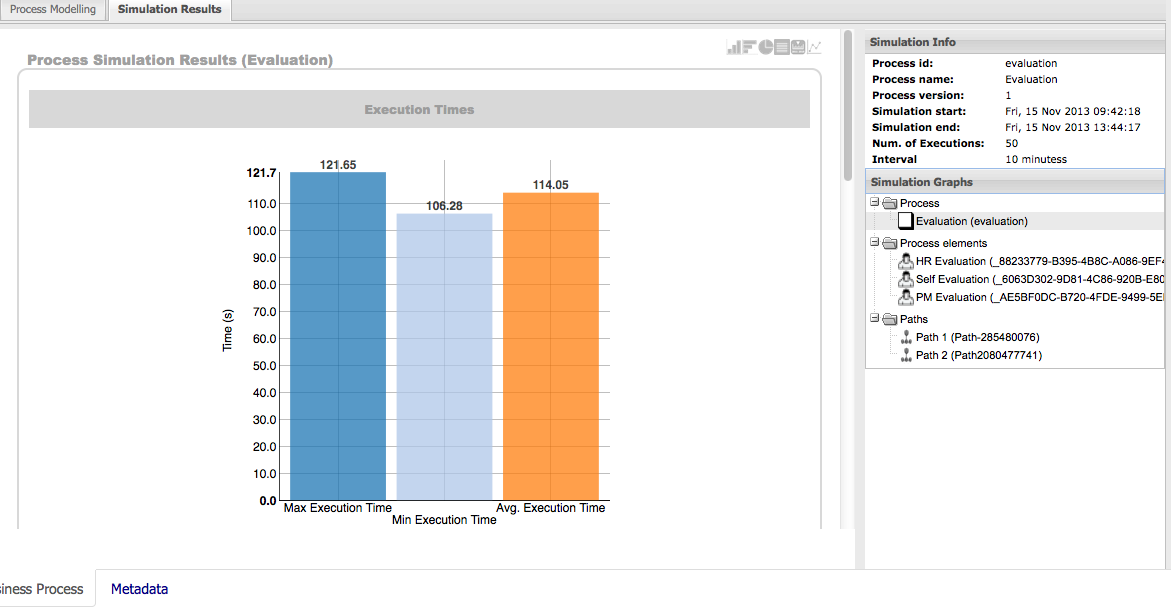
Designer simulation presents the users with many different chart types. These include:
Process results: Execution times, Activity instances, Total cost
Human Task results: Execution times, Resource Utilization, Resource Cost
All other nodes: Execution times
Process Paths: Path Execution
The below image shows a number of possible chart types users can view after process simulation has completed.

In addition to the chart results, Designer simulation also offers a full timeline display that includes all details of what happened during simulation. This timeline allows users to navigate through each
event that happened during process simulation and select a particular node to display results at that particular point in time.
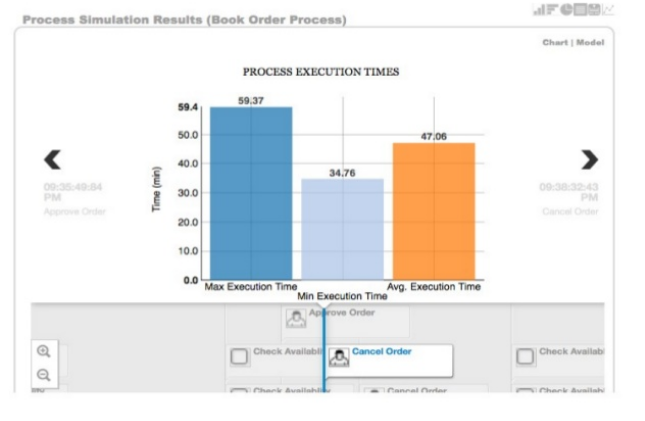
The simulation timeline can be switched to the Model view. This view displays the process model with the currently selected node in the timeline highlighted. The highlighted node displays the simulation results at that particular point in time of the simulation.
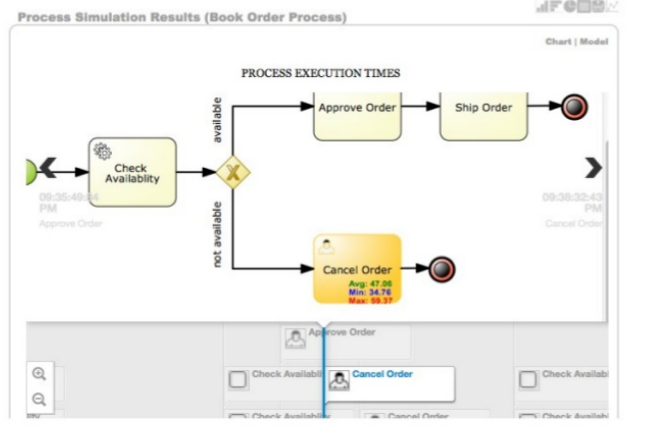
Path execution results shows a chart displaying the chosen path as well as path instance execution details.
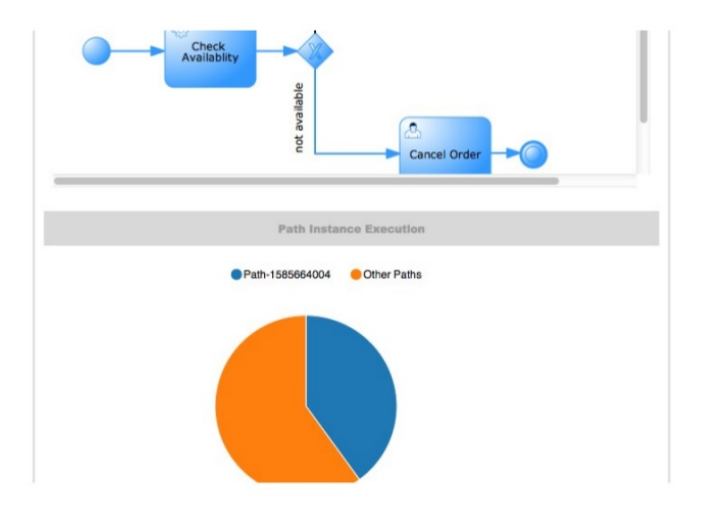
(23) Service Repository - Allows users to connect to a service repository via its URL and see the list of available services it provides. Each of the listed services can then be installed into the users project by clicking on the "wrench" icon next to each listed service. Installing a service does the following things:
- Installs the service configuration (wid) into the users Workbench project. This can later be editor via the Workitem Definitions Editor.
- Installs the service icon (defined in the service configuration) and if one does not exist a default one will be provided.
- Installs the service maven dependencies into the project POM.
- Installs the service default handler into the project Deployment Descriptor.
Users will be notified when the service is successfully installed. After the install users have to re-open the business process to be able to start using the installed services.
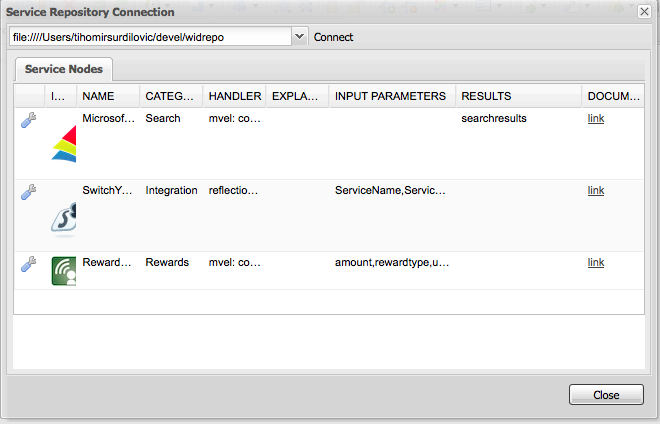
(24) Full screen Modev - allows users to place the drawing board of Designer into full-screen mode. This can help with better visualizing larger business processes without having to scroll. Note that this feature is possible only if your browser has full screen mode capabilities. If it does not designer will show a message stating this to the user.

(25) Process Dictionary - Designer Dictionary Editor allows users to create their own dictionary entries or harvest from process documentation or business requirement documents. Process Dictionary entries can be used as auto-completion for shape names. This will be expanded in the future versions to allow mapping of node patters to specific dictionary entries as well. Users can add entries to the dictionary in the Dictioanry Editor or from the selected shapes directly.
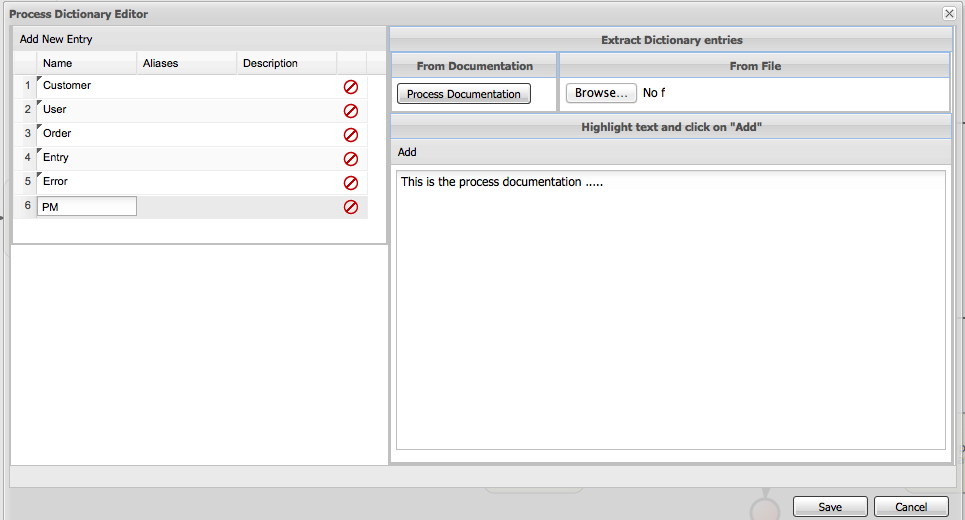
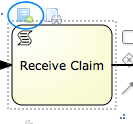
(26, 27, 28, 29) Zooming - zooming allows users to zoom in/out of the model, zoom in/out back to the original setting as well as zoom the process model on the drawing board to fit the currently dimensions of the drawing board.
This chapter intends to describe in a simple ways all the steps required to create a process with human tasks, generate and modify the forms for these tasks and execute them. It will provide initial guidance to perform all initial steps, but it will not provide a full description of all available features.
Given that forms are going to be used in tasks, it's possible to generate forms automatically from process variables and task definitions. These forms can be later be modified by using the form editor. In runtime, forms will receive data from process variables, display it to the user and capture his input, and then finally updating process variables again with the new values.
The following example will show all the steps to follow to create a form for the 'Create order' task in the process below.
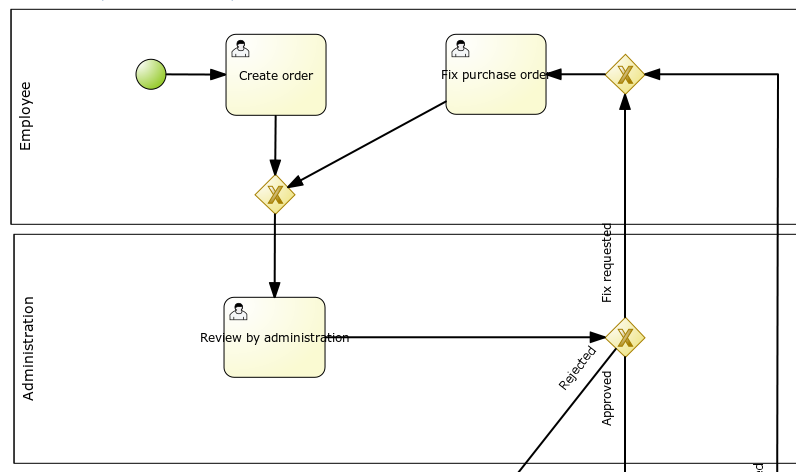
This form must look like the following in execution:
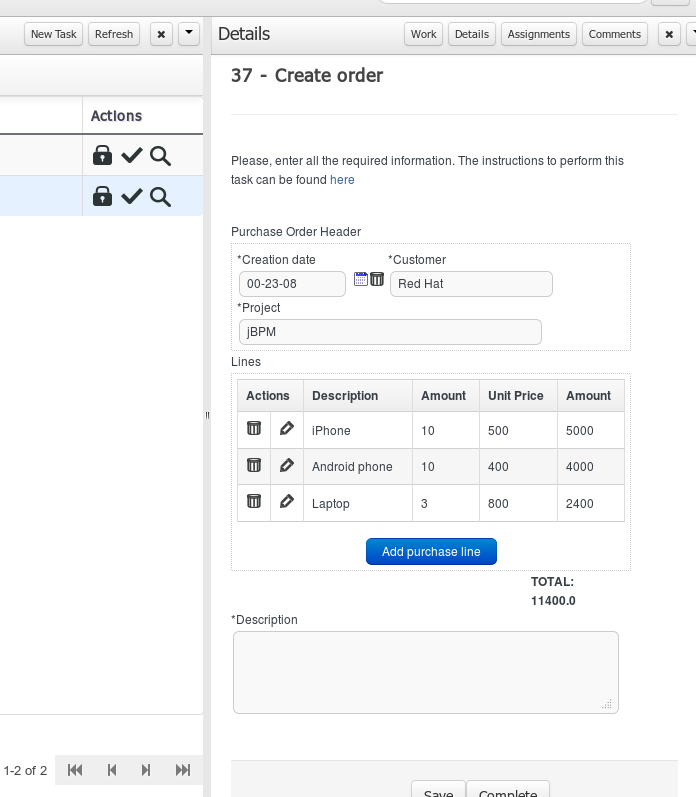
To hold values capture by forms, process variables can be created. These variables can be of a simple type like 'String' or a complex type. These complex types can be defined by using the Data Modeler tool, or be just regular POJOs (Plain Java Objects) created with any Java IDE.
In this example, we define a variable 'po' of type 'org.jbpm.examples.purchases.PurchaseOrder', defined with the Data Modeler tool.
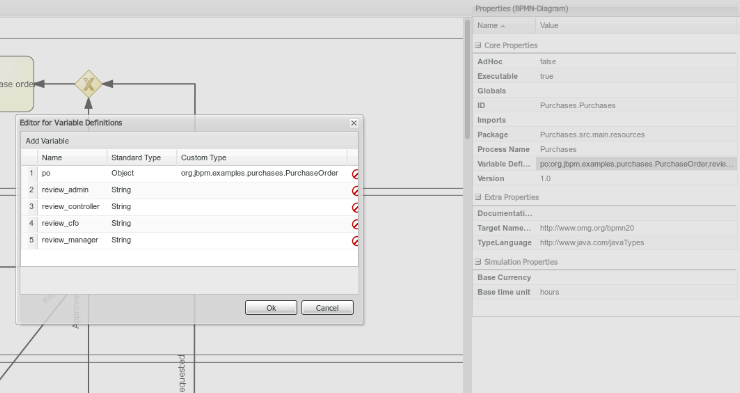
This variable is declared in the 'variables definition' property for the process.
After that, we must configure which variables are set as input parameters to the task, which ones will receive the response back from the form and establish the mappings. This is done by setting the 'DataInputSet', 'DataOutputSet' and 'Assignments' properties for any human task. See screenshots below for details.
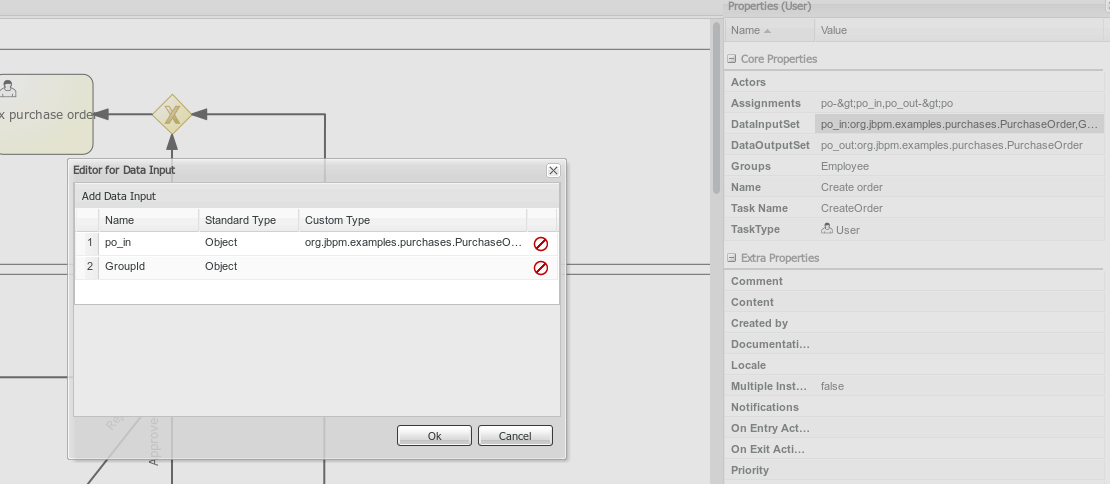
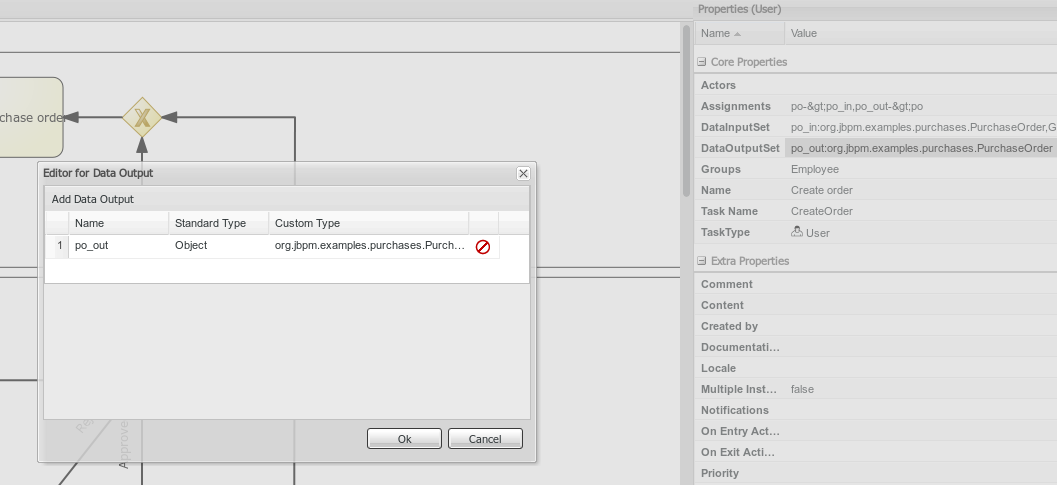
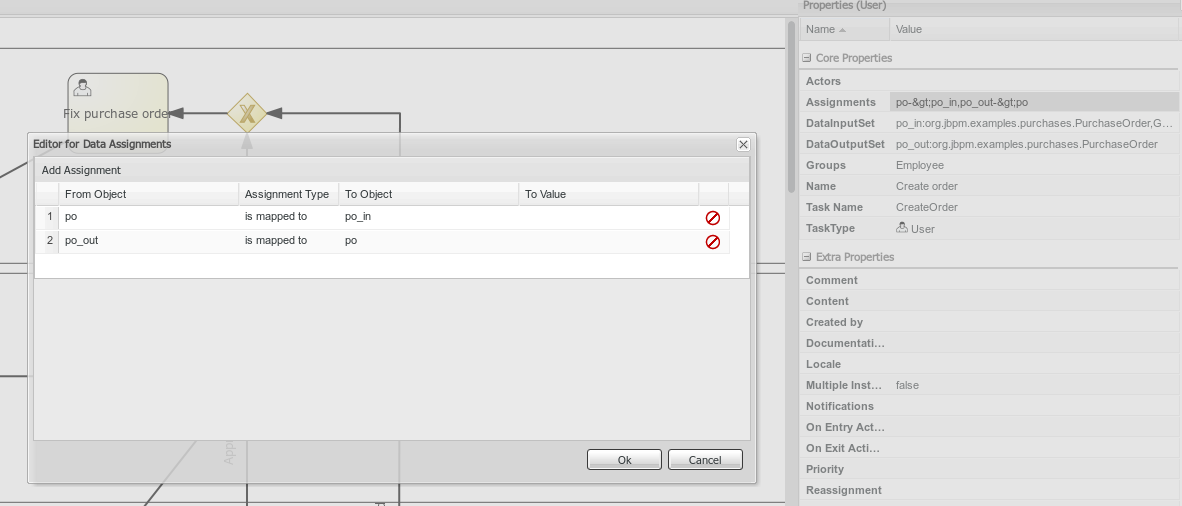
The Process Designer module provides some functionality to generate the forms automatically from task and variable definitions, as well as easily open the right form from the modeler.
This is done with the following menu option.
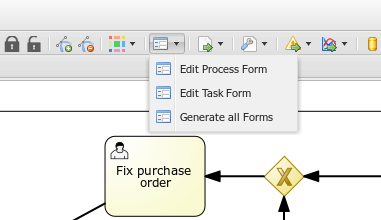
You can also click on the icon on top of task to open the form directly.
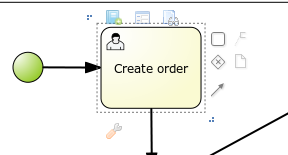
Forms are related to tasks by following a naming convention. If a form with a name formName-taskform is defined in the same package as the process, then this form is used by the human task engine to display and capture information from user.
Also, if a form named ProcessId-task form is created, it will be used as the initial form when starting this process.
For example, for our process the following forms would be generated.
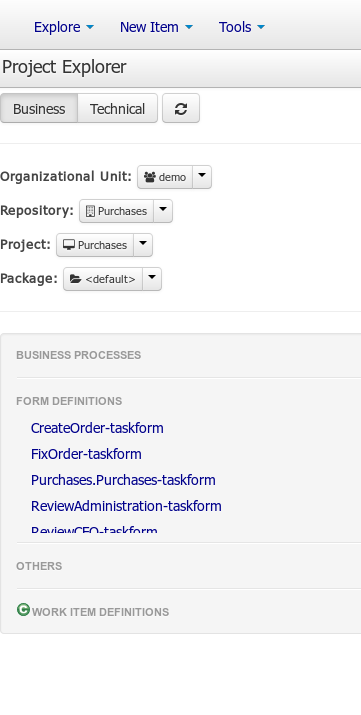
Once the forms have been generated, you can start editing them. There are several artifacts that are generated in the previous process, but also can be created manually.
When the form has been generated automatically, this tab contain the process variables as data origins. This allow bind form fields with them, this relation it’s linked creating data bindings.
A data binding define how task inputs will be mapped to form variables, and when the form is validated and submitted, how the values will update the task outputs.

For example, for this process, the following bindings are generated. Notice that the identifiers are automatically generated. You can have as many data origins as required, and can use a different colour to identify it.
In automatic form generation, a data origin is created for each process variable. The generated form have a field for each data origin bindable item (view FieldTypes) and this automatic fields have the binding defined too.
When these fields are displayed in editor the color of the data origin is shown over the field to make easy view if the field is correctly bound and the data origin implied.
We can change the way the form is displayed to the user in the task list. Next, we will show different levels of customization that will allow change it
The fields may be placed in different regions of the form. To move a field the user can access the contextual menu of the field and select 'Move field'.
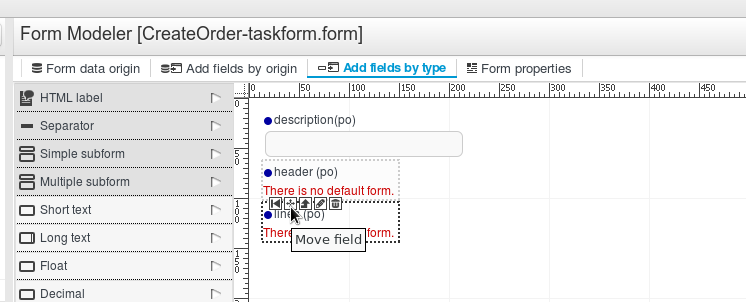
This will display the different regions of the form where you can place it.
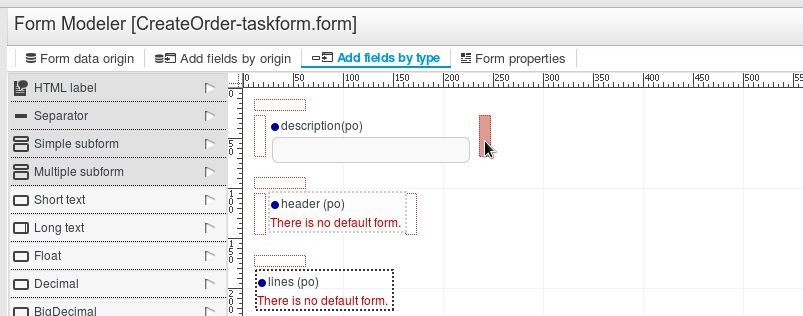
A field can be moved to the first or the last region with the contextual icons for that purpose.
You can add fields to forms either by its origin or by selecting one type of form field.
Let's see what has been created automatically for this purchase order form.
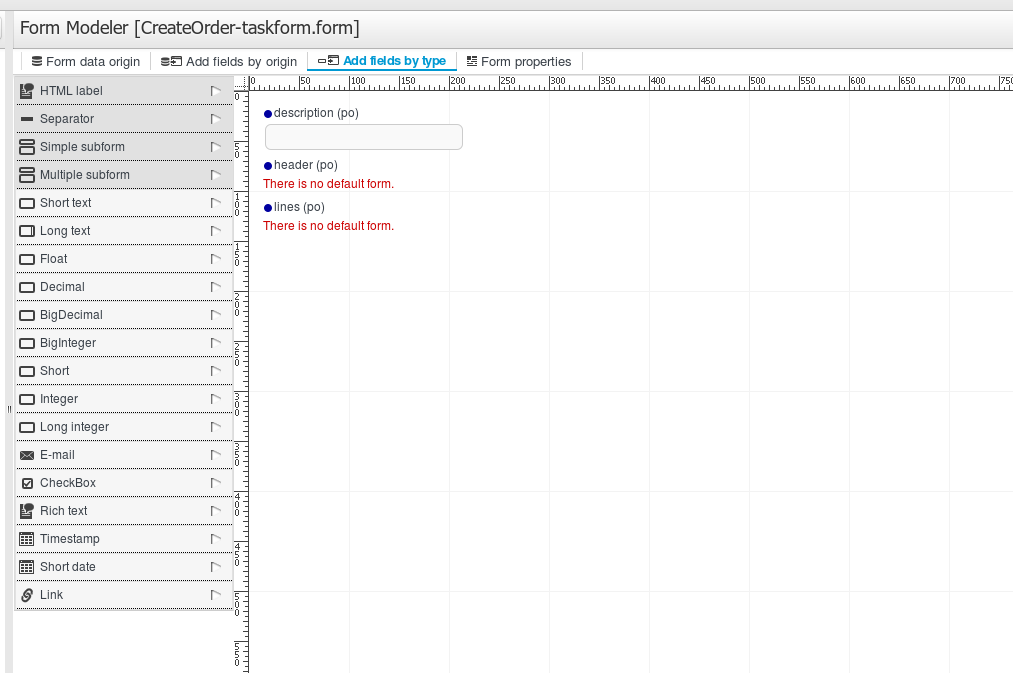
Add fields by origin: this tab allows you to add fields to the form based on the data origins defined. These fields will have the correct configuration on the "Input binding expression" and "Output binding expression" properties, so when the form is submitted, the fields values will be stored in the corresponding Data Origin.
Add fields by type: this tab allows you to freely add fields to the form from the Field Types palette on the Form Modeler. These fields won't be storing their values on any Data Origin until they have a correct configuration on the "Input binding expression" and "Output binding expression" properties.
To see a complete list of the available field types go to Field types section.
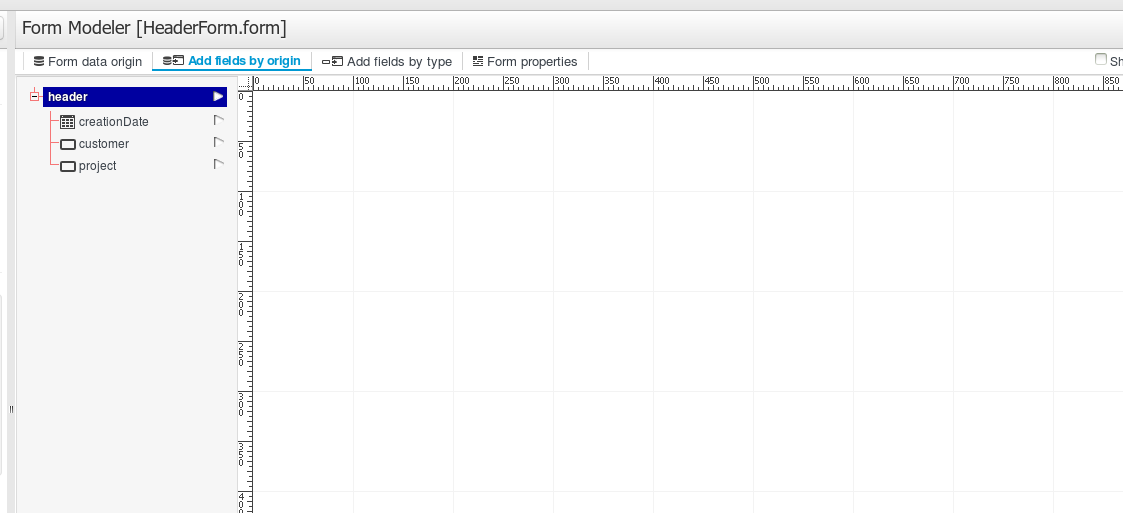
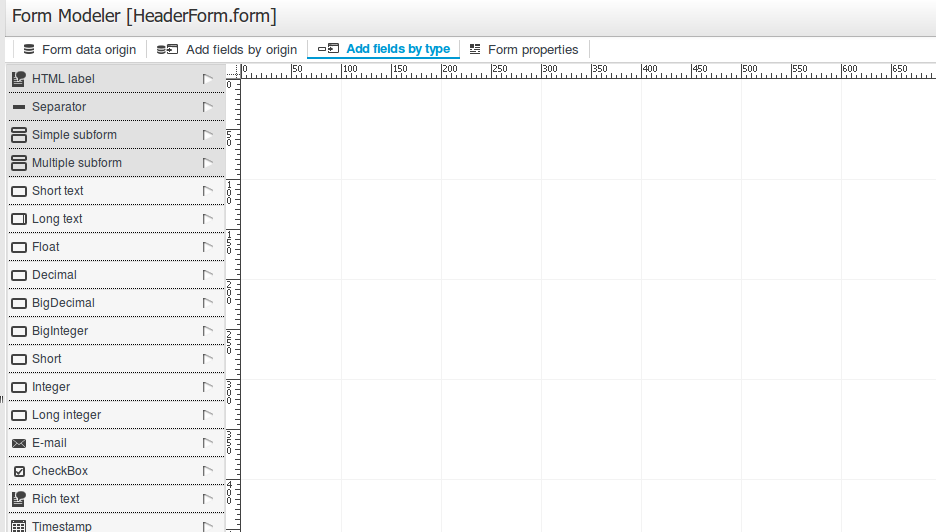
Notice the data model 'po' of type 'org.jbpm.examples.purchases.PurchaseOrder' is composed of three properties.
Simple: property of type text (description). We will adjust the view settings.
Complex: property of type object (header).
Complex: property of type array of objects (lines)
Now all these properties had to be configured.
Each field can be configured to enhance performance in the form. There are a group of common properties, that we call ‘Generic field properties’ and a group of specific properties that depends on the field type.
There are a group of properties that are common to all field types. We will detail them below:
Table 13.1.
| Field type | Can change the field type to other compatible field types |
| Field Name | Will be used as identifier in formulas calculation |
| Label | The text that will be shown as field label |
| Error message | When something goes wrong with the field, like validations,.. this message will be displayed |
| Label ccs class | Allows enter a class css to apply in label visualization |
| Label css style | to enter directly the style to apply to the label. |
| Help text | The text introduced is displayed as alt attribute to help to the user in data introduction |
| Style class | Allows enter a class css to apply in field visualization |
| Css style | to enter directly the style to apply to the label. |
| Read Only | When this check is on, the field will be used only for read |
| Input binding expression | This expression defines the link between field and process task input variable. It will be used in runtime to set the field value with that task input variable data. |
| Output binding expression | This expression defines the link between field and process task output variable. It will be used in runtime to set that task output variable. |
Let's explain the specific properties of each field type:
Short Text (java.lang.String)
Compatible field type: Long text, E-mail, Rich text
Specific properties
Size: input text length.
MaxLength: Maximum number of characters allowed.
Required: Indicates if it’s mandatory to fill this field.
Show HTML: indicates whether the contents of the field is interpreted as HTML in show mode.
Formula. to enter expressions that will be evaluated to set the field value. These expressions are described in Formula & expression section .
Range value. A range formula allows you to let you specify the values that the user can select from an specific field. These expressions are described in Formula & expression section
Pattern. Allow introduce an expression to specify the validation of the field. In case that the field value introduced hasn’t match the expression, and error is thrown and the error message has to be shown.
Default Value formula. Expression to set the field default value.
Long Text (java.lang.String)
Compatible field type: Long text, E-mail, Rich text
Specific properties
Size: input text length.
MaxLength: Maximum number of characters allowed.
Required: Indicates if it’s mandatory to fill this field.
Height: The number or rows to show at text area.
Formula. to enter expressions that will be evaluated to set the field value. These expressions are described in Formula & expression section .
Range value. A range formula allows you to let you specify the values that the user can select from an specific field. These expressions are described in Formula & expression section
Pattern. Allow introduce an expression to specify the validation of the field. In case that the field value introduced hasn’t match the expression, and error is thrown and the error message has to be shown.
Default Value formula. Expression to set the field default value.
Float (java.lang.Float)
Specific properties
Size: input text length.
MaxLength: Maximum number of characters allowed.
Required: Indicates if it’s mandatory to fill this field.
Formula. to enter expressions that will be evaluated to set the field value. These expressions are described in Formula & expression section .
Range value. A range formula allows you to let you specify the values that the user can select from an specific field. These expressions are described in Formula & expression section
Pattern. Allow introduce an expression to specify how the Float value has to be displayed. The pattern allowed is show in section pattern in http://docs.oracle.com/javase/6/docs/api/java/text/DecimalFormat.html
Default Value formula. Expression to set the field default value.
Decimal (java.lang.Double)
Specific properties
Size: input text length.
MaxLength: Maximum number of characters allowed.
Required: Indicates if it’s mandatory to fill this field.
Formula. Used to enter expressions that will be evaluated to set the field value. These expressions are described in Formula & expression section.
Range value. A range formula allows you to let you specify the values that the user can select from an specific field. These expressions are described in Formula & expression section .
Pattern. Allow introduce an expression to specify how the Double value has to be displayed. The pattern allowed is show in section pattern in http://docs.oracle.com/javase/6/docs/api/java/text/DecimalFormat.html
Default Value formula. Expression to set the field default value.
BigDecimal (java.math.BigDecimal)
Specific properties
Size: input text length.
MaxLength: Maximum number of characters allowed.
Required: Indicates if it’s mandatory to fill this field.
Formula. Used to enter expressions that will be evaluated to set the field value. These expressions are described in Formula & expression section.
Range value. A range formula allows you to let you specify the values that the user can select from an specific field. These expressions are described in Formula & expression section .
Pattern. Allow introduce an expression to specify how the BigDecimal value has to be displayed. The pattern allowed is show in section pattern in http://docs.oracle.com/javase/6/docs/api/java/text/DecimalFormat.html
Default Value formula. Expression to set the field default value.
Big integer (java.math.BigInteger)
Specific properties
Size: input text length.
MaxLength: Maximum number of characters allowed.
Required: Indicates if it’s mandatory to fill this field.
Formula. Used to enter expressions that will be evaluated to set the field value. These expressions are described in Formula & expression section.
Range value. A range formula allows you to let you specify the values that the user can select from an specific field. These expressions are described in Formula & expression section .
Default Value formula. Expression to set the field default value.
Short (java.lang.Short)
Specific properties
Size: input text length.
MaxLength: Maximum number of characters allowed.
Required: Indicates if it’s mandatory to fill this field.
Formula. Used to enter expressions that will be evaluated to set the field value. These expressions are described in Formula & expression section.
Range value. A range formula allows you to let you specify the values that the user can select from an specific field. These expressions are described in Formula & expression section .
Default Value formula. Expression to set the field default value.
Integer (java.lang.Integer)
Specific properties
Size: input text length.
MaxLength: Maximum number of characters allowed.
Required: Indicates if it’s mandatory to fill this field.
Formula. Used to enter expressions that will be evaluated to set the field value. These expressions are described in Formula & expression section.
Range value. A range formula allows you to let you specify the values that the user can select from an specific field. These expressions are described in Formula & expression section .
Default Value formula. Expression to set the field default value.
Long Integer (java.lang.Long)
Specific properties
Size: input text length.
MaxLength: Maximum number of characters allowed.
Required: Indicates if it’s mandatory to fill this field.
Formula. Used to enter expressions that will be evaluated to set the field value. These expressions are described in Formula & expression section.
Range value. A range formula allows you to let you specify the values that the user can select from an specific field. These expressions are described in Formula & expression section .
Default Value formula. Expression to set the field default value.
E-mail (java.lang.String)
Compatible field type: Short text, Long text, Rich text
Specific properties
Size: input text length.
MaxLength: Maximum number of characters allowed.
Required: Indicates if it’s mandatory to fill this field.
Default Value formula. Expression to set the field default value.
Checkbox (java.lang.Boolean)
Specific properties
Required: Indicates if it’s mandatory to fill this field.
Default Value formula. Expression to set the field default value.
Rich text: (java.lang.String)
Compatible field type: Short text, Long text, E-mail
Specific properties
Size: input text length.
MaxLength: Maximum number of characters allowed.
Required: Indicates if it’s mandatory to fill this field.
Height: The number or rows to show at text area.
Default Value formula. Expression to set the field default value.
Timestamp (java.util.Date)
Compatible field type: Short date
Specific properties
Size: input text length.
Required: Indicates if it’s mandatory to fill this field.
Formula. to enter expressions that will be evaluated to set the field value. These expressions are described in Formula & expression section .
Default Value formula. Expression to set the field default value.
Short date (java.util.Date)
Compatible field type: Timestamp
Specific properties
Size: input text length.
Required: Indicates if it’s mandatory to fill this field.
Formula. to enter expressions that will be evaluated to set the field value. These expressions are described in Formula & expression section .
Default Value formula. Expression to set the field default value.
Document (org.jbpm.document.Document)
Specific properties
Required: Indicates if it’s mandatory to fill this field.
Simple subform (Object)
For more details see sectionSimple Object (Subform field Type).
Specific properties
Default form. Show the list of available forms to select what one will be displayed to show the object.
Multiple subform (Multiple Object)
For more details see sectionArrays of objects.( Multiple subform field Type).
Specific properties
Default form. Show the list of available forms to select what one will be displayed to show the object when no other form is configured with an specific purpose.
Preview form. If a form is specified, it will be used to show the item details
Table form. If a form is specified, it will be used to show the table columns when the item list is showed
New item text. Text to show at New Item button
Add item text. Text to show at Add Item button
Cancel text. Text to show at Cancel button
Allow remove Items. If this check is selected, the form allow remove items in table view.
Allow edit items. If this check is selected, the form allow edit items in table view.
Allow preview items. If this check is selected, the form allow preview items in table view.
Hide creation button. Check to not show the creation button
Expanded. If is checked, when a new item is being added, the field display the table with the existing items and the creation form at same time
Allow data enter in table mode. Allow modify data in table view directly.
There are two types of complex fields: fields representing an object, and fields representing an object array.
Once the field is added to the form, either automatically or manually, it must be configured so that the form had to know how to display the objects that will contain in execution time.
Next we describe how can be the configuration process:
The first thing to do is define how the contained object will be displayed. This is done creating a form that represents the object.
In case of the object array, you can define a form to show in preview(edition), or to show when table is shown
Once the form to represent the object, the parent form has to be configured to use them in the parent Subform or Multiple subform.
Below we will describe how the setup would be:
One possible way of setting the value for an object property is by using an existing form, and embedding this form into the parent. This is called subform.
In this example, the Purchase Order header data is held in an object. Therefore, we must create a form to enter all the purchase order header data and link it from the parent task form.
We will follow the steps:
Create new form.
Create new data origin, selecting the type of the purchase order header.
Add fields by origin. All the properties are shown, and can be added to the form, either one by one or all of them at once.
All the properties have been added to the form, and now we can edit each of them and move them around.
Configure the fields and customize form.
Once the form has been saved, open the initial parent form and set the field property 'Default form'.
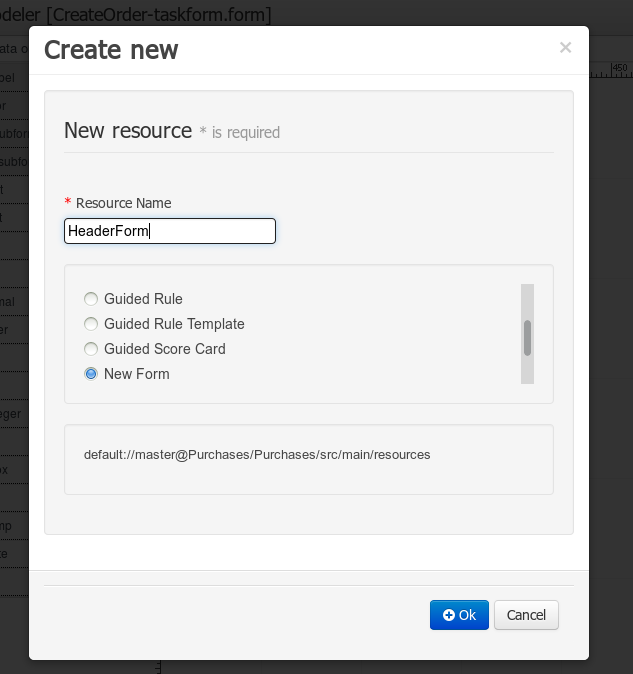
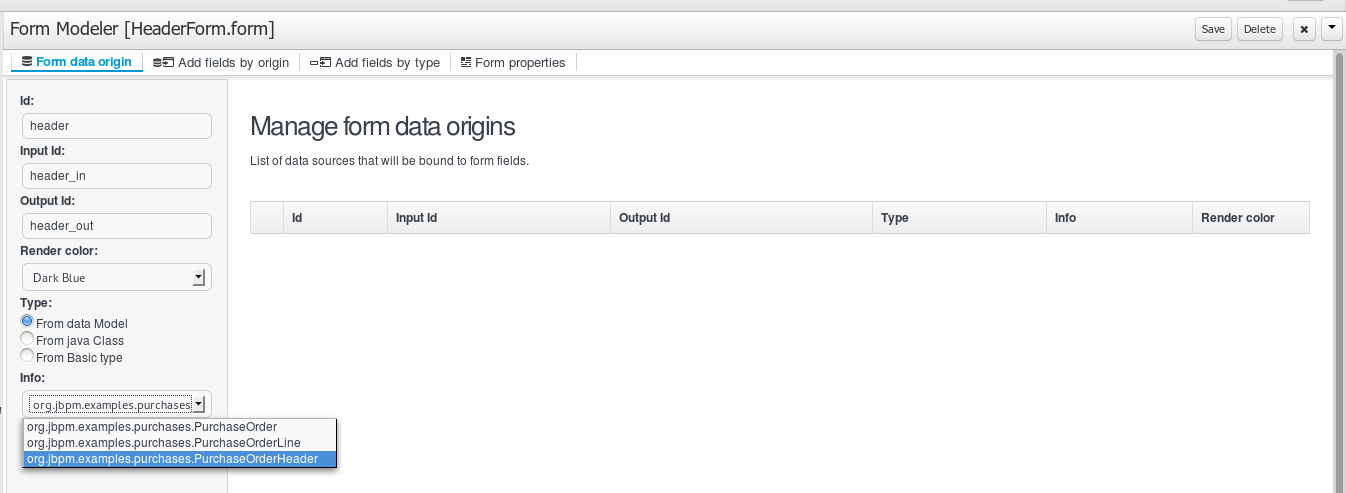
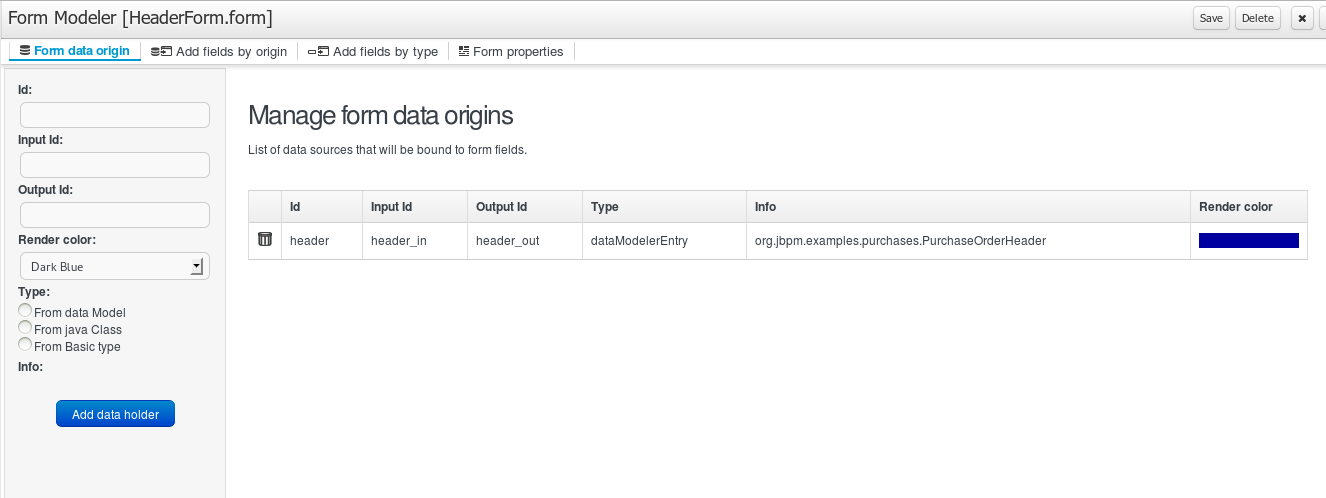
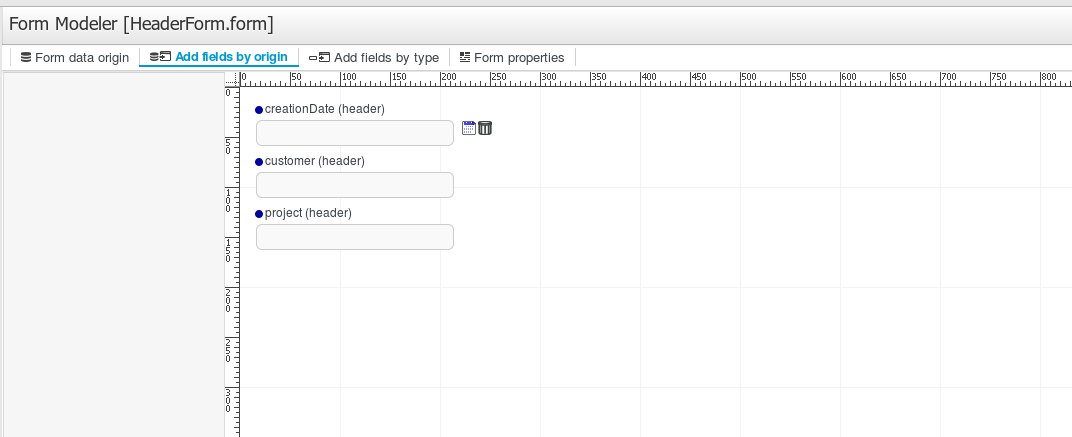
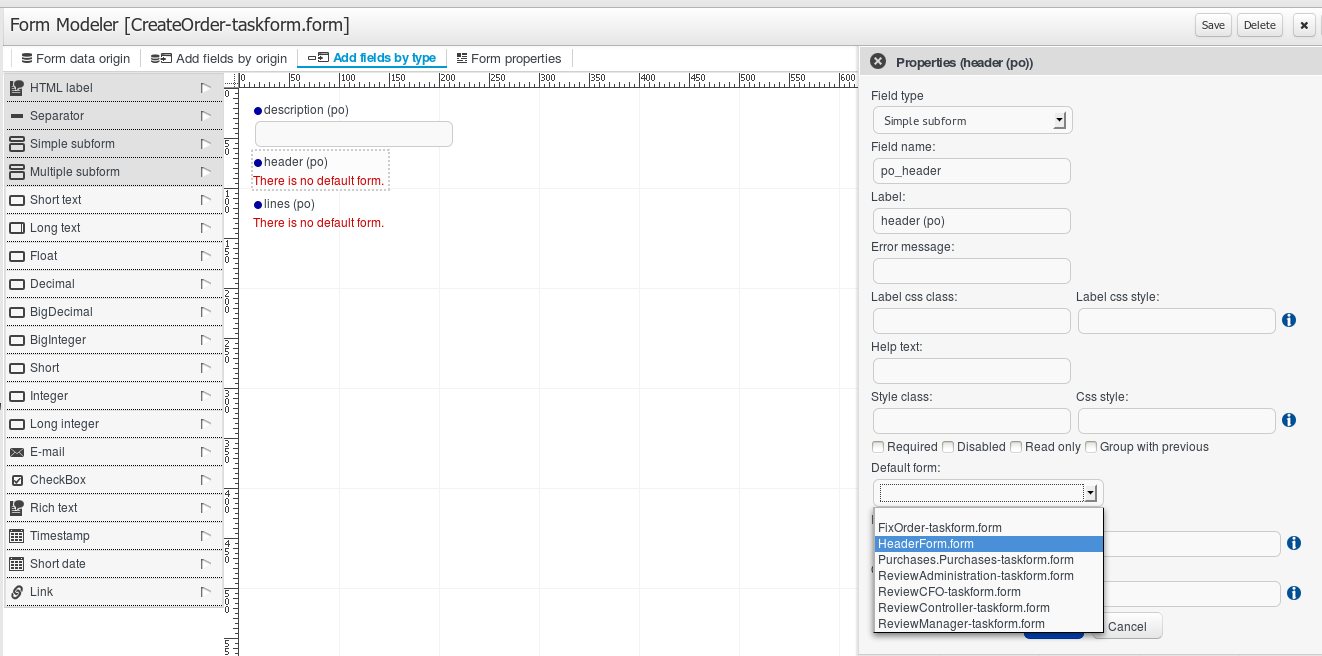
This will insert the subform inside the parent form, and will be shown as below:
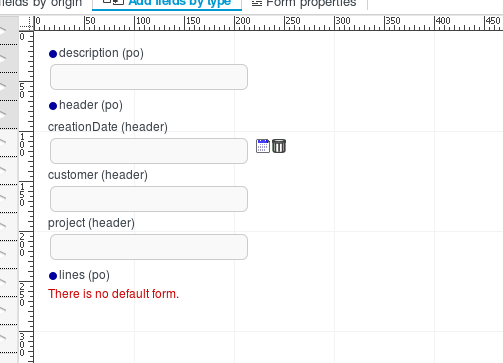
Now, we want to be able to create, edit and remove purchase order lines, by displaying a table with all the values and being able to capture information through a form. This will be done as follows:
Create a form that will hold and capture the information for each line's value (description, amount, unitPrice and total), following the same steps as above. This will be done as follows:
Create new form.
Create new data origin.
Add fields by origin. All the properties are shown, and can be added to the form, either one by one or all of them at once.
Customize form. Change display options to improve the form visualization
Configure the fields. After creating the basic form structure, we can use a formula to calculate automatically the total field. This formulas and expressions are described in Formula & expression section.
Finally, we save the lines form and go back to the parent form and configure all the lines properties.
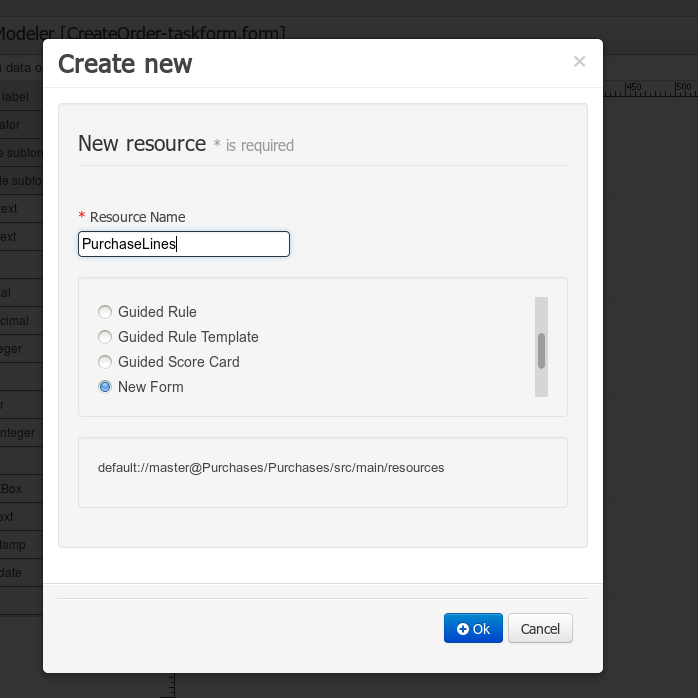
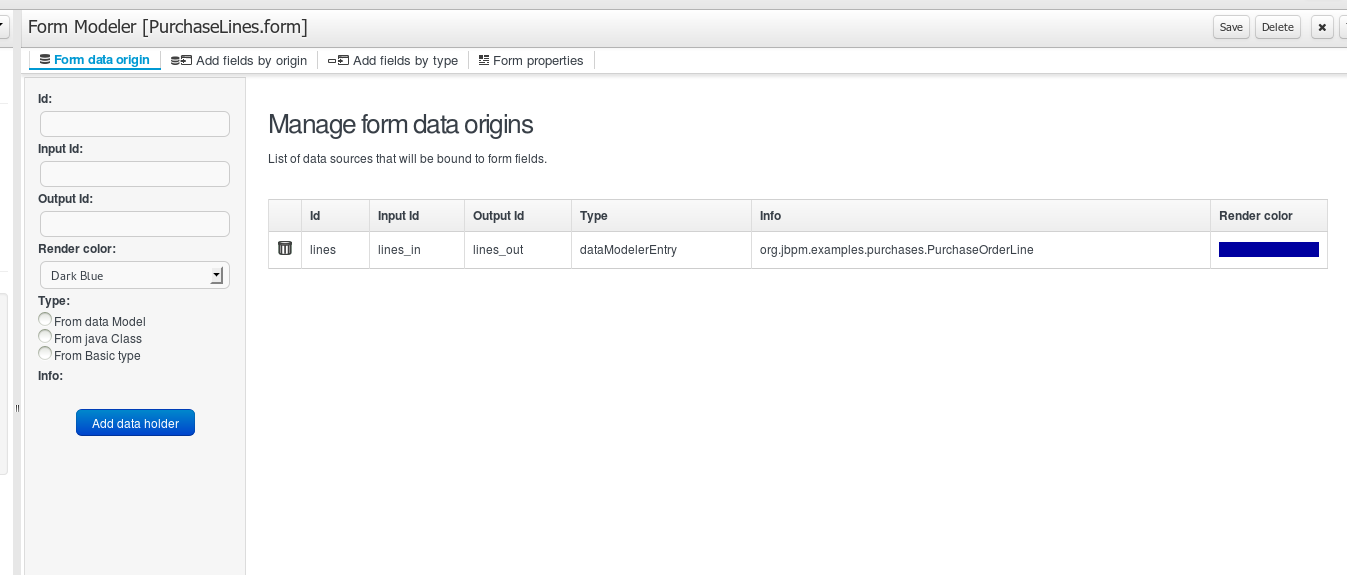
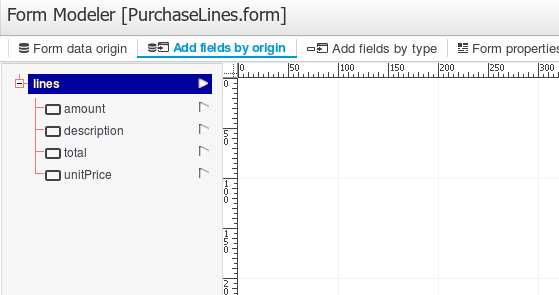
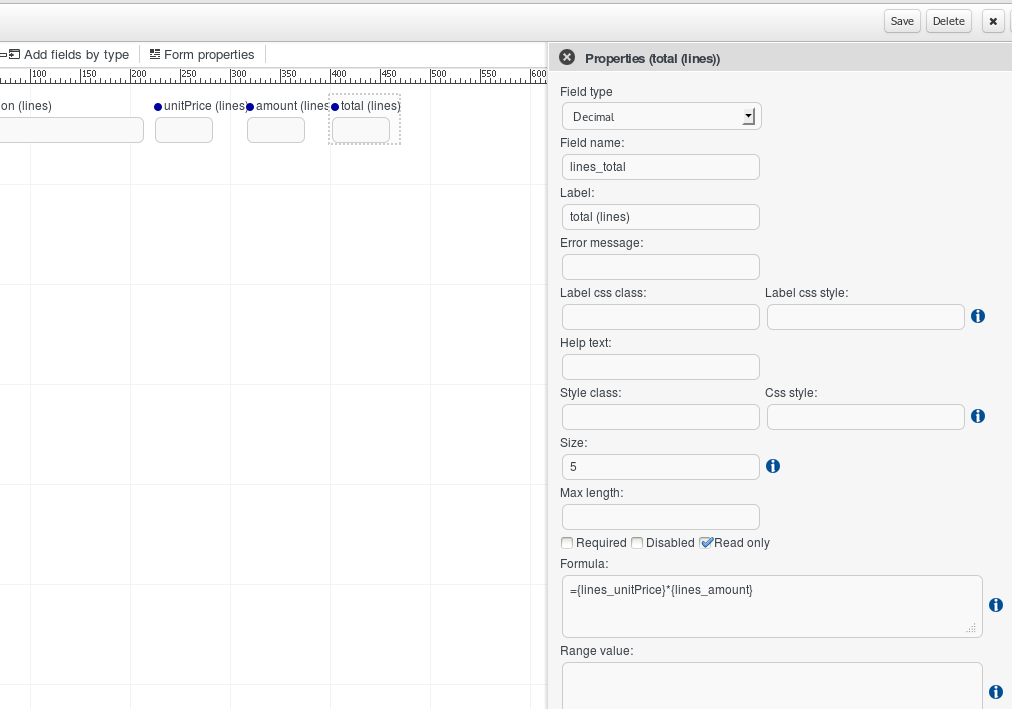
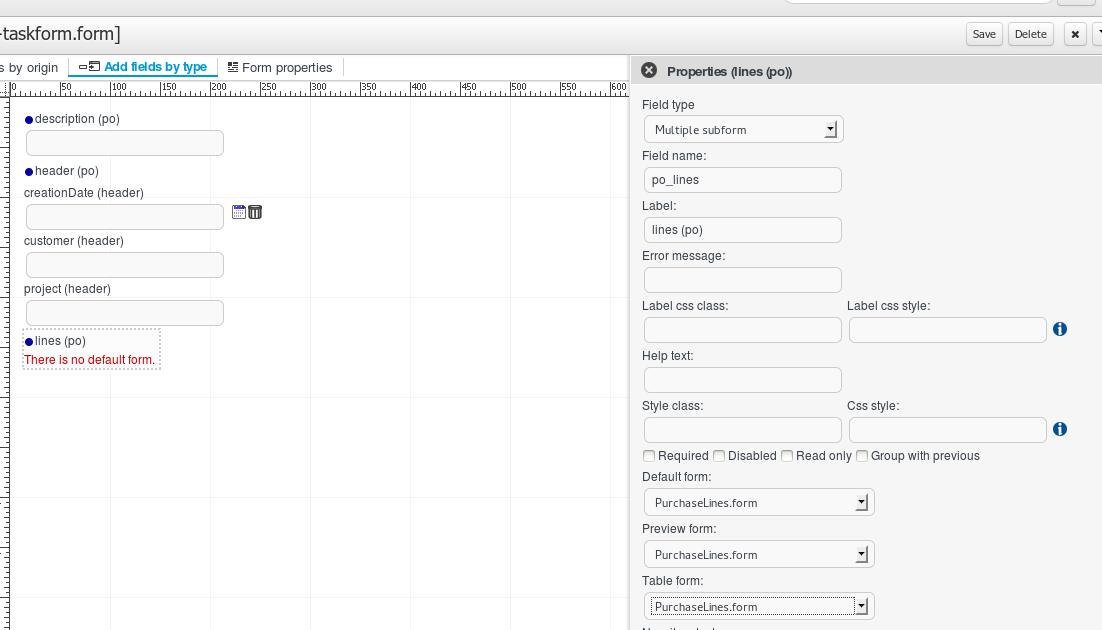
Form Modeler provides a Formula Engine that you can use to automatically calculate field values. That Formula engine supports Java and XPATH expressions to access the form fields values. Let’s see some examples.
Setting a Default value formula
Imagine that you have a form that contains a date field “Creation date” that has to be set by default with the current date. To do that you should edit the field properties and set a Default value formula like:
=new java.util.Date();After setting a Default formula value on a field properties, when the form is rendered by the first time the field will have the specified value.
As you can see, you can use a default formula any expression that return a value supported for the field.
Setting a Formula
The formula engine allows you to calculate formulas that depend on other Field values using XPATH expressions to refer to fields values like {a_field_nane}, standard operators (+, -, *, /, %...) to operate with them or calls to Java Functions for more complex operations.
To start let’s see how you can create a formula to calculate the line_total of a Purchase Order Line. Look at the image below and look at the formula on the line_total properties.
With this expression:
={line_unitPrice}*{line_amount}we’re forcing the Total of the line value to be the result of the the Unit price multiplied by the Amount, so when the user fills the Amount and Unit Price fields automatically the Total Amount field value is going to be calculated and filled with the operation result:
Is possible to create formulas to operate with values stored in subforms using expressions like
={a_field/a_subform_field}Look at the next image to see how it works:
This form has a subform field called po_header that is showing a form with the fields header_creationDate, header_customer and header_project. We want the Description field on our parent form to show some information from the header. Look at the Description field properties formula.
="Customer: " + {po_header/header_customer} + " Project: " + {po_header/header_project}This formula returns a text when the fields header_customer and header_projects are filled on the child form, so from now the parent form will be filled like this:
Ok, you’ve seen how to create formulas that access to a subform fields values, now we are going to see how to work with values stored in Multiple Subforms. Imagine that we have a Purchase Order Line form that contains a multiple subform of Purchase Order Lines, and we want to calculate the total amount of the lines created. Look at the image below and how the TOTAL field is configured.
On the formula expression: ={sum(po_lines/line_total)} we are using the XPATH function sum() that is going to summarize the totals of all the lines. So after creating some Lines the form will look like this:
Note that the line_total child field corresponds with the field line_total field on then form selected as a Default Form selected on the Lines field configuration.
On this sample we are using the sum() XPATH function to calculate the total of the Purchase Order, but XPATH provides a lot of possibilities to select values from a set of children and also a lot functions to summarize values (sum, count, avg...). For more information about XPATH you can take a look at http://www.w3schools.com/xpath/
Setting a Range Formula
A range formula allows you to let you specify the values that the user can select from an specific field, showing it like a select box. It can be used on all simple types except Dates and Checkboxes.
To see how it works look the next image and look at the Review Status field configuration.
As you can see that field is being shown as a select box and it has a range formula that specifies the values like this:
{approve,Approve order;reject,Reject order;modifications,Request Modifications}This expression is defining 3 duos of value/”text to show” separated with the character ‘,’ and each of this duos is separated from each other other with the ‘;’ character. So due this formula the resulting select box will show:
Table 13.2.
Value stored in input Text shown on Select Box approve Approve order reject Reject order modifications Request Modifications
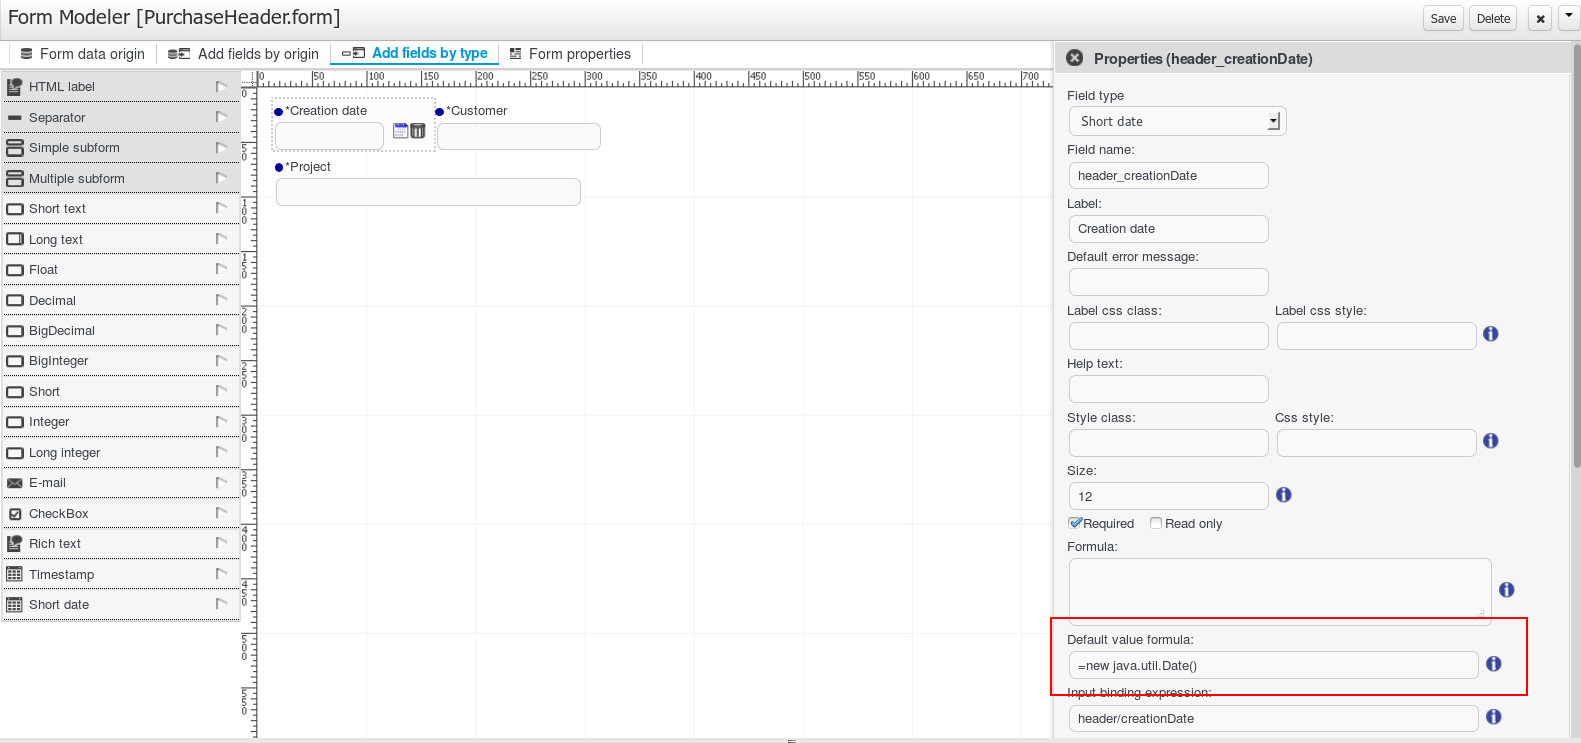
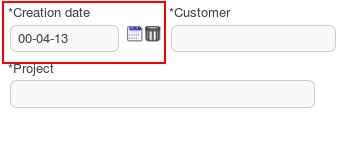
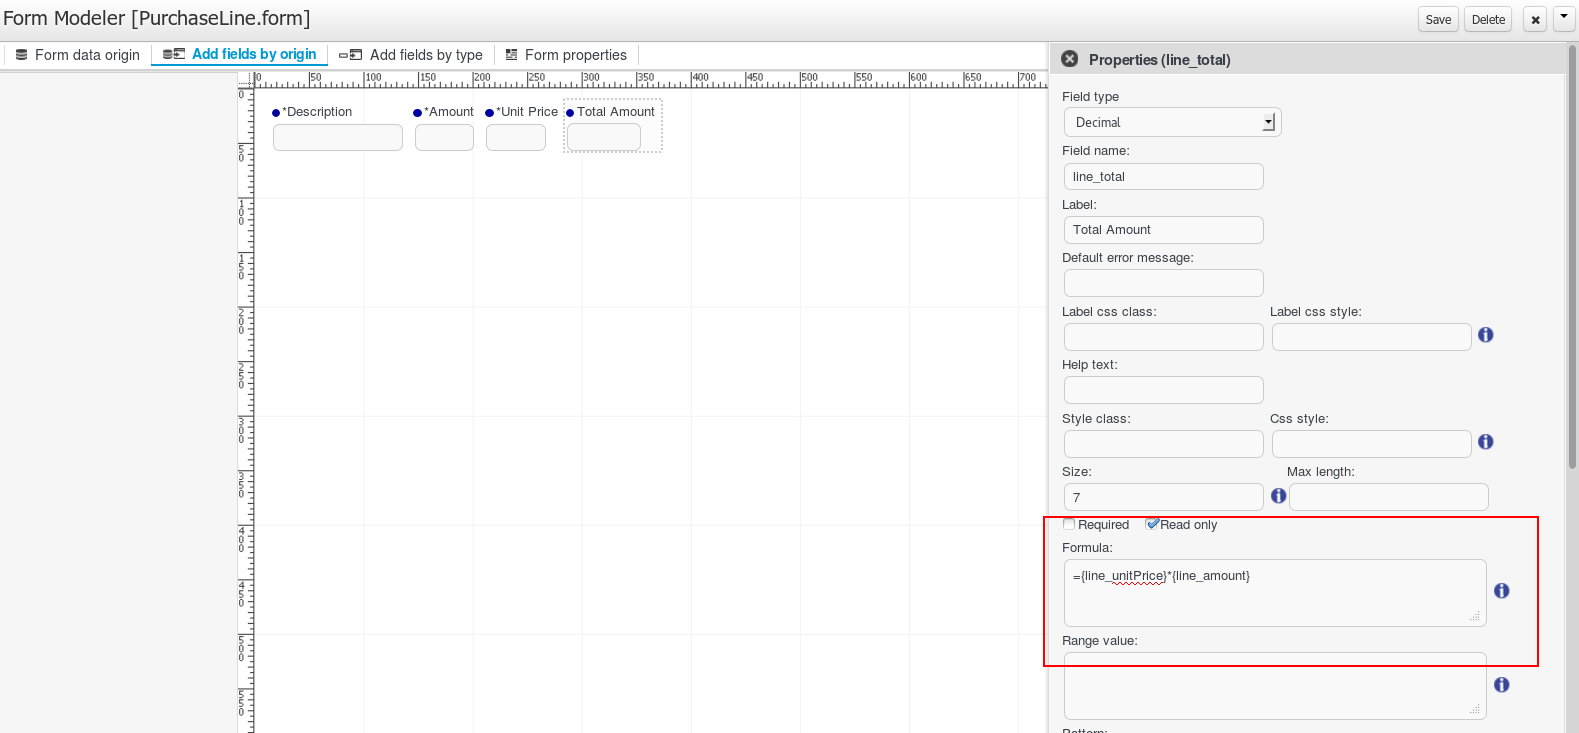

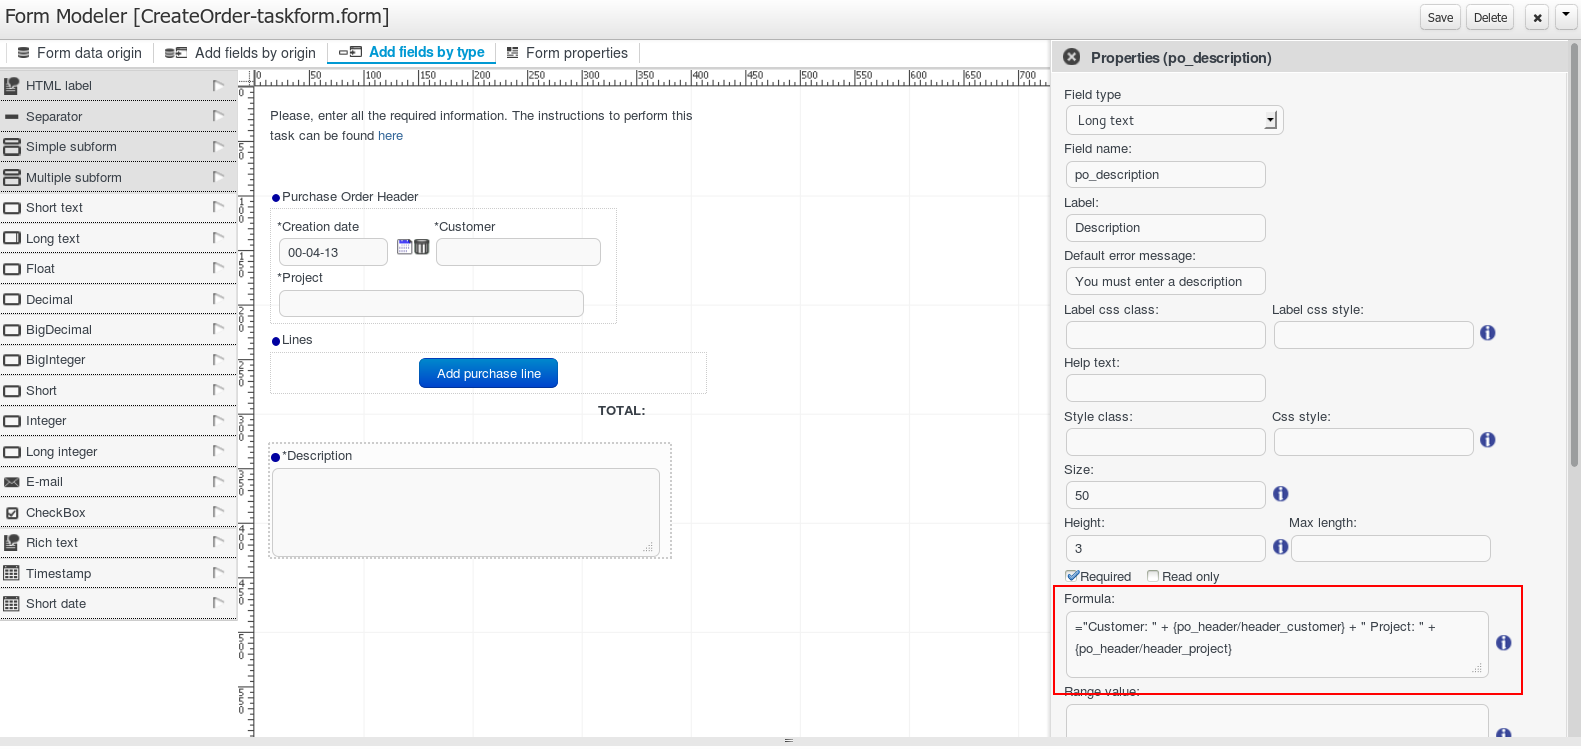
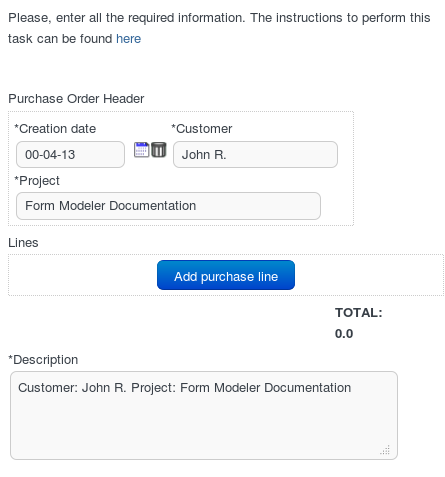
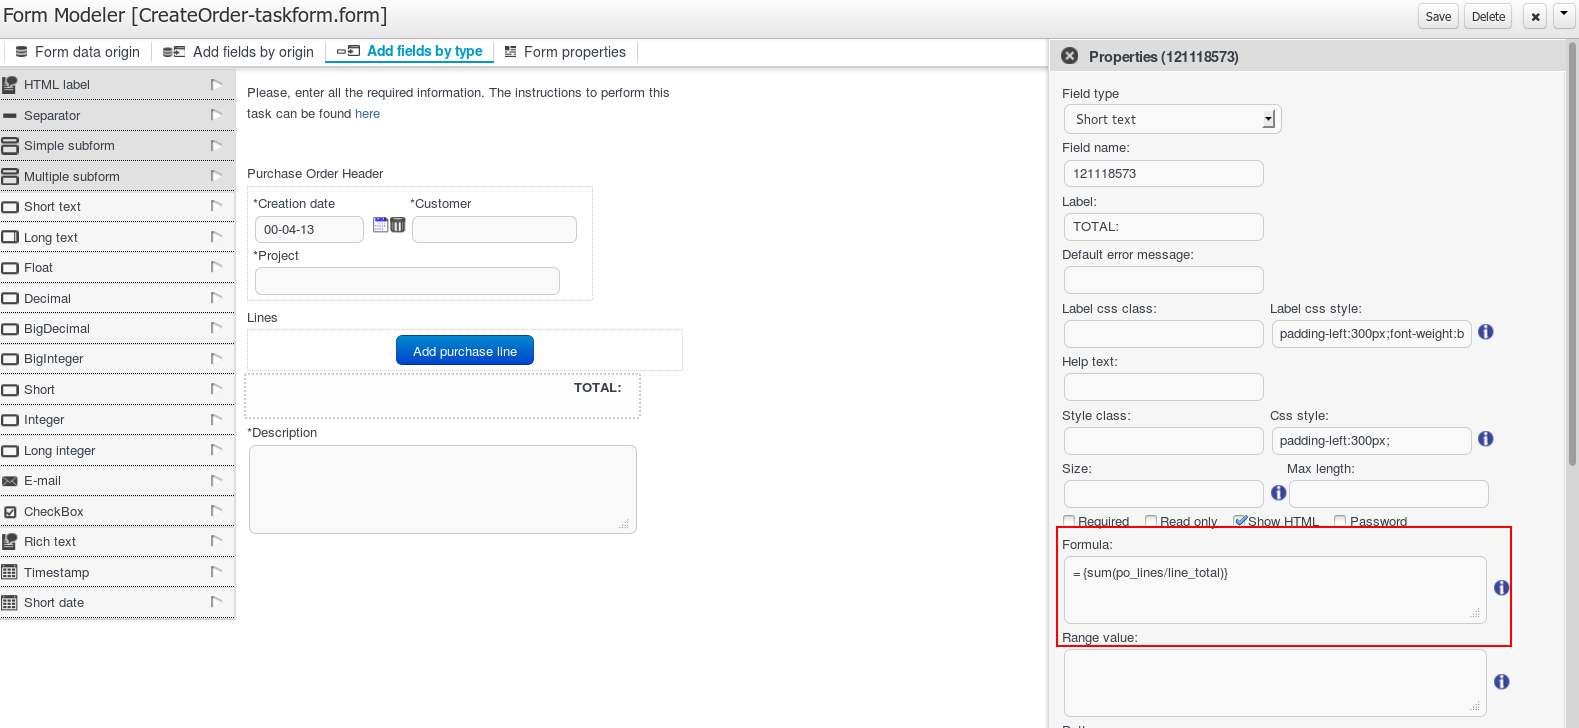
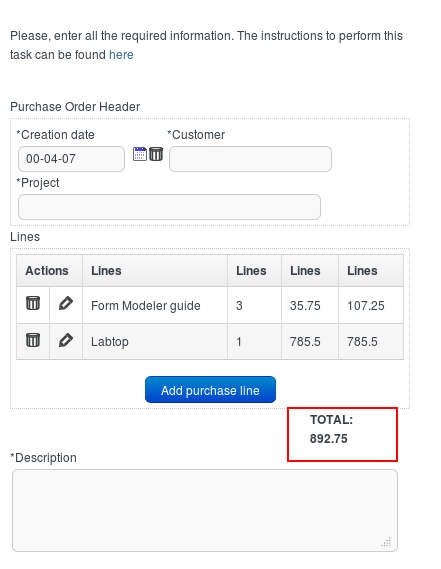
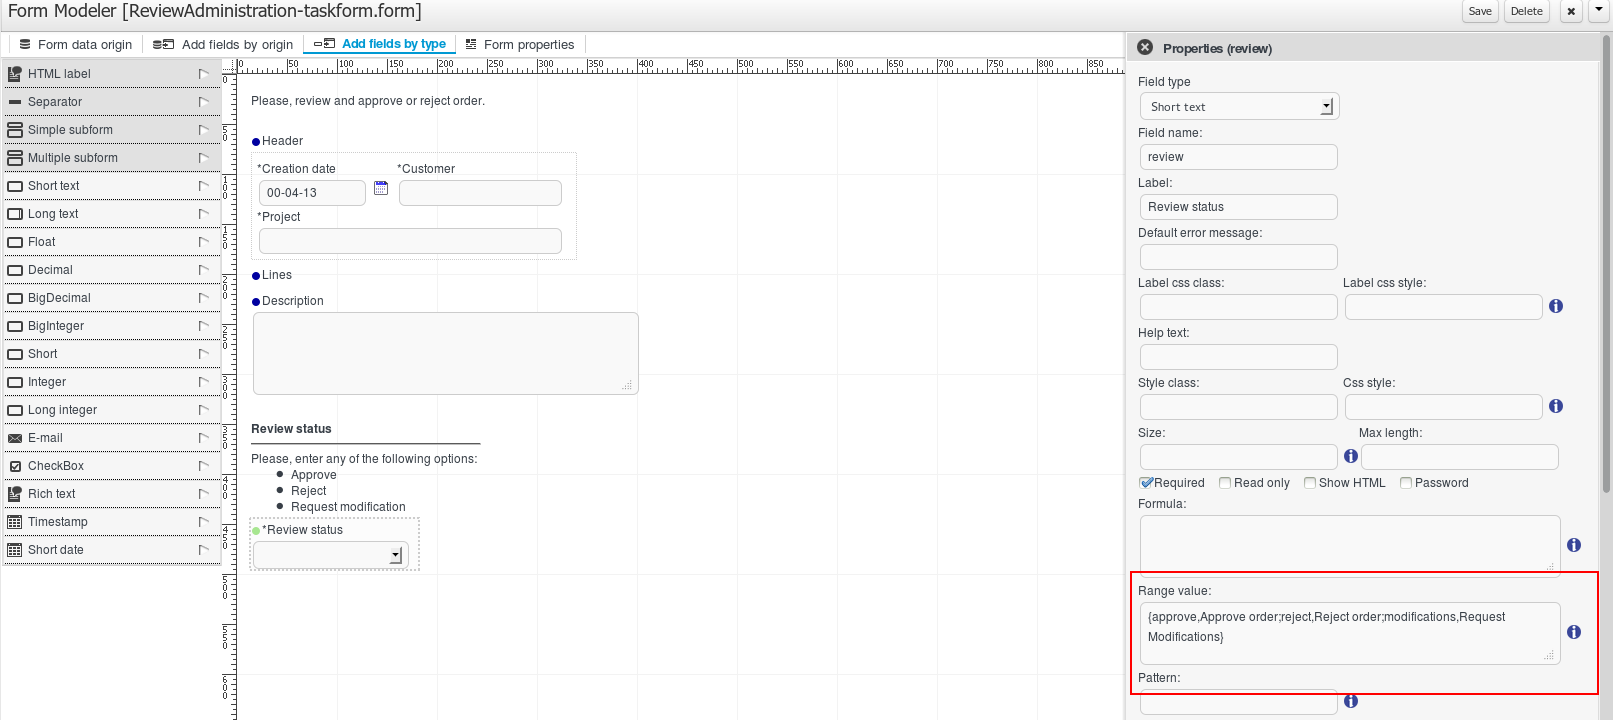
When you need an extra customization level and have more control over the HTML that is displayed. The form modeler provides the ability to edit the HTML directly.
To use this functionality, the user have to specify that in the ‘Form properties’ tab, 'Custom form layout' option and save.
Now the form is displayed with the custom HTML. To access this HTML editing, we click on the icon 'Edit'
The HTML editor is displayed; the HTML code will define how the form has to be shown. In this editor the user can directly create the HTML i locate the fields and labels with the syntax described below:
$field{fieldName} for field identified fieldName
$label{fieldName} for field identified fieldName label
These expressions will be replaced by the field or label rendering when the form will be shown.
Form modeler also provides two ways to help in the form HTML creation.
'Insert form elements'
Two select: one for the fields and another for the labels. Clicking on that, the field or label text is added to HTML. These selects only show the form fields haven’t been added yet.
'Generate template based on'
This functionality generates the HTML using all fields (default, alignment fields or Not aligned) depending on the selected value and overwrite the HTML.
There are three types of field types that you can use to model your form:
Simple types
These field types are used to represent simple properties like texts, numeric, dates, etc. The supported Field types are:
Table 13.3. Field types
Name Description Java Type Default on generated forms Short Text Simple input to enter short texts. java.lang.String yes Long Text Text area to enter long text. java.lang.String no Rich Text HTMLEditor to enter formatted texts . java.lang.String no Email Simple input to enter short text with email pattern. java.lang.String no Float Input to enter short decimals. java.lang.Float yes Decimal Input to enter number with decimals. java.lang.Double yes BigDecimal Input to enter big decimal numbers. java.math.BigDecimal yes BigInteger Input to enter big integers. java.math.BigInteger yes Short Input to enter short integers java.lang.Short yes Integer Input to enter integers. java.lang.Integer yes Long Integer Input to enter long integers java.lang.Long yes Checkbox Checkbox to enter true/false values java.lang.Boolean yes Timestamp Input to enter date & time values java.util.Date yes Short Date Input to enter date values. java.util.Date no Document File input to upload documents. org.jbpm.document.Document yes
Complex types
These field types are made to deal with properties that are Java Objects instead of basic types. These field types need extra forms to be created in order to show and write values onto the specified Java Object/s
Table 13.4. Complex types
Name Description Java Type Default on generated forms Simple subform Renders the a form, it is used to deal with 1:1 relationships. java.lang.Object yes Multiple subform This field type is used to deal with 1:N relationships. It allows to create, edit and delete a set child Objects.Text area to enter long text. java.util.List yes
Decorators
Decorators are a type of field types that don’t store data in the Object shown on the form. They can be used with aesthetic purpose
Table 13.5. Decorators
Name Description HTML label Allows the user to create HTML code that will be rendered in the form Separator Renders an HTML separator
Is possible to extend the platform to add Custom Field Types that make a specific field (of any type) on the form to look and behave totally different than the standard platform fields. On this section we will take a look on how to create them and how to configure them.
Basically a Custom Field Type is a Java class that implements the org.jbpm.formModeler.core.fieldTypes.CustomFieldType interface and is packaged inside inside a JAR file that is placed on the Application Server classpath or inside the application WAR.
Lets take a look atorg.jbpm.formModeler.core.fieldTypes.CustomFieldType:
package org.jbpm.formModeler.core.fieldTypes;

import java.util.Locale;
import java.util.Map;

/**
* Definition interface for custom fields
*/
public interface CustomFieldType {
    /**
    * This method returns a text definition for the custom type. This text will be shown
    * on the UI to identify the CustomFieldType
    * @param locale The current user locale
    * @return A String that describes the field type on the specified locale.
    */
    public String getDescription(Locale locale);

    /**
    * This method returns a string that contains the HTML code that will be used to show
    * the field value on screen
    * @param value The current field value
    * @param fieldName The field name
    * @param namespace The unique id for the rendered form, it should be used to generate
    * identifiers inside the HTML code.
    * @param required Determines if the field is required or not
    * @param readonly Determines if the field must be shown on read only mode
    * @param params A list of configuration params that can be set on the field
    * configuration screen
    * @return The HTML that will be used to show the field value
    */
    public String getShowHTML(Object value, String fieldName, String namespace,
              boolean required, boolean readonly, String... params);

    /**
    * This method returns a String that contains the HTML code that will show the input
    * view of the field. That will be used to set the field value.
    * @param value The current field value
    * @param fieldName The field name
    * @param namespace The unique id for the rendered form, it should be used to
    * generate identifiers inside the HTML code.
    * @param required Determines if the field is required or not
    * @param readonly Determines if the field must be shown on read only mode
    * @param params A list of configuration params that can be set on the field
    * configuration screen
    * @return The HTML code that will be used to show the input view of the field.
    */
    public String getInputHTML(Object value, String fieldName, String namespace,
              boolean required, boolean readonly, String... params);

    /**
    * This method is used to obtain the field value from the submitted values.
    * @param requestParameters A Map containing the request parameters for the
    * submitted form
    * @param requestFiles A Map containing the java.io.Files uploaded on the request
    * @param fieldName The field name
    * @param namespace The unique id for the rendered form, it should be used to generate
    * identifiers inside the HTML code.
    * @param previousValue The previous value of the current field
    * @param required Determines if the field is required or not
    * @param readonly Determines if the field must be shown on read only mode
    * @param params A list of configuration params that can be set on the field
    * configuration screen
    * @return The value of the field based on the submitted form values.
    */
    public Object getValue(Map requestParameters, Map requestFiles, String fieldName,
              String namespace, Object previousValue, boolean required, boolean readonly,
              String... params);
}
As you can see this Interface defines the methods that determines how the field has to be shown on the screen for when the form is shown on insert(getInputHTML(...)) or readonly (getShowHTML(...)) mode. It also provides the method (getValue(...)) that reads the needed parameters from the request and to obtain the correct field value. Te returned value type must match with the type of the field added on the form.
Now let's see how to use and configure and use a Custom Field type. Following the example on the previous chapter, we have created a File Input type and we have it already installed on our application. So now we are going to create a new form and add a Short Text property and turn it into a File Input and edit the field properties changing the Field Type from Short text toCustom field.
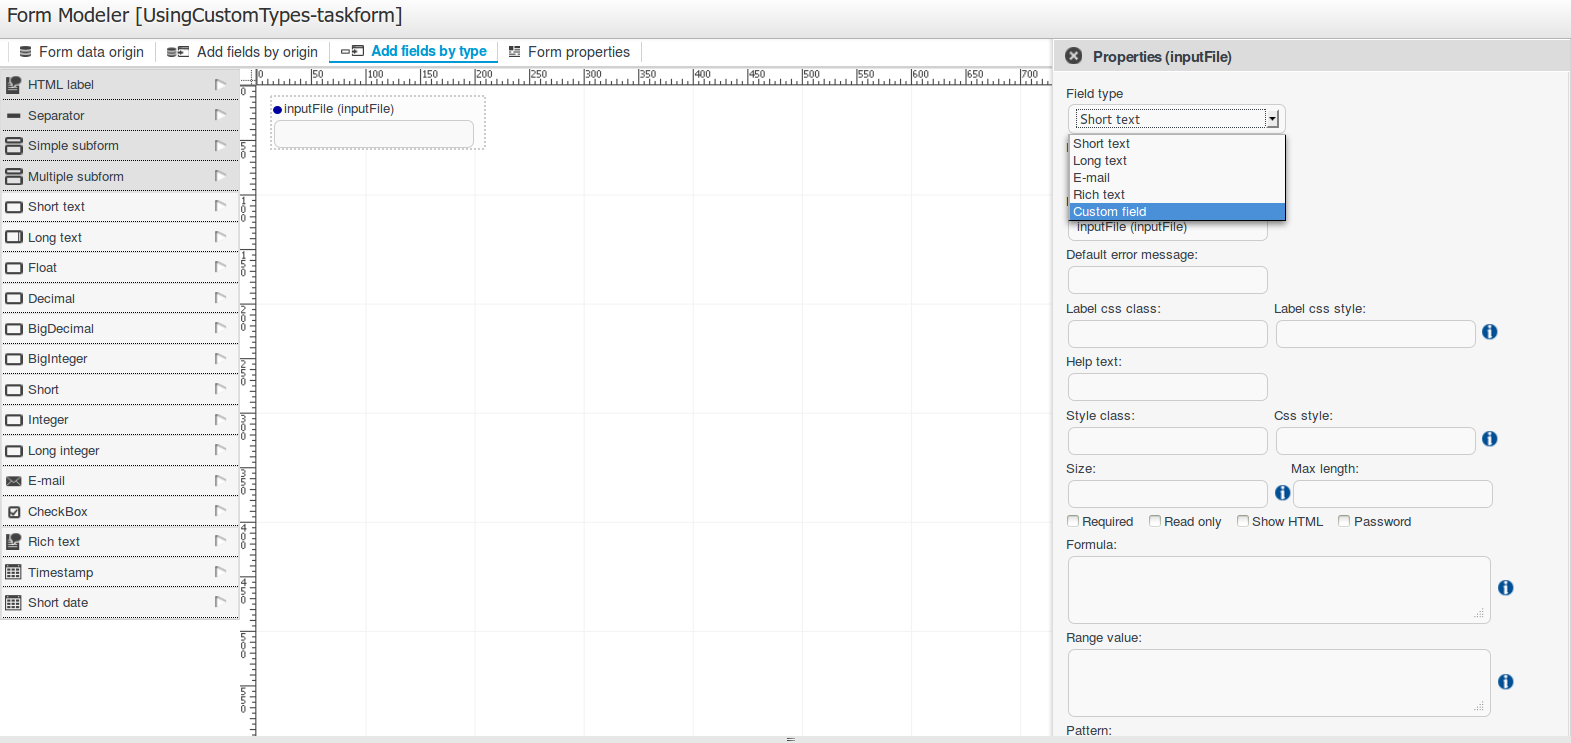
After changing the field type a new set of properties will appear:
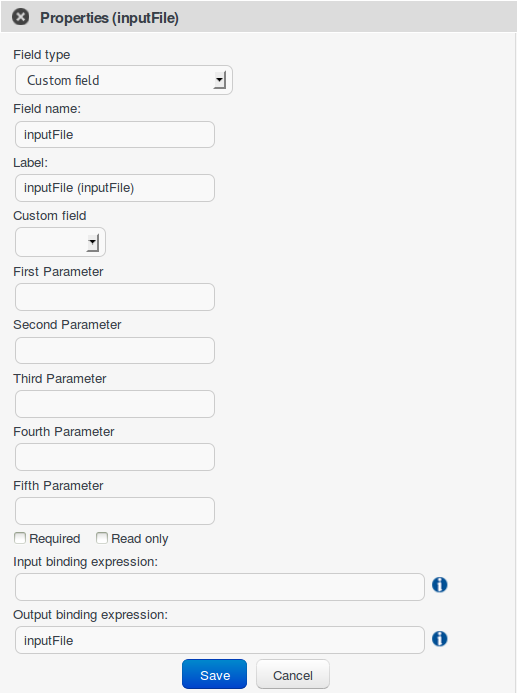
Table 13.6. Custom field properties
| Property | Description |
|---|---|
| Field type | Can change the field type to other compatible field types |
| Field Name | Will be used as identifier in formulas calculation |
| Label | The text that will be shown as field label |
| Custom field | A list containing all the Custom Field Types available on the platform |
| First parameter | A String parameter that can be user to pass custom configuration needed by the Custom Field Type implementation |
| Second parameter | A String parameter that can be user to pass custom configuration needed by the Custom Field Type implementation |
| Third parameter | A String parameter that can be user to pass custom configuration needed by the Custom Field Type implementation |
| Fourth parameter | A String parameter that can be user to pass custom configuration needed by the Custom Field Type implementation |
| Fifth parameter | A String parameter that can be user to pass custom configuration needed by the Custom Field Type implementation |
| Required | Indicates if it’s mandatory to fill this field. |
| Read Only | When this check is on, the field will be used only for read |
| Input binding expression | This expression defines the link between field and process task input variable. It will be used in runtime to set the field value with that task input variable data. |
| Output binding expression | This expression defines the link between field and process task output variable. It will be used in runtime to set that task output variable. |
So opening the Custom field select box we'll be able to select the File Input from the available custom types:
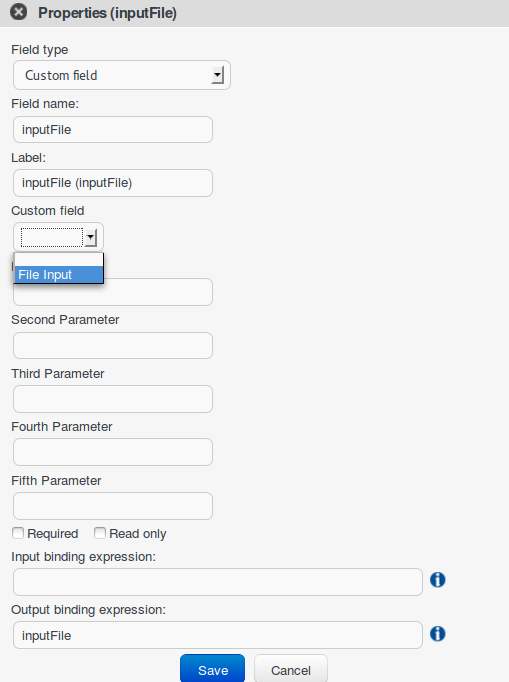
After selecting the File Input type on the list and saving the field properties the form will look like:
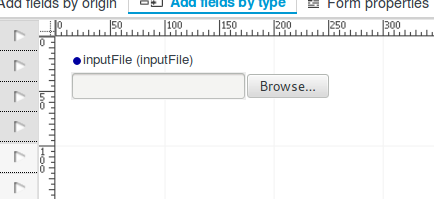
If we build a simple process and configure a Short text to be shown as the sampleFile Input, if we build the project on runtime the field will behave uploading the chosen files to the server and allowing the user to download it like this:

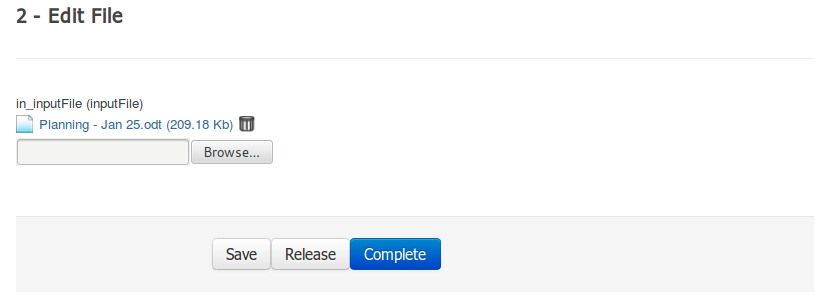
If we take a look at what's the process variable value, we'll see that is storing a String with the file path stored in server.
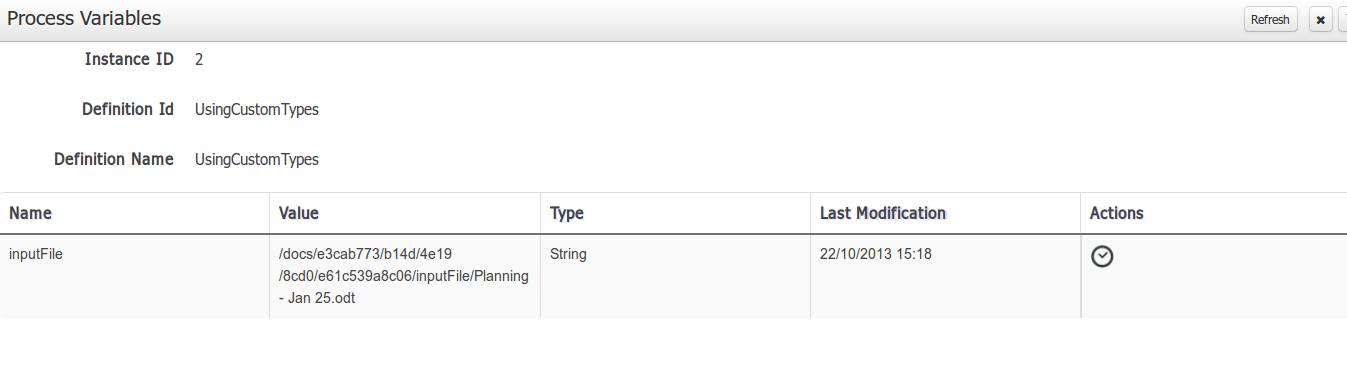
On this section we are going to describe step by step how to attach documents to your process variables from your forms and how you can configure to store the uploaded documents anywhere (File System, Data Base, Alfresco...) using the Pluggable Variable Persistence.
To make your process manage documents you have to define your process variables as usual using
the Custom Type org.jbpm.document.Document. Each variable defined as Document
will be shown on the form as a FILE input.
When the process forms are genereated and a org.jbpm.document.Document variable si found
a File input will be placed on the form.
Each time a document is uploaded using a form the Form Engine will generate an instance of
org.jbpm.document.Document to be stored on the process variable.
In order to store the document using the Pluggable Variable Persistence you'll have to define your Marshalling Strategy to manage the uploaded Documents. To start create a Maven project with your favourite IDE and add the following dependencies:
<dependency>
  <groupId>org.kie</groupId>
  <artifactId>kie-api</artifactId>
  <version>{version}</version>
</dependency>
<dependency>
  <groupId>org.jbpm</groupId>
  <artifactId>jbpm-document</artifactId>
  <version>{version}</version>
</dependency>
Once you did that is time to create your Document Marshalling Strategy, to do so you just have to create a class that extends:
package org.jbpm.document.marshalling;

public abstract class AbstractDocumentMarshallingStrategy implements ObjectMarshallingStrategy {

  public abstract Document buildDocument( String name, long size, Date lastModified, Map<String, String> params );

  public void write( ObjectOutputStream os, Object object )
        throws IOException;

  public Object read( ObjectInputStream os )
        throws IOException, ClassNotFoundException;

  public byte[] marshal( Context context, ObjectOutputStream os, Object object )
        throws IOException;

  public Object unmarshal( Context context, ObjectInputStream is, byte[] object,
        ClassLoader classloader ) throws IOException, ClassNotFoundException;

  public Context createContext();
}
The methods to implement are:
Document buildDocument( String name, long size, Date lastModified, Map<String, String> params ): Creates a valid Document instance with the data received. This method is called when a document is uploaded to create the Document instance before marshalling the document content.
byte[] marshal( Context context, ObjectOutputStream os, Object object ): Marshals the given object and returns the marshalled object as byte[]
Object unmarshal( Context context, ObjectInputStream is, byte[] object, ClassLoader classloader ): Reads the object received as byte[] and returns the unmarshalled object
void write(ObjectOutputStream os, Object object): Implement for backguards compatibility, it should do the same functionallity than byte[] marshal( Context context, ObjectOutputStream os, Object object )
Object read(ObjectInputStream os): Implement for backguards compatibility, it should do the same functionallity than Object unmarshal( Context context, ObjectInputStream is, byte[] object, ClassLoader classloader )
You can see how the default DocumentMarshallingStrategy is implemented looking at this link.
After creating your Document Marshalling Strategy and add it to your server classpath the only thing
remaining is to configure your project deployment descriptor add it to the marshalling strategies list.
To do it you just have to open the Kie-Workbench on your browser, open your project on the Authoring view and
edit the kie-deployment-descriptor.xml file located on <yourproject>/src/main/resources/META-INF
and add your Document Marshalling Strategy to the <marshalling-strategies> list
like this:
<?xml version="1.0" encoding="UTF-8" standalone="yes"?>
<deployment-descriptor
    xsi:schemaLocation="http://www.jboss.org/jbpm deployment-descriptor.xsd"
    xmlns:xsi="http://www.w3.org/2001/XMLSchema-instance">
  <persistence-unit>org.jbpm.domain</persistence-unit>
  <audit-persistence-unit>org.jbpm.domain</audit-persistence-unit>
  <audit-mode>JPA</audit-mode>
  <persistence-mode>JPA</persistence-mode>
  <runtime-strategy>SINGLETON</runtime-strategy>
  <marshalling-strategies>
    <marshalling-strategy>
      <resolver>reflection</resolver>
      <identifier>
        org.jbpm.document.marshalling.DocumentMarshallingStrategy
      </identifier>
    </marshalling-strategy>
  </marshalling-strategies>
  <event-listeners/>
  <task-event-listeners/>
  <globals/>
  <work-item-handlers/>
  <environment-entries/>
  <configurations/>
  <required-roles/>
</deployment-descriptor>
Since this is done you're able to build your project and upload your documents on your process.


Note
On this example we are configuring the default DocumentMarshallingStrategy, please use it for test and
demo purposes.
This chapter intends to describe how you can embed process forms and interact with them on another webapp including the new Javascript API provided by the platform.
You can find the library inside the kie-wb-*.war on the js file located on
js/jbpm-forms-rest-integration.js.
This JavaScript API tries to be a simple mechanism to use forms on remote applications allowing to load the forms from different KIE Workbench instances, submit them, launch processes/tasks and execute callback functions when the actions are done.
The basic methods are:
- showStartProcessForm(hostUrl, deploymentId, processId, divId, onsuccessCallback, onerrorCallback): Makes a call to the REST endpoint to obtain the form URL and if it gets a valid response will embed the process start form on the given div. The parameteres needed are:
hostURL: the URL of the KIE Workbench instance that holds the deployments.
deploymentId: the deployment identifier that contains the process to run.
processId: the identifier of the process to run.
divId: the identifier of the div that has to contain the form.
onsuccessCallback (optional): a javascript function that will be executed if the form is going to be rendered. This function will receive the server response as a parameter
onerrorCallback (optional): a javascript function that will be executed if any error occurs and it is impossible to render the form. This function will receive the server response as a parameter
- startProcess(divId, onsuccessCallback, onerrorCallback): Submits the form loaded on the given div and starts the process. The parameteres needed are:
divId: the identifier of the div that to contains the form.
onsuccessCallback (optional): a javascript function that will be executed after the process is started. This function will receive the server response as a parameter
onerrorCallback (optional): a javascript function that will be executed if any error occurs and it is impossible to start the process. This function will receive the server response as a parameter
- showTaskForm(hostUrl, taskId, divId, onsuccessCallback, onerrorCallback): Makes a call to the REST endpoint to obtain the form URL and if it gets a valid response will embed the task form on the given div. The parameteres needed are:
hostURL: the URL of the KIE Workbench instance that holds the deployments.
taskId: the identifier of the task to show the form.
divId: the identifier of the div that has to contain the form.
onsuccessCallback (optional): a javascript function that will be executed if the form is going to be rendered. This function will receive the server response as a parameter
onerrorCallback (optional): a javascript function that will be executed if any error occurs and it is impossible to render the form. This function will receive the server response as a parameter
- claimTask(divId, onsuccessCallback, onerrorCallback): Claims the task whose form is being rendered
divId: the identifier of the div that contains the form.
onsuccessCallback (optional): a javascript function that will be executed after the task is claimed. This function will receive the server response as a parameter
onerrorCallback (optional): a javascript function that will be executed if any error occurs and it is impossible to claim the task. This function will receive the server response as a parameter
- startTask(divId, onsuccessCallback, onerrorCallback): Starts the task whose form is being rendered
divId: the identifier of the div that contains the form.
onsuccessCallback (optional): a javascript function that will be executed after the task is started. This function will receive the server response as a parameter
onerrorCallback (optional): a javascript function that will be executed if any error occurs and it is impossible to start the task. This function will receive the server response as a parameter
- releaseTask(divId, onsuccessCallback, onerrorCallback): Releases the task whose form is being rendered
divId: the identifier of the div that contains the form.
onsuccessCallback (optional): a javascript function that will be executed after the task is released. This function will receive the server response as a parameter
onerrorCallback (optional): a javascript function that will be executed if any error occurs and it is impossible to release the task. This function will receive the server response as a parameter
- saveTask(divId, onsuccessCallback, onerrorCallback): Submits the form and saves the state of the task whose form is being rendered
divId: the identifier of the div that contains the form.
onsuccessCallback (optional): a javascript function that will be executed after the task is saved. This function will receive the server response as a parameter
onerrorCallback (optional): a javascript function that will be executed if any error occurs and it is impossible to save the task. This function will receive the server response as a parameter
- completeTask(divId, onsuccessCallback, onerrorCallback): Submits the form and completes task whose form is being rendered
divId: the identifier of the div that contains the form.
onsuccessCallback (optional): a javascript function that will be executed after the task is completed. This function will receive the server response as a parameter
onerrorCallback (optional): a javascript function that will be executed if any error occurs and it is impossible to complete the task. This function will receive the server response as a parameter
- clearContainer(divId): Cleans the div content and the related data stored on the component.
divId: the identifier of the div that contains the form.
Now let's see an example how you can use the library to load the HR process form and start a new process instance. We are going to define a HTML page that will contain very simple components:
"Show Process Form" BUTTON: The button that is going to make a call to a showProcessForm() function to embedd the process form.
"myform" DIV: the div that will containt the form
"Start Process" BUTTON: the button that will call the startProcess() function that submits the form and start a new process instance. At the begining it will be hidden and only will be displayed when the form is going to be rendered.
First we are look at the HTML code:
<head>
  <script src="js/jbpm-forms-rest-integration.js"></script>
  <script>
      var formsAPI = new jBPMFormsAPI();
  </script>
</head>
<body>
  <input type="button" id="showformButton"
      value="Show Process Form" onclick="showProcessForm()">
  <p/>
  <div id="myform" style="border: solid black 1px; width: 500px; height: 200px;">
  </div>
  <p/>
  <input type="button" id="startprocessButton"
      style="display: none;" value="Start Process" onclick="startProcess()">
</body>
Notice that in first place we have added the js library and created an instance of the jBPMFormsAPI object that will manage the form rendering.
Now let's see how the showProcessForm() function looks like:
function showProcessForm() {
  var onsuccessCallback = function(response) {
    document.getElementById("showformButton").style.display = "none";
    document.getElementById("startprocessButton").style.display = "block";
  }

  var onerrorCallback = function(errorMessage) {
    alert("Unable to load the form, something wrong happened: " + errorMessage);
    formsAPI.clearContainer("myform");
  }
  formsAPI.showStartProcessForm("http://localhost:8080/kie-wb/", "org.jbpm:HR:1.0", "hiring", "myform", onsuccessCallback, onerrorCallback);
}
As you can see, first we are defining the callback functions:
- onsuccessCallback: This function is going to be called when the call to the REST endpoint and the form is going to be rendered. On this example we simply hide the "Show Process Form" button and show the "Start Process" button in order to allow to submit the form and start the process. This function takes as a parameter the response of the REST call to inform the user that everything gone well.
- onerrorCallback: This function is going to be called if any error occurs (e.g. any communication error with the REST endpoint or unexpected js errors) On this example we simply show an alert showing the error message received and clear the "myform" DIV status.
Once we defined the callback function we proceed to call the formsAPI.showStartProcessForm(...) that is going make the REST call and embedd the form inside the specified div. Notice that we are providing a bunch of information in order to load the form, the URL where the KIE-Workbench is running (in this example "http://localhost:8080/kie-wb/"), the deployment where the process is located ("org.jbpm:HR:1.0"), the process id ("hiring"), the DIV id that is going to contain the form ("myform") and the callback functions (onsuccessCallback and onerrorCallback).
Now let's take a look at the startProcess() that is the one that is going to submit the form and start the process:
function startProcess() {
  var onsuccessCallback = function(response) {
    document.getElementById("showformButton").style.display = "block";
    document.getElementById("startprocessButton").style.display = "none";
    formsAPI.clearContainer("myform");
    alert(response);
  }

  var onerrorCallback = function(response) {
    document.getElementById("showformButton").style.display = "block";
    document.getElementById("startprocessButton").style.display = "none";
    formsAPI.clearContainer("myform");
    alert("Unable to start the process, something wrong happened: " + response);
  }
  formsAPI.startProcess("myform", onsuccessCallback, onerrorCallback);
}
As showProcessForm(), first we are defining the callback functions. Both are doing basically the same:
Show the "Show Process Form" button and hide the "Start Process" button to allow start another process instance.
Clear the "myform" DIV status
Show an alert with the response notifying that the process has started well or if an error occured
Once that is done we just do the call to the formsAPI.startProcess(...) that will send a message to the component that renders the form inside the "myform" DIV and will exectue the callback functions when the action is done. Notice that we don't need the provide any other information than the DIV that contains the form and optionally the callback functions.
With a simple code like this you'll be able to run process/task forms that are located on different Kie-Workbench instances from any other application.

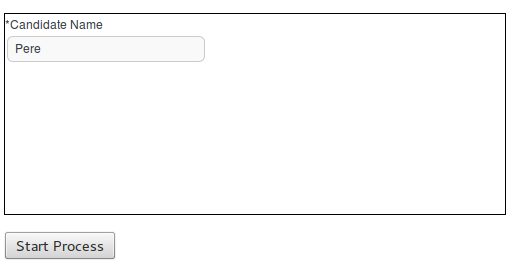
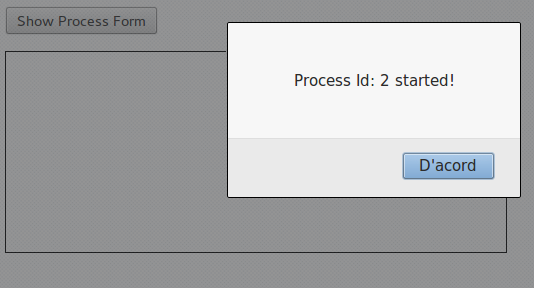
In version 5.x processes were stored in so called packages produced by Guvnor and next downloaded by jbpm console for execution using KnowledgeAgent. Alternatively one could drop their process files (bpmn2 files) into a predefined directory that was scanned on the jbpm console start. That was it. That enforces users to always use Guvnor when dynamic deployment was needed. Although there is nothing wrong with it, actually that was recommended approach but not everytime it was desired.
Version 6, on the other hand moves away from proprietary packages in favor of, well known and mature, Apache Maven based packaging - known as knowledge archives - kjar. Processes, rules etc (aka business assets) are now part of a simple jar file built and managed by Maven. Along the business assets, java classes and other file types are stored in the jar file too. Moreover, as any other maven artifact, kjar can have defined dependencies on other artifacts including other kjars. What makes the kjar special when compared with regular jars is a single descriptor file kept inside META-INF directory of the kjar - kmodule.xml. That descriptor allows to define:
knowledge bases and their properties
knowledge sessions and their properties
work item handlers
event listeners
By default, this descriptor is empty (just kmodule root element) and is considered as marker file. Whenever a runtime component (such as jbpm console) is about to process kjar it looks up kmodule.xml to build its runtime representation. In addition to kmodule.xml a deployment descriptor (that provides fine graind control over deployment) is available (since 6.1).
While kmodule is mainly targeting on knowledge base and knowledge session basic configuration, deployment descriptors are considered more technical configuration. Following are the items available for configuration via deployment descriptors:
persistence unit name for runtime data
persistence unit for audit data
persistence mode (JPA or NONE)
audit mode (JPA, JMS, NONE)
runtime strategy (SINGLETON, PER_REQUEST, PER_PROCESS_INSTANCE)
list of event listeners to be registered
list of task event listeners to be registered
list of work item handlers to be registered
list of globals to be registered
marshalling strategies to be registered (for pluggable variable persistence)
required roles to be granted access to resources of the kjar
additional configuration options of knowledge session
additional environment entries for knowledge session
list of fully qualified class names that shall be added to the classes used for serialization by remote services
whether or not to limit the classes from the deployment used for serialization by the remote services
Deployment descriptor is an xml file that is placed inside META-INF folder of the kjar, although it is an optional file and deployments will succeed even when such descriptor is missing.
<deployment-descriptor xsi:schemaLocation="http://www.jboss.org/jbpm deployment-descriptor.xsd" xmlns:xsi="http://www.w3.org/2001/XMLSchema-instance">
    <persistence-unit>org.jbpm.domain</persistence-unit>
    <audit-persistence-unit>org.jbpm.domain</audit-persistence-unit>
    <audit-mode>JPA</audit-mode>
    <persistence-mode>JPA</persistence-mode>
    <runtime-strategy>PER_PROCESS_INSTANCE</runtime-strategy>
    <marshalling-strategies/>
    <event-listeners/>
    <task-event-listeners/>
    <globals/>
    <work-item-handlers/>
    <environment-entries/>
    <configurations/>
    <required-roles/>
    <remoteable-classes/>
    <limit-serialization-classes/>
</deployment-descriptor>
It provides more configuration options then the standard deployment has. Deployment descriptors are used in hierarchical way meaning they can be placed on various levels of the system and merged on runtime. jBPM supports following levels of deployment descriptors:
server level - this is the main and considered default deployment descriptos that apply to all deployments on given server
kjar level - this is dedicated deployment descriptor to given kjar
deploy time level - this is deployment descriptor that is given at the time of deployment
Deployment descriptors on different levels are merged on deployment time where the master is considered descriptor lower in the hierarchy and slave one that is higher in hierarchy. To give an example, when a kjar is deployed and it contains deployment descriptor kjar's deployment descriptor is considered slave and server level descriptor is considered master. With default merge mode it will override all master entries with slave ones as long as they are not empty and combine all collections.
Since kjar can have dependencies to other kjars, and in turn that dependencies might have deployment descriptors as well, they will be placed in deployment descriptors hierarchy lower than the actual kjar that is being deployed. With that said, this is how it will look like from hierarchy point of view, starting with master (server level):
server level
dependency kjar level
kjar level
That in default merging mode will result in deployment descriptor where with non empty values from kjar's deployment descriptors and merged collection from all levels.
So far all merging was done with default mode, which is MERGE_COLLECTIONS but that's not the only mode that is available:
KEEP_ALL - meaning that the master wins - all configuration defined in master will be retained
OVERRIDE_ALL - meaning that slave wins - all configuration defined in master will be retained
OVERRIDE_EMPTY - meaning all non empty configuration items from slave will replace those in master, including collections
MERGE_COLLECTIONS - meaning all non empty configuration items from slave will replace those in master but collections will me merged (combined)
Tip
Deployment descriptos can be given as partial xml documents, meaning they do not need to be complete set of all configuration items, e.g. if user would like to override only the audit mode in kjar, it's enough to have following deployment descriptor:
<?xml version="1.0" encoding="UTF-8" standalone="yes"?>
<deployment-descriptor xsi:schemaLocation="http://www.jboss.org/jbpm deployment-descriptor.xsd" xmlns:xsi="http://www.w3.org/2001/XMLSchema-instance">
    <audit-mode>JPA</audit-mode>
</deployment-descriptor>
Although it's worth noting that when using OVERRIDE_ALL merge mode all configuration items should be specified since it will always use them and do not merge with any other deployment descriptor in the hierarchy.
Default deployment descriptor
There is always default deployment descriptor available, even if it was not explicitly configured, when running in jbpm-console (kie-workbench) the default values are as follows:
persistence-unit is set to org.jbpm.domain
audit-persistence-unit is set to org.jbpm.domain
persistence-mode is set to JPA
audit-mode is set to JPA
runtime-strategy is set to SINGLETON
all collection based configuration items are left empty
Note
Regardless of collection elements in default deployment descriptor are empty there will be some work item handlers/listeners registered that are required to support functionality of the jbpm console such as BAM listeners or human task work item handler.
Default deployment descriptor can be altered by specifying valid URL location to an xml file that will provide fully defined deployment descriptor. By fully defined we mean that all elements should be specified as this deployment descriptor will become server level deployment descriptor.
-Dorg.kie.deployment.desc.location=file:/my/custom/location/deployment-descriptor.xml
Collection configuration items
Deployment descriptor consists of collection based items (event listeners, work item handlers, globals, etc) that usually require definition of an object that should be created on runtime. There are two types of collection based configuration items:
object model - that is clear definition of the object to be built or looked up in available registry
named object model - that is an extension to object model and allows to provide name of the object which will be used to register object
Object model consits of:
identifier - defines main information about the object, such as fully qualified class name, spring bean id, mvel expression
parameters - optional parameters that should be used while creating object instance from the model
resolver - identifier of the resolver that will be used to create object instances from the model - (reflection, mvel, spring)
Table 14.1. Object models
| Configuration item | Type of collection items |
|---|---|
| event-listeners | ObjectModel |
| task-event-listeners | ObjectModel |
| marshalling-strategies | ObjectModel |
| work-item-handlers | NamedObjectModel |
| globals | NamedObjectModel |
| environment-entries | NamedObjectModel |
| configurations | NamedObjectModel |
| required-roles | String |
Depending on resolver type, creation or look up of the object will be performed. The default (and easiest) is reflection that will use both parameters and identifier (in this case is FQCN) to construct the object. Parameters in this case can be String or another object model for representing other types than String. Following is an example of an object model that will create an instance of org.jbpm.test.CustomStrategy using reflection resolver that will use constructor of that class with two String parameters. Note that String paramaters are created with different ways (using object model - first param, directly by giving String - second param).
Example 14.1.
...
<marshalling-strategy>
  <resolver>reflection</resolver>
  <identifier>org.jbpm.test.CustomStrategy</identifier>
  <parameters>
    <parameter xsi:type="objectModel">
       <resolver>reflection</resolver>
       <identifier>java.lang.String</identifier>
       <parameters>
         <parameter xsi:type="xs:string" xmlns:xs="http://www.w3.org/2001/XMLSchema">param1</parameter>
       </parameters>
       </parameter>
         <parameter xsi:type="xs:string" xmlns:xs="http://www.w3.org/2001/XMLSchema">param2</parameter>
       </parameters>
</marshalling-strategy>
...
Same can be done by using DeploymentDescriptor fluent API:
// create instance of DeploymentDescriptor with default persistence unit name
DeploymentDescriptor descriptor = new DeploymentDescriptorImpl("org.jbpm.domain");

// get builder and modify the descriptor
descriptor.getBuilder()
.addMarshalingStrategy(new ObjectModel("org.jbpm.testCustomStrategy",
			new Object[]{
			new ObjectModel("java.lang.String", new Object[]{"param1"}),
			"param2"}));
Reflection based object model resolver is the most verbose in case there are parameters involved but there are few parameters that are available out of the box and do not need to be created, they are simply referenced by name:
entityManagerFactory (type of this parameter is javax.persistence.EntityManagerFactory)
runtimeManager (type of this parameter is org.kie.api.runtime.manager.RuntimeManager)
kieSession (type of this parameter is org.kie.api.KieServices)
taskService (type of this parameter is org.kie.api.task.TaskService)
executorService (type of this parameter is org.kie.internal.executor.api.ExecutorService)
So to be able to use one of these it's enough to reference them by name and make sure that proper object type is used within your class:
...
<marshalling-strategy>
  <resolver>reflection</resolver>
  <identifier>org.jbpm.test.CustomStrategy</identifier>
  <parameters>
     <parameter xsi:type="xs:string" xmlns:xs="http://www.w3.org/2001/XMLSchema">runtimeManager</parameter>
   </parameters>
</marshalling-strategy>
...
In case reflection based resolver is not enough, more advanced resolver can be used that utilizes power of MVEL language. It's much easier in the configuration as it expects mvel expression as identifier of the object model. It will provide the out of the box parameters (listed above: runtime manager, kie session, etc) into the mvel context while evaluating expression. To define object model with mvel resolver use following xml (that will be equivalent to replection based above):
...
<marshalling-strategy>
  <resolver>mvel</resolver>
  <identifier>new org.jbpm.test.CustomStrategy(runtimeManager)</identifier>
</marshalling-strategy>
...
Last but not least, there is Spring based resolver available as well that allows to simply look up a bean by its identifier from spring application context. This resolver is not used in jbpm console (kie-workbench) as it does not use spring but whenever jBPM is used together with Spring it might become handy when deploying kjars into the runtime. It's very simple definition in xml, again equivalent to the other one assuming org.jbpm.test.CustomStrategy is registered in spring application context under customStrategy id.
...
<marshalling-strategy>
  <resolver>spring</resolver>
  <identifier>customStrategy</identifier>
</marshalling-strategy>
...
Manage deployment descriptor
Deployment descriptor is created as soon as project is created. It does contins the most basic deployment descriptor that is based on the default one. Meaning all settings present in default deployment descriptor will be copied into the one placed in the project. Further changes can be done directly in the xml content (in next versions more user friendly editor will most likely be provided). It is accessible from Administration perspecitve as this is considered technical administration task rather than business related activity.
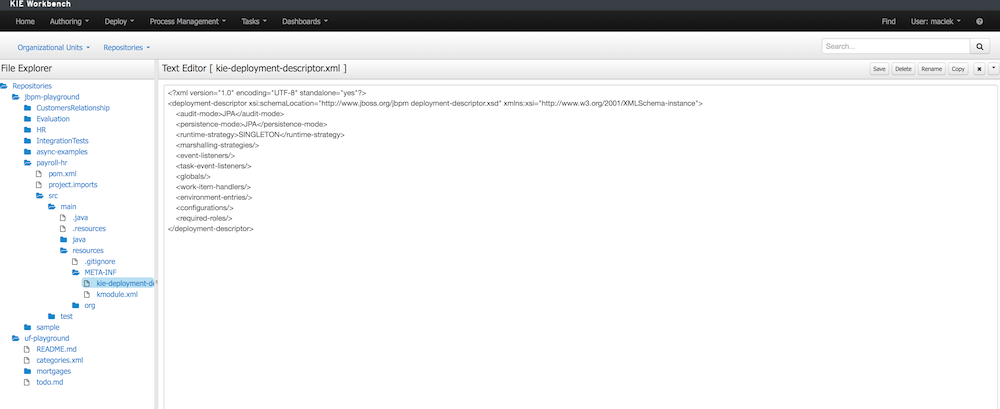
Restrict access to runtime engine
jbpm console (kie-workbench) provides access restriction to repositories that can be configured with supplementary tool called kie-config-cli. This protects repositories in the authoring perspsective based on roles membership. Deployment descriptors moves this capability to the runtime engine by ensuring that access to processes will be granted only to users that belong to groups defined in the deployment descriptor as required roles. By default when project is created (at the same time deployment descriptor is created as well) required roles are automatically filled in based on repository restrictions. These roles can be still altered by editing deployment descriptor via Administration perspective as presented in Manage deployment descriptor section.
Security is enforced on two levels:
user interface - user will see only process definitions that are available for his/her roles
runtime manager - each access to get RuntimeEngine out of RuntimeManager is pretected based on the role membership, in case unauthorized access it attempted SecurityException will be thrown
Required roles are defined as simple strings that should match actual roles defined in security realm. Following is a xml snippet that shows definition of required roles in deployment descriptor:
<deployment-descriptor>
...
    <required-roles>
        <required-role>experts</required-role>
    </required-roles>
...
</deployment-descriptor>
In case fine grained control is required defined roles can be prefixed with one of the following to control it on further level:
view:
to restrict access to be able to see given process definitions/instances on UI
executre:
to restrict access to be able to execute given process definitions
all:
applies to both view and execute restrictions and this is the default when no prefix is given.
For example to restrict access to show process from given kjar only to group 'management' but still allow them to be executed by anyone (sort of system processes) one could define it as follows:
<deployment-descriptor>
...
   <required-roles>
      <required-role>view:management</required-role>
   </required-roles>
...
</deployment-descriptor>
Classes used for serialization in the remote services
When processes make use of custom types (or in general non promitive types) and there is a use case to include remote api invocations (REST, SOAP, JMS) such types must be available to the remote services marshalling mechanism that is based on JAXB for XML type. By default all types defined in kjar will be automatically included in JAXB context and therefore will be avialble for remote interaction. Though there might be more classes (like from dependent model) that shall be included there too.
Upon deployment, jBPM will scan classpath of given kjar to automatically register classes that might be needed for remote interaction. This is done based on following rules:
all classes included in kjar project itself
all classes included as dependency of projects type kjar
classes that are annotated with @XmlRootElement (JAXB annotation) and included as regular dependency of the kjar
classes that are annotated with @Remotable (kie annotation) and included as regular dependency of the kjar
If that is not enough deployment descriptor allows to manually specify classes that shall be added to the JAXB context via remoteable-classes element:
<remoteable-classes>
   ...
   <remotable-class>org.jbpm.test.CustomClass</remotable-class>
   <remotable-class>org.jbpm.test.AnotherCustomClass</remotable-class>
   ...
</remoteable-classes>
With this all classes can be added to the JAXB context to properly marshal and unmarshal data types when interacting with jBPM remotely.
Limiting classes usd for serialization in the remote services
When there are classes in the kjar project or in the dependencies of the kjar project that woudl cause problems when used for serialization, the limit-serialization-classes property can be used to limit which classes are used for serialization
<limit-serialization-classes>true</limit-serialization-classes>This property limits classes used for serialization to classes which fulfill both of the following "location" and "annotation" criteria:
Classes that:
are located in the kjar project
are in a direct dependency of the kjar project
are listed in the
remoteable-classeselement and are available on the classpath of the kjar
These classes must also be annotated with one of the following type annotations:
javax.xml.bind.annotation.XmlRootElementjavax.xml.bind.annotation.XmlTypeorg.kie.api.remote.Remotable
Additionally, classes will be excluded if they are any of the following: interfaces, local classes, member classes or anonymous classes.
You can access to the Process Deployments List under the Deploy top level menu of the KIE Workbench
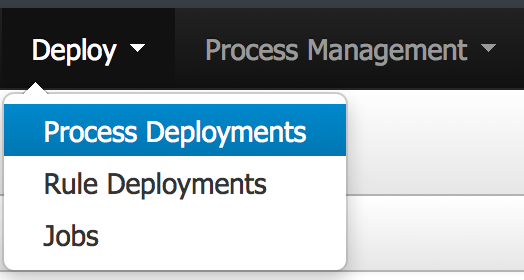
The Deployed Unit list shows all the Process Deployed Units into the platform that are already enabled to be used. Each deployment unit can contain multiple business processes and business rules. In order to have your process and rules deployed and listed in this list, you need ot Build and Deploy your KIE projects from the Authoring Perspective or via the Remote Endpoints. If your processes and rules are in a KIE Project listed in this list and you have correspondent the rights you should be able to see the process definitions in the Process Definitions Perspective.
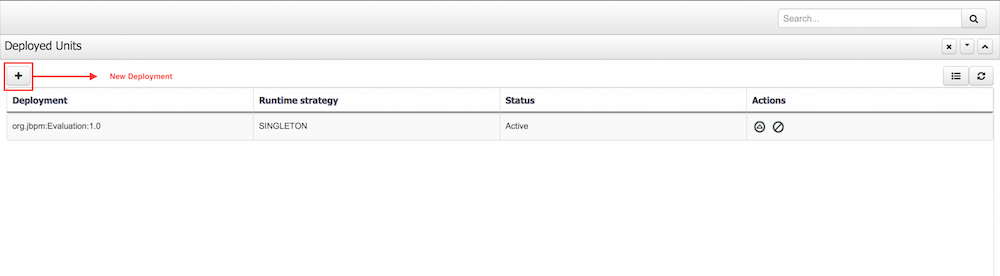
From the Authoring Perspective (Build and Deploy), a default deployment will be performed, for a more advanced deployments you can trigger a custom deployment with other options from this screen.
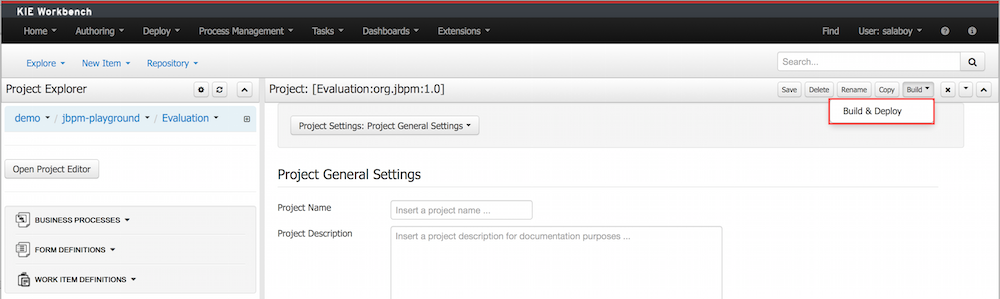
By clicking the New Deployment Unit (+) button you will be able to select a different KIE Base, KIE Session, Strategy and Merge Mode for your deployment. By default the "DEFAULT" KIE Base and KIE Sessions are used, the SINGLETON Strategy is selected and the Merge Mode is set to "Merge Collection".
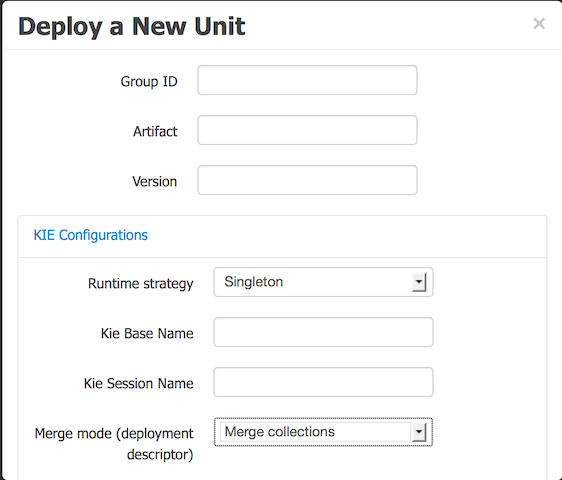
The Jobs perspective allows you to monitor and trigger Asynchronous Jobs schedulled to the jBPM Executor Service. You can access to the Jobs List from the Deploy top level menu of the KIE Workbench.
The Jobs List shows all the Jobs that were schedulled and their status. The Filter on top of the table helps the administrator to monitor the Jobs execution and take corrective actions in case of Failure. Check the jBPM Executor section of the documentation for more information.
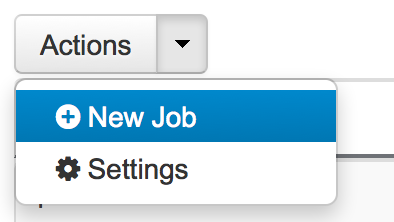
Administrators have also the option to configure the jBPM Executor Service Settings and to start and stop the service from the User Interface via the Actions -> Settings option.
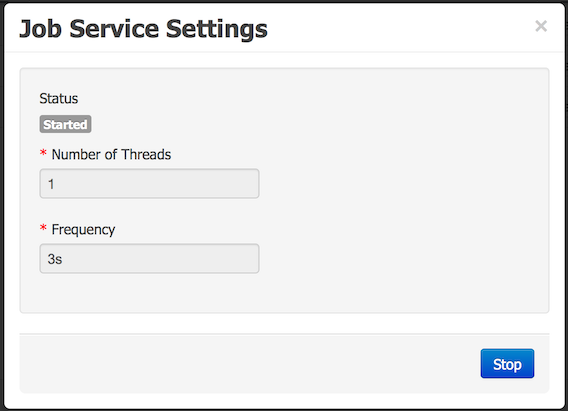
Administrators can also schedulle manually new Jobs from the User Interface via the Actions -> Settings option. By specifing the command class name and the parameters needed to run the command a new Job can be created. This manually created jobs will not be associated with any process instance. Notice also that the Due Date paramenter allows the execution to be derrefered for the future. If the Due Date is the time of schedulling the jBPM Executor Service will execute the command as soon as there is an Executor Thread available. The number of retries will help the command to be executed more than once if it fails. This can help in situations when the business logic requires an external service to be called where the runtime cannot rely on that service to be available 100% of the time.
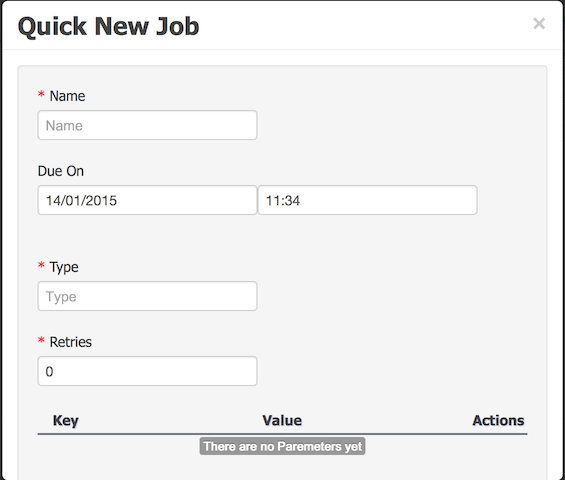
This chapter describes the screens related with the creation and management of process definitions and process instances.
Once you have modelled, configured all the technical details and build and deployed your projects containing your business processes you should be able to see all the available process definitions in the Process Definition List. For all the process definitions listed in the Process Definitions List you will be able to inspect the Process Definition details and start as many Process Instances as needed. The following sections describes the features provided by all the screens in charge of the manipulation of process definitions and process instances. You can find these screens under the Process Management Menu, in the jBPM Console NG or in KIE Workbench.
You can find the source code related with the process definition and instances manupilation inside this module: http://github.com/droolsjbpm/jbpm-console-ng/tree/master/jbpm-console-ng-process-runtime Feel free to report issues, send Pull Requests and get in contact with the team via comments in github.
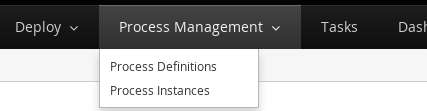
The process definition section is composed by two main screens: the Process Definition Lists and the Process Definition Details.
The process definition list shows all the available process definitions that were deployed into the platform. Look at the Deployments section for more information about how to check all the deploymed units available in the platform runtime.
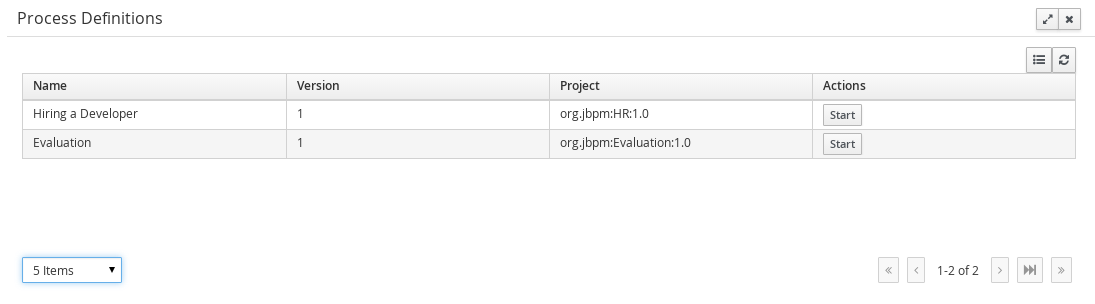
You can click in the list rows to access to the details of the process definition.
The process definition details shows all the available information about the process definition. You can consider this screen as a brief about the process model. You can quickly see if there is a Sub Process associated with it, or how many users and groups are participating in the selected definition.
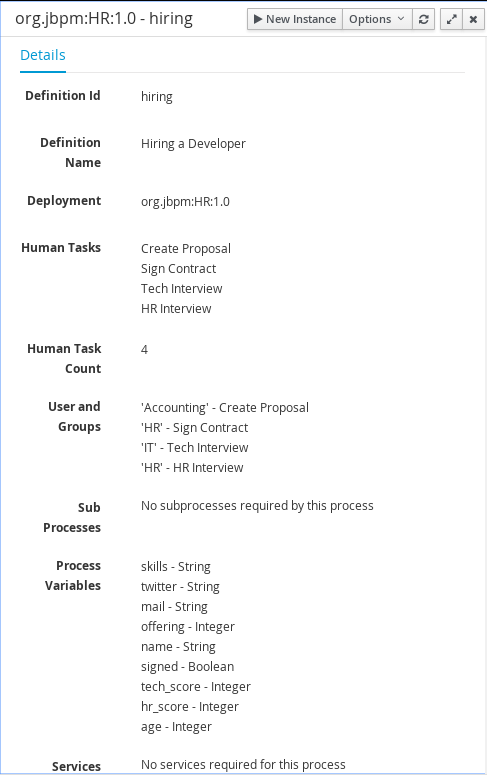
Notice that you can View the Process Model (Read Only mode) using the Options Menu in the top bar. You can also look at all the process instances for the selected process definition by going to Options -> View Process Instances.
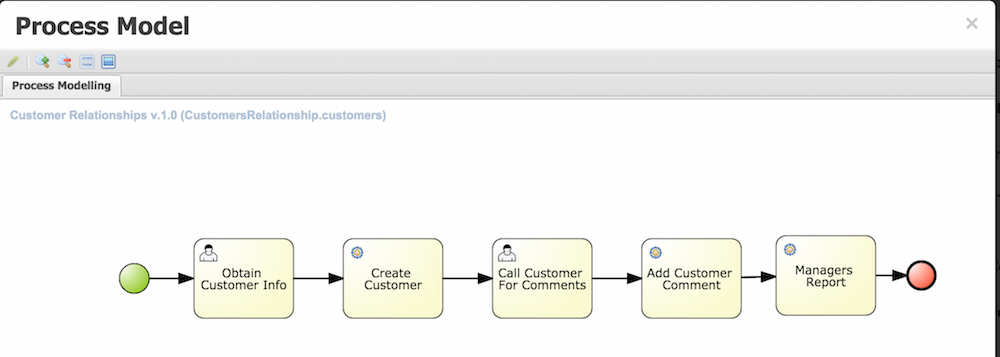
You can create new Process Instances from the Process Definition List (Action Column), from the Process Definition Detail view or from the Process Instance.
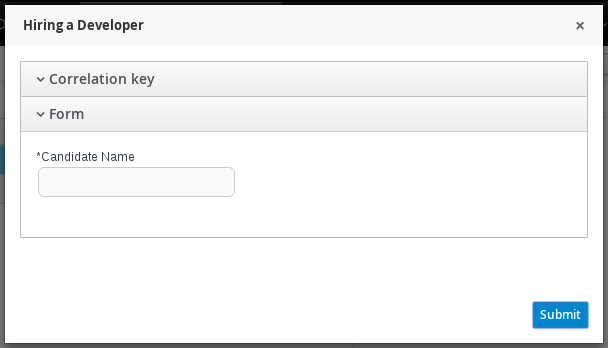
When you create a Process Instance usually a Form will be presented to introduce the information required by the process to be started. Once you complete the required information and click on the Submit button, the instance will be created and the details of the Process Instance will be displayed on top of the Process Definition Details.
The process instances section is composed by two main screens: the Process Instance Lists and the Process Instance Details. In this case the Process Instance Details provides several tabs with the runtime information related with the process.
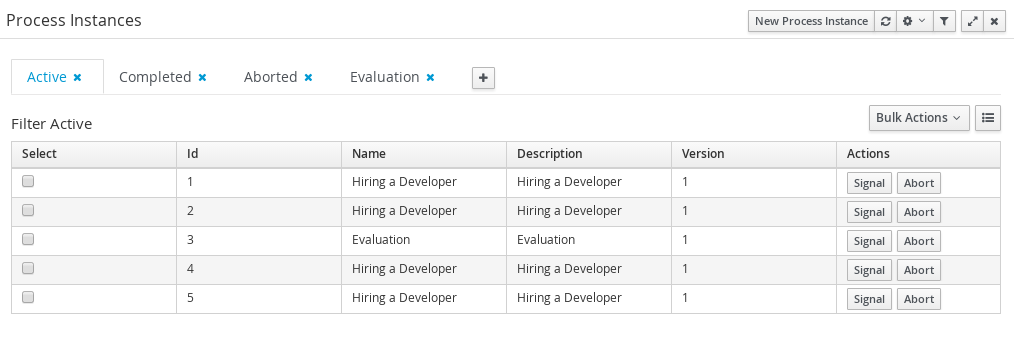
Each row inside the process instance list represent a running process instance from a particular Process Definition. Each execution is differentiated from all the others by the internal state of the information that the process is manipulating. In order to inspect this information you can click in each row to see the process instance details.
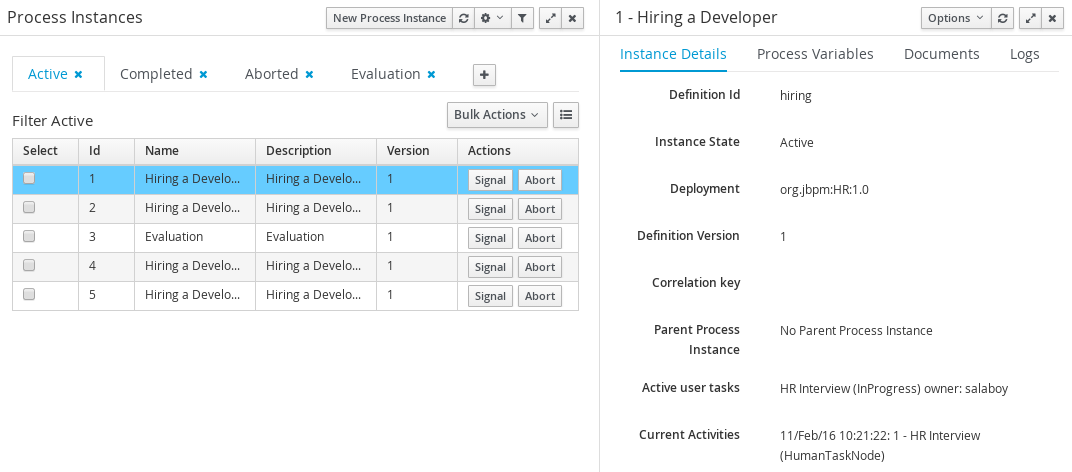
As you can see the Process Instance Detail first tab gives you a quick overview about what is going on inside the process. This is by showing the current state of the instance and also the current activity that is being executed. The process variables tab display all the process variables that are being manipulated by the instance with the exception of the variables that contains documents.
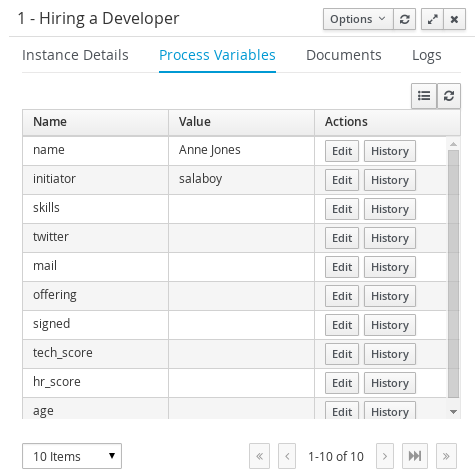
If the process contains a variable of the type: org.jbpm.Document it will be listed in the Documents tab, for easy access, download and manipulation of the attached documents. Notice that at this point you cannot attach new documents to currently running instances, but this feature will be added in future versions.
Finally, the Logs tab shows two types of logs for different end users. There are two types of Logs available inside the tab: Business and Technical.
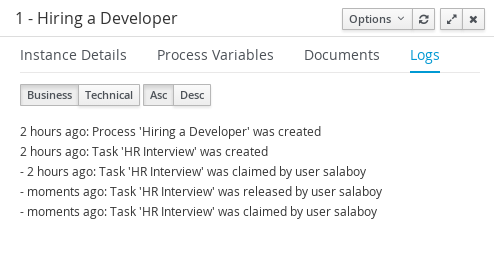
To complement the process logs you can open the Process Model that shows the completed activies in grey and the current activities highlighted in red.
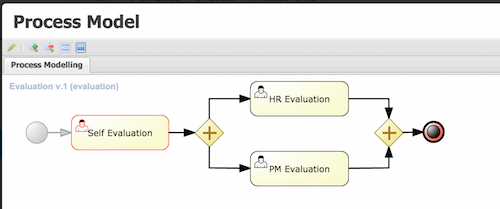
This list works with the concept of view. A view is a set of visualization parameters that modify what items has to be displayed and how the items details has to be shown.
A view embrace
Columns to be shown
Items by page
Restrictions over the displayed process instances
A Name to be shown at tab name
A Description as title when the view is selected
We find here different areas with different purposes:Filtering, general section configuration and specific view parameter setting in the data grid presentation:
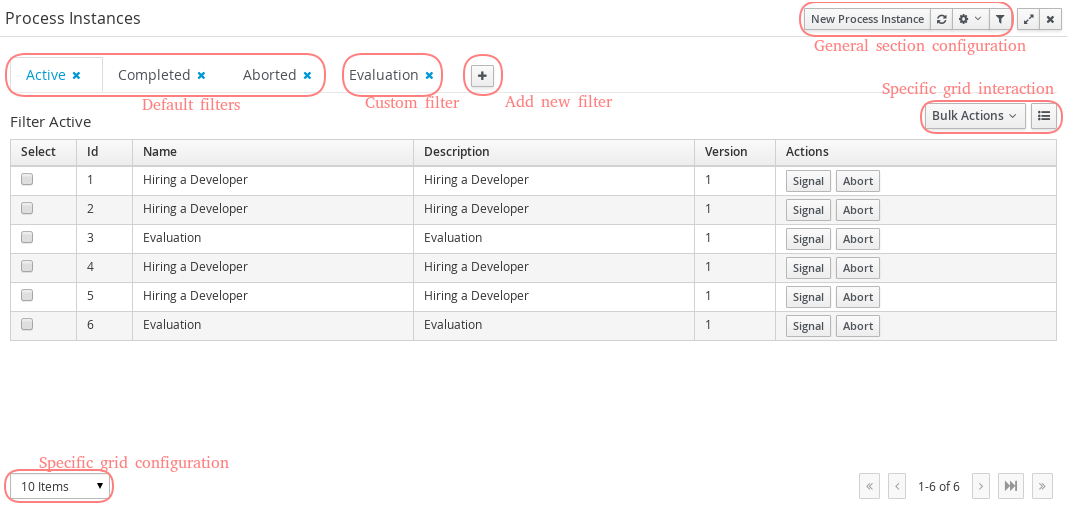
Here, there are the available views as tabs. When a tab is selected, the related parameters are applied to the data grid. Here we have include the Dataset technology for queries and its queries editor as a powerful tool to create the filters
The user can remove existing tabs clicking the cross button near the tab name

A new view can be created clicking the last tab, over the '+' button. A New Items list popup appears and lets the user introduce parameters related with the new tab like: the name, the description and the filter.
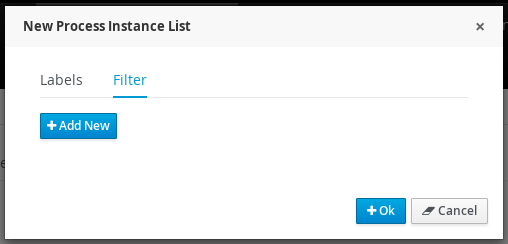
If the view has to include a restriction over a specific column, then the link 'Add new' has to be selected. A drop down list with all the columns to create restrictions
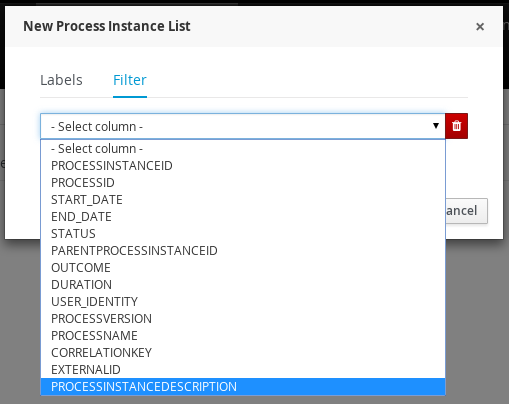
Once the column is selected, depending of its type, a new dropdown list is open with the kind of restrictions available for the selected column and the necessary form to add them.
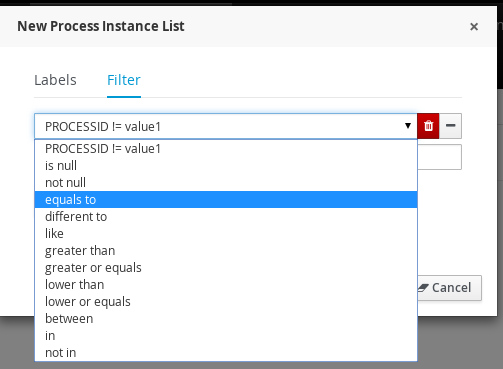
One filter can include a list of different conditions over different columns and the editor allow remove each one clicking th 'x' button near them
Once the view creation parameters are defined, the 'Ok' button makes the new view appears as a new tab.
In this area, the user can create a new item (in this case process instance), can refresh manually the view that is being displayed, can configure autorefresh option and can restore default filters.
Auto refresh is a functionality that allows define how often the data grid has to be refresed. The user can select one of the different values ( 1,5 or 10 minutes),or disable this feature, clicking 'Disable'. If the auto refresh is enabled, then the last view displayed is refreshed after the amount of time defined.
The last button is the 'Restore default filters'. There is a set of predefined views that appears the first time the user access to the section, in the case of process instances list they are: Active, Complete and Aborted. The user can remove every view includind the default ones, but in this area the default views can be restored clicking 'Restore default filters'.
In this area the user can change dynamically the view editable parameters like visible columns, or set the number of items to show in a page.
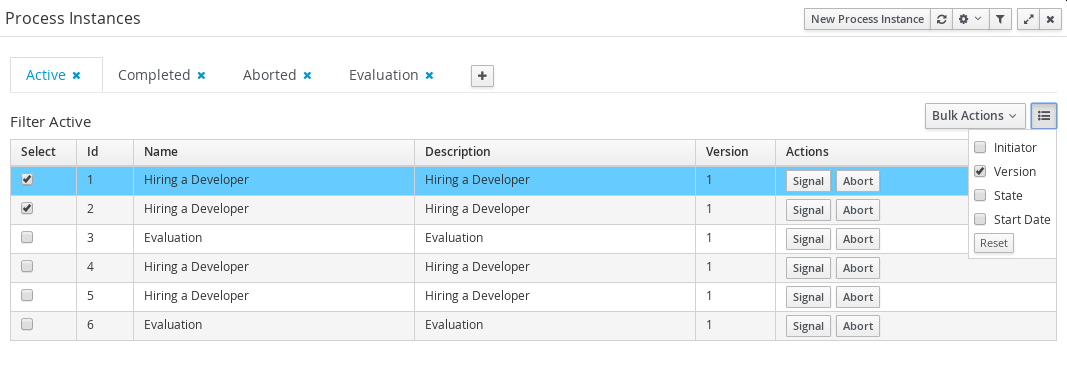
Here we have the posibility or execute bulk actions over the items marked as selected. I this case the available actions are 'Abort' or 'Signal'
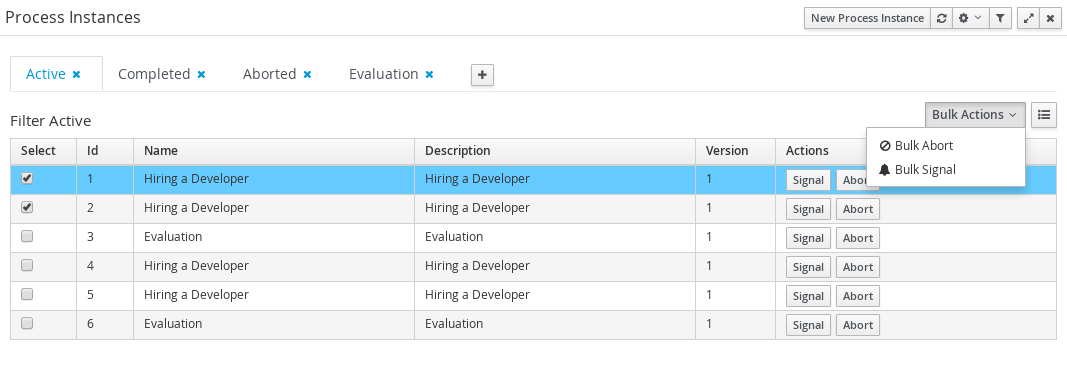
The number of items to show in a page can be configurable too, from the page size dropdown list
There is an specific restriction than makes the process instance list view, have a different behaviour. This happend when a filter over the column 'PROCESSID' is defined.
In this case, the columns available to show have been incremented with the specified process variables which have value. The user can then, view process instance variables from a specific process id, in the same grid of the process instances.
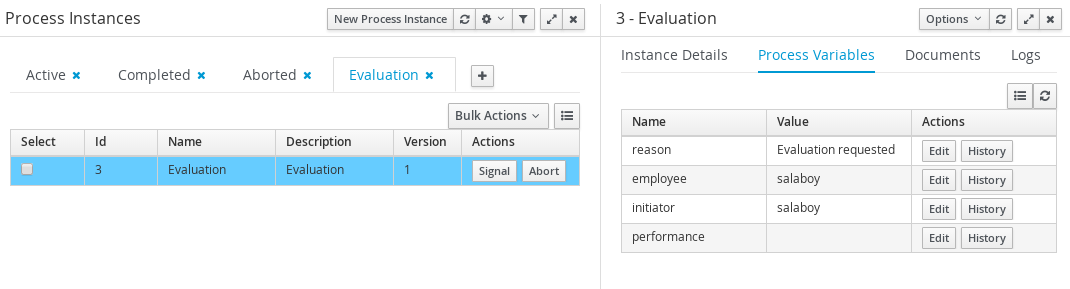
This chapter introduces the Task Management screens and the its integration with the Form Modeller component to allow users to work on their assigned tasks. You can find the source code of these screens here: https://github.com/droolsjbpm/jbpm-console-ng/tree/master/jbpm-console-ng-human-tasks . Feel free to report issues, send Pull Requests and get in contact with the team via comments in github. At the end of this section you will find a technical description about how to customize these views.
Every user with access to the platform will have access to its personal task list where tasks assigned to him/her will be displayed. Each user will be able to create its own personal tasks or work on tasks that were create as a result of a business process execution.
You can access to the Task List accessing Tasks main menu:

Pending tasks for each user will be displayed in their task list screen. Notice that you will not be able to see assigned tasks from another user different from the one that is currenlty logged in.
The list will show all the tasks that match with the defined restrictions ordered by the columns presented. You can change the default ordering clicking on the column header. This view offer a more traditional BPM Task List view where you can sort the data based on different columns.
Here appears again the concept of view versus just filtering as we explained in the process instante list. The default views here have the following restrictions over the tasks to show:
Active: all the Active tasks that user can work on. That means Personal and Group Tasks.
Personal: all the personal tasks that already belong to the user.
Group: all the group tasks that needs to be claimed by the user in order to start working on them.
All: show all the tasks no matter the status. It will show completed tasks as well with the exception of completed tasks that belongs to a process that is already finished. In such cases the tasks are cleaned up after the process is completed and for that reason they will not be displayed.
Admin: show all the tasks where the currently logged user was set as business administrator for such task.
Note
The user can always restore the default filters selecting the option 'Restore default filters'
As was explained in the process instance list, the user can define custom filters adding new tab and defining restrictions over task data in this case.
The user can now create a specific filter that provides domain specific columns to be added to a task list. When the user creates a custom filter for a specific task name the task variables are enabled as columns.
The custom filter that activates the capability to display task variables as columns is set a filter with the restriction Name="taskName".
When the filter with the restriction over a specific task name is applied, the task associated variables appear as a selectable columns, to the task list.
You can access to the Task Details by clicking in a task row. The details associated with a task can be changed, like for example the Due Date, the Priority or the task description.
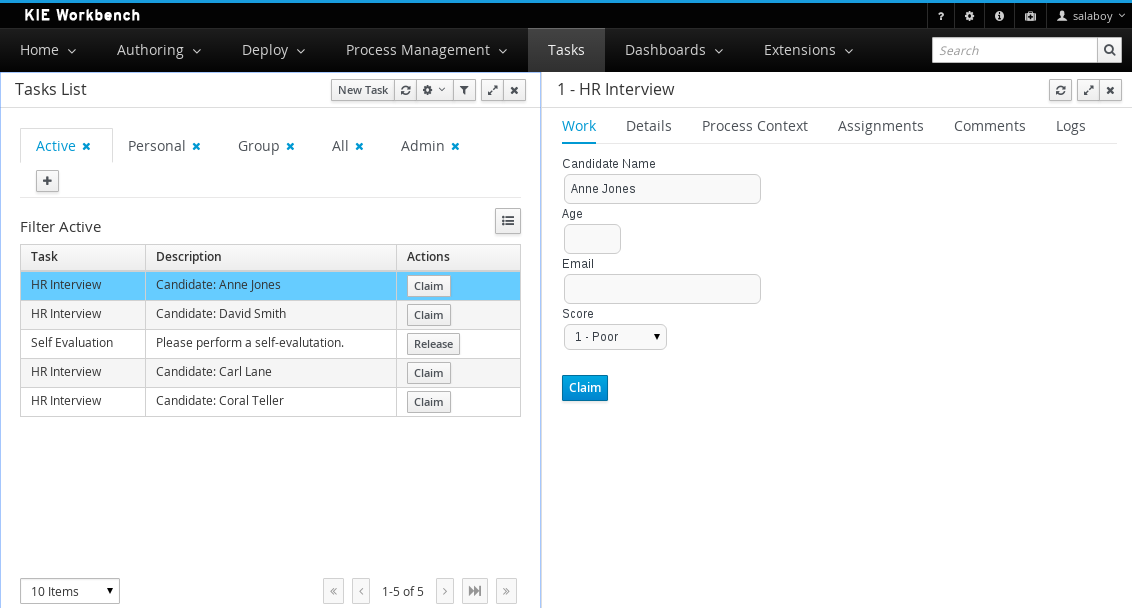
The task details appear in a new region with different sections that allow view the task associated information:
Work In this tab the associated form is displayed if the task has one. In this section is where the user can interact with the process, executing the available actions in each moment.
Details Here the basic task data is accessible: priority, status, description
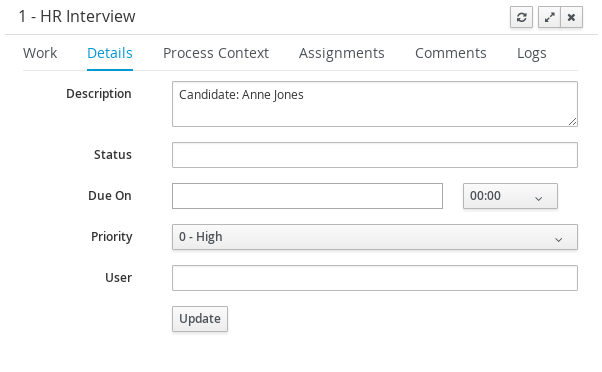
Process Context Data related with the process instance associated. If the task was created by a Business Process, you will have access to see the Process Instance status that has created it.
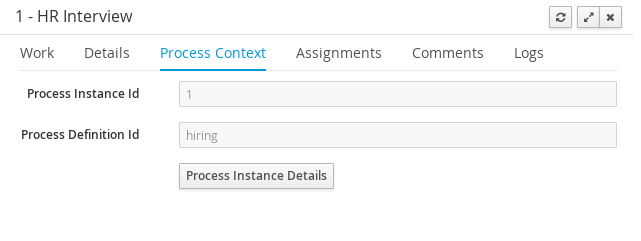
Assignments The Task Assignments tab allows you to delegate the task to another person or group if you are not able to continue working on it.

Comments You can also add while you are working on a task comments about the progress.
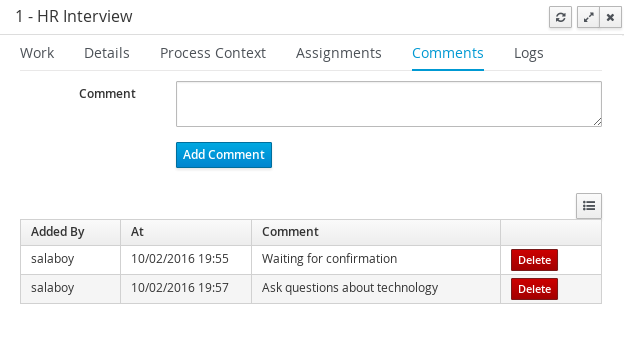
Tasks can have associated a Form to store data. If tasks are part of a Business Process, usually some data needs to be collected and propagated to the business process for further usage. For that reason, tasks has to provide a way to gather and store data. Forms can be created for specific tasks using the Form Modeller. If no form is provided a dynamic form will be created based on the information that the task needs to handle. If a task is created as an ad-hoc task (not related with any process) there will be no such information to generate a form and only basic actions will be provided.
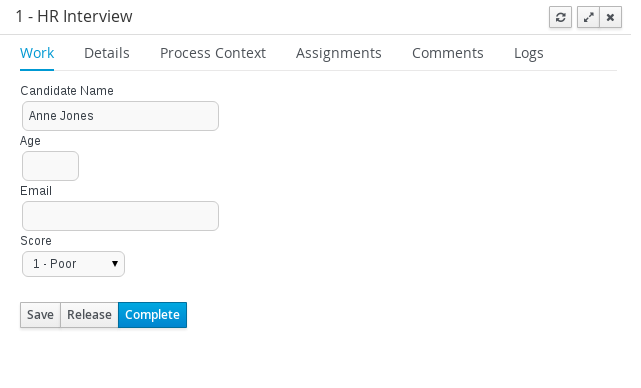
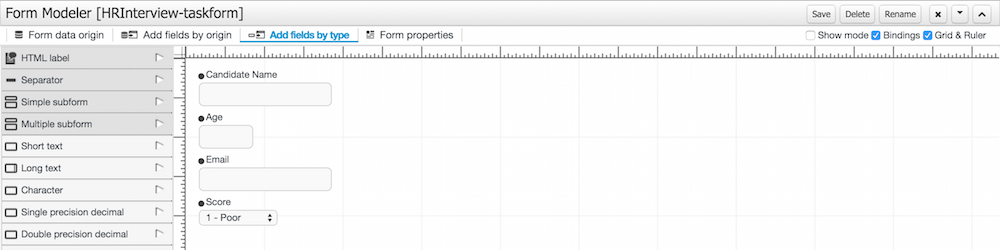
As mentioned in the introduction a User can create their own tasks, which will not be associated with any Business Process. These tasks can be used to keep track of your personal list of TO DOs. You can also create tasks and assign them to different people in your team or group.

At the advanced tab the user can define information like priority or the task due on date.
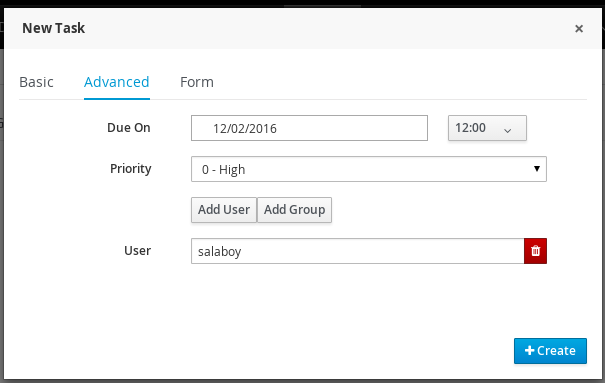
When a user creates a new task, can associate an existing form. At the 'Form' tab, the deployment id has to be selected from the list of available deployments id
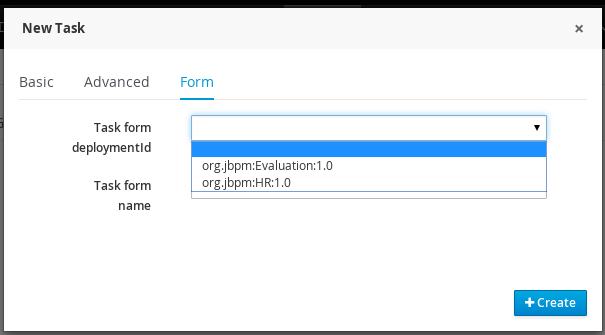
In that moment, the next list of form names is filled with the available forms at that deployment.
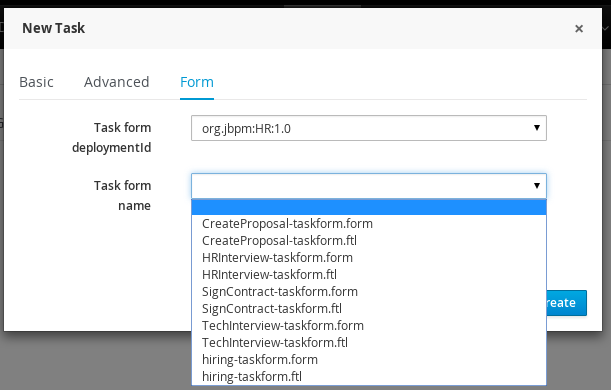
Once the 'Create' button has been selected, a task is created with the associated form and the status 'In Progress'. The complete action on task shows the selected form.
Imagine you are developing a BPM solution which mixes process with business data. Imagine also you need some forms to be used within processes in order to let the users enter data. Moreover, you'll likely want to have some kind of dashboards to display metrics and key performance indicators in order to quickly assess how your processes are doing. So far so good.
jBPM brings you all the ingredients you need to develop end-to-end business process solutions. The jBPM's BAM module (also known as Dashbuilder) allows for composing custom business dashboards by mixing data coming from heterogeneous sources of information. The module is now fully integrated into KIE workbench. A new specific section for dealing with dashboards has been added and it can be accessed either from the home page or from the menu bar, as shown in the next figure.
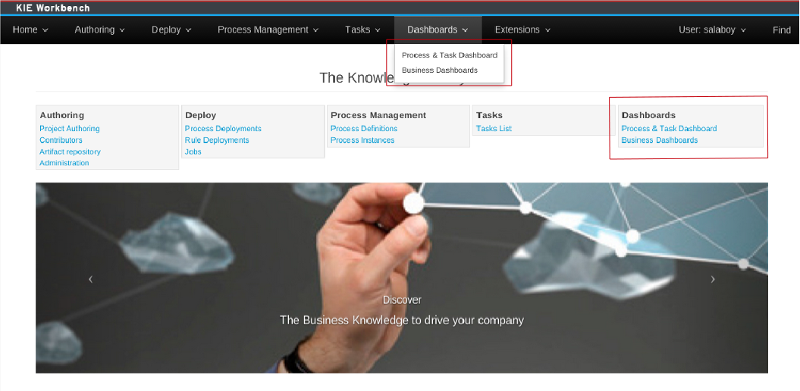
In the figure, within the highlighted sections, there exists two options:
Business Dashboards: This option is intended to give users access to the generic dashboard tooling either to compose new dashboards or just to consume existing ones.
Process & Task Dashboard: It opens up the Process Dashboard perspective which contains several performance indicators related to the jBPM execution engine.
BPM solutions are not only made up with processes, rules or forms but also with data belonging to the customer business domain. Such data is handled in the forms, the rules and, of course, the dashboards that are part of the solution. Usually, dashboards feed with data coming from several sources of information, from business domain entities persisted into relational databases to data hold in legacy systems. In order to cope with this kind of scenarios a generic highly customizable dashboard tooling is needed.
It's obviously expected that a customer building a BPM solution want to track how its processes are performing. To do so the customer need a monitoring and reporting tool. This is the main reason why the Dashbuilder project has been included as a core module of the jBPM ecosystem. Notice also that Dashbuilder, as an independent project, is not only used by jBPM but also by many other projects like, for example, JBoss Teiid a data virtualization system that allows applications to use data from multiple, heterogeneous data stores.
Note
Please, read the Dashbuilder book in order to get detailed information about how to build custom dashboards.An example of dashboard is the Sales Dashboard which comes built-in any installation of Dashbuilder. Two screenshots below:
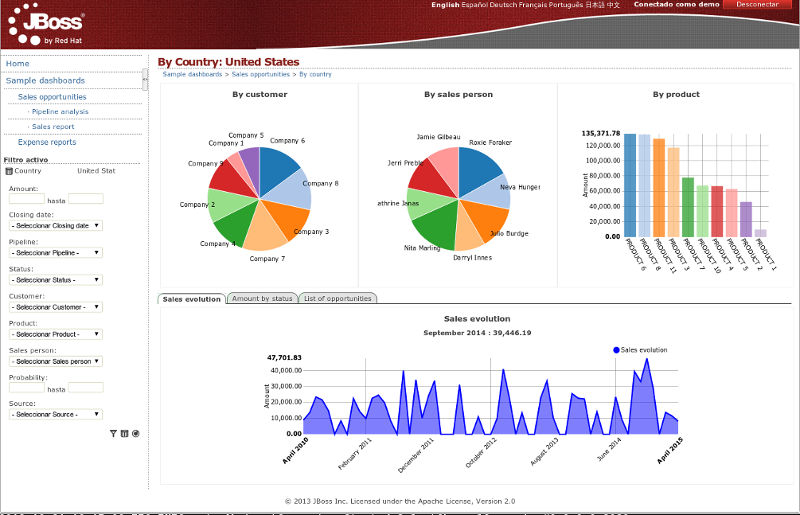
The jBPM Process Dashboard is an specific use case of a dashboard feed from data coming from a relational database via SQL queries. In this case, the database tables consumed are: processinstancelog and bamtasksummary both belonging to the jBPM engine.
Every time the jBPM runtime updates the information stored into such tables the data becomes automatically available to the dashboard indicators. The following picture shows the main screen that users get when navigating to the Process & Task Dashboard.
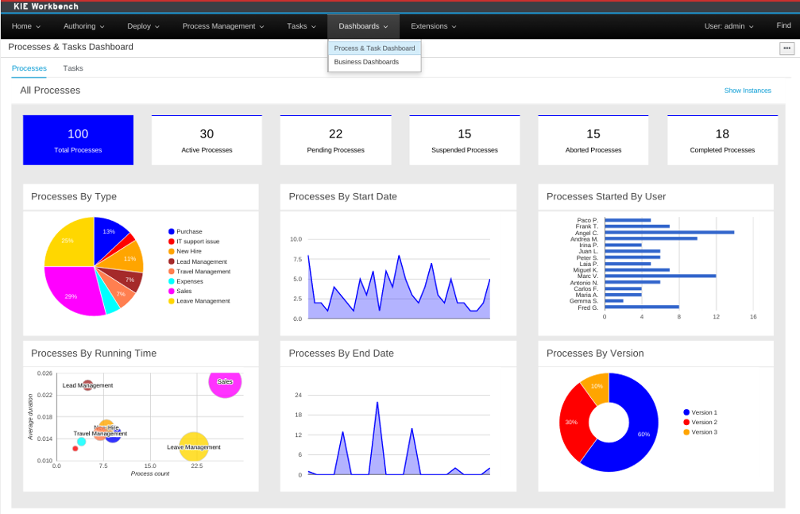
Note
Notice, those are generic metrics not tied to any specific business process. Nonetheless, it's worth to mention that it would be very easy for customers to modify, extend or adapt this generic dashboard for custom needs. A customer could take the jBPM Process Dashboard as the base template for building a custom dashboard which mixes data coming from the jBPM engine plus data coming from its own business domain.As you can see there exists two tabs in the top of the screen: Processes and Tasks. As their name indicates, every tab contains only indicators related to either processes or tasks.
To filter through the data users can click on the charts in order to select, for instance, a given process, a given status, etc... Every time a filter is applied, all the indicators are automatically updated and synced according to the criteria set. The next picture shows, for instance, what happens when both the process Sales and the status Active are selected.
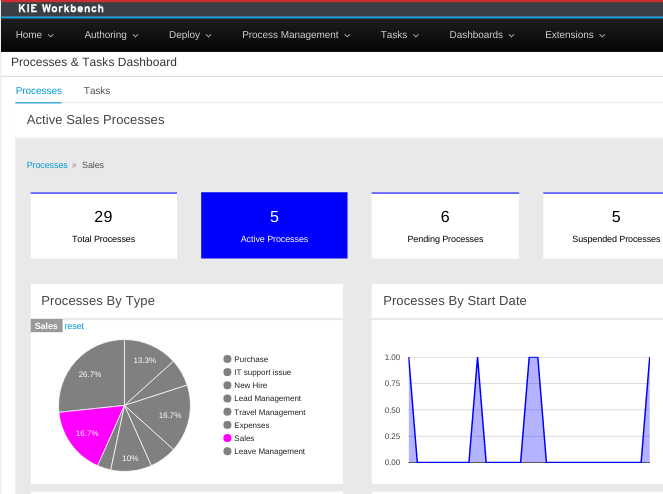
Using the built-in filter features is a good way to select the process instances the users want to look into. Additionally, at any time, no matter whether there is any active filter or not, users can also navigate to the actual list of instances the dashboard indicators are showing. The Show Instances link at the top right side on the screen can be used to display those instances. Once clicked, the view is switched to the screen shown in the next picture:
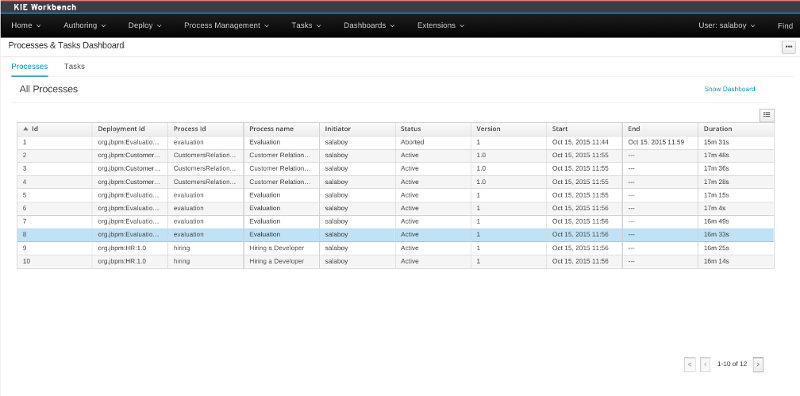
From this view, users can sort the instances just by clicking on any column. They can get a detailed view of a particular instance just by clicking on the desired row as well.
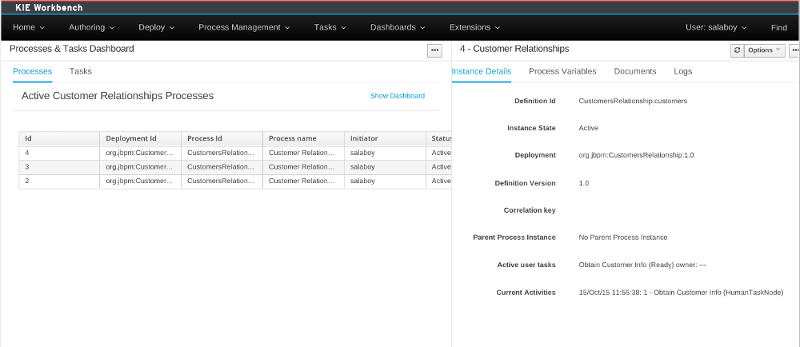
The process instance details panel is shown on the right of the screen just after clicking on a row. Notice this is a read only view, just for monitoring purposes. After identifying a target process instance the next step is to use the jBPM Process Instance Console in case the user needs to manage such process instance.
To switch from the process view to the task view just click on the Tasks tab at the top of the screen.
The task view only contains indicators related to tasks. It basically provides the same features introduced above for process instances (filters, show instances, get details), this time related to tasks instead of processes though.
To sum up, the jBPM Process & Task Dashboard let users:
To monitor their processes and tasks
To apply the proper filters in order quickly identify problematic instances
To get the required information about a given instance in order to be able to fix any unexpected issue
The workbench contains an execution server (for executing processes and tasks), which also allows you to invoke various process and task related operations through a remote API. As a result, you can setup your process engine "as a service" and integrate this into your applications easily by doing remote requests and/or sending the necessary triggers to the execution server whenever necessary (without the need to embed or manage this as part of your application).
Both a REST and JMS based service are available (which you can use directly), and a Java remote client allows you to invoke these operations using the existing KieSession and TaskService interfaces (you also use for local interaction), making remote integration as easy as if you were interacting with a local process engine.
The Remote Java API provides KieSession, TaskService and AuditService interfaces to the JMS and REST APIs.
The interface implementations provided by the Remote Java API take care of the underlying
logic needed to communicate with the JMS or REST APIs. In other words, these implementations
will allow you to interact with a remote workbench instance (i.e. KIE workbench or the jBPM
Console) via known interfaces such as the KieSession or TaskService interface,
without having to deal with the underlying transport and serialization details.
The first step in interacting with the remote runtime is to use a RemoteRuntimeEngineFactory
static newRestBuilder(), newJmsBuilder() or newCommandWebServiceClientBuilder() to create
a builder instance. Use the new builder instance to configure and to create a RuntimeEngine
instance to interact with the server.
Each of the REST, JMS or WebService RemoteClientBuilder instances exposes different
methods that allow the configuration of properties like the base URL of the REST API, JMS queue
locations or timeout while waiting for responses.
The Remote Java API provides clients, not "instances"
While the KieSession, TaskSerivce and AuditService instances provided by the Remote Java API
may "look" and "feel" like local instances of the same interfaces, please make sure to remember
that these instances are only wrappers around a REST or jMS client that interacts with a remote REST or JMS
API.
This means that if a requested operation fails on the server, the Remote Java API client instance
on the client side will throw a RuntimeException indicating that the REST call failed. This is
different from the behaviour of a "real" (or local) instance of a KieSession, TaskSerivce and
AuditService instance because the exception the local instances will throw will relate to how the
operation failed. Operations on a Remote Java API client instance that would normally throw other
exceptions (such as the TaskService.claim(taskId, userId) operation when called by a user who is
not a potential owner), will now throw a RuntimeException instead when the requested operation
fails on the server.
Also, while local instances require different handling (such as having to dispose of a KieSession),
client instances provided by the Remote Java API hold no state and thus do not require any special
handling.
Finally, the instances returned by the client KieSession and TaskService instances (for example,
process instances or task summaries) are not the same (internal) objects as used by the core engines.
Instead, these returned instances are simple data transfer objects (DTOs) that implement the same
interfaces but are designed to only return the associated data. Modifying or casting these returned
instances to an internal implementation class will not succeed.
Creating a Remote Java Client Instance
The following is a simple example of creating a REST-based client. The appName variable in the
code below will be either "business-central" or "kie-wb" dependending on whether you’re using product
or community.
String deploymentId = "com.burns.reactor:homer:1.0"; String serverInstanceUrl = "http://localhost:8080/" + appName; RuntimeEngine engine = RemoteRuntimeEngineFactory.newRestBuilder().addDeploymentId(deploymentId).addUrl(new URL(serverInstanceUrl)) .addUserName("homer") .addPassword("d0nut5R!!!") .build();KieSession kieSessionClient = engine.getKieSession();
Create the appropriate builder instance. The method | |
Call the appropriate methods and pass the appropriate parameters to configure the client | |
"Build" or instantiate the actual client |
Each builder has a number of different (required or optional) methods to configure a client
RuntimeEngine instance.
- Methods with always next to them are always required.
- Methods with when next to them are required depending on the factors described ("required when…") and otherwise optional.
- All other methods are optional.
Remote Rest Runtime Engine Builder methods
-
addDeploymentId(String deploymentId)when Set the deployment id of the deployment
- Required when:
- doing an operation on a client instance that affects a process instance
-
addExtraJaxbClasses(Class… extraJaxbClasses )when Add extra classes to the classpath available to the serialization mechanisms
When passing instances of user-defined classes in a Remote Java API call, it’s important to use this method first to add the classes so that the class instances can be serialized correctly.
- Required when:
- passing custom class instances as arguments to an operation on a client instance
-
addPassword(String password)always - Set the password of the user connecting to the server
-
addProcessInstanceId(long process)when Set the process instance id of the deployment
- Required when:
- interacting with a
PER_PROCESS_INSTANCEdeployment
-
addTimeout(int timeoutInSeconds) Set the timeout for the REST call
The default is 5 seconds.
-
addUrl(URL serverInstanceUrl)always Set the URL for the application instance
This should be a URL that roughly corresponds to
http://server:port/business-central/orhttp://server:port/kie-wb/.-
addUserName(String userName)always - Set the name of the user connecting to the server
-
clearJaxbClasses() - Clears the list of (user-defined) Classes that the client instance should know about
The following example illustrates how the Remote Java API can be used with the REST API.
public void startProcessAndHandleTaskViaRestRemoteJavaAPI(URL serverRestUrl, String deploymentId, String user, String password) {
        // the serverRestUrl should contain a URL similar to "http://localhost:8080/jbpm-console/"

        // Setup the factory class with the necessarry information to communicate with the REST services
        RuntimeEngine engine = RemoteRuntimeEngineFactory.newRestBuilder()
        .addUrl(serverRestUrl)
        .addTimeout(5)
        .addDeploymentId(deploymentId)
        .addUserName(user)
        .addPassword(password)
        // if you're sending custom class parameters, make sure that
        // the remote client instance knows about them!
        .addExtraJaxbClasses(MyType.class)
        .build();

        // Create KieSession and TaskService instances and use them
        KieSession ksession = engine.getKieSession();
        TaskService taskService = engine.getTaskService();

        // Each operation on a KieSession, TaskService or AuditLogService (client) instance
        // sends a request for the operation to the server side and waits for the response
        // If something goes wrong on the server side, the client will throw an exception.
        Map<String, Object> params = new HashMap<String, Object>();
        params.put("paramName", new MyType("name", 23));
        ProcessInstance processInstance
        = ksession.startProcess("com.burns.reactor.maintenance.cycle", params);
        long procId = processInstance.getId();

        String taskUserId = user;
        taskService = engine.getTaskService();
        List<TaskSummary> tasks = taskService.getTasksAssignedAsPotentialOwner(user, "en-UK");

        long taskId = -1;
        for (TaskSummary task : tasks) {
        if (task.getProcessInstanceId() == procId) {
        taskId = task.getId();
        }
        }

        if (taskId == -1) {
        throw new IllegalStateException("Unable to find task for " + user +
        " in process instance " + procId);
        }

        taskService.start(taskId, taskUserId);

        // resultData can also just be null
        Map<String, Object> resultData = new HashMap<String, Object>();
        taskService.complete(taskId, taskUserId, resultData);
}When configuring the remote JMS client, you must choose one of the following ways to configure the JMS connection:
Pass the
ConnectionFactoryinstance and the KieSession, TaskService and ResponseQueueinstances when configuring the remote java client. To do that, please use the following methods:-
addConnectionFactory(ConnectionFactory) -
addKieSessionQueue(Queue) -
addTaskServiceQueue(Queue) -
addResponseQueue(Queue) -
addHostName(String) -
addJmsConnectorPort(String)
-
or pass a remote
InitialContextinstance that contains references to the necessaryConnectionFactoryandQueueinstances (see previous bullet).- please then use the method
addRemoteInitialContext(InitialContext)
- please then use the method
or pass a String with the hostname of the JBoss EAP server that KIE Workbench is running on
- please then use the method
addJbossServerHostName(String)
- please then use the method
In addition, if you are doing an operation on a task via the remote JMS client (and are not
using the disableTaskSecurity() method), then you must also configure SSL. The following methods
(described in more detail below) are available for this:
-
addHostName(String) -
addJmsConnectorPort(int) -
addKeystoreLocation(String) -
addKeystorePassword(String) -
addTruststoreLocation(String) -
addTruststorePassword(String) -
useKeystoreAsTruststore()
Example JMS Remote Java Client Configuration with a remote javax.jms classes
The following example illustrates how to configure a Remote Java API JMS client using
instances of the ConnectionFactory and Queue classes.
private static final String CONNECTION_FACTORY_NAME = "jms/RemoteConnectionFactory";  private static final String KSESSION_QUEUE_NAME = "jms/queue/KIE.SESSION";
private static final String TASK_QUEUE_NAME = "jms/queue/KIE.TASK";
private static final String RESPONSE_QUEUE_NAME = "jms/queue/KIE.RESPONSE";
public void startProcessViaJmsRemoteJavaAPI(String hostname, int jmsConnPort,
String deploymentId, String user, String password,
String processId) throws NamingException {
InitialContext remoteInitialContext = getRemoteInitialContext();
String queueName = KSESSION_QUEUE_NAME;
Queue sessionQueue = (Queue) remoteInitialContext.lookup(queueName);
queueName = TASK_QUEUE_NAME;
Queue taskQueue = (Queue) remoteInitialContext.lookup(queueName);
queueName = RESPONSE_QUEUE_NAME;
Queue responseQueue = (Queue) remoteInitialContext.lookup(queueName);
String connFactoryName = CONNECTION_FACTORY_NAME;
ConnectionFactory connFact = (ConnectionFactory) remoteInitialContext.lookup(connFactoryName);
RuntimeEngine engine = RemoteRuntimeEngineFactory.newJmsBuilder()
.addDeploymentId(deploymentId)
.addConnectionFactory(connFact)
private static final String KSESSION_QUEUE_NAME = "jms/queue/KIE.SESSION";
private static final String TASK_QUEUE_NAME = "jms/queue/KIE.TASK";
private static final String RESPONSE_QUEUE_NAME = "jms/queue/KIE.RESPONSE";
public void startProcessViaJmsRemoteJavaAPI(String hostname, int jmsConnPort,
String deploymentId, String user, String password,
String processId) throws NamingException {
InitialContext remoteInitialContext = getRemoteInitialContext();
String queueName = KSESSION_QUEUE_NAME;
Queue sessionQueue = (Queue) remoteInitialContext.lookup(queueName);
queueName = TASK_QUEUE_NAME;
Queue taskQueue = (Queue) remoteInitialContext.lookup(queueName);
queueName = RESPONSE_QUEUE_NAME;
Queue responseQueue = (Queue) remoteInitialContext.lookup(queueName);
String connFactoryName = CONNECTION_FACTORY_NAME;
ConnectionFactory connFact = (ConnectionFactory) remoteInitialContext.lookup(connFactoryName);
RuntimeEngine engine = RemoteRuntimeEngineFactory.newJmsBuilder()
.addDeploymentId(deploymentId)
.addConnectionFactory(connFact)  .addKieSessionQueue(sessionQueue)
.addTaskServiceQueue(taskQueue)
.addResponseQueue(responseQueue)
.addUserName(user)
.addPassword(password)
.addHostName(hostname)
.addJmsConnectorPort(jmsConnPort)
.disableTaskSecurity()
.addKieSessionQueue(sessionQueue)
.addTaskServiceQueue(taskQueue)
.addResponseQueue(responseQueue)
.addUserName(user)
.addPassword(password)
.addHostName(hostname)
.addJmsConnectorPort(jmsConnPort)
.disableTaskSecurity()  .build();
// Create KieSession instances and use them
KieSession ksession = engine.getKieSession();
// Each operation on a KieSession, TaskService or AuditLogService (client) instance
// sends a request for the operation to the server side and waits for the response
// If something goes wrong on the server side, the client will throw an exception.
ProcessInstance processInstance = ksession.startProcess(processId);
long procId = processInstance.getId();
}
.build();
// Create KieSession instances and use them
KieSession ksession = engine.getKieSession();
// Each operation on a KieSession, TaskService or AuditLogService (client) instance
// sends a request for the operation to the server side and waits for the response
// If something goes wrong on the server side, the client will throw an exception.
ProcessInstance processInstance = ksession.startProcess(processId);
long procId = processInstance.getId();
}
| The names of the |
| Here we add the connection factory and queue instances. |
| If we are not using SSL, but are doing operations on tasks, then we have to explictly call
the |
Each builder has a number of different (required or optional) methods to configure a client
RuntimeEngine instance.
- Methods with always next to them are always required.
- Methods with when next to them are required depending on the factors described ("required when…") and otherwise optional.
- All other methods are optional.
Remote JMS Runtime Engine Builder methods
-
addConnectionFactory(ConnectionFactory connectionFactory)when Add a
ConnectionFactoryused to create JMS session to send and receive messages- Required when:
- configuring the JMS java client by passing
ConnectionFactoryandQueueinstances
-
addDeploymentId(String deploymentId)when Set the deployment id of the deployment
- Required when:
- doing an operation on a client instance that affects a process instance — this also includes completing or failing tasks created by process instances
-
addExtraJaxbClasses(Class… extraJaxbClasses )when Add extra classes to the client for when user-defined class instances are passed as parameters to client methods
When passing instances of user-defined classes in a Remote Java API call, it’s important to use this method first to add the classes so that the class instances can be serialized correctly.
- Required when:
- passing custom class instances as arguments to an operation on a client instance
-
addHostName(String hostname)when Set the host name for the server that the client is making a JMS connection with
- Required when:
configuring the JMS java client by setting
ConnectionFactoryandQueueinstancesconfiguring the JMS java client to use SSL
-
addJbossServerHostName(String hostname) Set the host name of the JBoss EAP server that the client is making a JMS connection with
After using this method, no other configuration is needed with regards to the server. However, additional server parameters (host name, port) may be needed when also configuring SSL.
Make sure that the EAP version-appropriate
org.jboss.naming:jboss-namingdependency is available on the classpath when doing this-
addJmsConnectorPort(int port)when Set the port used for the JMS connection connection with the server
- Required when:
configuring the JMS java client by passing
ConnectionFactoryandQueueinstancesconfiguring the JMS java client to use SSL
-
addKeystoreLocation(String keystorePath)when Set the location (path) of the keystore
- Required when:
- configuring the JMS java client to use SSL
-
addKeystorePassword(String keystorePassword)when Set the password for the keystore
- Required when:
- configuring the JMS java client to use SSL
-
addKieSessionQueue(Queue ksessionQueue)when Pass the
javax.jms.Queueinstance representing the KIE.SESSION queue used to receive process instance requests from the client- Required when:
- configuring the JMS java client by setting
ConnectionFactoryandQueueinstances
-
addPassword(String password)always - Set the password of the user connecting to the server
-
addProcessInstanceId(long process)when Set the process instance id of the deployment
- Required when:
- interacting with a `PER_PROCESS_INSTANCE` deployment
-
addRemoteInitialContext(InitialContext remoteInitialContext) Set the remote
InitialContextinstance from the remote application server, which is then used to retrieve theConnectionFactoryandQueueinstancesAfter using this method, no other configuration is needed with regards to the server. However, additional server parameters (host name, port) may be needed when also configuring SSL.
-
addResponseQueue(Queue responseQueue)when Pass the
javax.jms.Queueinstance representing the KIE.RESPONSE queue used to send responses to the client- Required when:
- configuring the JMS java client by setting
ConnectionFactoryandQueueinstances
-
addTaskServiceQueue(Queue taskServiceQueue)when Pass the
javax.jms.Queueinstance representing the KIE.TASK queue used to receive task operation requests to the client- Required when:
- configuring the JMS java client by setting
ConnectionFactoryandQueueinstances
-
addTimeout(int timeoutInSeconds) - Set the timeout for the JMS message. The default is 5 seconds.
-
addTruststoreLocation(String truststorePath)when Set the location (path) of the keystore
- Required when:
- configuring the JMS java client to use SSL
-
addTruststoreLocation(String truststorePassword)when Set the password for the keystore
- Required when:
- configuring the JMS java client to use SSL
-
addUserName(String userName)always Set the name of the user connecting to the server
This is also the user whose permissions will be used when doing any task operations
-
clearJaxbClasses() - Clears the list of (user-defined) Classes that the client instance should know about
-
disableTaskSecurity() - Enables configuration of a client that can send task-related operation requests without having to use SSL. If this option is not used and a task operation is called, the client will throw an exception.
-
useKeystoreAsTruststore() - Uses the same file (location) and password for the truststore configuration when configuring SSL.
Important
In order to instantiate a remote InitialContext via JNDI, the application-server-specific
dependencies need to be included on the classpath.
For JBoss EAP 6, the artifact (jar) containing this class is the
org.jboss:jboss-remote-naming artifact (jar), version
1.0.5.Final or higher. Depending on the version of AS 7 or EAP 6 that you
use, this version may vary.
If you are using a different application server, please see your specific
application server documentation for the parameters and artifacts necessary to create an
InitialContextFactory instance or otherwise get a remote
InitialContext instance (via JNDI) from the application server instance.
The following example illustrates how to configure a Remote Java API JMS client using
a remote InitialContext instance along with SSL. In this case, the same file is being used as
both the client’s keystore (the client’s identifying keys and certificates) and as the client’s
truststore (the client’s list of trusted certificates from other parties, in this case, the server).
public void startProcessAndHandleTaskViaJmsRemoteJavaAPISsl(String hostNameOrIpAdress, int jmsSslConnectorPort,
        String deploymentId, String user, String password,
        String keyTrustStoreLocation, String keyTrustStorePassword,
        String processId) {

        InitialContext remoteInitialContext = getRemoteInitialContext();

        RuntimeEngine engine = RemoteRuntimeEngineFactory.newJmsBuilder()
        .addDeploymentId(deploymentId)
        .addRemoteInitialContext(remoteInitialContext)
        .addUserName(user)
        .addPassword(password)
        .addHostName(hostNameOrIpAdress)
        .addJmsConnectorPort(jmsSslConnectorPort)
        .useKeystoreAsTruststore()
        .addKeystoreLocation(keyTrustStoreLocation)
        .addKeystorePassword(keyTrustStorePassword)
        .build();

        // create JMS request
        KieSession ksession = engine.getKieSession();
        ProcessInstance processInstance = ksession.startProcess(processId);
        long procInstId = processInstance.getId();
        logger.debug("Started process instance: " + procInstId );

        TaskService taskService = engine.getTaskService();
        List<TaskSummary> taskSumList
        = taskService.getTasksAssignedAsPotentialOwner(user, "en-UK");
        TaskSummary taskSum = null;
        for( TaskSummary taskSumElem : taskSumList ) {
        if( taskSumElem.getProcessInstanceId().equals(procInstId) ) {
        taskSum = taskSumElem;
        }
        }
        long taskId = taskSum.getId();
        logger.debug("Found task " + taskId);

        // get other info from task if you want to
        Task task = taskService.getTaskById(taskId);
        logger.debug("Retrieved task " + taskId );

        taskService.start(taskId, user);

        Map<String, Object> resultData = new HashMap<String, Object>();
        // insert results for task in resultData
        taskService.complete(taskId, user, resultData);
        logger.debug("Completed task " + taskId );
}Starting with this release, a simple webservice has been added to the remote API.
Example WebService Remote Java Client Configuration
The following example illustrates how to configure a Remote Java API WebService client using the hostname of the JBoss EAP server on which kie-wb or business-central is running.
import java.net.URL;
        import java.util.List;
        import java.util.Map;

        import org.kie.api.command.Command;
        import org.kie.api.task.model.Task;
        import org.kie.remote.client.documentation.objects.MyType;
        import org.kie.remote.client.jaxb.JaxbCommandsRequest;
        import org.kie.remote.client.jaxb.JaxbCommandsResponse;
        import org.kie.remote.jaxb.gen.GetTaskCommand;
        import org.kie.remote.jaxb.gen.GetTaskContentCommand;
        import org.kie.remote.jaxb.gen.GetTasksByProcessInstanceIdCommand;
        import org.kie.remote.jaxb.gen.JaxbStringObjectPairArray;
        import org.kie.remote.jaxb.gen.StartProcessCommand;
        import org.kie.remote.jaxb.gen.util.JaxbStringObjectPair;
        import org.kie.remote.services.ws.command.generated.CommandWebService;
        import org.kie.remote.services.ws.command.generated.CommandWebServiceException;
        import org.kie.services.client.api.RemoteRuntimeEngineFactory;
        import org.kie.services.client.serialization.jaxb.impl.JaxbCommandResponse;
        import org.kie.services.client.serialization.jaxb.impl.JaxbLongListResponse;
        import org.kie.services.client.serialization.jaxb.impl.process.JaxbProcessInstanceResponse;
        import org.slf4j.Logger;
        import org.slf4j.LoggerFactory;

        public class WebserviceJavaApiExamples {

        private Logger logger = LoggerFactory.getLogger(WebserviceJavaApiExamples.class);

        /**
        * Create the webservice client
        * @param applicationUrl Something like "http://localhost:8080/kie-wb/"
        *                       or "http://localhost:8080/business-central/"
        * @param user The user doing the webservice requests
        * @param password The user's password
        * @param deploymentId The deployment id that the request will interact with
        * @return A {@link CommandWebService} client instance
        */
        private static CommandWebService createWebserviceClient(URL applicationUrl,
        String user, String password, String deploymentId) {
        CommandWebService client =
        RemoteRuntimeEngineFactory.newCommandWebServiceClientBuilder()
        .addServerUrl(applicationUrl)
        .addUserName(user)
        .addPassword(password)
        .addDeploymentId(deploymentId)
        .addExtraJaxbClasses(MyType.class)
        .buildBasicAuthClient();

        return client;
        }

        /**
        * Send a webservice request with a single command
        * @param service The webserivce client instance
        * @param cmd The command that we're sending (see the
        *            'org.kie.remote.jaxb.gen package' in kie-remote-client)
        * @param respClass The class that we expect as a response
        * @param deploymentId The id of the deployment that we will interact with
        * @return the response object
        * @throws CommandWebServiceException if the webservice operation fails
        */
        private static <T> T doWebserviceSingleCommandRequest(CommandWebService service,
        Command<?> cmd, Class<T> respClass, String deploymentId)
        throws CommandWebServiceException {
        // Get a response from the WebService
        JaxbCommandsRequest req = new JaxbCommandsRequest(deploymentId, cmd);
        JaxbCommandsResponse response = service.execute(req);

        // check response
        JaxbCommandResponse<?> cmdResp = response.getResponses().get(0);

        return (T) cmdResp;
        }

        /**
        * Start a simple process, and retrieve the task information and content
        * via the webservice
        *
        * @param applicationUrl Something like "http://localhost:8080/kie-wb/"
        *                       or "http://localhost:8080/business-central/"
        * @param user The user doing the webservice requests
        * @param password The user's password
        * @param deploymentId The deployment id that the request will interact with
        * @param processId The id of the process we want to start
        * @throws Exception if something goes wrong
        */
        public static void startSimpleProcess(URL applicationUrl,
        String user, String password, String deploymentId, String processId)
        throws Exception {

        CommandWebService commandWebService
        = createWebserviceClient(applicationUrl, user, password, deploymentId);

        // Create start process command
        StartProcessCommand spc = new StartProcessCommand();
        spc.setProcessId(processId);
        JaxbStringObjectPairArray map = new JaxbStringObjectPairArray();
        JaxbStringObjectPair keyValue = new JaxbStringObjectPair();
        keyValue.setKey("myobject");
        keyValue.setValue(new MyType("variable", 29));
        map.getItems().add(keyValue);
        spc.setParameter(map);

        // Do webService request
        JaxbProcessInstanceResponse jpir
        = doWebserviceSingleCommandRequest(commandWebService, spc,
        JaxbProcessInstanceResponse.class, deploymentId);
        long procInstId = ((JaxbProcessInstanceResponse) jpir).getId();

        // Create command
        GetTasksByProcessInstanceIdCommand gtbic = new GetTasksByProcessInstanceIdCommand();
        gtbic.setProcessInstanceId(procInstId);

        // Do webservice request
        JaxbLongListResponse jllr
        = doWebserviceSingleCommandRequest(commandWebService, gtbic,
        JaxbLongListResponse.class, deploymentId );
        List<Long> taskIds = jllr.getResult();
        long taskId = taskIds.get(0);

        // Commands for task and task content
        GetTaskCommand gtc = new GetTaskCommand();
        gtc.setTaskId(taskId);
        GetTaskContentCommand gtcc = new GetTaskContentCommand();
        gtcc.setTaskId(taskId);

        // Do webservice request (with both commands)
        JaxbCommandsRequest req = new JaxbCommandsRequest(deploymentId, gtc);
        req.getCommands().add(gtcc);
        JaxbCommandsResponse response = commandWebService.execute(req);

        // Get task and content response
        Task task = (Task) response.getResponses().get(0).getResult();
        Map<String, Object> contentMap
        = (Map<String, Object>) response.getResponses().get(1).getResult();
        }

        }
| All commands that can be used with the webservice can be found in the |
| The |
| Similar to the REST |
Remote Webservice Client Builder methods
-
addDeploymentId(String deploymentId)when Set the deployment id of the deployment
- Required when:
- doing an operation on a client instance that affects a process instance — this also includes completing or failing tasks created by process instances
-
addExtraJaxbClasses(Class… extraJaxbClasses )when Add extra classes to the client for when user-defined class instances are passed as parameters to client methods
When passing instances of user-defined classes in a Remote Java API call, it’s important to use this method first to add the classes so that the class instances can be serialized correctly.
- Required when:
- passing custom class instances as arguments to an operation on a client instance
-
addServerUrl(URL applicationUrl)always - Set the URL for the application (kie-wb or business-central) that the webservice request will be sent to
-
addPassword(String password)always - Set the password of the user connecting to the server
-
addTimeout(int timeoutInSeconds) - Set the timeout for the Webservice response. The default is 5 seconds.
-
addUserName(String userName)always Set the name of the user connecting to the server
This is also the user whose permissions will be used when doing any task operations
-
setWsdlLocationRelativePath() - OCRAM
-
useHttpRedirect() - OCRAM
As mentioned above, the Remote Java API provides client-like instances of the RuntimeEngine, KieSession,
TaskService and AuditService interfaces.
This means that while many of the methods in those interfaces are available, some are not. The following tables lists the methods
which are available. Methods not listed in the below, will throw an UnsupportedOperationException explaining that the
called method is not available.
Table 17.1. Available process-related KieSession methods
| Return type | Method signature | Description |
|---|---|---|
|
|
|
Abort the process instance |
|
|
|
Return the process instance |
|
|
|
Return the process instance |
|
|
|
Return all (active) process instances |
|
|
|
Signal all (active) process instances |
|
|
|
Signal the process instance |
|
|
|
Start a new process and return the process instance (if the process instance has not immediately completed) |
|
|
|
Start a new process and return the process instance (if the process instance has not immediately completed) |
Table 17.2. Available rules-related KieSession methods<
| Return type | Method signature | Description |
|---|---|---|
|
|
|
Return the total fact count |
|
|
|
Return a global fact |
|
|
|
Return the id of the |
|
|
|
Set a global fact |
|
|
|
Fire all rules |
Table 17.3. Available WorkItemManager methods
| Return type | Method signature | Description |
|---|---|---|
|
|
|
Abort the work item |
|
|
|
Complete the work item |
|
|
|
Return the work item |
Table 17.4. Available task operation TaskService methods
| Return type | Method signature | Description |
|---|---|---|
|
|
|
Add a new task |
|
|
|
Activate a task |
|
|
|
Claim a task |
|
|
|
Claim a task |
|
|
|
Claim the next available task for a user |
|
|
|
Claim the next available task for a user |
|
|
|
Complete a task |
|
|
|
Delegate a task |
|
|
|
Exit a task |
|
|
|
Fail a task |
|
|
|
Forward a task |
|
|
|
Nominate a task |
|
|
|
Release a task |
|
|
|
Remove a task |
|
|
|
Resume a task |
|
|
|
Skip a task |
|
|
|
Start a task |
|
|
|
Stop a task |
|
|
|
Suspend a task |
Table 17.5. Available task retrieval and query TaskService methods
| Return type | Method signature |
|---|---|
|
|
|
|
|
|
|
|
|
|
|
|
|
|
|
|
|
|
|
|
|
|
|
|
|
|
|
|
`List<TaskSummary> |
|
|
|
|
|
|
|
|
|
|
Table 17.6. Available AuditService methods
| Return type | Method signature |
|---|---|
|
|
|
|
|
|
|
|
|
|
|
|
|
|
|
|
|
|
|
|
|
|
|
|
|
|
|
|
|
|
|
|
|
|
|
|
REST API calls to the execution server allow you to remotely manage processes and tasks and retrieve
various dynamic information from the execution server. The majority of the calls are synchronous,
which means that the call will only finish once the requested operation has completed on the server.
The exceptions to this are the deployment POST calls, which will return the status of the request
while the actual operation requested will asynchronously execute.
When using Java code to interface with the REST API, the classes used in POST operations or
otherwise returned by various operations can be found in the (org.kie.remote:)kie-services-client
JAR.
As of the community 6.2.0.Final release, users now need to be assigned one of the following roles in order to be able to access REST URLs:
Table 17.7. REST permission roles
| Role | Description |
|---|---|
|
|
May use all REST URLs |
|
|
May use REST URLs relating to project management, including repository and organizational unit management |
|
|
May use REST URLs relating to deployment management |
|
|
May use REST URLs relating to process management |
|
|
May use REST URLs that return info about processes |
|
|
May use REST URLs relating to task management |
|
|
May use REST URLs that return info about tasks |
|
|
May use the query REST URLs |
|
|
May use the REST URL relating to the java remote client |
Specifically, the roles give the user access to the following URLs:
Table 17.8. REST permission roles
This section lists REST calls that interface process instances.
The deploymentId component of the REST calls below must conform to the following regular expression:
[\w\.-]+(:[\w\.-]+){2,2}(:[\w\.-]*){0,2}For more information about the composition of the deployment id, see the Deployment Calls section.
[POST]
/runtime/{deploymentId}/process/{processDefId}/start
- Starts a process.
- Returns a
JaxbProcessInstanceResponseinstance, that contains basic information about the process instance. Notes:
- The processDefId component of the URL must conform to the following regex:
[_a-zA-Z0-9-:\.]+
- The processDefId component of the URL must conform to the following regex:
Parameters:
- This operation takes map query parameters (see below), which will be used as parameters for the process instance.
- You can only pass basic types (as map query parameters) using this URL. If you want to pass complex and/or custom classes, you should use the Java Remote API instead.
[GET]
rest/runtime/{deploymentId}/process/{processDefId}/startform
- Checks that exists the process identified by processDefId on the given deployment and generates an URL to show the start form on a remote application.
- Returns a
JaxbProcessInstanceFormResponseinstance, that contains the URL to the start process form. Notes:
- The processDefId component of the URL must conform to the following regex:
[_a-zA-Z0-9-:\.]+
- The processDefId component of the URL must conform to the following regex:
[GET]
/runtime/{deploymentId}/process/instance/{procInstId}
- Does a (read only) retrieval of the process instance. This operation will fail (code 400) if the process instance has been completed.
- Returns a
JaxbProcessInstanceResponseinstance. Notes:
- The procInstId component of the URL must conform to the following regex:
[0-9]+
- The procInstId component of the URL must conform to the following regex:
[POST]
/runtime/{deploymentId}/process/instance/{procInstId+}/abort
- Aborts the process instance.
- Returns a
JaxbGenericResponseindicating whether or not the operation has succeeded. Notes:
- The procInstId component of the URL must conform to the following regex:
[0-9]+
- The procInstId component of the URL must conform to the following regex:
[POST]
/runtime/{deploymentId}/process/instance/{procInstId}/signal
- Signals the process instance.
- Returns a
JaxbGenericResponseindicating whether or not the operation has succeeded. Notes:
- The procInstId component of the URL must conform to the following regex:
[0-9]+
- The procInstId component of the URL must conform to the following regex:
Parameters: This operation takes a
signaland aeventquery parameter.- The
signalparameter value is used as the name of the signal. This parameter is required. - The
eventparameter value is used as the value of the event. This value may use the number query parameter syntax described above.
- The
[GET]
/runtime/{deploymentId}/process/instance/{procInstId}/variable/{varName}
- Returns the value of a process variable in a process instance.
- Either the variable object instance itself is returned or, if the variable is a primitive, the variable value wrapped in simple class which is returned.
Notes:
- The procInstId component of the URL must conform to the following regex:
[0-9]+
- The procInstId component of the URL must conform to the following regex:
[POST]
/runtime/{deploymentId}/signal
- Signals the
KieSession - Returns a
JaxbGenericResponseindicating whether or not the operation has succeeded. Notes:
- The procInstId component of the URL must conform to the following regex:
[0-9]+
- The procInstId component of the URL must conform to the following regex:
Parameters: This operation takes a
signaland aeventquery parameter.- The
signalparameter value is used as the name of the signal. This parameter is required. - The
eventparameter value is used as the value of the event. This value may use the number query parameter syntax described above.
- The
[GET]
/runtime/{deploymentId}/workitem/{workItemId}
- Gets a
WorkIteminstance - Returns a
JaxbWorkIteminstance Notes:
- The workItemId component of the URL must conform to the following regex:
[0-9]+
- The workItemId component of the URL must conform to the following regex:
[POST]
/runtime/{deploymentId}/workitem/{workItemId}/complete
- Completes a
WorkItem - Returns a
JaxbGenericResponseindicating whether or not the operation has succeeded Notes:
- The workItemId component of the URL must conform to the following regex:
[0-9]+
- The workItemId component of the URL must conform to the following regex:
Parameters:
- This operation takes map query parameters, which are used as input to signify the results for completion of the work item.
- You can only pass basic types (as map query parameters) using this URL. If you want to pass complex and/or custom classes, you should use the Java Remote API instead.
[POST]
/runtime/{deploymentId}/workitem/{workItemId: [0-9-]+}/abort
- Aborts a
WorkItem - Returns a
JaxbGenericResponseindicating whether or not the operation has succeeded Notes:
- The workItemId component of the URL must conform to the following regex:
[0-9]+
- The workItemId component of the URL must conform to the following regex:
[POST]
/runtime/{deploymentId}/withvars/process/{processDefId}/start
- Starts a process and retrieves the list of variables associated with the process instance
Returns a
JaxbProcessInstanceWithVariablesResponsethat contains:- Information about the process instance (with the same fields and behaviour as the
JaxbProcessInstanceResponse - A key-value list of the variables available in the process instance.
- Information about the process instance (with the same fields and behaviour as the
Notes:
- The processDefId component of the URL must conform to the following regex:
[_a-zA-Z0-9-:\.]+
- The processDefId component of the URL must conform to the following regex:
[GET]
/runtime/{deploymentId}/withvars/process/instance/{procInstId}
- Retrieves a process instances and the list of variables associated with the process instance
- Returns a
JaxbProcessInstanceWithVariablesResponse(see the above REST call) Notes:
- The processInstId component of the URL must conform to the following regex:
[0-9]+
- The processInstId component of the URL must conform to the following regex:
[POST]
/runtime/{deploymentId}/withvars/process/instance/{procInstId}/signal
- Signals a process instance and retrieves the list of variables associated it
- Returns a
JaxbProcessInstanceWithVariablesResponse(see above) Notes:
- The processInstId component of the URL must conform to the following regex:
[0-9]+
- The processInstId component of the URL must conform to the following regex:
Parameters:: This operation takes a
signaland aeventquery parameter.- The
signalparameter value is used as the name of the signal. This parameter is required. - The
eventparameter value is used as the value of the event. This value may use the number query parameter syntax described above.
- The
- Cleans (deletes) all history logs
- Gets a list of
ProcessInstanceLoginstances - Returns a
JaxbHistoryLogListinstance that contains a list ofJaxbProcessInstanceLoginstances Notes:
- This operation responds to pagination parameters
[GET]
/history/instance/{procInstId}
- Gets the
ProcessInstanceLoginstance associated with the specified process instance - Returns a
JaxbHistoryLogListinstance that contains aJaxbProcessInstanceLoginstance Notes:
- The processInstId component of the URL must conform to the following regex:
[0-9]+
- The processInstId component of the URL must conform to the following regex:
- Parameters: This operation responds to pagination parameters
[GET]
/history/instance/{procInstId}/child
- Gets a list of
ProcessInstanceLoginstances associated with any child/sub-processes associated with the specified process instance - Returns a
JaxbHistoryLogListinstance that contains a list ofJaxbProcessInstanceLoginstances Notes:
- The processInstId component of the URL must conform to the following regex:
[0-9]+
- The processInstId component of the URL must conform to the following regex:
- Parameters: This operation responds to pagination parameters
[GET]
/history/instance/{procInstId}/node
- Gets a list of
NodeInstanceLoginstances associated with the specified process instance - Returns a
JaxbHistoryLogListinstance that contains a list ofJaxbNodeInstanceLoginstances Notes:
- The processInstId component of the URL must conform to the following regex:
[0-9]+
- The processInstId component of the URL must conform to the following regex:
- Parameters: This operation responds to pagination parameters
[GET]
/history/instance/{procInstId}/variable
- Gets a list of
VariableInstanceLoginstances associated with the specified process instance - Returns a
JaxbHistoryLogListinstance that contains a list ofJaxbVariableInstanceLoginstances Notes:
- The processInstId component of the URL must conform to the following regex:
[0-9]+
- The processInstId component of the URL must conform to the following regex:
- Parameters: This operation responds to pagination parameters
[GET]
/history/instance/{procInstId}/node/{nodeId}
- Gets a list of
NodeInstanceLoginstances associated with the specified process instance that have the given (node) id - Returns a
JaxbHistoryLogListinstance that contains a list ofJaxbNodeInstanceLoginstances Notes:
- The processInstId component of the URL must conform to the following regex:
[0-9]+ - The nodeId component of the URL must conform to the following regex:
[a-zA-Z0-9-:\.]+
- The processInstId component of the URL must conform to the following regex:
- Parameters: This operation responds to pagination parameters
[GET]
/history/instance/{procInstId}/variable/{varId}
- Gets a list of
VariableInstanceLoginstances associated with the specified process instance that have the given (variable) id - Returns a
JaxbHistoryLogListinstance that contains a list ofJaxbVariableInstanceLoginstances Notes:
- The processInstId component of the URL must conform to the following regex:
[0-9]+ - The varId component of the URL must conform to the following regex:
[a-zA-Z0-9-:\.]+
- The processInstId component of the URL must conform to the following regex:
- Parameters: This operation responds to pagination parameters
[GET]
/history/process/{processDefId}
- Gets a list of
ProcessInstanceLoginstances associated with the specified process definition - Returns a
JaxbHistoryLogListinstance that contains a list ofJaxbProcessInstanceLoginstances Notes:
- The processDefId component of the URL must conform to the following regex:
[_a-zA-Z0-9-:\.]+
- The processDefId component of the URL must conform to the following regex:
- Parameters: This operation responds to pagination parameters
[GET]
/history/variable/{varId}
- Gets a list of
VariableInstanceLoginstances associated with the specified variable id - Returns a
JaxbHistoryLogListinstance that contains a list ofJaxbVariableInstanceLoginstances Notes:
- The varId component of the URL must conform to the following regex:
[a-zA-Z0-9-:\.]+
- The varId component of the URL must conform to the following regex:
- Parameters: This operation responds to pagination parameters
[GET]
/history/variable/{varId}/value/{value}
- Gets a list of
VariableInstanceLoginstances associated with the specified variable id that contain the value specified - Returns a
JaxbHistoryLogListinstance that contains a list ofJaxbVariableInstanceLoginstances Notes:
- Both the varId and value components of the URL must conform to the following regex:
[a-zA-Z0-9-:\.]+
- Both the varId and value components of the URL must conform to the following regex:
- Parameters:: This operation responds to pagination parameters
[GET]
/history/variable/{varId}/instances
- Gets a list of
ProcessInstanceinstances that contain the variable specified by the given variable id. - Returns a
JaxbProcessInstanceListResponseinstance that contains a list ofJaxbProcessInstanceResponseinstances Notes:
- The varId component of the URL must conform to the following regex:
[a-zA-Z0-9-:\.]+
- The varId component of the URL must conform to the following regex:
- Parameters: This operation responds to pagination parameters
[GET]
/history/variable/{varId}/value/{value}/instances
- Gets a list of
ProcessInstanceinstances that contain the variable specified by the given variable id which contains the (variable) value specified - Returns a
JaxbProcessInstanceListResponseinstance that contains a list ofJaxbProcessInstanceResponseinstances Notes:
- Both the varId and value components of the URL must conform to the following regex:
[a-zA-Z0-9-:\.]+
- Both the varId and value components of the URL must conform to the following regex:
- Parameters: This operation responds to pagination parameters
[GET]
/runtime/{deploymentId}/history/variable/{varId}
- Gets a list of
VariableInstanceLoginstances associated with the specified variable id - Returns a
JaxbHistoryLogListinstance that contains a list ofJaxbVariableInstanceLoginstances Notes:
- The varId component of the URL must conform to the following regex:
[a-zA-Z0-9-:\.]+
- The varId component of the URL must conform to the following regex:
- Parameters:: This operation responds to pagination parameters
[GET]
/runtime/{deploymentId}/history/variable/{varId}/value/{value}
- Gets a list of
VariableInstanceLoginstances associated with the specified variable id that contain the value specified - Returns a
JaxbHistoryLogListinstance that contains a list ofJaxbVariableInstanceLoginstances Notes:
- Both the varId and value components of the URL must conform to the following regex:
[a-zA-Z0-9-:\.]+
- Both the varId and value components of the URL must conform to the following regex:
- Parameters: This operation responds to pagination parameters
[GET]
/runtime/{deploymentId}/history/variable/{varId}/instances
- Gets a list of
ProcessInstanceinstances that contain the variable specified by the given variable id. - Returns a
JaxbProcessInstanceListResponseinstance that contains a list ofJaxbProcessInstanceResponseinstances Notes:
- The varId component of the URL must conform to the following regex:
[a-zA-Z0-9-:\.]+
- The varId component of the URL must conform to the following regex:
- Parameters: This operation responds to pagination parameters
[GET]
/runtime/{deploymentId}/history/variable/{varId}/value/{value}/instances
- Gets a list of
ProcessInstanceinstances that contain the variable specified by the given variable id which contains the (variable) value specified - Returns a
JaxbProcessInstanceListResponseinstance that contains a list ofJaxbProcessInstanceResponseinstances Notes:
- Both the varId and value components of the URL must conform to the following regex:
[a-zA-Z0-9-:\.]+
- Both the varId and value components of the URL must conform to the following regex:
- Parameters:: This operation responds to pagination parameters
The following section describes the three different types of task calls:
* Task REST operations that mirror the TaskService interface, allowing the user to interact with the remote TaskService instance
* The Task query REST operation, that allows users to query for Task instances
* Other Task REST operations that retrieve information
Task operation authorizations. Task REST operations use the user information (used to authorize and authenticate the HTTP call) to check whether or not the requested operations can happen. This also applies to REST calls that retrieve information, such as the task query operation. REST calls that request information will only return information about tasks that the user is allowed to see.
With regards to retrieving information, only users associated with a task may retrieve information about the task. However, the authorizations of progress and other modifications of task information are more complex. See the Task Permissions section in the Task Service documentation for more infomration.
Note
Given that many users have expressed the wish for a "super-task-user" that can execute task REST operations on all tasks, regardless of the users associated with the task, there are now plans to implement that feature. However, so far for the 6.x releases, this feature is not available.
All of the task operation calls described in this section use the user (id) used in the REST basic authorization as input for the user parameter in the specific call.
Some of the operations take an optional lanaguage query parameter. If this parameter is not given
as a element of the URL itself, the default value of “en-UK” is used.
The taskId component of the REST calls below must conform to the following regex:
[0-9]+
[POST]
/task/{taskId}/activate
- Activates a task
- Returns a
JaxbGenericResponsewith the status of the operation
- Claims a task
- Returns a
JaxbGenericResponsewith the status of the operation
[POST]
/task/{taskId}/claimnextavailable
- Claims the next available task
- Returns a
JaxbGenericResponsewith the status of the operation - Parameters: Takes an optional
languagequery parameter.
[POST]
/task/{taskId}/complete
- Completes a task
- Returns a JaxbGenericResponse with the status of the operation
- Parameters: Takes map query parameters, which are the "results" input for the complete operation
[POST]
/task/{taskId}/delegate
- Delegates a task
- Returns a
JaxbGenericResponsewith the status of the operation - Parameters: Requires a
targetIdquery parameter, which identifies the user or group to which the task is delegated
- Exits a task
- Returns a
JaxbGenericResponsewith the status of the operation
- Fails a task
- Returns a
JaxbGenericResponsewith the status of the operation
- Delegates a task
- Returns a
JaxbGenericResponsewith the status of the operation - Parameters: Requires a
targetIdquery parameter, which identifies the user or group to which the task is forwarded
[POST]
/task/{taskId}/nominate
- Nominates a task
- Returns a
JaxbGenericResponsewith the status of the operation - Parameters: Requires at least one of either the
userorgroupquery parameter, which identify the user(s) or group(s) that are nominated for the task
- Releases a task
- Returns a
JaxbGenericResponsewith the status of the operation
[POST]
/task/{taskId}/resume
- Resumes a task
- Returns a
JaxbGenericResponsewith the status of the operation
- Skips a task
- Returns a
JaxbGenericResponsewith the status of the operation
- Starts a task
- Returns a
JaxbGenericResponsewith the status of the operation
[POST]
/task/{taskId}/stop
- Stops a task
- Returns a JaxbGenericResponse with the status of the operation
- Suspends a task
- Returns a
JaxbGenericResponsewith the status of the operation
- The
/task/queryoperation queries all non-archived tasks based on the parameters given. - This URL has been deprecated. Please see the
/query/taskoperation.
==== Other Task calls
- Gets the task info from a task identified by the given task id
- Returns: a
JaxbTaskwith the content of the task Notes:
- The taskId component of the URL must conform to the following regex:
[0-9]+ - Will return HTTP Status 404 (not found) if the task does not exist
- The taskId component of the URL must conform to the following regex:
- Gets the task content from a task identified by the given task id
- Returns: a
JaxbContentwith the content of the task Notes:
- The taskId component of the URL must conform to the following regex:
[0-9]+
- The taskId component of the URL must conform to the following regex:
[GET]
/task/content/{contentId}
- Gets the task content from a task identified by the given content id
- Returns a
JaxbContentwith the content of the task Notes:
- The contentId component of the URL must conform to the following regex:
[0-9]+
- The contentId component of the URL must conform to the following regex:
[GET]
/task/{taskId}/showTaskForm
- Checks that the task identified by taskId exists and generates an URL to show the task form on a remote application.
- Returns a
JaxbTaskFormResponseinstance, that contains the URL to the task form.
[POST]
/task/history/bam/clear
- Clears (deletes) all
BAMTaskSummaryinstances in the database.
The calls described in this section allow users to manage deployments. Deployments are in fact
KieModule JARs which can be deployed or undeployed, either via the UI or via the REST calls described
below. Configuration options, such as the runtime strategy, should be specified when deploying the deployment:
the configuration of a deployment can not be changed after it has already been deployed.
The above deploymentId regular expression describes an expression that contains the following elements, separated from eachother by a : character:
- The group id
- The artifact id
- The version
- The (optional) kbase id
- The (optional) ksession id
In a more formal sense, the deploymentId component of the REST calls below must conform to the following regex:
`[\w\.-]+(:[\w\.-]+){2,2}(:[\w\.-]*){0,2}`This regular expression is explained as follows:
- The
[\w\.-]element, which occurs 3 times in the above regex, refers to a character set that can contain the following character sets:
This [\w\.-] element occurs at least 3 times and at most 5 times, separated by a : character each time.
Example 17.1. Accepted deploymentId's
-
com.wonka:choco-maker:67.190 These example `deploymentId’s contain the optional kbase and ksession id groups.
-
com.wonka:choco-maker:67.190:oompaBase -
com.wonka:choco-maker:67.190:oompaLoompaBase:gloopSession
-
There are 2 operations that can be used to modify the status of a deployment:
-
/deployments/{deploymentId}/deploy -
/deployments/{deploymentId}/undeploy
These POST deployment calls are both asynchronous, which
means that the information returned by the POST request does not reflect the
eventual final status of the operation itself.
Important
As noted above, both the /deploy and /undeploy operations are
asynchronous REST operations. Successfull requests to these URLs will return the
status 202 upon the request completion. RFC 2616 defines the 202 status
as meaning the following:
RFC 2616: "the request has been accepted for processing, but the processing has not been completed."
This means the following:
- While the request may have been accepted "successfully", the operation itself (deploying or undeploying the deployment unit) may actually fail.
- Furthermore, information about deployments, such as that retrieved by calling the
GEToperations described below, are snapshots and the information (including the status of the deployment unit) may have changed by the time the user client receives the answer to theGETrequest.
- Returns a list of all the available deployed instances in a
JaxbDeploymentUnitListinstance
- Returns a list of all the available deployed process definitions in a
JaxbProcessDefinitionListinstance
[GET]
/deployment/ {deploymentId}
- Returns a
JaxbDeploymentUnitinstance containing the information (including the configuration) of the deployment unit. Notes:
- This operation will fail when the URL uses a deployementId that refers to a deployment unit that does not exist or for which the deployment has not yet been completed.
- This operation may succeed for deployment units for which an undeploy operation request has not yet completed.
[POST]
/deployment/{deploymentId}/deploy
- Deploys the deployment unit referenced by the deploymentId
- Returns a
JaxbDeploymentJobResultinstance with the status of the request Parameters: Takes a
strategyquery parameter, which- describes the runtime strategy used for the deployment.
must have one of the following (case-_in_sensitive) values:
-
SINGLETON -
PER_REQUEST -
PER_PROCESS_INSTANCE
-
- The default runtime strategy used for a deployment is
SINGLETON.
Notes:
- The deploy operation is an asynchronous operation: the request can fail after
being submitted. The status of the deployment can be retrieved using the
GETcalls described above. It is possible to post a deployment descriptor (or a fragment of it) while submitting deploy request. That allows to override other deployment descriptors in the hierarchy. To do so the content type of the request must be set to
application/xmland the request body should be a a valid deployment descriptor content.Example 17.2. Changing the audit logging mode from default JPA to JMS submit
<deployment-descriptor xsi:schemaLocation="http://www.jboss.org/jbpm deployment-descriptor.xsd"
                       xmlns:xsi="http://www.w3.org/2001/XMLSchema-instance">
    <audit-mode>JMS</audit-mode>
</deployment-descriptor>
Since deployment descriptors can be merged differently, it’s possibile to provide the merge mode as part of deploy request by adding query parameter:
mergemodewhere values should be one of the following- KEEP_ALL
- OVERRIDE_ALL
- OVERRIDE_EMPTY
- MERGE_COLLECTIONS
- The deploy operation is an asynchronous operation: the request can fail after
being submitted. The status of the deployment can be retrieved using the
[POST]
/deployment/{deploymentId}/undeploy
- Undeploys the deployment unit referenced by the
deploymentId - Returns a
JaxbDeploymentJobResultinstance with the status of the request Notes:
- The undeploy operation is an asynchronous operation. The status of the deployment can be
retrieved using the
GETcalls described above.
- The undeploy operation is an asynchronous operation. The status of the deployment can be
retrieved using the
[POST]
/deployment/{deploymentId}/activate
- Activates the deployment unit referenced by the
deploymentId - Returns a
JaxbDeploymentJobResultinstance with the status of the request Notes:
- The undeploy operation is an asynchronous operation. The status of the deployment can be
retrieved using the
GETcalls described above.
- The undeploy operation is an asynchronous operation. The status of the deployment can be
retrieved using the
[POST]
/deployment/{deploymentId}/deactivate
- Deactivates the deployment unit referenced by the
deploymentId - Returns a
JaxbDeploymentJobResultinstance with the status of the request Notes:
- The undeploy operation is an asynchronous operation. The status of the deployment can be
retrieved using the
GETcalls described above.
- The undeploy operation is an asynchronous operation. The status of the deployment can be
retrieved using the
[GET]
/deployment/{deploymentId}/processes
- Undeploys the deployment unit referenced by the
deploymentId - Returns a
JaxbDeploymentJobResultinstance with the status of the request Notes:
- The undeploy operation is an asynchronous operation. The status of the deployment can be
retrieved using the
GETcalls described above.
- The undeploy operation is an asynchronous operation. The status of the deployment can be
retrieved using the
While there is a /runtime/{id}/execute and a task/execute method, both will take all types
of commands. This is possible because execute takes a JaxbCommandsRequest object, which contains a list of
(org.kie.api.command.)Command objects. The JaxbCommandsRequest has fields to store the proper
deploymentId and processInstanceId information.
Of course, if you send a request with a command that needs this information (deploymentId, for example)
and don’t fill the deploymentId in, the request will fail.
- Executes a
Command - Returns a
JaxbCommandResponseimplementation with the result of the operation
Table 17.10. Runtime commands
|
AbortWorkItemCommand |
GetProcessInstancesCommand |
GetIdCommand |
|
CompleteWorkItemCommand |
SetProcessInstanceVariablesCommand |
SetGlobalCommand |
|
GetWorkItemCommand |
SignalEventCommand | |
|
StartCorrelatedProcessCommand |
DeleteCommand | |
|
AbortProcessInstanceCommand |
StartProcessCommand |
FireAllRulesCommand |
|
GetProcessIdsCommand |
GetVariableCommand |
InsertObjectCommand |
|
GetProcessInstanceByCorrelationKeyCommand |
GetFactCountCommand |
UpdateCommand |
Table 17.11. Task commands
|
ActivateTaskCommand |
FailTaskCommand |
GetTasksOwnedCommand |
|
AddTaskCommand |
ForwardTaskCommand |
NominateTaskCommand |
|
CancelDeadlineCommand |
GetAttachmentCommand |
ProcessSubTaskCommand |
|
ClaimNextAvailableTaskCommand |
GetContentCommand |
ReleaseTaskCommand |
|
ClaimTaskCommand |
GetTaskAssignedAsBusinessAdminCommand |
ResumeTaskCommand |
|
CompleteTaskCommand |
GetTaskAssignedAsPotentialOwnerCommand |
SkipTaskCommand |
|
CompositeCommand |
GetTaskByWorkItemIdCommand |
StartTaskCommand |
|
DelegateTaskCommand |
GetTaskCommand |
StopTaskCommand |
|
ExecuteTaskRulesCommand |
GetTasksByProcessInstanceIdCommand |
SuspendTaskCommand |
Table 17.12. History/Audit commands
|
ClearHistoryLogsCommand |
FindProcessInstanceCommand |
FindSubProcessInstancesCommand |
|
FindActiveProcessInstancesCommand |
FindProcessInstancesCommand |
FindVariableInstancesByNameCommand |
|
FindNodeInstancesCommand |
FindSubProcessInstancesCommand |
FindVariableInstancesCommand |
The following /rest/execute call can be used to start a process (with process id ‘evaluation’ in
the project with deployment id ‘org.jbpm:Evaluation:1.0’) and two parameters (parameter employee
equal to ‘krisv’ and reason equal to ‘Yearly performance evaluation’).
<?xml version="1.0" encoding="UTF-8" standalone="yes"?>
<command-request>
  <deployment-id>org.jbpm:Evaluation:1.0</deployment-id>
  <ver>6.2.0.1</ver>
  <user>krisv</user>
  <start-process processId="evaluation">
    <parameter>
      <item key="reason">
        <value xsi:type="xs:string" xmlns:xs="http://www.w3.org/2001/XMLSchema"
               xmlns:xsi="http://www.w3.org/2001/XMLSchema-instance">Yearly performance evaluation</value>
      </item>
      <item key="employee">
        <value xsi:type="xs:string" xmlns:xs="http://www.w3.org/2001/XMLSchema"
               xmlns:xsi="http://www.w3.org/2001/XMLSchema-instance">krisv</value>
      </item>
    </parameter>
  </start-process>
</command-request>
Note that the request should also contain the following HTTP headers:
- A Content-Type header with the
value of
application/xml - A Authorization header with basic authentication information, as specificed by RFC2616 (see link).
The response will contain information about the process instance that was just started:
<?xml version="1.0" encoding="UTF-8" standalone="yes"?>
  <command-response>
    <deployment-id>org.jbpm:Evaluation:1.0</deployment-id>
    <ver>6.2.0.1</ver>
    <process-instance index="0">
    <process-id>evaluation</process-id>
    <id>15</id>
    <state>1</state>
    <parentProcessInstanceId>0</parentProcessInstanceId>
    <command-name>StartProcessCommand</command-name>
  </process-instance>
</command-response>The /execute operation also supports sending user-defined class instances as parameters in the
command. This relies on JAXB for serialization and deserialization. To be able to deserialize the
custom class on the server side, a "Kie-Deployment-Id" header must also be set to the deployment id
of the project.
For example, when starting a process or completing a task, a user typically passes additional parameters (process variable values or the result data for the completed task). These values are then either primitives (Strings, ints, etc.) or user-defined classes that were created using the data modeler in the workbench, added directly to the deployed project or part of a dependency to the deployment (project).
The following request starts a process which contains a custom TestObject class (with two fields)
as a parameter.
<?xml version="1.0" encoding="UTF-8" standalone="yes"?>
<command-request>
  <deployment-id>demo:testproject:1.0</deployment-id>
  <ver>6.2.0.1</ver>
  <user>krisv</user>
  <start-process processId="testproject.testprocess">
    <parameter>
      <item key="testobject">
        <value xsi:type="testObject" xmlns:xsi="http://www.w3.org/2001/XMLSchema-instance">
          <field1>1</field1>
          <field2>2</field2>
        </value>
      </item>
    </parameter>
  </start-process>
</command-request>
Just as in the basic example above, both a Content-Type and Authorization header should be set
in the request.
The 3 headers that therefore need to be set in the requst are the following:
- A Content-Type header with the
value of
application/xml - A Authorization header with basic authentication information, as specificed by RFC2616 (see link).
- A Kie-Deployment-Id header with the value of the deployment id containing the class definitions of any parameters sent with the command .
The URL templates in the table below are relative to the one of the following URLs:
- [GET]
/runtime/{deploymentId}/process/{procDefID}
- returns basic information about the process definition, including process variable information
- [POST]
/runtime/{deploymentId}/process/{procDefID}/start
- start a process instance based on the Process definition (accepts query map parameters)
- [GET]
/runtime/{deploymentId}/process/{procDefID}/startform
- returns a valid URL to the start process form to be shown on a client aplication.
- [GET]
/runtime/{deploymentId}/process/instance/{procInstanceID}
- return a process instance details
- [POST]
/runtime/{deploymentId}/process/instance/{procInstanceID}/abort
- abort the process instance
- [POST]
/runtime/{deploymentId}/process/instance/{procInstanceID}/signal
- send a signal event to process instance (accepts query map parameters)
- [GET]
/runtime/{deploymentId}/process/instance/{procInstanceID}/variable/{varId}
- return a variable from a process instance
- [POST]
/runtime/{deploymentId}/signal/
- send a signal event to deployment
- [GET]
/runtime/{deploymentId}/workitem/{workItemID}
- complete a work item (accepts query map parameters)
- [POST]
/runtime/{deploymentId}/workitem/{workItemID}/complete
- complete a work item (accepts query map parameters)
- [POST]
/runtime/{deploymentId}/workitem/{workItemID}/abort
- abort a work item
- [POST]
/runtime/{deploymentId}/withvars/process/{procDefinitionID}/start
- start a process instance and return the process instance with its variables
- [GET]
/runtime/{deploymentId}/withvars/process/instance/{procInstanceID}/
- return a process instance with its variables
- [POST]
/runtime/{deploymentId}/withvars/process/instance/{procInstanceID}/signal
send a signal event to the process instance (accepts query map parameters)
The following query parameters are accepted:
— The
signalparameter specifies the name of the signal to be sent — Theeventparameter specifies the (optional) value of the signal to be sent
- [GET]
/task/query
- return a TaskSummary list
- [GET]
/task/content/{contentID}
- returns the content of a task
- [GET]
/task/{taskID}
- return the task
- [POST]
/task/{taskID}/activate
- activate the task
- [POST]
/task/{taskID}/claim
- claim the task
- [POST]
/task/{taskID}/claimnextavailable
- claim the next available task
- [POST]
/task/{taskID}/complete
- complete the task (accepts query map paramaters)
- [POST]
/task/{taskID}/delegate
- delegate the task
- [POST]
/task/{taskID}/exit
- exit the task
- [POST]
/task/{taskID}/fail
- fail the task
- [POST]
/task/{taskID}/forward
- forward the task
- [POST]
/task/{taskID}/nominate
- nominate the task
- [POST]
/task/{taskID}/release
- release the task
- [POST]
/task/{taskID}/resume
- resume the task (after suspending)
- [POST]
/task/{taskID}/skip
- skip the task
- [POST]
/task/{taskID}/start
- start the task
- [POST]
/task/{taskID}/stop
- stop the task
- [POST]
/task/{taskID}/suspend
- suspend the task
- [GET]
/task/{taskID}/content
- returns the content of a task
- [GET]
/task/{taskID}/showTaskForm
- returns a valid URL to the task form to be shown on a client aplication.
- [POST]
/history/clear/
- delete all process, node and history records
- [GET]
/history/instances
- return the list of all process instance history records
- [GET]
/history/instance/{procInstId}
- return a list of process instance history records for a process instance
- [GET]
/history/instance/{procInstId}/child
- return a list of process instance history records for the subprocesses of the process instance
- [GET]
/history/instance/{procInstId}/node
- return a list of node history records for a process instance
- [GET]
/history/instance/{procInstId}/node/{nodeId}
- return a list of node history records for a node in a process instance
- [GET]
/history/instance/{procInstId}/variable
- return a list of variable history records for a process instance
- [GET]
/history/instance/{procInstId}/variable/{variableId}
- return a list of variable history records for a variable in a process instance
- [GET]
/history/process/{procDefId}
- return a list of process instance history records for process instances using a given process definition
- [GET]
/history/variable/{varId}
- return a list of variable history records for a variable
- [GET]
/history/variable/{varId}/instances
- return a list of process instance history records for process instances that contain a variable with the given variable id
- [GET]
/history/variable/{varId}/value/{value}
- return a list of variable history records for variable(s) with the given variable id and given value
- [GET]
/history/variable/{varId}/value/{value}/instances
- return a list of process instance history records for process instances with the specified variable that contains the specified variable value
- [GET]
/deployments
- return a list of (deployed) deployments
- [GET]
/deployment/{deploymentId}
- return the status and information about the deployment
- [POST]
/deployment/{deploymentId}/deploy
- submit a request to deploy a deployment
- [POST]
/deployment/{deploymentId}/undeploy
- submit a request to undeploy a deployment
The REST Query API allows users of the jBPM console and the KIE workbench (as well as products based on these applications) to "richly" query tasks, variables and process instances.
The rich query operations can be reached via the following URLs:
http://server.address:port/{application-id}/rest/query/
  task                       * [GET] rich query operation for task summaries
  runtime
    process                  * [GET] rich query operation for process instances and process variables
    task                     * [GET] rich query operation for task summaries and process variables
Both url’s take a number of different query parameters. See the next section for a description of these.
The following is a summary of the query operations:
- Queries the process instances and process variables
- Returns a
JaxbQueryProcessInstanceResultcontaining the results of the query - Takes the URL query parameters described in the Query parameters table below
- Queries the tasks and process variables
- Returns a
JaxbQueryTaskResultcontaining the results of the query - Takes the URL query parameters described in the Query parameters table below
- Queries all non-archived tasks based on the parameters given.
- Returns a
JaxbTaskSummaryListResponsewith a list ofTaskSummaryinstances Parameters:
- Takes the following (case-'in' sensitive) query parameters listed below.
All parameters except for the
unionparameter may be repeated.-
businessAdministrator - Returned tasks should have a business administrator identified by this parameter
-
potentialOwner - Returned tasks should have a potential owner identified by this parameter
-
processInstanceId - Returned tasks should be associated with the process instance identified by this parameter
-
status - Returned tasks should have a status identified by this parameter
-
taskId - Returned tasks should have the (task) id identified by this parameter
-
taskOwner - Returned tasks should have a task owner (initiator) identified by this parameter
-
workItemId - Returned tasks should be associated with the work item identified by this parameter
-
language - Specifies the language that the returned tasks should be associated with
-
union - This specifies whether the query should query the union or intersection of the parameters. See below for an example and more info. This parameter may only be passed once
-
Example 17.3.
/query/task
usage
The following
/query/task
operation retrieves the task summaries of all tasks that have a work
item id of 3, 4, or 5. If you specify the same parameter multiple times, the query
will select tasks that match any of that parameter.
http://server:port/rest/task/query?workItemId=3&workItemId=4&workItemId=5
The next call will retrieve any task summaries for which the task id is 27 and for which the work item id is 11. Specifying different parameters will result in a set of tasks that match both (all) parameters.
`http://server:port/rest/task/query?workItemId=11&taskId=27`
The next call will retrieve any task summaries for which the task id is 27 or the
work item id is 11. While these are different parameters, the union parameter is being used
here so that the union of the two queries (the work item id query and the task id query) is returned.
http://server:port/rest/task/query?workItemId=11&taskId=27&union=true`
The next call will retrieve any task summaries for which the status is Created
and the potential owner of the task is Bob. Note that the letter case for the status
parameter value is case-'in’sensitve.
http://server:port/rest/task/query?status=creAted&potentialOwner=Bob`
The next call will return any task summaries for which the status is Created
and the potential owner of the task is bob. Note that the potential owner parameter is
case-'sensitive'. bob is not the same user id as Bob!
http://server:port/rest/task/query?status=created&potentialOwner=bob`
The next call will return the intersection of the set of task summaries for which the
process instance is 201, the potential owner is bob and for which the status is Created
or Ready.
http://server:port/rest/task/query?status=created&status=ready&potentialOwner=bob&processInstanceId=201
That means that the task summaries that have the following characteristics would be included:
- process instance id 201, potential owner
bob, statusReady - process instance id 201, potential owner
bob, statusCreated
And that following task summaries will not be included:
- process instance id 183, potential owner
bob, statusCreated - process instance id 201, potential owner '`mary`, status
Ready - process instance id 201, potential owner
bob, status `Complete`
In the documentation below,
- "query parameters" are strings like
processInstanceId,taskIdandtid. The case (lowercase or uppercase) of these parameters does not matter, except when the query parameter also specifies the name of a user-defined variable. - "parameters" are the values that are passed with some query parameters. These are values like
org.process.frombulator,29andharry.
When you submit a REST call to the query operation, your URL will look something like this:
http://localhost:8080/business-central/rest/query/runtime/process/processId=org.process.frombulator&piid=29
A query containing multiple different query parameters will search for the intersection of the given parameters.
However, many of the query parameters described below can be entered multiple times: when multiple values are given for the same query parameter, the query will then search for any results that match one or more of the values entered.
Example 17.4. Repeated query parameters
The following process instance query:
processId=org.example.process&processInstanceId=27&processInstanceId=29
will return a result that
- only contains information about process instances with the "org.example.process" process definition
- only contains information about process instances that have an id of 27 or 29
Some query criteria can be given in ranges while for others, a simple regular expression language can be used to describe the value.
Query parameters that
- can be given in ranges have an "X" in the min/max column in the table below.
- use regular expressions have an "X" in the regex column below.
In order to pass the lower end or start of a range, add _min to end of the parameter name.
In order to pass the upper end or end of a range, add _max to end of the parameter name.
Range ends are inclusive.
Only passing one end of the range (the lower or upper end), results in querying on an open ended range.
Example 17.5. Range parameters
A task query with the following parameters:
processId=org.example.process&taskId_min=50&taskId_max=53
will return a result that
- only contains information about tasks associated with the "org.example.process" process definition
- only contains information about tasks that have a task id between 50 and 53, inclusive.
While a task query with the following parameters:
processId=org.example.process&taskId_min=52
will return a result that
- only contains information about tasks associated with the "org.example.process" process definition
- only contains information about tasks that have a task id that is larger than or equal to 52
In order to apply regular expressions to a query parameter, add “_re” to the end of the parameter name.
The regular expression language contains 2 special characters:
-
*means 0 or more characters -
.means 1 character
The slash character (\) is not interpreted.
Example 17.6. Regular expression parameters
The following process instance query
processId_re=org.example.*&processVersion=2.0
will return a result that
only contains information about process instances associated with a process definition whose name matches the regular expression "org.example.*". This includes:
-
org.example.process -
org.example.process.definition.example.long.name -
orgXexampleX
-
- only contains information about process instances that have a process (definition) version of 2.0
The "task or process" column describes whether or not a query parameter can be used with the task and/or the process instance query operations.
Table 17.13. Query parameters
| parameter | short form | description | regex | min / max | task or process |
|---|---|---|---|---|---|
|
|
|
Process instance id |
X |
T,P | |
|
|
|
Process id |
X |
T,P | |
|
|
|
Deployment id |
X |
T,P | |
|
|
|
Task id |
X |
T | |
|
|
|
Task initiator/creator |
X |
T | |
|
|
|
Task stakeholder |
X |
T | |
|
|
|
Task potential owner |
X |
T | |
|
|
|
Task owner |
X |
T | |
|
|
|
Task business admin |
X |
T | |
|
|
|
Task status |
T | ||
|
|
|
Process instance status |
T,P | ||
|
|
|
Process version |
X |
T,P | |
|
|
|
Process instance start date1 |
X |
T,P | |
|
|
|
Process instance end date1 |
X |
T,P | |
|
|
|
Variable id |
X |
T,P | |
|
|
|
Variable value |
X |
T,P | |
|
|
|
Variable id and value 2 |
T,P | ||
|
|
|
Variable id and value 3 |
X |
T,P | |
|
|
|
Which variable history logs 4 |
T,P |
[1] The date operations take strings with a specific date format as their values: yy-MM-dd_HH:mm:ss.SSS.
However, users can also submit only part of the date:
- Submitting only the date (
yy-MM-dd) means that a time of 00:00:00 is used (the beginning of the day). - Submitting only the time (
HH:mm:ss) means that the current date is used.
Table 17.14. Example date strings
| Date string | Actual meaning |
|---|---|
|
|
May 29th, 2015, 13:40:12.288 (1:40:12.288 PM) |
|
|
November 20th, 2014, 00:00:00.000 |
|
|
Today, 9:30:00 (AM) |
For the format used, see the SimpleDateFormat documentation.
[2] The var query parameter is used differently than other parameters. If you want to specify
both the variable id and value of a variable (as opposed to just the variable id), then you can
do it by using the var query parameter. The syntax is var_<variable-id>=<variable-value>
Example 17.7.
var_X=Y example
The query parameter and parameter pair var_myVar=value3 queries for process instances with
variables4 that are called myVar and that have the value value3
[3] The varreggex (or shortened version vr) parameter works similarly to the var query
parameter. However, the value part of the query parameter can be a regular expression.
[4] By default, only the information from most recent (last) variable instance logs is retrieved. However, users can also retrieve all variable instance logs (that match the given criteria) by using this parameter.
Table 17.15. Query parameters examples
| parameter | short form | example |
|---|---|---|
|
|
|
|
|
|
|
|
|
|
|
|
|
|
|
|
|
|
|
|
|
|
|
|
|
|
|
|
|
|
|
|
|
|
|
|
|
|
|
|
|
|
|
|
|
|
|
|
|
|
|
|
|
|
|
|
|
|
|
|
|
|
|
|
|
|
|
|
|
|
|
|
|
|
|
|
The process instance query returns a JaxbQueryProcessInstanceResult instance.
The task query returns a JaxbQueryTaskResult instance.
Results are structured as follows:
- a list of process instance info (JaxbQueryProcessInstanceInfo) objects
- or a list of task instance info (JaxbQueryTaskInfo) objects
A JaxbQueryProcessInstanceInfo object contains:
- a process instance object
- a list of 0 or more variable objects
A JaxbQueryTaskInfo info object contains:
- the process instance id
- a list of 0 or more task summary obejcts
- a list of 0 or more variable objects
The Java Message Service (JMS) is an API that allows Java Enterprise components to communicate with each other asynchronously and reliably.
Operations on the runtime engine and tasks can be done via the JMS API exposed by the jBPM console and KIE workbench. However, it’s not possible to manage deployments or the knowledge base via this JMS API.
Unlike the REST API, it is possible to send a batch of commands to the JMS API that will all be processed in one request after which the responses to the commands will be collected and return in one response message.
When the Workbench is deployed on the JBoss AS or EAP server, it automatically creates 3 queues:
-
jms/queue/KIE.SESSION -
jms/queue/KIE.TASK -
jms/queue/KIE.RESPONSE
The KIE.SESSION and KIE.TASK queues should be used to send request messages to the JMS API.
Command response messages will be then placed on the KIE.RESPONSE queues. Command request messages
that involve starting and managing business processes should be sent to the KIE.SESSION and
command request messages that involve managing human tasks, should be sent to the KIE.TASK queue.
Although there are 2 different input queues, KIE.SESSION and KIE.TASK, this is only in order to
provide multiple input queues so as to optimize processing: command request messages will be
processed in the same manner regardless of which queue they’re sent to. However, in some cases,
users may send many more requests involving human tasks than requests involving business processes,
but then not want the processing of business process-related request messages to be delayed by the
human task messages. By sending the appropriate command request messages to the appropriate queues,
this problem can be avoided.
The term "command request message" used above refers to a JMS text message that contains a
serialized JaxbCommandsRequest object. At the moment, only XML serialization (as opposed to, JSON
or protobuf, for example) is supported.
While it is possible to interact with a BPMS or KIE workbench server instance by sending and
processing JMS messages that you create yourself, it will always be easier to use the remote Java
API that’s supplied by the kie-services-client jar.
For more information about how to use the remote Java API to interact with the JMS API of a server instance, see the <link linkend='remote.java.api.jms'>Remote Java API</link> section.
The JMS API accepts TextMessage instances that contain serialized JaxbCommandsRequest objects.
These JaxbCommandsRequest instances can be filled with multiple command objects. In this way,
it’s possible to send a batch of commands for processing to the JMS API.
When users wish to include their own classes with requests, there a number of requirements that must be met for the user-defined classes. For more information about these requirements, see the Sending and receiving user class instances section in the remote API additional documentation section.
The following is a rather long example that shows how to use the JMS API. The numbers ("callouts") along the side of the example refer to notes below that explain particular parts of the example. It’s supplied for those advanced users that do not wish to use the jBPM Remote Java API.
The jBPM Remote Java API, described here, will otherwise take care of all of the logic shown below.
package org.kie.remote.client.documentation.jms;
import static org.kie.services.client.serialization.SerializationConstants.DEPLOYMENT_ID_PROPERTY_NAME;
import static org.kie.services.client.serialization.SerializationConstants.SERIALIZATION_TYPE_PROPERTY_NAME;
import static org.kie.services.shared.ServicesVersion.VERSION;
import java.util.Collections;
import java.util.List;
import java.util.Set;
import java.util.UUID;
import javax.jms.Connection;
import javax.jms.ConnectionFactory;
import javax.jms.JMSException;
import javax.jms.Message;
import javax.jms.MessageConsumer;
import javax.jms.MessageProducer;
import javax.jms.Queue;
import javax.jms.Session;
import javax.jms.TextMessage;
import javax.naming.InitialContext;
import javax.naming.NamingException;
import org.kie.api.command.Command;
import org.kie.api.runtime.process.ProcessInstance;
import org.kie.api.task.model.TaskSummary;
import org.kie.remote.client.api.RemoteRuntimeEngineFactory;
import org.kie.remote.client.api.exception.MissingRequiredInfoException;
import org.kie.remote.client.api.exception.RemoteApiException;
import org.kie.remote.client.api.exception.RemoteCommunicationException;
import org.kie.remote.client.jaxb.ClientJaxbSerializationProvider;
import org.kie.remote.client.jaxb.JaxbCommandsRequest;
import org.kie.remote.client.jaxb.JaxbCommandsResponse;
import org.kie.remote.jaxb.gen.AuditCommand;
import org.kie.remote.jaxb.gen.GetTaskAssignedAsPotentialOwnerCommand;
import org.kie.remote.jaxb.gen.StartProcessCommand;
import org.kie.remote.jaxb.gen.TaskCommand;
import org.kie.services.client.serialization.JaxbSerializationProvider;
import org.kie.services.client.serialization.SerializationException;
import org.kie.services.client.serialization.SerializationProvider;
import org.kie.services.client.serialization.jaxb.impl.JaxbCommandResponse;
import org.kie.services.client.serialization.jaxb.rest.JaxbExceptionResponse;
import org.slf4j.Logger;
import org.slf4j.LoggerFactory;
public class SendJmsExample {
protected static final Logger logger = LoggerFactory.getLogger(SendJmsExample.class);
public void sendCommandsViaJms( String user, String password, String connectionUser, String connectionPassword,
String deploymentId, String processId, String hostName ) {
/**
* JMS setup
*/
// Get JNDI context from server
InitialContext context = RemoteRuntimeEngineFactory.getRemoteJbossInitialContext(hostName, connectionUser, connectionPassword);
// Create JMS connection
ConnectionFactory connectionFactory;
try {
connectionFactory = (ConnectionFactory) context.lookup("jms/RemoteConnectionFactory");
} catch( NamingException ne ) {
throw new RuntimeException("Unable to lookup JMS connection factory.", ne);
}
// Setup queues
Queue sessionQueue, taskQueue, sendQueue, responseQueue;
try {
sendQueue = sessionQueue = (Queue) context.lookup("jms/queue/KIE.SESSION");
taskQueue = (Queue) context.lookup("jms/queue/KIE.TASK");
responseQueue = (Queue) context.lookup("jms/queue/KIE.RESPONSE");
} catch( NamingException ne ) {
throw new RuntimeException("Unable to lookup send or response queue", ne);
}
/**
* Command preparation
*/
StartProcessCommand startProcCmd = new StartProcessCommand();
startProcCmd.setProcessId(processId);
/**
* Send command via JMS and receive response
*/
SerializationProvider serializationProvider = ClientJaxbSerializationProvider.newInstance();
ProcessInstance procInst = (ProcessInstance) sendJmsCommand(startProcCmd,
connectionUser, connectionPassword,
user, password, deploymentId, null,
connectionFactory, sendQueue, responseQueue,
serializationProvider, Collections.EMPTY_SET, JaxbSerializationProvider.JMS_SERIALIZATION_TYPE,
5 * 1000);
/**
* Command preparation
*/
GetTaskAssignedAsPotentialOwnerCommand gtaapoCmd = new GetTaskAssignedAsPotentialOwnerCommand();
gtaapoCmd.setUserId(user);
// Send command request
Long processInstanceId = null; // needed if you're doing an operation on a PER_PROCESS_INSTANCE deployment
/**
* Send command via JMS and receive response
*/
@SuppressWarnings("unchecked")
List<TaskSummary> taskSumList = (List<TaskSummary>) sendJmsCommand(gtaapoCmd,
connectionUser, connectionPassword,
user, password, deploymentId, processInstanceId,
connectionFactory, sendQueue, responseQueue,
serializationProvider, Collections.EMPTY_SET, JaxbSerializationProvider.JMS_SERIALIZATION_TYPE,
5 * 1000);
long taskId = taskSumList.get(0).getId();
}
// @formatter:off
public static Object sendJmsCommand( Command command,
String connUser, String connPassword,
String userName, String password, String deploymentId, Long processInstanceId,
ConnectionFactory factory, Queue sendQueue, Queue responseQueue,
SerializationProvider serializationProvider, Set<Class<?>> extraJaxbClasses, int serializationType,
long timeoutInMillisecs ) {
// @formatter:on
if( deploymentId == null && !(command instanceof TaskCommand || command instanceof AuditCommand) ) {
throw new MissingRequiredInfoException("A deployment id is required when sending commands involving the KieSession.");
}
JaxbCommandsRequest req;  if( command instanceof AuditCommand ) {
req = new JaxbCommandsRequest(command);
} else {
req = new JaxbCommandsRequest(deploymentId, command);
}
req.setProcessInstanceId(processInstanceId);
req.setUser(userName);
req.setVersion(VERSION);
Connection connection = null;
Session session = null;
JaxbCommandsResponse cmdResponse = null;
String corrId = UUID.randomUUID().toString();
String selector = "JMSCorrelationID = '" + corrId + "'";
try {
// setup
MessageProducer producer;
MessageConsumer consumer;
try {
if( password != null ) {
connection = factory.createConnection(connUser, connPassword);
} else {
connection = factory.createConnection();
}
session = connection.createSession(false, Session.AUTO_ACKNOWLEDGE);
producer = session.createProducer(sendQueue);
consumer = session.createConsumer(responseQueue, selector);
connection.start();
} catch( JMSException jmse ) {
throw new RemoteCommunicationException("Unable to setup a JMS connection.", jmse);
}
// Create msg
TextMessage textMsg;
if( command instanceof AuditCommand ) {
req = new JaxbCommandsRequest(command);
} else {
req = new JaxbCommandsRequest(deploymentId, command);
}
req.setProcessInstanceId(processInstanceId);
req.setUser(userName);
req.setVersion(VERSION);
Connection connection = null;
Session session = null;
JaxbCommandsResponse cmdResponse = null;
String corrId = UUID.randomUUID().toString();
String selector = "JMSCorrelationID = '" + corrId + "'";
try {
// setup
MessageProducer producer;
MessageConsumer consumer;
try {
if( password != null ) {
connection = factory.createConnection(connUser, connPassword);
} else {
connection = factory.createConnection();
}
session = connection.createSession(false, Session.AUTO_ACKNOWLEDGE);
producer = session.createProducer(sendQueue);
consumer = session.createConsumer(responseQueue, selector);
connection.start();
} catch( JMSException jmse ) {
throw new RemoteCommunicationException("Unable to setup a JMS connection.", jmse);
}
// Create msg
TextMessage textMsg;  try {
// serialize request
String xmlStr = serializationProvider.serialize(req);
try {
// serialize request
String xmlStr = serializationProvider.serialize(req);  textMsg = session.createTextMessage(xmlStr);
// set properties
// 1. corr id
textMsg.setJMSCorrelationID(corrId);
// 2. serialization info
textMsg.setIntProperty(SERIALIZATION_TYPE_PROPERTY_NAME, serializationType);
if( extraJaxbClasses != null && !extraJaxbClasses.isEmpty() ) {
if( deploymentId == null ) {
throw new MissingRequiredInfoException(
"Deserialization of parameter classes requires a deployment id, which has not been configured.");
}
textMsg.setStringProperty(DEPLOYMENT_ID_PROPERTY_NAME, deploymentId);
}
// 3. user/pass for task operations
boolean isTaskCommand = (command instanceof TaskCommand);
if( isTaskCommand ) {
if( userName == null ) {
throw new RemoteCommunicationException(
"A user name is required when sending task operation requests via JMS");
}
if( password == null ) {
throw new RemoteCommunicationException(
"A password is required when sending task operation requests via JMS");
}
textMsg.setStringProperty("username", userName);
textMsg.setStringProperty("password", password);
}
// 4. process instance id
} catch( JMSException jmse ) {
throw new RemoteCommunicationException("Unable to create and fill a JMS message.", jmse);
} catch( SerializationException se ) {
throw new RemoteCommunicationException("Unable to deserialze JMS message.", se.getCause());
}
// send
try {
producer.send(textMsg);
} catch( JMSException jmse ) {
throw new RemoteCommunicationException("Unable to send a JMS message.", jmse);
}
// receive
Message response;
try {
response = consumer.receive(timeoutInMillisecs);
} catch( JMSException jmse ) {
throw new RemoteCommunicationException("Unable to receive or retrieve the JMS response.", jmse);
}
if( response == null ) {
logger.warn("Response is empty");
return null;
}
// extract response
assert response != null: "Response is empty.";
try {
String xmlStr = ((TextMessage) response).getText();
cmdResponse = (JaxbCommandsResponse) serializationProvider.deserialize(xmlStr);
textMsg = session.createTextMessage(xmlStr);
// set properties
// 1. corr id
textMsg.setJMSCorrelationID(corrId);
// 2. serialization info
textMsg.setIntProperty(SERIALIZATION_TYPE_PROPERTY_NAME, serializationType);
if( extraJaxbClasses != null && !extraJaxbClasses.isEmpty() ) {
if( deploymentId == null ) {
throw new MissingRequiredInfoException(
"Deserialization of parameter classes requires a deployment id, which has not been configured.");
}
textMsg.setStringProperty(DEPLOYMENT_ID_PROPERTY_NAME, deploymentId);
}
// 3. user/pass for task operations
boolean isTaskCommand = (command instanceof TaskCommand);
if( isTaskCommand ) {
if( userName == null ) {
throw new RemoteCommunicationException(
"A user name is required when sending task operation requests via JMS");
}
if( password == null ) {
throw new RemoteCommunicationException(
"A password is required when sending task operation requests via JMS");
}
textMsg.setStringProperty("username", userName);
textMsg.setStringProperty("password", password);
}
// 4. process instance id
} catch( JMSException jmse ) {
throw new RemoteCommunicationException("Unable to create and fill a JMS message.", jmse);
} catch( SerializationException se ) {
throw new RemoteCommunicationException("Unable to deserialze JMS message.", se.getCause());
}
// send
try {
producer.send(textMsg);
} catch( JMSException jmse ) {
throw new RemoteCommunicationException("Unable to send a JMS message.", jmse);
}
// receive
Message response;
try {
response = consumer.receive(timeoutInMillisecs);
} catch( JMSException jmse ) {
throw new RemoteCommunicationException("Unable to receive or retrieve the JMS response.", jmse);
}
if( response == null ) {
logger.warn("Response is empty");
return null;
}
// extract response
assert response != null: "Response is empty.";
try {
String xmlStr = ((TextMessage) response).getText();
cmdResponse = (JaxbCommandsResponse) serializationProvider.deserialize(xmlStr);  } catch( JMSException jmse ) {
throw new RemoteCommunicationException("Unable to extract " + JaxbCommandsResponse.class.getSimpleName()
+ " instance from JMS response.", jmse);
} catch( SerializationException se ) {
throw new RemoteCommunicationException("Unable to extract " + JaxbCommandsResponse.class.getSimpleName()
+ " instance from JMS response.", se.getCause());
}
assert cmdResponse != null: "Jaxb Cmd Response was null!";
} finally {
if( connection != null ) {
try {
connection.close();
if( session != null ) {
session.close();
}
} catch( JMSException jmse ) {
logger.warn("Unable to close connection or session!", jmse);
}
}
}
String version = cmdResponse.getVersion();
if( version == null ) {
version = "pre-6.0.3";
}
if( !version.equals(VERSION) ) {
logger.info("Response received from server version [{}] while client is version [{}]! This may cause problems.",
version, VERSION);
}
List<JaxbCommandResponse<?>> responses = cmdResponse.getResponses();
if( responses.size() > 0 ) {
JaxbCommandResponse<?> response = responses.get(0);
if( response instanceof JaxbExceptionResponse ) {
JaxbExceptionResponse exceptionResponse = (JaxbExceptionResponse) response;
throw new RemoteApiException(exceptionResponse.getMessage());
} else {
return response.getResult();
}
} else {
assert responses.size() == 0: "There should only be 1 response, not " + responses.size() + ", returned by a command!";
return null;
}
}
}
} catch( JMSException jmse ) {
throw new RemoteCommunicationException("Unable to extract " + JaxbCommandsResponse.class.getSimpleName()
+ " instance from JMS response.", jmse);
} catch( SerializationException se ) {
throw new RemoteCommunicationException("Unable to extract " + JaxbCommandsResponse.class.getSimpleName()
+ " instance from JMS response.", se.getCause());
}
assert cmdResponse != null: "Jaxb Cmd Response was null!";
} finally {
if( connection != null ) {
try {
connection.close();
if( session != null ) {
session.close();
}
} catch( JMSException jmse ) {
logger.warn("Unable to close connection or session!", jmse);
}
}
}
String version = cmdResponse.getVersion();
if( version == null ) {
version = "pre-6.0.3";
}
if( !version.equals(VERSION) ) {
logger.info("Response received from server version [{}] while client is version [{}]! This may cause problems.",
version, VERSION);
}
List<JaxbCommandResponse<?>> responses = cmdResponse.getResponses();
if( responses.size() > 0 ) {
JaxbCommandResponse<?> response = responses.get(0);
if( response instanceof JaxbExceptionResponse ) {
JaxbExceptionResponse exceptionResponse = (JaxbExceptionResponse) response;
throw new RemoteApiException(exceptionResponse.getMessage());
} else {
return response.getResult();
}
} else {
assert responses.size() == 0: "There should only be 1 response, not " + responses.size() + ", returned by a command!";
return null;
}
}
}
| These classes can all be found in the |
| The |
| Note that the JMS message sent to the remote JMS API must be constructed as follows:
|
| The same serialization mechanism used to serialize the request message will be used to serialize the response message. |
Except for the Execute calls, all other REST calls described below can use either JAXB or JSON.
All REST calls, unless otherwise specified, use JAXB serialization.
When using JSON, make sure to add the JSON media type ("application/json") to the
ACCEPT header of your REST call.
Sometimes, users may wish to pass instances of their own classes as parameters to commands sent in a REST or Webservice request or JMS message. In order to do this, there are a number of requirements.
The user-defined class satisfy the following in order to be property serialized and deserialized:
It should be possible to serialize and deserialize the user-defined class using JAXB. For simple custom classes, this might be available out-of-the-box, but for more complex types, this might mean the classes need to be correctly annotated with JAXB annotations, including the following:
- The user-defined class must be annotated with a
javax.xml.bind.annotation.XmlRootElementannotation with a non-emptynamevalue - All fields or getter/setter methods must be annotated with a
javax.xml.bind.annotation.XmlElementorjavax.xml.bind.annotation.XmlAttributeannotations.
- The user-defined class must be annotated with a
Furthermore, the following usage of JAXB annotations is recommended:
- Annotate the user-defined class with a
javax.xml.bind.annotation.XmlAccessorTypeannotation specifying that fields should be used, (javax.xml.bind.annotation.XmlAccessType.FIELD). This also means that you should annotate the fields (instead of the getter or setter methods) with@XmlElementor@XmlAttributeannotations. - Fields annotated with
@XmlElementor@XmlAttributeannotations should also be annotated withjavax.xml.bind.annotation.XmlSchemaTypeannotations specifying the type of the field, even if the fields contain primitive values.
- Annotate the user-defined class with a
- Use objects to store primitive values. For example, use the
java.lang.Integerclass for storing an integer value, and not theintclass. This way it will always be obvious if the field is storing a value. - The user-defined class definition must implement a no-arg constructor.
- Any fields in the user-defined class must either be object primitives (such as a
LongorString) or otherwise be objects that satisfy the same requiremends in this list (correct usage of JAXB annotations and a no-arg constructor). - The class definition must be included in the deployment jar (kjar) of the deployment that the command (request) is sent to.
The sender must pass the deployment id in the header of the request. This property is necessary to able to load the proper classes from the deployment itself before deserializing the message on the server side.
- For REST requests, this means that the "Kie-Deployment-Id" header property must be set.
- For JMS messages, the
deploymentIdstring property on the JMS text message must be set.
Retrieving process variables
While submitting an instance of a user-defined class is possible via both the JMS and REST API, retrieving an instance of the process variable is only possible via the REST API.
When interacting with the Remote API, users may want to pass instances of their own classes as parameters to certain operations. As mThis will only be possible if the KJar for a deployment includes these classes.
REST calls that involve the TaskService (e.g. that start with /task..), often do not
contain any information about the associated deployment. In that case, an extra query parameter will have to be
added to the REST call so that the server can find the appropriate deployment with the class (definition) and
correctly deserialize the information passed with the call.
For these REST calls which do not contain the deployment id, you’ll need to add the following parameter:
Table 17.16. Deployment id query parameter
| Parameter name | Description |
|---|---|
|
deploymentId |
Value (must match the regex |
Some of the REST calls below return lists of information. The results of these operations can be paginated, which means that the lists can be split up and returned according to the parameters sent by the user.
For example, if the REST call parameters indicate that page 2 with page size 10 should be returned for the results, then results 10 to (and including) 19 will be returned.
The first page is always page 1 (as opposed to page "0").
Table 17.17. Pagination query parameter syntax
| Parameter name | Description |
|---|---|
|
page |
The page number requested. The default value is 1. |
|
p |
Synonym for the above |
|
pageSize |
The number of elements per page to return. The default value is 10. |
|
s |
Synonym for the above |
If both a "long" pagination parameter and its synonym are used, then only the value from the "long" variant is used. For
example, if the page is given with a value of 11 and the p parameter is given with a value of 37, then the value of the
page parameter, 11 , will be used and the p parameter will be ignored.
For the following operations, pagination is always used. See above for the default values used.
Table 17.18. REST operations using pagination
| REST call URL | Short Description |
|---|---|
|
|
Returns a list of |
|
|
Returns a list of |
|
|
Returns a list of |
|
|
Returns a list of |
|
|
Returns a list of |
|
|
Returns a list of |
|
|
Returns a list of |
|
|
Returns a list of |
|
|
Returns a list of |
|
|
Returns a list of |
|
|
Returns a list of |
|
|
Returns a list of |
|
|
Returns a list of |
|
|
Returns a |
|
|
Returns a |
If you’re triggering an operation with a REST API call that would normally (e.g. when interacting the same operation on a
local KieSession or TaskService instance) take an instance of a java.util.Map as one of its parameters,
you can submit key-value pairs to the operation to simulate this behaviour by passing a query parameter whose name starts
with map_.
Example 17.8. Query parameter examples
If you pass the query parameter map_kEy=vAlue in a REST call, then the
Map that’s passed to the actual underlying KieSession or TaskService
operation will contain this (String, String) key value pair: "kEy" ⇒ "vAlue".
You could pass this parameter like so:
http://localhost:8080/kie-wb/rest/runtime/myproject/process/wonka.factory.loompa.hire/start?map_kEy=vAlue
Map query parameters also use the object query parameter syntax described
below, so the following query parameter, map_total=5000 will be translated
into a key-value pair in a map where the key is the String "total" and the
value is a Long with the value of 5000. For example:
http://localhost:8080/kie-wb/rest/runtime/myproject/process/wonka.factory.oompa.chocolate/start?map_total=5000`
The following operations take query map parameters:
-
/runtime/{deploymentId}/process/{processDefId}/start -
/runtime/{deploymentId}/workitem/{processItemId}/complete -
/runtime/{deploymentId}/withvars/process/{processDefId}/start -
/task/{taskId}/complete -
/task/{taskId}/fail
While REST calls obviously only take strings as query parameters, using the following notation for query parameters will mean that the string is translated into a different type of object when the value of the string is used in the actual operation:
The remote API calls allow access to the underlying deployments, regardless of whether these
deployments use the Singleton, Per-Process-Instance or Per-Request strategies.
While there’s enough information in the URL in order to access deployments that use the
Singleton , or Per-Request strategies, that’s not always the case with the
Per-Process-Instance runtimes because the remote API operation will need the process instance id
in order to identify the deployment.
Therefore, for REST calls for which the URL does not contain the process instance id, you’ll need to add the following parameter:
Table 17.20. Per-Process-Instance runtime query parameter
| Parameter name | Description |
|---|---|
|
|
Value (must match the regex |
How to use the Eclipse-based tooling
The jBPM Eclipse plugin provides developers (and very technical users) with an environment to edit and test processes, and integrate it deeply with their applications. It provides the following features (on top of the Eclipse IDE):
Wizards for creation of
a jBPM project
a BPMN2 process
jBPM Perspective (showing the most commonly used views in a predefined layout)
Kie Navigator View for managing Kie Server installations and projects
The jBPM installer is capable of downloading and installing an Eclipse installation, including the Drools and jBPM Eclipse plugin (with a full jBPM runtime preconfigured) and the Eclipse BPMN2 Modeler.
Tip
Using the jBPM installer is definitely the recommended starting point for most users.
You can however also download and install the jBPM Eclipse Plugin manually. To do so, you need to:
Download Eclipse (Kepler recommended, but older versions like Indigo or Juno should also still work)
Start Eclipse
Select "Install New Software ..." from the Help menu. Add the Drools and jBPM update site http://downloads.jboss.org/jbpm/release/6.0.1.Final/updatesite/. You should see the plugins as shown below. Note that you can also download and unzip the Drools and jBPM update site to your local file system and use that as local update site instead.
Select the JBoss jBPM Core and JBoss Drools Core plugins and click "Next >". Click "Next >" again after reviewing your selecting, accept the terms of the license agreement and click "Finish" to download and install the plugins. If you get a warning about installing software that contains unsigned content, click OK. After successful installation, Eclipse should ask you to restart, click Yes.
The plugin should now be installed. To check, check if you can for example see the new jBPM Project wizard: under the "File" menu, select "New Project ..." and there you should be able to see "New jBPM Project" under the jBPM category.
Register a jBPM runtime to get started, see the section on jBPM runtimes in this chapter for more information.
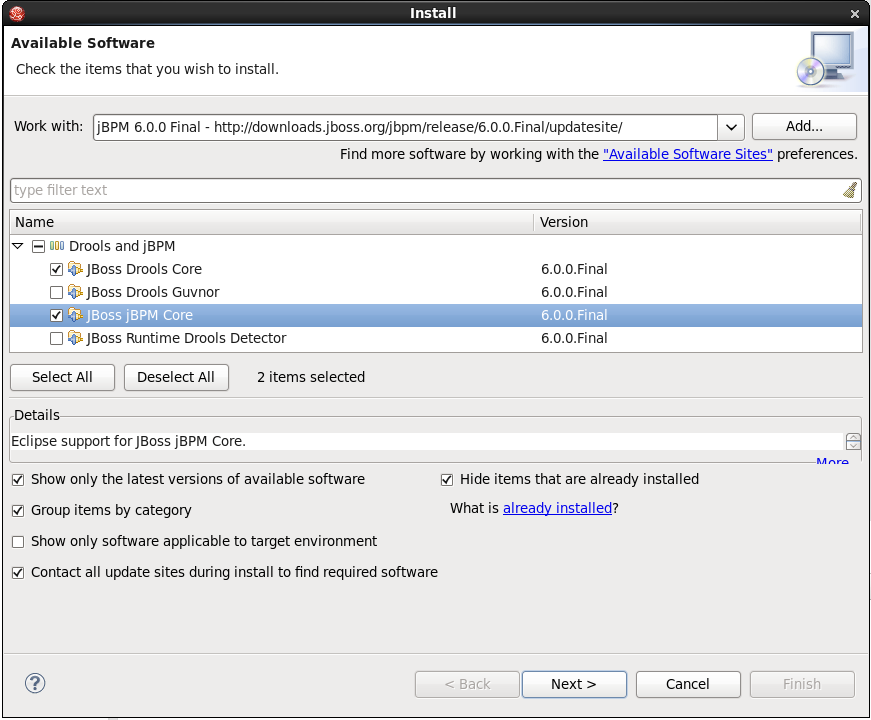
Note that, when doing a manual install, you still need to manually install the Eclipse BPMN 2.0 Modeler plugin as well. Check out the chapter on the Eclipse BPMN 2.0 Modeler on how to do that.
The aim of the new project wizard is to set up an executable sample project to start using processes immediately. This will set up a basic structure, the classpath, sample process and a test case to get you started. To create a new jBPM project, in the "File" menu select "New" and then "Project ..." and under the jBPM category, select "jBPM Project". A dialog as shown below should pop up.
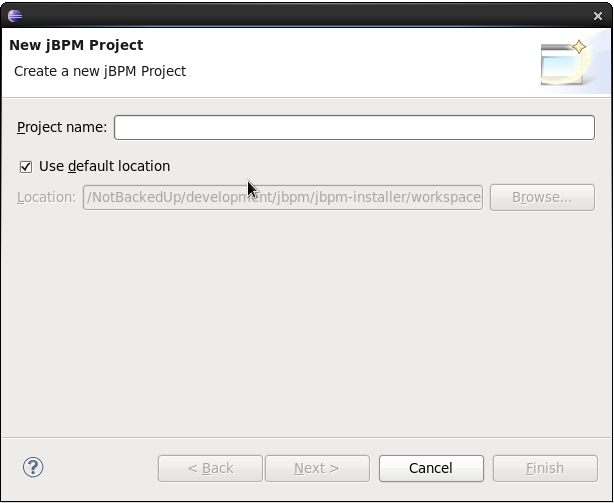
Fill in a name for your project and if necessary change the location where this project should be located (by default Eclipse will generate it inside your Eclipse workspace folder) and click "Next >".
Now you can optionally include a sample process in your project to get started. You can select to either use a simple "Hello World" process, a slightly more advanced process including human tasks and persistence or simply an empty project. You can also select to include a JUnit test class that you can use to test your process. These can serve as a starting point, and will give you something executable almost immediately, which you can then modify to your needs.
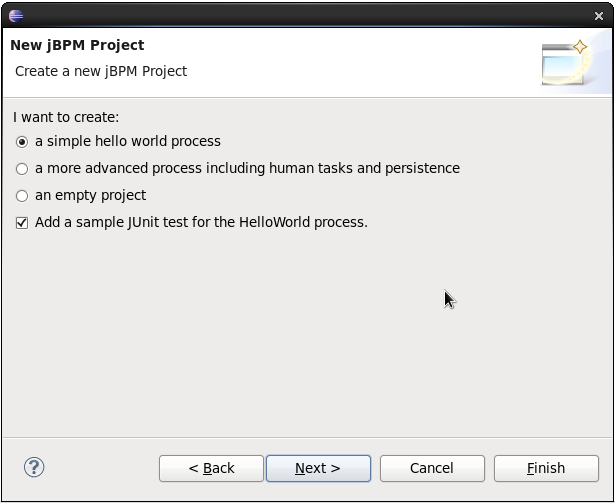
Finally, the last page in the wizard allows you select a jBPM runtime, as shown below. You can either use the default runtime (as configured for you workspace, in your workspace preferences), or you can select a specific runtime for this project. For more information about runtimes and how to create them, see the section on jBPM runtimes in this chapter.
You can also select which version of jBPM you want to generate sample code for. By default it will generate an example using the latest jBPM 6.x API, but you could also generate examples using the old jBPM 5.x API. Note that you yourself are responsible for making sure that the code you generate can be understood by the runtime (for example, if you create an example using jBPM6 API but select a jBPM5 runtime, your sample will not compile). Also note that, if you want to execute a jBPM5 example on jBPM6, you will need to have the knowledge-api JAR inside your jBPM6 runtime, as this is responsible for the backwards compatibility of the jBPM5 API in jBPM6.
When you selected the simple 'hello world' example, the result is shown below. Feel free to experiment with the plug-in at this point.
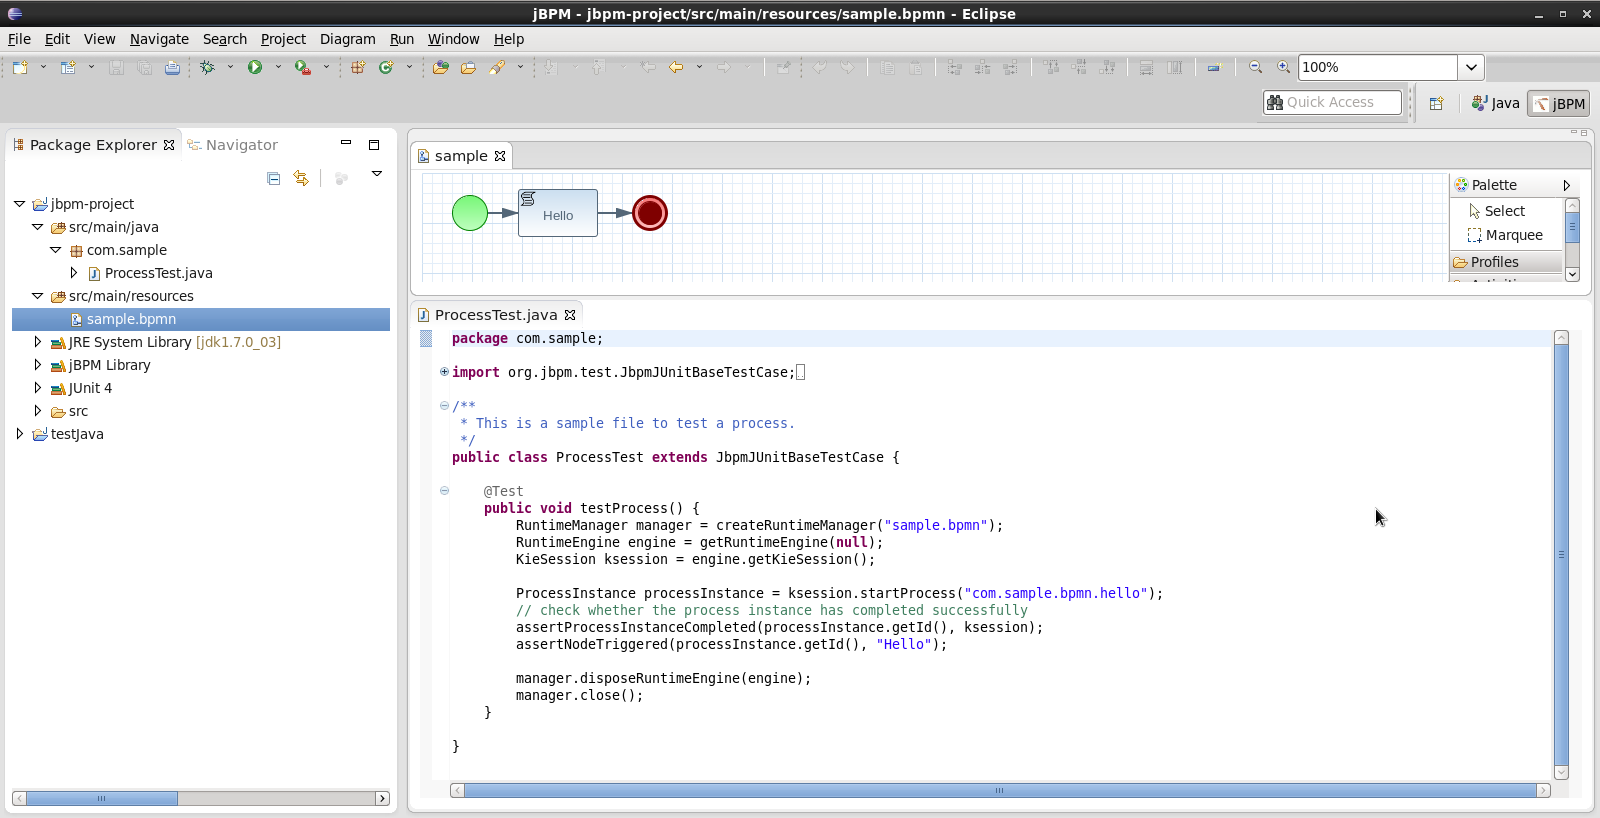
The newly created project contains an example process file (sample.bpmn) in the src/main/resources directory and an example Java file (ProcessTest.java) that can be used to test the process in a jBPM engine. You'll find this in the folder src/main/java, in the com.sample package. All the other JARs that are necessary during execution are also added to the classpath in a custom classpath container called jBPM Library.
You can also convert an existing Java project to a jBPM project by selecting the "Convert to jBPM Project" action. Right-click the project you want to convert and under the "Configure" category (at the bottom) select "Convert to jBPM Project". This will add the jBPM Library to your project's classpath.
You can create a new process simply as an empty text file with extension ".bpmn", or use the "New BPMN2 Process" wizard to do so. To create a new process, in the "File" menu select "New" and then "Other ..." and under the jBPM category, select "BPMN2 Process" and click "Next >". In the next dialog, you should select the folder where the process should be created (for example the src/main/resources folder of your project) and a name for the process. Clicking "Finish" should create your new process (by default it should only contain one start node) and open it so you can start editing it.
A jBPM runtime is a collection of JAR files that represent one specific release of the jBPM project JARs. To create a runtime, download the binary distribution of the version of jBPM you want to use and unzip on your local file system. You must then point the IDE to the release of your choice by selecting the folder where these JARs are located. If you want to create a new runtime based on the latest jBPM project JARs included in the plugin itself, you can also easily do that. You are required to specify a default jBPM runtime for your Eclipse workspace, but each individual project can override the default and select the appropriate runtime for that project specifically.
To define one or more jBPM runtimes using the Eclipse preferences view you open up your Preferences, by selecting the "Preferences" menu item in the menu "Window". A "Preferences" dialog should show all your settings. On the left side of this dialog, under the jBPM category, select "Installed jBPM runtimes". The panel on the right should then show the currently defined jBPM runtimes. For example, if you used the jBPM Installer, it should look like the figure below.
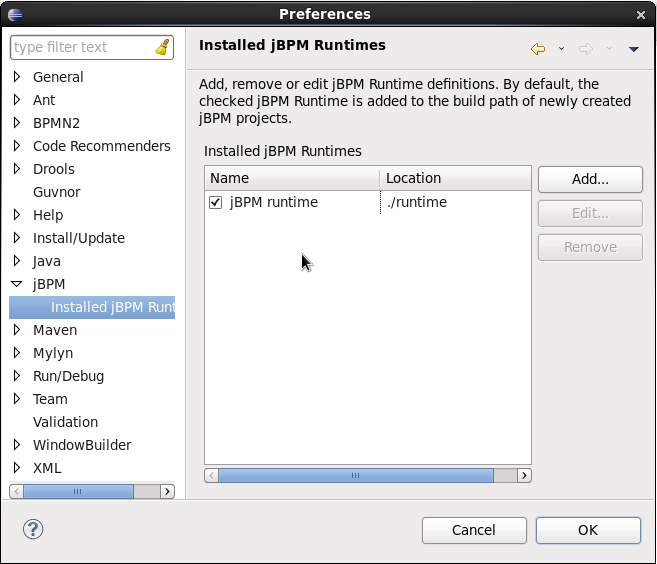
To define a new jBPM runtime, click on the "Add" button. A dialog such as the one shown below should pop up, asking for the name of your runtime and the location on your file system where it can be found.
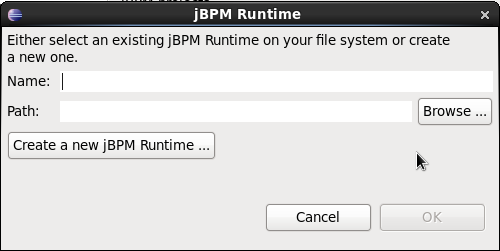
In general, you have two options:
If you simply want to use the default JAR files as included in the jBPM Eclipse plugin, you can create a new jBPM runtime automatically by clicking the "Create a new jBPM Runtime ..." button. A file browser will show up, asking you to select the folder on your file system where you want this runtime to be created. The plugin will then automatically copy all required dependencies to the specified folder. Make sure to select a unique name for the newly created runtime and click "OK" to register this runtime.
Tip
Note that creating a jBPM runtime from the default JAR files as included in the jBPM Eclipse plugin is only recommended to get you started the first time and for very simple use cases. The runtime that is created this way only contains the minimal set of JARs, and therefore doesn't support a significant set of features, including for example persistence. Make sure to create a full runtime (using the second approach) for real development.
If you want to use one specific release of the jBPM project, you should create a folder on your file system that contains all the necessary jBPM libraries and dependencies (for example by downloading the binary distribution and unzipping it on your local file system). Instead of creating a new jBPM runtime as explained above, give your runtime a unique name and click the "Browse ..." button to select the location of this folder containing all the required JARs. Click "OK" to register this runtime.
After clicking the OK button, the runtime should show up in your table of installed jBPM runtimes, as shown below. Click on the checkbox in front of one of the installed runtimes to make it the default jBPM runtime. The default jBPM runtime will be used as the runtime of all your new jBPM projects (in case you didn't select a project-specific runtime).
You can add as many jBPM runtimes as you need. Note that you will need to restart Eclipse if you changed the default runtime and you want to make sure that all the projects that are using the default runtime update their classpath accordingly.
Whenever you create a jBPM project (using the New jBPM Project wizard or by converting an existing Java project to a jBPM project), the plugin will automatically add all the required JARs to the classpath of your project.
When creating a new jBPM project, the plugin will automatically use the default Drools runtime for that project, unless you specify a project-specific one. You can do this in the final step of the New jBPM Project wizard, as shown below, by deselecting the "Use default Drools runtime" checkbox and selecting the appropriate runtime in the drop-down box. If you click the "Configure workspace settings ..." link, the workspace preferences showing the currently installed jBPM runtimes will be opened, so you can add new runtimes there.
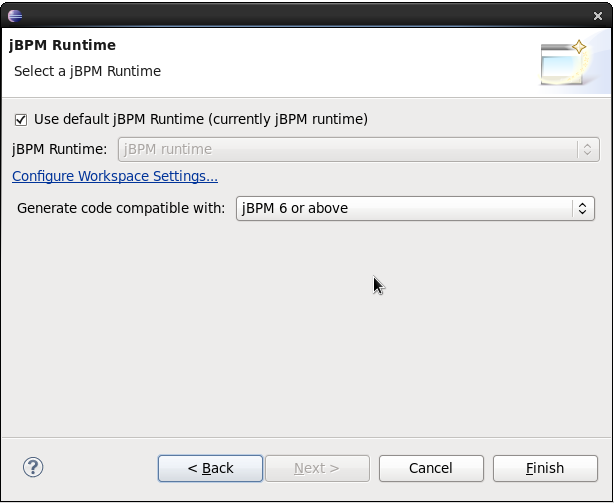
You can change the runtime of a jBPM project at any time by opening the project properties and selecting the jBPM category, as shown below. Mark the "Enable project specific settings" checkbox and select the appropriate runtime from the drop-down box. If you click the "Configure workspace settings ..." link, the workspace preferences showing the currently installed jBPM runtimes will be opened, so you can add new runtimes there. If you deselect the "Enable project specific settings" checkbox, it will use the default runtime as defined in your global workspace preferences.
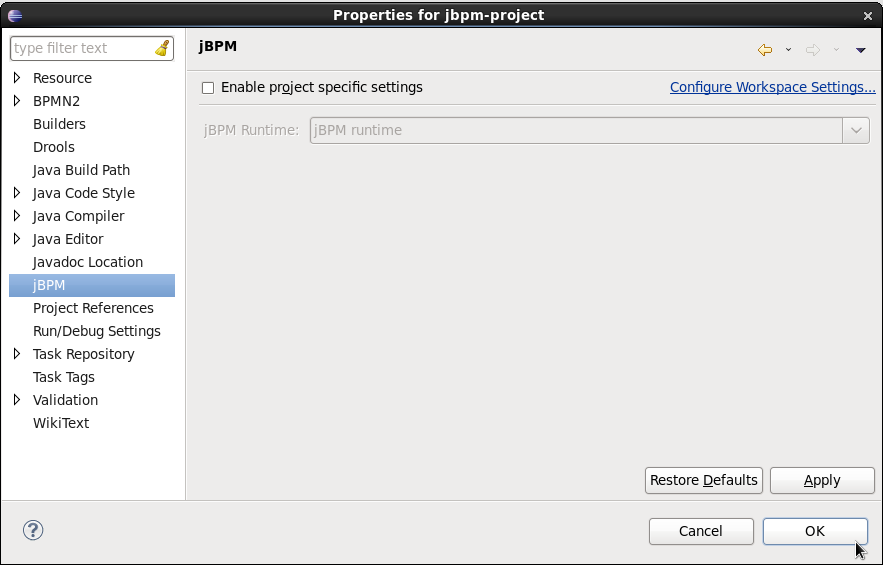
The aim of the new Maven project wizard is to set up an executable sample project to start using processes immediately (but not as normal Java project with all jBPM dependencies added using a jBPM library but by using Maven (and thus a pom.xml) to define your project's properties and dependencies. This wizard will set up a Maven project using a pom.xml, and include a sample process and Java class to execute it. To create a new jBPM Maven project, in the "File" menu select "New" and then "Project ..." and under the jBPM category, select "jBPM Project (Maven)". Give your project a name and click finish. The result should be as shown below.
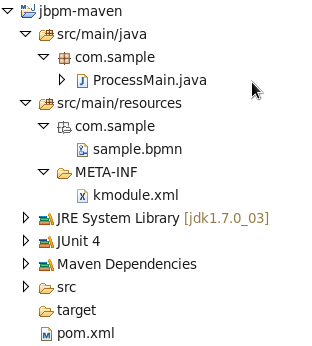
The pom.xml that is generated for your project contains the following:
<?xml version="1.0" encoding="UTF-8"?>
<project xmlns="http://maven.apache.org/POM/4.0.0"
         xmlns:xsi="http://www.w3.org/2001/XMLSchema-instance"
         xsi:schemaLocation="http://maven.apache.org/POM/4.0.0 http://maven.apache.org/xsd/maven-4.0.0.xsd">

  <modelVersion>4.0.0</modelVersion>

  <groupId>com.sample</groupId>
  <artifactId>jbpm-example</artifactId>
  <version>1.0.0-SNAPSHOT</version>

  <name>jBPM :: Sample Maven Project</name>
  <description>A sample jBPM Maven project</description>

  <properties>
    <version.org.jbpm>6.0.0.Final</version.org.jbpm>
  </properties>

  <repositories>
    <repository>
      <id>jboss-public-repository-group</id>
      <name>JBoss Public Repository Group</name>
      <url>http://repository.jboss.org/nexus/content/groups/public/</url>
      <releases>
        <enabled>true</enabled>
        <updatePolicy>never</updatePolicy>
      </releases>
      <snapshots>
        <enabled>true</enabled>
        <updatePolicy>daily</updatePolicy>
      </snapshots>
    </repository>
  </repositories>

  <dependencies>
    <dependency>
      <groupId>org.jbpm</groupId>
      <artifactId>jbpm-test</artifactId>
      <version>${version.org.jbpm}</version>
    </dependency>
  </dependencies>
</project>
In the properties section, you can specify which version of jBPM you would like to use (by default it uses 6.0.0.Final). It adds the JBoss Nexus Maven repository (where all the jBPM JARs and their dependencies are located) to your project and configures the dependencies.
Note
By default, only the jbpm-test JAR is specified as a dependency, as this has transitive dependencies to almost all of the core dependencies you will need. You are free to update the dependencies section however to include only the dependencies you need.
The project also contains a sample process, under src/main/resources, in the com.sample package, and a kmodule.xml configuration file under the META-INF folder. The kmodule.xml defines which resources (processes, rules, etc.) are to be loaded as part of your project. In this case, it is defining a kbase called "kbase" that will load all the resources in the com.sample folder:
<kmodule xmlns="http://www.drools.org/xsd/kmodule">
  <kbase name="kbase" packages="com.sample"/>
</kmodule>
Finally, it also contains a Java class that can be used to execute the sample process.
It will first create a kbase called "kbase" (by inspecting the kmodule.xml file and thus
loading the sample.bpmn process) and then use a RuntimeManager to
get access to a KieSession and TaskService. In this case, it is used
to start a process and then complete the tasks created by this process one by one.
The Drools Eclipse Plugin, which is bundled as part of the same Eclipse Update Site as the jBPM Eclipse Plugin, provides similar features for creating and editing business rules, and execute them using the Drools engine. This for example allows you to create and edit .drl files containing business rules. You can combine your processes and rules inside one project and execute them together on the same KieSession.
The Kie Navigator is a new view in the Eclipse Tooling as of version 6.3. The Kie Navigator View is accessed from the Eclipse Window->Show View main menu:
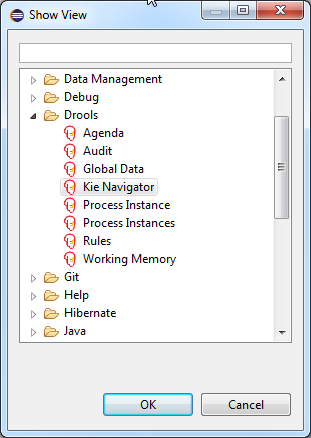
In order to use the Kie Navigator View, you must first define an Application Server in the WST Servers View. So, initially the Kie Navigator View will look like this:
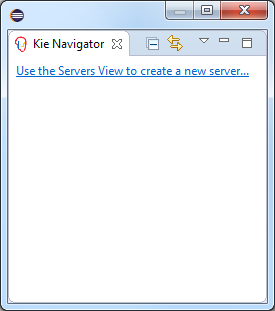
Clicking on the link “Use the Servers View to create a new server…” will open the Servers View where a new server definition can be created. Management of the server, including startup and shutdown is done from here. Note that Drools/jBPM requires certain additional JVM and server startup options, which must be added to the server startup configuration. Once a new server has been defined, open the server configuration page (double click on the newly created server entry) and the server Overview page is opened:
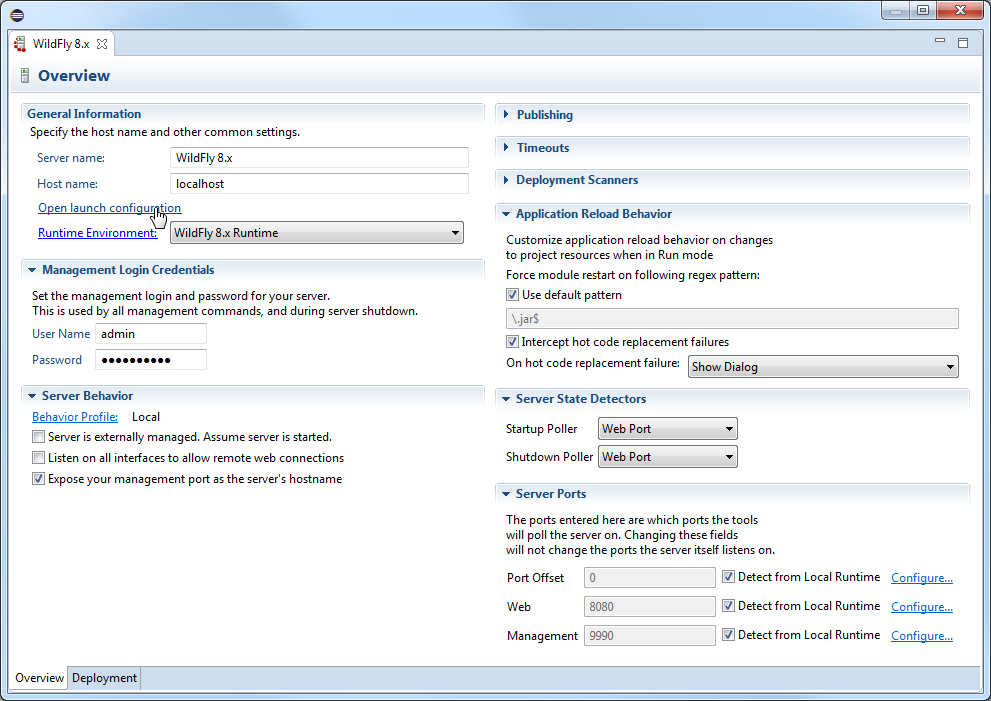
Clicking the “Open launch configuration” link opens the following dialog:
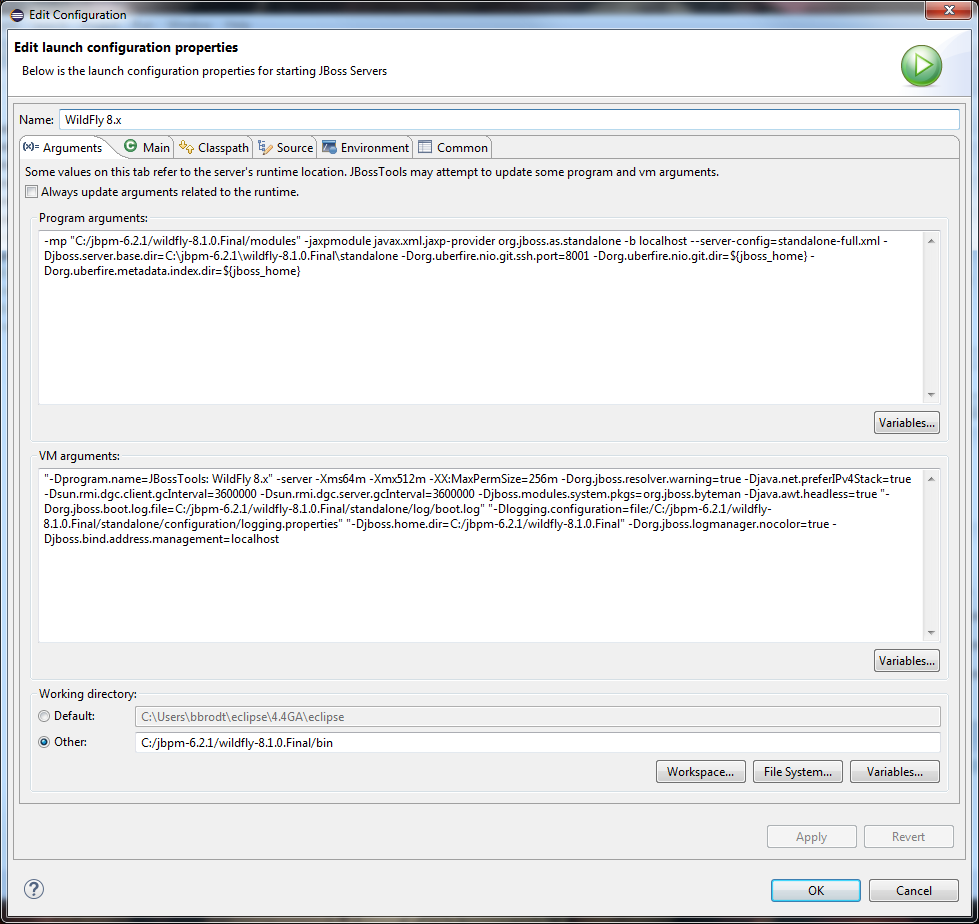
Here the user can enter the app server and JVM arguments to properly configure startup of the Kie web service. See the Drools/jBPM documentation for more information about these arguments.
Alternatively, the app server and Kie web service application can be started from a command-line using either the provided Ant demo scripts or any other custom startup script. Note that starting from the Servers view may cause the app server to be shut down when exiting Eclipse. A server can also be configured in Eclipse for external management (see the “Server Behavior” section in the above screenshot.)
Once the server has been configured and started, the Kie Navigator View will recognize the server and attempt to communicate with the Kie web service. The view now looks something like this:
In this screenshot several nodes have been expanded to show all possible situations. At the root of this view is the app server. The Kie Navigator View is designed to support multiple servers, but each must obviously be configured a different hostname and/or HTTP port number. This, for example, allows management of development, test and production servers.
Below the server level are Organizational Units and Repositories. Repositories that are not currently associated with an Organizational Unit appear directly under the Server root node. Below the Organizational Unit level are the associated Repositories, and below the Repositories are Projects contained in the Repository.
A Repository can either be available ( ) or unavailable (
 ) in the Workspace; a Repository is only available if it has been
“imported” (see Context Menus, below) from the Kie web server.
) in the Workspace; a Repository is only available if it has been
“imported” (see Context Menus, below) from the Kie web server.
Similarly, a Project can either be available ( ) or unavailable (
 ) depending on whether it has been “imported”. When a Project has been
imported, it behaves exactly the same as if it were being viewed in the Eclipse Project
Explorer or Navigator; that is, all of the same menu actions available in the Project
Explorer are also available in the Kie Navigator View. Also, all of the icon decorators and
labels on project folders are the same as in Project Explorer.
) depending on whether it has been “imported”. When a Project has been
imported, it behaves exactly the same as if it were being viewed in the Eclipse Project
Explorer or Navigator; that is, all of the same menu actions available in the Project
Explorer are also available in the Kie Navigator View. Also, all of the icon decorators and
labels on project folders are the same as in Project Explorer.
This section describes the context menu actions available for each type of node in the Kie Navigator tree.
Refresh - causes a refresh of the entire viewer by making REST calls to the server to update the tree hierarchy.
Create Organization… - creates a new Organizational Unit with information collected from the following dialog:
Properties - displays the Server Properties dialog (see the Property Pages section below.)
Add Repository... - adds a Repository that is not already associated with any other Organizational Unit to this Organization. A selection dialog containing a list of all unassociated Repositories will be displayed, from which you can select a Repository to add to the Organizational Unit.
Create Repository... - creates a new Repository with information collected from the following dialog:
Delete Organization... - deletes the selected Organizational Unit and dissociates any Repositories that were associated with this Organization. The Repositories are not deleted.
Properties - displays the Organizational Unit Properties dialog (see the Property Pages section below.)
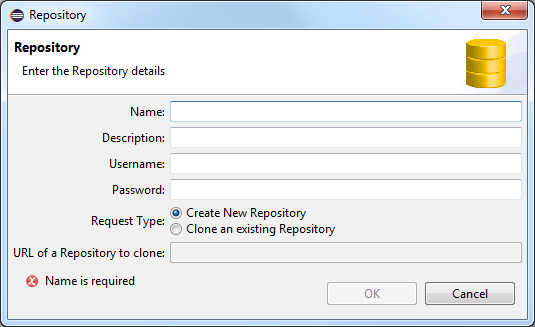

Import Repository... - clones the Repository and makes it available in the Git Repository View. This menu action is only available if the Repository has not already been cloned. All actions that affect the Repository (pull, commit, push, etc.) can then be performed from the Git Repository View.
Create Project... - creates a new Project with information collected from the following dialog:
If the “Import the Project” checkbox is checked, the Project will be created in the local Repository and then created, and opened in the local workspace. If unchecked, the Project is only created in the local Repository; it can then be “imported” at a later time. Note that the Project will become “visible” in the Kie web console immediately, but the Project contents will only be available on the server after Repository changes are committed and pushed upstream.
Remove Repository... - removes the selected Repository from its containing Organizational Unit. The user will be prompted to optionally delete the Repository from the server.
Show in Git Repository View - opens the Git Repositories View and highlights the selected Repository in that view if it is available.
Properties - displays the Repository Properties dialog (see the Property Pages section below.)
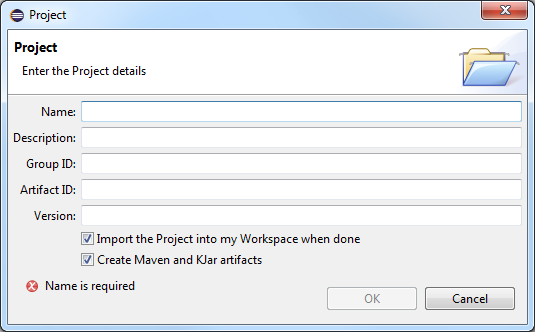
This context menu is only available if the Project has not yet been “Imported” that is, it has not yet been created in the local workspace.
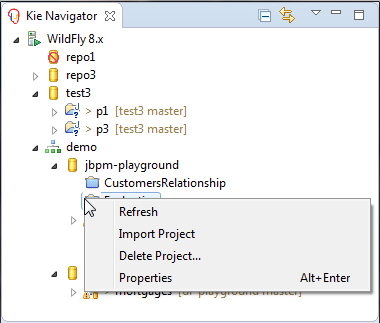
Import Project - creates a local workspace project that references the selected Project in the Repository. This makes the project available for use. If a project with the same name already exists in the workspace, the newly selected Project can not be imported.
Delete Project... - deletes the selected Project and removes it from its containing Repository.
Properties - displays the Project Properties dialog (see the Property Pages section below.)
Once a Project has been “Imported”, it becomes synchronized with the other Eclipse resource viewers as well (e.g. Project Explorer, Java Package Explorer, Eclipse Navigator, etc.) and any changes made in any of these viewers will also be reflected in the Kie Navigator View and vice-versa. The screenshot below illustrates this effect:
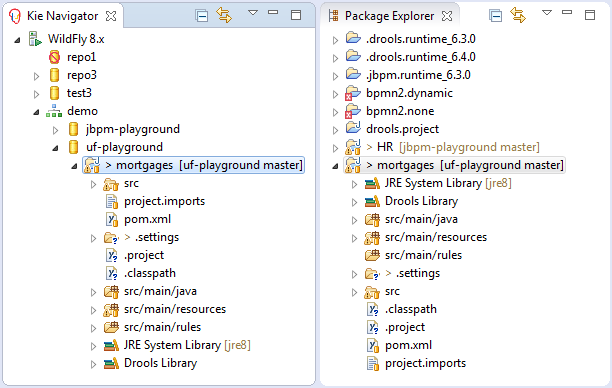
This section describes all of the property pages for each entry type in the Kie Navigator tree.
Server Name:the server name as defined in the WST Servers Viewer. This can not be changed.
Host Name:the name of the machine on which the app server is running. This is also managed from the WST Servers Viewer.
Username/Password:login credentials for the Kie web app. This is used to make REST calls to the Kie web service.
Trust connections to this Server:if a host is not known as a trusted site, the ssh protocol will prompt the user to verify that this is a trusted site. Setting this checkbox disables the prompt. The host can also be entered into the ssh configuration as a trusted site to avoid this problem.
KIE Application Name:the name of the Kie web app; the Kie Navigator will try the following application names by default to determine the app name:
kie-wb
kie-drools-wb
kie-jbpm-wb
business-central
drools-console
jbpm-console
jboss-brms
However, since the user has the option of renaming the Kie web app during installation, Kie Navigator may not be able to discover the actual name. This field is intended for the case where the web app name has been user-defined.
Use default Git Repository Path:when this checkbox is set, repositories will be cloned into the directory configured by Git (see the Eclipse User Preferences for Git.) When unchecked, the directory used in the following field will be used instead.
Git Repository Path:the directory to use for cloning repositories from this server; this field is only enabled if the “Use default Git Repository Path” checkbox is unset. Note that since it is possible to have many servers (e.g. production, test, etc.) with a similar organizational structure, the chances of repository name collisions are high. It is therefore suggested to use a different repository directory for each server. By default, the server name is appended to the default Git repository path, to give a unique directory name for each server.
These fields correspond to the Organizational Unit definition in the Kie web app. Note that only the Owner and Default Group ID can be changed.
These fields correspond to the Repository definition in the Kie web app. The property page also shows the remote and local Git repository locations. Note that only the description and login credentials can be changed.
These fields correspond to the Project definition in the Kie web app. Currently none of these fields can be updated on the web server due to REST API limitations.
If a Project has been imported, this property page is shown in the context of the Eclipse project properties, as shown here:
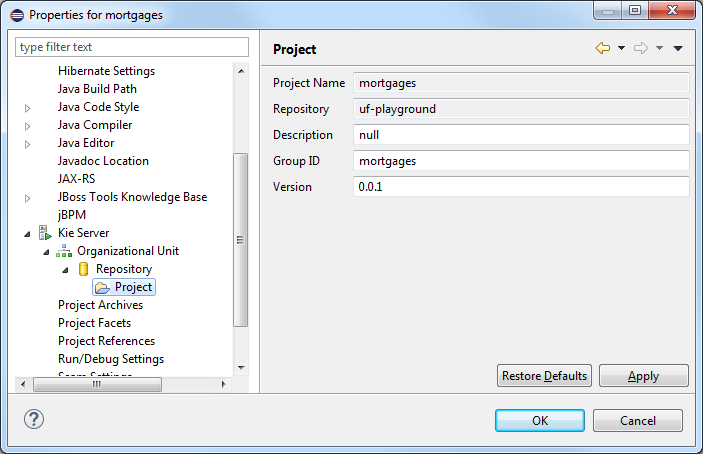
This section describes how to debug processes using the jBPM Eclipse plugin. This means that the current state of your running processes can be inspected and visualized during the execution. Note that we currently don't allow you to put breakpoints on the nodes within a process directly. You can however put breakpoints inside any Java code you might have (i.e. your application code that is invoking the engine or invoked by the engine, listeners, etc.) or inside rules (that could be evaluated in the context of a process). At these breakpoints, you can then inspect the internal state of all your process instances.
When debugging the application, you can use the following debug views to track the execution of the process:
The process instances view, showing all running process instances (and their state). When double-clicking a process instance, the process instance view visually shows the current state of that process instance at that point in time.
The audit view, showing the audit log (note that you should probably use a threaded file logger if you want to session to save the audit event to the file system on regular intervals, so the audit view can be update to show the latest state).
The global data view, showing the globals.
Other views related to rule execution like the working memory view (showing the contents (data) in the working memory related to rule execution), the agenda view (showing all activated rules), etc.
The process instances view shows the process instances currently running in the selected ksession. To be able to use the process instances view, first open the Process Instances view (Window - Show View - Other ... and under the Drools category select Process Instances and Process Instance). Tip: it might be useful to drag the Process Instance view to the Outline View and slightly enlarge it, as shown in the screenshot below, so you can see both the Process Instances and Process Instance views at the same time.
Next, use a (regular) Java breakpoint to stop your application at a specific point (for example right after starting a new process instance). In the Debug perspective, select the ksession you would like to inspect, and the Process Instances view should show the process instances that are currently active inside that ksession. For example, the screenshot below shows one running process instance (with id "1"). When double-clicking a process instance, the process instance viewer will graphically show the progress of that process instance. An example where the process instance is waiting for a human actor to perform "Task 1" is shown below.
Note
The process instances view shows the process instances currently active inside the selected ksession. Note that, when using persistence, process instances are not kept in memory inside the ksession, as they are stored in the database as soon as the command completes. Therefore, you will not be able to use the Process Instances view when using persistence. For example, when executing a JUnit test using the JbpmJUnitBaseTestCase, make sure to call "super(true, false);" in the constructor to create a runtime manager that is not using persistence.
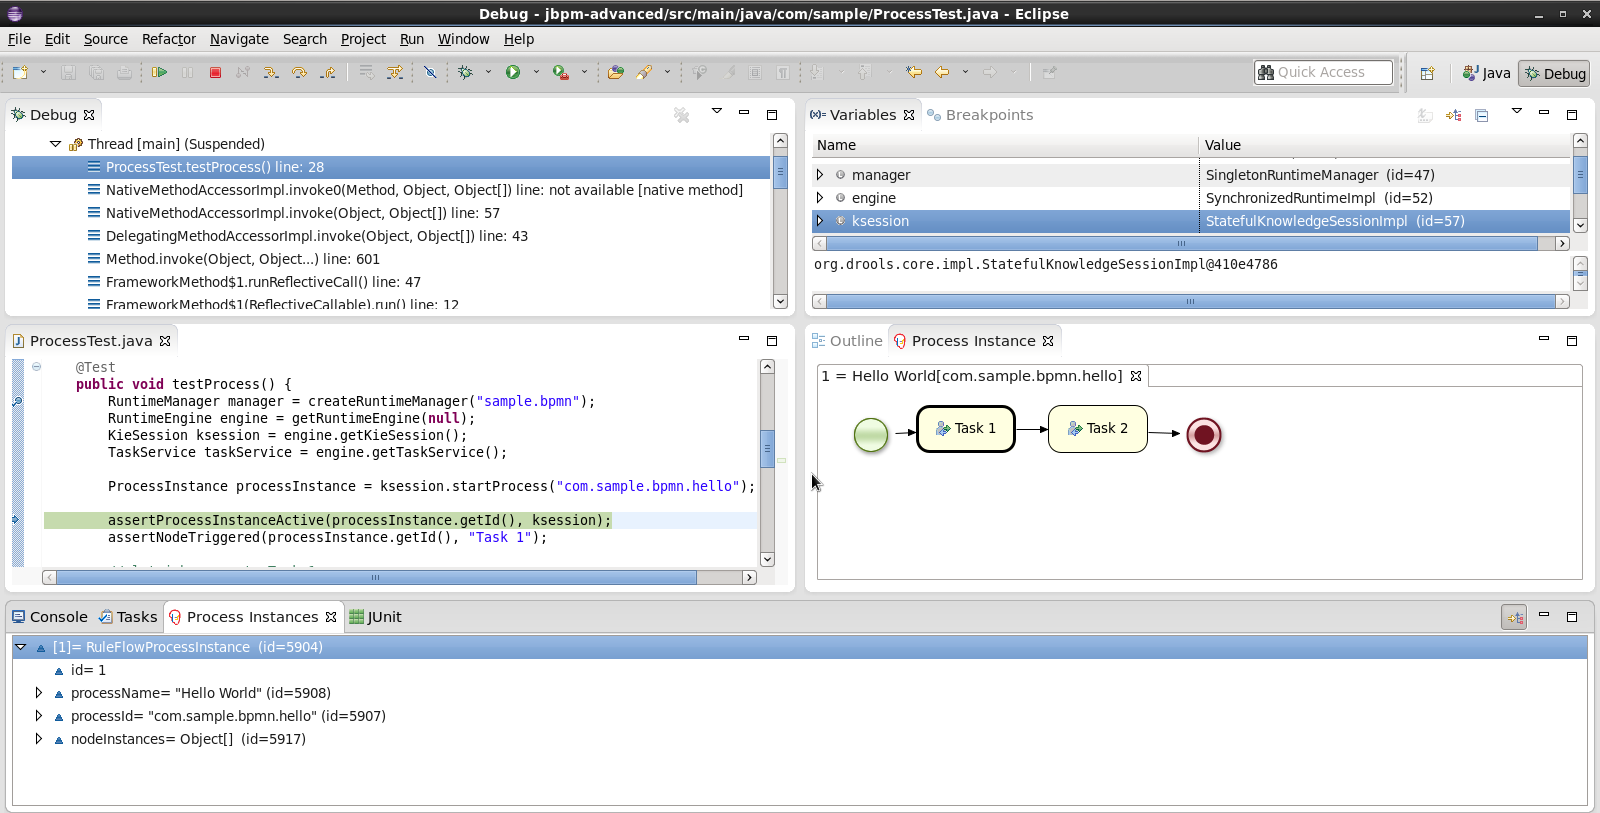
Tip
When you double-click a process instance in the process instances view and the process instance view complains that it cannot find the process, this means that the plugin wasn't able to find the process definition of the selected process instance in the cache of parsed process definitions. To solve this, simply change the process definition in question and save again (so it will be parsed) or rebuild the project that contains the process definition in question.
The audit view can be used to show the all the events inside an audit log in a tree-based manner. An audit log is an XML-based log file which contains a log of all the events that occurred while executing a specific ksession. To create a logger, use KieServices to create a new logger and attach it to a ksession. Be sure to close the logger after usage.
KieRuntimeLogger logger = KieServices.Factory.get().getLoggers()
    .newThreadedFileLogger(ksession, "mylogfile", 1000);
// do something with the ksession here
logger.close();
To be able to use the Audit View, first open it (Window - Show View - Other ... and under the Drools category select Audit). To open up a log file in the audit view, open the selected log file in the audit view (using the "Open Log" action in the top right corner), or simply drag and drop the log file from the Package Explorer or Navigator into the audit view. A tree-based view is generated based on the data inside the audit log. An event is shown as a subnode of another event if the child event is caused by (a direct consequence of) the parent event. An example is shown below.
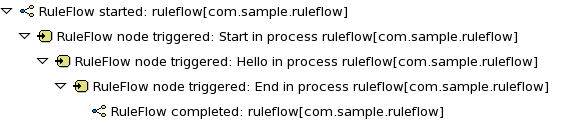
Tip
Note that the file-based logger will only save the events on close (or when a certain threshold is reached). If you want to make sure the events are saved on a regular interval (for example during debugging), make sure to use a threaded file logger, so the audit view can be update to show the latest state. When creating a threaded file logger, you can specify the interval after which events should be saved to the file (in milliseconds).
From Eclipse, you can synchronize your local workspace with one or more repositories that are managed inside the workbench application. This enables collaboration between developers using Eclipse and users of the web-based workbench (business analysts or end users for example). Synchronization between the workbench repositories and your local version of these projects is done using Git (a popular distributed source code version control system).
When creating and executing processes inside Eclipse, you are creating them on your local file system. You can however also import an existing repository from the Workbench, apply changes and push these changes back into the Workbench repositories. We are using existing Git tools for this. Note that this section will describe how to do this using the EGit tooling (Eclipse Tooling for Git which comes by default with most versions of Eclipse), but feel free to use your preferred Git tool instead.
Note
This section is not intended to explain what Git is, or how to use EGit, in detail. If you don't have any experience with Git and/or EGit, it might be recommended to read up on them first if necessary.
To import an existing repository from the workbench, you can use the EGit import wizard. In the File menu, select "Import ..." and in the Git category, select "Projects from Git" and click "Next >". This should open a new dialog where you should select the location of the repository you would like to import. Since we are connecting to a repository that is managed by the workbench application, select "URI" and click "Next >" once more.
Use the following URI to connect to your workbench repositories:
ssh://<hostname>:8001/<repository_name>For example, if you are running the workbench application on your local host (for example by using the jbpm-installer), and you want to import the jbpm-playground repo, use the following URI:
ssh://localhost:8001/jbpm-playgroundNote that you can change the port that is used by the server to provide ssh access
to the git repository if necessary, using the system property org.uberfire.nio.git.ssh.port
Fill in the URI of the repository you would like to import, as for example shown below, and click "Next >".
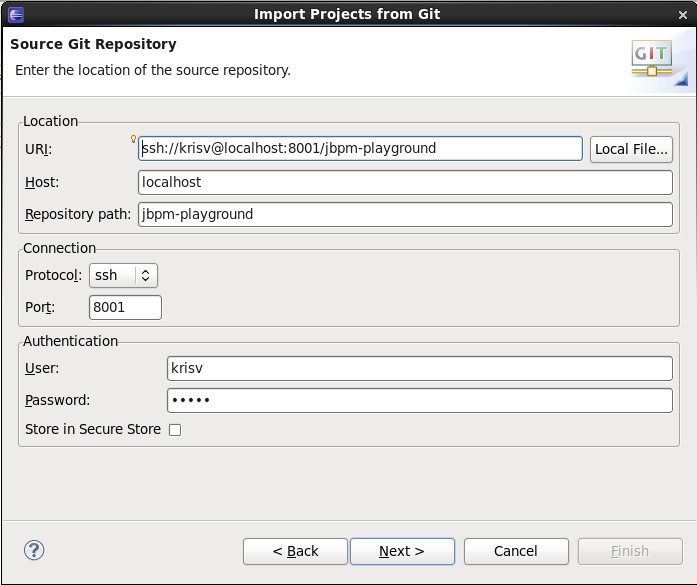
You will be asked to select which branch you would like to import. Select the master branch and click "Next >" again.
Finally, you need to specify where on your local file system you would like this repository to be created. Fill in the directory (you can use the Browse button to select the folder in question, and if necessary you can create a new folder there as well) and click "Next >". This will now download the repository to the folder you just selected.
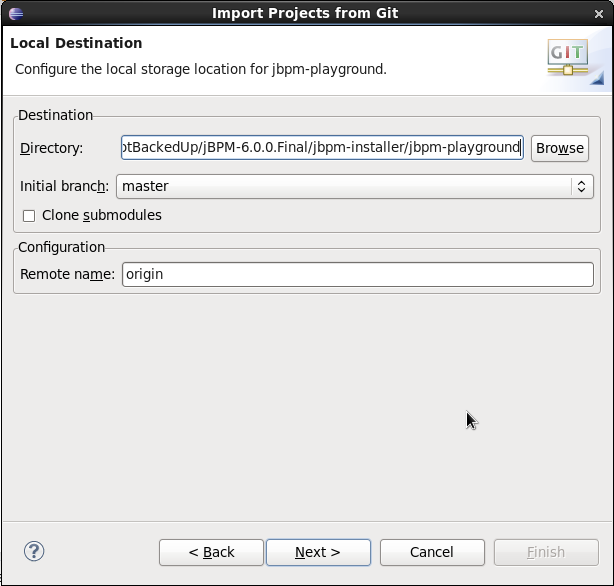
You still need to import the repository you just downloaded as a project in your Eclipse workspace. Select "Import as general project" and after clicking "Next >", give it a name and click "Finish". After doing so, your workspace should now contain your repository, and you should be able to browse, open and edit the various assets inside.
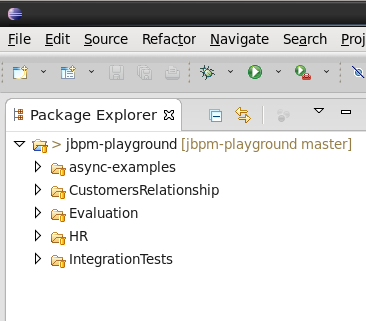
You can commit and push changes (you do locally) back to the workbench repositories. To commit changes, right-click on your repository project and select "Team -> Commit ...". A new dialog pops up, showing all the changes you have on your local file system. Select the files you want to commit (if you double-click them, you can get an overview of the changes you did for that file), provide an appropriate commit message and click "Commit".
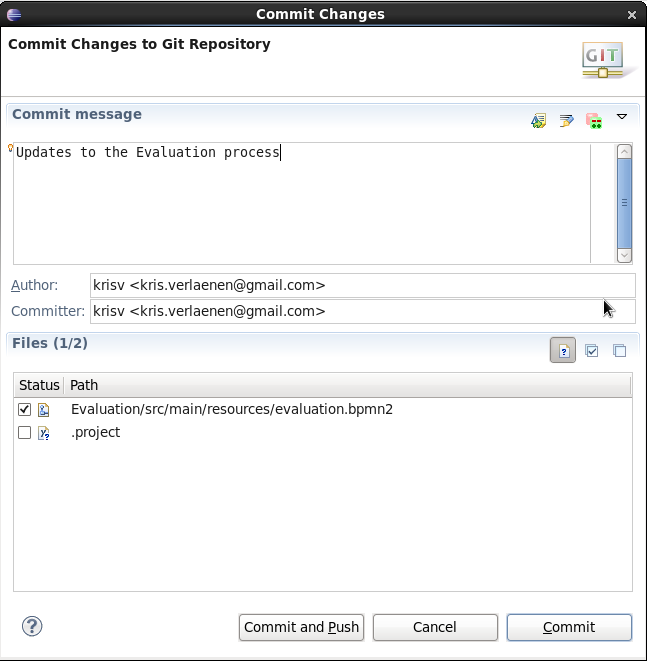
Once you've committed your change to your local git, you still need to push it to the workbench repository. Right-click your project again, and select "Team -> Push to Upstream".
Note
You are only allowed to push changes upstream if your local version includes all recent changes (otherwise you might be overriding someone else's changes). You might be forced to update (and if necessary resolve conflicts) before you are allowed to commit any changes.
To retrieve the latest changes from the workbench repository, right-click your repository project and select "Team -> Fetch from Upstream". This will fetch all changes from the workbench repository, but not yet apply them to your local version. Now right-click your project again and select "Team -> Merge ...". In the dialog that pops up next, you need to select "origin/master" branch (under Remote Tracking) to indicate that you want to merge in all changes from the original repository in the workbench, and click "Merge".
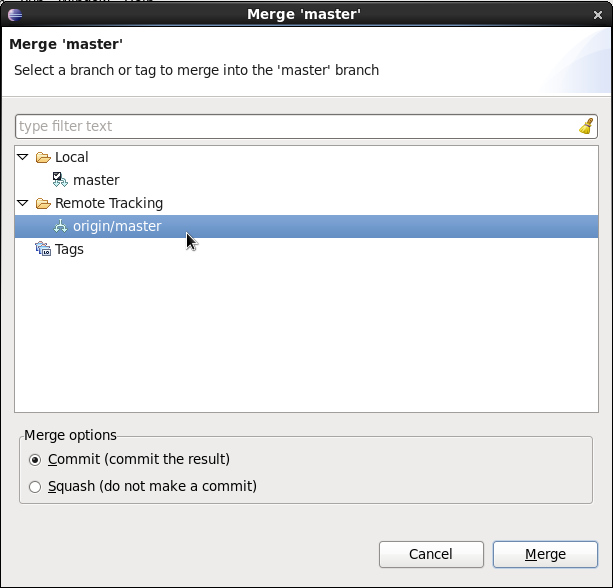
Note
It is possible that you have committed and/or conflicting changes in your local version, you might have to resolve these conflicts and commit the merge results before you will be able to complete the merge successfully. It is recommended to update regularly, before you start updating a file locally, to avoid merge conflicts being detected when trying to commit changes.
When you import a repository, it will download all the projects that are inside that repository. It is however useful to mount one specific project as a separate Java project in Eclipse. When you do this, Eclipse will be able to interpret the information in the project pom.xml file (that you created in the workbench), download and include any dependencies you specified, compile any Java classes you have in your project (that you for example created with the data modeler), etc.
To do so, right-click on one of the projects in your repository project and select "Import ..." and under the Maven category, select "Existing Maven Projects" (as shown below) and click Next.
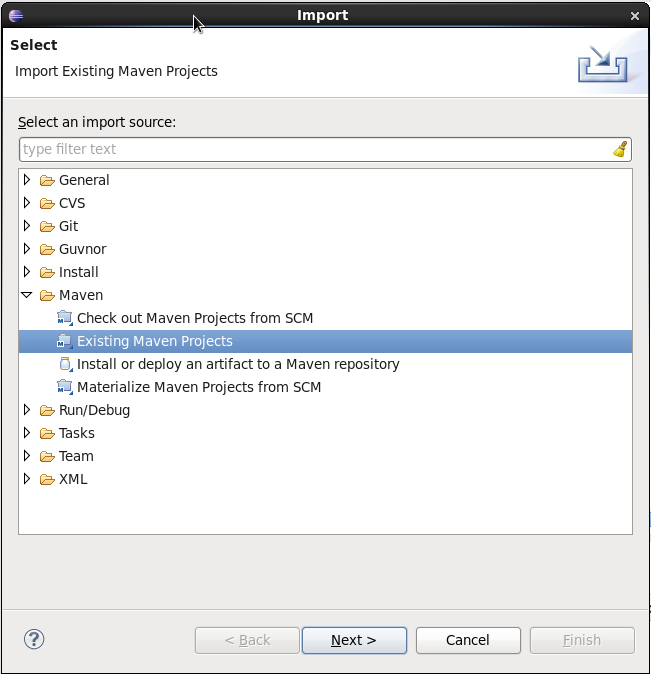
In the next page, you should see the pom.xml of the project you selected. Click Finish.
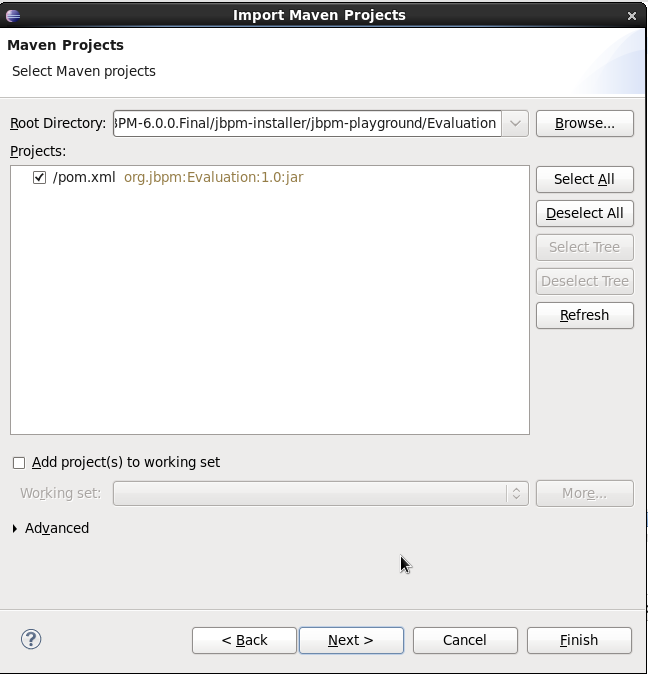
If your project requires some of the jBPM libraries to correctly compile and/or execute any Java classes in your project (for example if you have test classes in your project that start up a jBPM engine and execute some tests for your project, or if you are using the data modeler, which will add some annotations to the generated Java classes), you still need to add the jBPM libraries to the classpath of your project. To do so, simply convert your project into a jBPM project, which will add the jBPM library to your project's classpath. Right-click your project and select "Configure -> Convert to jBPM Project". Your project should now have a jBPM Library added to its classpath (it might be necessary to clean your project to pick up this change and recompile all Java classes).
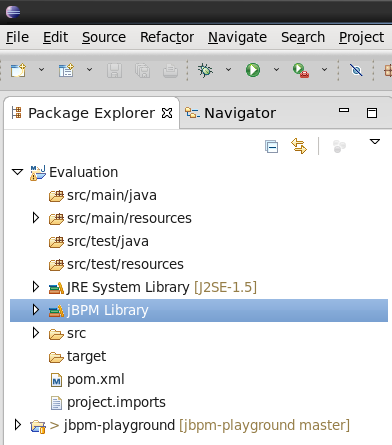
The Eclipse BPMN 2.0 Modeler allows you to specify business processes, choreographies, etc. using the BPMN 2.0 XML syntax (including BPMNDI for the graphical information). The editor itself is based on the Eclipse Graphiti framework and the Eclipse BPMN 2.0 EMF meta-model.
Features:
It supports almost all BPMN 2.0 process constructs and attributes (including lanes and pools, annotations and all the BPMN2 node types).
Added additional support for the few custom attributes that jBPM introduces using a special jBPM Target Runtime.
Allows you to configure which elements and attributes you want use when modeling processes (so we can limit the constructs for example to the subset currently supported by jBPM, which is a profile supported by default, or even more if you like).
The BPMN2 Modeler project is being developed at eclipse.org, sponsored by Red Hat/JBoss. Red Hat understands the benefits of developing software in the community, and therefore, the Eclipse BPMN 2.0 Modeler was developed not just for the jBPM project only, but it can be used in a much broader context and is fully spec compliant. jBPM-specific features are developed as part of a separate jBPM Target Runtime. We welcome other organizations in contributing to this modeler as well and (re)using the generic functionality and/or defining their own target runtime if necessary. Not only is this a good thing for the community, but it also leaves the path open for the jBPM suite to evolve as new features are requested by customers.
Many thanks go out to the people at Codehoop that did a great job in creating a first version of this editor.
The jBPM installer is capable of downloading and installing an Eclipse installation, including the Eclipse BPMN2 Modeler and the Drools and jBPM Eclipse plugin (with a full jBPM runtime preconfigured).
Tip
Using the jBPM installer is definitely the recommended starting point for most users.
You can however also download and install the jBPM Eclipse Plugin manually. To do so, you need Eclipse 3.6.2 (Helios) or newer. To install, startup Eclipse and install the Eclipse BPMN 2.0 Modeler from the following update site (from menu Help -> Install new software and then add the update site in question by clicking the Add button, filling in a name and the correct URL as shown below). It will automatically download all other dependencies as well (e.g. Graphiti etc.)
Eclipse 3.6 (Helios): http://download.eclipse.org/bpmn2-modeler/updates/helios
Eclipse 3.7 - 4.2.1 (Indigo - Juno): http://download.eclipse.org/bpmn2-modeler/updates/juno
Eclipse 4.3 (Kepler): http://download.eclipse.org/bpmn2-modeler/updates/kepler
The project is hosted at eclipse.org and open for anyone to contribute. The project home page can he found here:
http://http://eclipse.org/bpmn2-modeler/
Sources are available here (using Eclipse Public License v1.0):
https://git.eclipse.org/c/bpmn2-modeler/org.eclipse.bpmn2-modeler.git
A community forum for posting questions and exchanging ideas is also available here:
http://www.eclipse.org/forums/
A Bugzilla bug tracking system is available for reporting new bugs, or checking the status of existing bugs, here:
https://bugs.eclipse.org/bugs/buglist.cgi?product=BPMN2Modeler
The Eclipse BPMN 2.0 Modeler documentation is available at:
http://eclipse.org/bpmn2-modeler/documentation.php
It contains various screencasts but also a full user guide, describing all its features in detail:
http://eclipse.org/bpmn2-modeler/documentation/UserGuide-v1.0.pdf
Here are some screenshots of the editor in action.
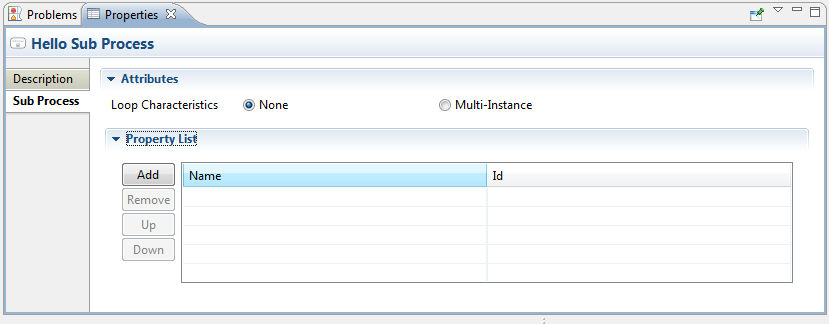
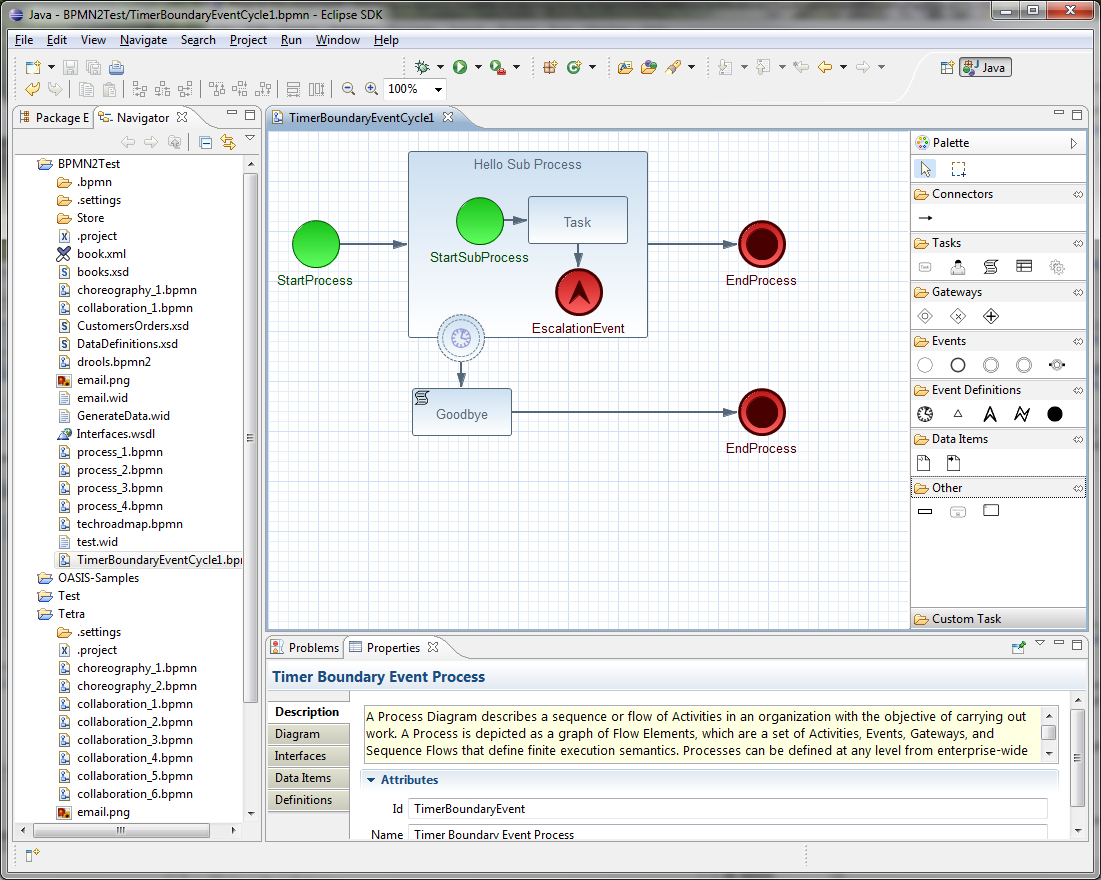
Integrating jBPM with other technologies, frameworks, etc.
Table of Contents
Apache Maven is used by jBPM for two main purposes:
as deployment units that gets installed into runtime environment for execution
as dependency management tool for building systems based on jBPM - embedding jBPM into application
Since version 6, jBPM provides simplified and complete deployment mechanism that is based entirely on Apache Maven artifacts. These artifacts also known as kjars are simple JAR files that include a descriptor for KIE system to produce KieBase and KieSession. Descriptor of the kjar is represented as XML file named kmodule.xml and it can be:
empty to apply all defaults
custom configuration of KieBase and KieSession
<kmodule xmlns:xsi="http://www.w3.org/2001/XMLSchema-instance" xmlns="http://www.drools.org/xsd/kmodule">
</kmodule>
Empty kmodule.xml that provides all defaults for the kjar:
single default KieBase that
contains all assets from all packages
event processing mode set to - cloud
equality behaviour set to - identity
declarative agenda is disabled
scope set to - ApplicationScope - valid for CDI integrations only
single default stateless KieSession that
is bound to above (single, default) KieBase
clock type is set to - real time
scope set to - ApplicationScope - valid for CDI integrations only
single default stateful KieSession that
is bound to above (single, default) KieBase
clock type is set to - real time
scope set to - ApplicationScope - valid for CDI integrations only
All these and more can be configured manually via kmodule.xml when defaults are not enough. The complete set of elements can be found in xsd schema of kmodule.xml.
<kmodule xmlns:xsi="http://www.w3.org/2001/XMLSchema-instance"
         xmlns="http://www.drools.org/xsd/kmodule">
  <kbase name="defaultKieBase" default="true" eventProcessingMode="cloud" equalsBehavior="identity" declarativeAgenda="disabled" scope="javax.enterprise.context.ApplicationScoped" packages="*">
    <ksession name="defaultKieSession" type="stateful" default="true" clockType="realtime" scope="javax.enterprise.context.ApplicationScoped">
        <workItemHandlers>
            <workItemHandler name="CustomTask" type="FQCN_OF_HANDLER" />
        </workItemHandlers>
        <listeners>
            <listener type="FQCN_OF_EVENT_LISTENER" />
        </listeners>
    </ksession>
    <ksession name="defaultStatelessKieSession" type="stateless" default="true" clockType="realtime" scope="javax.enterprise.context.ApplicationScoped"/>
  </kbase>
</kmodule>
As illustrated in the listing above the kmodule.xml provides flexible way of instructing the runtime engine on what should be configured and how. The example above does not present all available options, but these are the most common when working with processes.
Note
Important to note is that when using RuntimeManager, KieSession instances are created by the RuntimeManager instead of by KieContainer but kmodule.xml (or model in general) is aways used as a base of the construction process. KieBase although is always taken from KieContainer.
Kjars are represented same way as any other Maven artifact - by Group Artifact Version which is then represented as ReleaseId in KIE API. This the the only thing required to deploy kjar into runtime environment such as KIE Workbeanch.
When building systems that embed jBPM as workflow engine the simplest way is to configure all dependencies required by jBPM via Apache Maven. jBPM provides set of BOMs (Bill Of Material) to simplify what artifacts needs to be declared. Common way to start with integration of custom application and jBPM is to define dependency management:
  <properties>
    <project.build.sourceEncoding>UTF-8</project.build.sourceEncoding>
    <version.org.drools>6.0.0.Final</version.org.drools>
    <version.org.jbpm>6.0.0.Final</version.org.jbpm>
    <hibernate.version>4.2.0.Final</hibernate.version>
    <hibernate.core.version>4.2.0.Final</hibernate.core.version>
    <slf4j.version>1.6.4</slf4j.version>
    <jboss.javaee.version>1.0.0.Final</jboss.javaee.version>
    <logback.version>1.0.9</logback.version>
    <h2.version>1.3.161</h2.version>
    <btm.version>2.1.4</btm.version>
    <junit.version>4.8.1</junit.version>
  </properties>
  <dependencyManagement>
    <dependencies>
      <!-- define drools BOM -->
      <dependency>
        <groupId>org.drools</groupId>
        <artifactId>drools-bom</artifactId>
        <type>pom</type>
        <version>${version.org.drools}</version>
        <scope>import</scope>
      </dependency>
      <!-- define drools BOM -->
      <dependency>
        <groupId>org.jbpm</groupId>
        <artifactId>jbpm-bom</artifactId>
        <type>pom</type>
        <version>${version.org.jbpm}</version>
        <scope>import</scope>
      </dependency>
    </dependencies>
  </dependencyManagement>
Above should be declared in top level pom.xml so all modules that need to use KIE (drools and jBPM) API can access it.
Next, module(s) that would operate on KIE API should declare following dependencies:
    <dependency>
      <groupId>org.jbpm</groupId>
      <artifactId>jbpm-flow</artifactId>
    </dependency>
    <dependency>
      <groupId>org.jbpm</groupId>
      <artifactId>jbpm-flow-builder</artifactId>
    </dependency>
    <dependency>
      <groupId>org.jbpm</groupId>
      <artifactId>jbpm-bpmn2</artifactId>
    </dependency>
    <dependency>
      <groupId>org.jbpm</groupId>
      <artifactId>jbpm-persistence-jpa</artifactId>
    </dependency>
    <dependency>
      <groupId>org.jbpm</groupId>
      <artifactId>jbpm-human-task-core</artifactId>
    </dependency>
    <dependency>
      <groupId>org.jbpm</groupId>
      <artifactId>jbpm-runtime-manager</artifactId>
    </dependency>
    <dependency>
      <groupId>org.slf4j</groupId>
      <artifactId>slf4j-api</artifactId>
      <version>${slf4j.version}</version>
    </dependency>
Above are the main runtime dependencies, regardless of where the application is deployed (application server, servlet container, standalone app). A good practice is to test the workflow components to ensure they work properly before actual deployment and thus following test dependencies should be defined:
    <!-- test dependencies -->
    <dependency>
      <groupId>org.jbpm</groupId>
      <artifactId>jbpm-shared-services</artifactId>
      <classifier>btm</classifier>
      <scope>test</scope>
    </dependency>
    <dependency>
      <groupId>ch.qos.logback</groupId>
      <artifactId>logback-classic</artifactId>
      <version>${logback.version}</version>
      <scope>test</scope>
    </dependency>
    <dependency>
      <groupId>junit</groupId>
      <artifactId>junit</artifactId>
      <version>${junit.version}</version>
      <scope>test</scope>
    </dependency>
    <dependency>
      <groupId>org.hibernate</groupId>
      <artifactId>hibernate-entitymanager</artifactId>
      <version>${hibernate.version}</version>
      <scope>test</scope>
    </dependency>
    <dependency>
      <groupId>org.hibernate</groupId>
      <artifactId>hibernate-core</artifactId>
      <version>${hibernate.core.version}</version>
      <scope>test</scope>
    </dependency>
    <dependency>
      <groupId>com.h2database</groupId>
      <artifactId>h2</artifactId>
      <version>${h2.version}</version>
      <scope>test</scope>
    </dependency>
    <dependency>
      <groupId>org.codehaus.btm</groupId>
      <artifactId>btm</artifactId>
      <version>${btm.version}</version>
      <scope>test</scope>
    </dependency>
Last but not least, define the JBoss Maven repository for artifacts resolution:
  <repositories>
    <repository>
      <id>jboss-public-repository-group</id>
      <name>JBoss Public Repository Group</name>
      <url>http://repository.jboss.org/nexus/content/groups/public/</url>
      <releases>
        <updatePolicy>never</updatePolicy>
      </releases>
      <snapshots>
        <updatePolicy>daily</updatePolicy>
      </snapshots>
    </repository>
  </repositories>
That should allow to configure jBPM in your application and provide access to KIE API to operate on processes, rules, events.
jBPM 6 comes with out of the box integration with CDI (Contexts and Dependency Injection). Although most of the API can be used in CDI world there are some dedicated modules that are designed especially for CDI containers. The most important one is jbpm-services-cdi that provides cdi wrappers on top of jbpm services, these shall be used in most of the cases were CDI is available for jBPM integration. It provides following set of services:
DeploymentService
ProcessService
UserTaskService
RuntimeDataService
DefinitionService
These services are first class citizens for CDI world so they are available for injection in any other CDI bean.
Service responsible for deploying DeploymentUnits into runtime environment. By deploying given deployment unit becomes ready for execution and has RuntimeManager created for it.DeploymentService can next be used to retrieve:
RuntimeManager instance for given deployment id
DeployedUnit that represents complete deployment process for given deployment id
list of all deployed units known to the deployment service
Deployment service stores the deployed units by default in memory and thus in case of a need to restore all previously deployed units, component that uses deployment service needs to store that information itself. Common places for such a store are database, file system, repository of some sort, etc. Deployment service will fire CDI events on deployment and undeployment to allow application components to react real time to these events to be able to store deployments or remove them from the store when they are undeployed.
DeploymentEvent with qualifier @Deploy will be fired on deployment
DeploymentEvent with qualifier @Undeploy will be fired on undeployment
use CDI observer mechanism to get notification on above events. First to save deployments in the store of your choice:
    public void saveDeployment(@Observes @Deploy DeploymentEvent event) {
        // store deployed unit info for further needs
        DeployedUnit deployedUnit = event.getDeployedUnit();
    }
next to remove it when it was undeployed
    public void removeDeployment(@Observes @Undeploy DeploymentEvent event) {
        // remove deployment with id event.getDeploymentId()
    }
Note
Deployment service comes with deployment synchronization mechanism that allows to persist deployed units into data base (since version 6.2) that is by default enabled. See jbpm services section for more details.
Due to the fact that there might be several implementation of DeploymentService use of qualifiers is needed to instruct CDI container which one shall be injected. jBPM comes with two out of the box:
@Kjar - KmoduleDeploymentService that is tailored to work with KmoduleDeploymentUnits that are small descriptor on top of a kjar - recommended to use in most of the cases
@Vfs - VFSDeploymentDService that allows to deploy assets directly from VFS (Virtual File System) that is provided by UberFire framework. Due to that fact VFSDeploymentService and VFSDeploymentUnit are not bundled with jbpm core modules but with jbpm-console-ng modules.
The general practice is that every implementation of DeploymentService should come with dedicated implementation of DeploymentUnit as these two provided out of the box.
FormProviderService provides access to form representations usually displayed on UI for both process forms and user task forms. It is built on concept of isolated FormProviders that can provide different capabilities and be backed by different technologies. FormProvider interface describes contract for the implementations
public interface FormProvider {

    int getPriority();

    String render(String name, ProcessDesc process, Map<String, Object> renderContext);

    String render(String name, Task task, ProcessDesc process, Map<String, Object> renderContext);
}
Implementations of FormProvider interface should always define priority as this is the main driver for the FormProviderService to ask for the content of the form of a given provider. FormProviderService will collect all available providers and iterate over them asking for the form content (rendered) in their priority order. The lower the number the higher priority it gets during evaluation, e.g. provider with priority 5 will be evaluated before provider with priority 10. FormProviderService will iterate over available providers as long as one delivers the content. In the worse case scenario, simple text based forms will be returned.
jBPM comes with following FormProviders out of the box:
Fremarker based implementation to support jbpm version 5 process and task forms - priority 3
Default forms provider, considered last resort if none of the other providers deliver content this one will always provide simplest possible forms - lowest priority (1000)
when form modeler is used there is additional FormProvider available to deliver forms modeled in that tool - priority 2
RuntimeDataService provides access to actual data that is availabe on runtime such as
available processes to be executed - with various filters
active process instances - with various filters
process instance history
process instance variables
active and completed nodes of process instance
Default implementation of RuntimeDataService is observing deployment events and index all deployed processes to expose them to the calling components. So whatever gets deployed RuntimeDataService will be aware of that.
Service that provides access to process details stored as part of BPMN2 XML.
Note
Before using any method that provides information, buildProcessDefinition must be invoked to populate repository with process information taken from BPMN2 content.
BPMN2DataService provides access to following data:
overall description of process for given process definition
collection of all user tasks found in the process definition
information about defined inputs for user task node
information about defined outputs for user task node
ids of reusable processes (call activity) defined within given process definition
information about process variables defined within given process definition
information about all organizational entities (users and groups) included in the process definition. Depending on the actual process definition the returned values for users and groups can contain
actual user or group name
process variable that will be used to get actual user or group name on runtime e.g. #{manager}
To make use of jbpm-services-cdi in your system you'll need to provide some beans for the out of the box services to satisfy all dependencies they have. There are several beans that depends on actual scenario
entity manager and entity manager factory
user group callback for human tasks
identity provider to pass authenticated user information to the services
When running in JEE environment like an JBoss Application Server following producer bean should satisfy all requirements of the jbpm-services-cdi
public class EnvironmentProducer {

    @PersistenceUnit(unitName = "org.jbpm.domain")
    private EntityManagerFactory emf;

    @Inject
    @Selectable
    private UserGroupInfoProducer userGroupInfoProducer;

    @Inject
    @Kjar
    private DeploymentService deploymentService;

    @Produces
    public EntityManagerFactory getEntityManagerFactory() {
        return this.emf;
    }

    @Produces
    public org.kie.api.task.UserGroupCallback produceSelectedUserGroupCalback() {
        return userGroupInfoProducer.produceCallback();
    }

    @Produces
    public UserInfo produceUserInfo() {
        return userGroupInfoProducer.produceUserInfo();
    }

    @Produces
    @Named("Logs")
    public TaskLifeCycleEventListener produceTaskAuditListener() {
        return new JPATaskLifeCycleEventListener(true);
    }

    @Produces
    public DeploymentService getDeploymentService() {
        return this.deploymentService;
    }

    @Produces
    public IdentityProvider produceIdentityProvider {
        return new IdentityProvider() {
             // implement IdentityProvider
        };
    }
}
Then beans.xml for the application should enable proper alternative for user group callback (that will be taken based on @Selectable qualifier)
<beans xmlns="http://java.sun.com/xml/ns/javaee" xmlns:xsi="http://www.w3.org/2001/XMLSchema-instance"
  xsi:schemaLocation="http://java.sun.com/xml/ns/javaee http://docs.jboss.org/cdi/beans_1_0.xsd">

  <alternatives>
    <class>org.jbpm.kie.services.cdi.producer.JAASUserGroupInfoProducer</class>
  </alternatives>

</beans>
Note
org.jbpm.kie.services.cdi.producer.JAASUserGroupInfoProducer is just an example here which usually is the good fit for JBoss Application Server to reuse security settings on application server regardless of what it actually is (LDAP, DB, etc). Check Human Task section for more alternatives for UserGroupCallback.
Optionally there can be several other producers provided to deliver:
WorkItemHandlers
Process, Agenda, WorkingMemory event listeners
These components can be provided by implementing following interfaces
/**
 * Allows to provide custom implementations to deliver WorkItem name and WorkItemHandler instance pairs
 * for the runtime.
 * <br/>
 * It will be invoked by RegisterableItemsFactory implementation (especially InjectableRegisterableItemsFactory
 * in CDI world) for every KieSession. Recommendation is to always produce new instances to avoid unexpected
 * results.
 *
 */
public interface WorkItemHandlerProducer {

    /**
     * Returns map of (key = work item name, value work item handler instance) of work items
     * to be registered on KieSession
     * <br/>
     * Parameters that might be given are as follows:
     * <ul>
     *  <li>ksession</li>
     *  <li>taskService</li>
     *  <li>runtimeManager</li>
     * </ul>
     *
     * @param identifier - identifier of the owner - usually RuntimeManager that allows the producer to filter out
     * and provide valid instances for given owner
     * @param params - owner might provide some parameters, usually KieSession, TaskService, RuntimeManager instances
     * @return map of work item handler instances (recommendation is to always return new instances when this method is invoked)
     */
    Map<String, WorkItemHandler> getWorkItemHandlers(String identifier, Map<String, Object> params);
}
and
/**
 * Allows do define custom producers for know EventListeners. Intention of this is that there might be several
 * implementations that might provide different listener instance based on the context they are executed in.
 * <br/>
 * It will be invoked by RegisterableItemsFactory implementation (especially InjectableRegisterableItemsFactory
 * in CDI world) for every KieSession. Recommendation is to always produce new instances to avoid unexpected
 * results.
 *
 * @param <T> type of the event listener - ProcessEventListener, AgendaEventListener, WorkingMemoryEventListener
 */
public interface EventListenerProducer<T> {

    /**
     * Returns list of instances for given (T) type of listeners
     * <br/>
     * Parameters that might be given are as follows:
     * <ul>
     *  <li>ksession</li>
     *  <li>taskService</li>
     *  <li>runtimeManager</li>
     * </ul>
     * @param identifier - identifier of the owner - usually RuntimeManager that allows the producer to filter out
     * and provide valid instances for given owner
     * @param params - owner might provide some parameters, usually KieSession, TaskService, RuntimeManager instances
     * @return list of listener instances (recommendation is to always return new instances when this method is invoked)
     */
    List<T> getEventListeners(String identifier, Map<String, Object>  params);
}
Beans implementing these two interfaces will be collected on runtime and consulted when building KieSession by RuntimeManager. See RuntimeManager section for more details on this.
A complete runnable example of application built with CDI can be found here.
Note
Even though RuntimeManager can be directly injected, it's recommended to utilize jbpm services when frameworks like CDI, ejb or Spring is used. jBPM services bring in significant amount of features that encapsulate best practices when using RuntimeManager.
RuntimeManager itself can be injected as CDI bean into any other CDI bean within the application. It has then requirement to get RungimeEnvironment properly produces to allow RuntimeManager to be correctly initialized. RuntimeManager comes with three predefined strategies and each of them gets CDI qualifier so it can be referenced:
@Singleton
@PerRequest
@PerProcessInstance
Producer that was defined in Configuration section should be now enhanced with producer methods to provide RuntimeEnvironment
public class EnvironmentProducer {

    //add same producers as for services

    @Produces
    @Singleton
    @PerRequest
    @PerProcessInstance
    public RuntimeEnvironment produceEnvironment(EntityManagerFactory emf) {

        RuntimeEnvironment environment = RuntimeEnvironmentBuilder.Factory.get()
                .newDefaultBuilder()
                .entityManagerFactory(emf)
                .userGroupCallback(getUserGroupCallback())
                .registerableItemsFactory(InjectableRegisterableItemsFactory.getFactory(beanManager, null))
                .addAsset(ResourceFactory.newClassPathResource("BPMN2-ScriptTask.bpmn2"), ResourceType.BPMN2)
                .addAsset(ResourceFactory.newClassPathResource("BPMN2-UserTask.bpmn2"), ResourceType.BPMN2)
                .get();
        return environment;
    }
}
In this example single producer method is capable of providing RuntimeEnvironment for all strategies of RuntimeManager by specifying all qualifiers on the method level.
Once complete producer is available, RuntimeManager can be injected into application's CDi bean
public class ProcessEngine {

    @Inject
    @Singleton
    private RuntimeManager singletonManager;

    public void startProcess() {

        RuntimeEngine runtime = singletonManager.getRuntimeEngine(EmptyContext.get());
        KieSession ksession = runtime.getKieSession();

        ProcessInstance processInstance = ksession.startProcess("UserTask");

        singletonManager.disposeRuntimeEngine(runtime);
    }
}
That's all what needs to be configured to make use of CDI power with jBPM.
Note
An obvious limitation of injecting directly RuntimeManager via CDI is that there might be only one RuntimeManager in the application. That in some case can be desired and that's why there is such option. In general recommended approach is to make use of DeploymentService whenever there is a need to have many RuntimeManagers active within application.
As an alternative to DeploymentService, RuntimeManagerFactory can be injected and then RuntimeManager instance can be created manually by the application. In such case EnvironmentProducer stays same as for DeploymentService and following is an example of simple ProcessEngine bean
public class ProcessEngine {

    @Inject
    private RuntimeManagerFactory managerFactory;

    @Inject
    private EntityManagerFactory emf;

    @Inject
    private BeanManager beanManager;

    public void startProcess() {
        RuntimeEnvironment environment = RuntimeEnvironmentBuilder.Factory.get()
                .newDefaultBuilder()
                .entityManagerFactory(emf)
                .addAsset(ResourceFactory.newClassPathResource("BPMN2-ScriptTask.bpmn2"), ResourceType.BPMN2)
                .addAsset(ResourceFactory.newClassPathResource("BPMN2-UserTask.bpmn2"), ResourceType.BPMN2)
                .registerableItemsFactory(InjectableRegisterableItemsFactory.getFactory(beanManager, null))
                .get();

        RuntimeManager manager = managerFactory.newSingletonRuntimeManager(environment);
        RuntimeEngine runtime = manager.getRuntimeEngine(EmptyContext.get());
        KieSession ksession = runtime.getKieSession();

        ProcessInstance processInstance = ksession.startProcess("UserTask");

        manager.disposeRuntimeEngine(runtime);
        manager.close();
    }

}jBPM can be configured in many ways with Spring though the two most frequenlty used approaches are:
direct use of runtime manager API
use of jbpm services
While both approaches are tested and valid, which one to chose is a matter of the system functionaltiy. Before selecting one of the approache the most important question to ask is:
Will my system run multiple runtime managers at the same time?
If the asnwer to this question is no, then go ahead with direct Runtime Manager API as it will be the simplest way to use jBPM within your application. But when answer is yes, then go ahead with jbpm services as they encapsulate runtime manager API with best practices by providing dynamic runtime environment for your BPM logic - also known as execution server.
This is the standard (and the simplest) way to get up and running with jBPM in your application. You only configure it once and run as part of the application. With the RuntimeManager usage, both process engine and task service will be managed in complete synchronization, meaning there is no need from end user to deal with "plumbing" code to make these two work together.
To provide spring based way of setting up jBPM, few factory beans where added:
org.kie.spring.factorybeans.RuntimeEnvironmentFactoryBean
org.kie.spring.factorybeans.RuntimeManagerFactoryBean
org.kie.spring.factorybeans.TaskServiceFactoryBean
FactoryBeans provide standard way to configure Spring application spring xml though there are not custom spring xml tags equivalent for them.
Factory responsible for producing instances of RuntimeEnvironment that are consumed by RuntimeManager upon creation. It allows to create following types of RuntimeEnvironment (that mainly means what is configured by default):
DEFAULT - default (most common) configuration for RuntimeManager
EMPTY - completely empty environment to be manually populated
DEFAULT_IN_MEMORY - same as DEFAULT but without persistence of the runtime engine
DEFAULT_KJAR - same as DEFAULT but knowledge asset are taken from KJAR identified by releaseid or GAV
DEFAULT_KJAR_CL - build directly from classpath that consists kmodule.xml descriptor
Mandatory properties depends on the selected type but knowledge information must be given for all types. That means that one of the following must be provided:
knowledgeBase
assets
releaseId
groupId, artifactId, version
Next for DEFAULT, DEFAULT_KJAR, DEFAULT_KJAR_CL persistence needs to be configured:
entity manager factory
transaction manager
Transaction Manager must be Spring transaction manager as based on its presence entire persistence and transaction support is configured. Optionally EntityManager can be provided to be used instead of always creating new one from EntityManagerFactory - e.g. when using shared entity manager from Spring. All other properties are optional and are meant to override the default given by type of the environment selected.
FactoryBean responsible for creation of RuntimeManager instances of given type based on provided runtimeEnvironment. Supported types:
SINGLETON
PER_REQUEST
PER_PROCESS_INSTANCE
where default is SINGLETON when no type is specified. Every runtime manager must be uniquely identified thus identifier is a mandatory property. All instances created by this factory are cached to be able to properly dispose them using destroy method (close()).
Creates instance of TaskService based on given properties. Following are mandatory properties that must be provided:
entity manager factory
transaction manager
Transaction Manager must be Spring transaction manager as based on its presence entire persistence and transaction support is configured. Optionally EntityManager can be provided to be used instead of always creating new one from EntityManagerFactory - e.g. when using shared entity manager from Spring. In addition to above there are optional properties that can be set on task service instance:
userGroupCallback - implementation of UserGroupCallback to be used, defaults to MVELUserGroupCallbackImpl
userInfo - implementation of UserInfo to be used, defaults to DefaultUserInfo
listener - list of TaskLifeCycleEventListener that will be notified upon various operations on tasks
This factory creates single instance of task service only as it's intended to be shared across all other beans in the system.
Following section aims at giving complete spring configuration for single runtime manager wihtin spring application context.
Setup entity manager factory and transaction manager:
<bean id="jbpmEMF" class="org.springframework.orm.jpa.LocalContainerEntityManagerFactoryBean">
  <property name="persistenceUnitName" value="org.jbpm.persistence.spring.jta"/>
</bean>

<bean id="btmConfig" factory-method="getConfiguration" class="bitronix.tm.TransactionManagerServices"></bean>

<bean id="BitronixTransactionManager" factory-method="getTransactionManager"
      class="bitronix.tm.TransactionManagerServices" depends-on="btmConfig" destroy-method="shutdown" />

<bean id="jbpmTxManager" class="org.springframework.transaction.jta.JtaTransactionManager">
  <property name="transactionManager" ref="BitronixTransactionManager" />
  <property name="userTransaction" ref="BitronixTransactionManager" />
</bean>
with this we have ready persistence configuration that gives us:
JTA transaction manager (backed by bitronix - for unit tests or servlet containers)
entity manager factory for persistence unit named org.jbpm.persistence.spring.jta
Configure resource that we are going to use - business process
<bean id="process" factory-method="newClassPathResource" class="org.kie.internal.io.ResourceFactory">
  <constructor-arg>
    <value>jbpm/processes/sample.bpmn</value>
  </constructor-arg>
</bean>
this configures single process that will be available for execution - sample.bpmn that will be taken from class path. This is the simplest way to get your processes included when trying out jbpm.
Configure RuntimeEnvironment with our infrastructure (entity manager, transaction manager, resources)
<bean id="runtimeEnvironment" class="org.kie.spring.factorybeans.RuntimeEnvironmentFactoryBean">
  <property name="type" value="DEFAULT"/>
  <property name="entityManagerFactory" ref="jbpmEMF"/>
  <property name="transactionManager" ref="jbpmTxManager"/>
  <property name="assets">
    <map>
      <entry key-ref="process"><util:constant static-field="org.kie.api.io.ResourceType.BPMN2"/></entry>
    </map>
  </property>
</bean>
that gives us default runtime environment ready to be used to create instance of a RuntimeManager.
Create RuntimeManager with the environment we just setup
<bean id="runtimeManager" class="org.kie.spring.factorybeans.RuntimeManagerFactoryBean" destroy-method="close">
  <property name="identifier" value="spring-rm"/>
  <property name="runtimeEnvironment" ref="runtimeEnvironment"/>
</bean>
with just four steps you are ready to execute your processes with Spring and jBPM 6, utilizing EntityManagerFactory and JTA transaction manager.
Complete spring configuration file can be found here.
This is just one configuration setup that jBPM 6 supports - JTA transaction manager and EntityManagerFactory, others are:
JTA and SharedEntityManager
Local Persistence Unit and EntityManagerFactory
Local Persistence Unit and SharedEntityManager
For more details about difference configuration options look at the example configuration files and test cases.
In case more dynamic nature is required in your Spring application then more appropriate could be to build up so called execution server based on jbpm services. jBPM services has been designed in a way to make them framework agnostic and in case framework specific addons are required they will be brought by additional module. So the code logic of the services is embedded in jbpm-kie-services. These are pure java services and by that can be easily consumed by Spring application.
Dynamic nature means that processes (And other assets like data model, rules, forms, etc) can be added and removed without restarting application.
There is almost no code involved to completely configure jBPM services in spring besides single interface that needs to be implemented - IdentityProvider that depends on your security configuration. One built with Spring Security can be like following though it might not cover all features one can have for Spring application.
import java.util.ArrayList;
import java.util.Collections;
import java.util.List;

import org.kie.internal.identity.IdentityProvider;
import org.springframework.security.core.Authentication;
import org.springframework.security.core.GrantedAuthority;
import org.springframework.security.core.context.SecurityContextHolder;

public class SpringSecurityIdentityProvider implements IdentityProvider {

	public String getName() {

		Authentication auth = SecurityContextHolder.getContext().getAuthentication();
		if (auth != null && auth.isAuthenticated()) {
			return auth.getName();
		}
		return "system";
	}

	public List<String> getRoles() {
		Authentication auth = SecurityContextHolder.getContext().getAuthentication();
		if (auth != null && auth.isAuthenticated()) {
			List<String> roles = new ArrayList<String>();

			for (GrantedAuthority ga : auth.getAuthorities()) {
				roles.add(ga.getAuthority());
			}

			return roles;
		}

		return Collections.emptyList();
	}

	public boolean hasRole(String role) {
		return false;
	}

}
As usual, first thing to start with is transaction configuration:
<context:annotation-config />
<tx:annotation-driven />
<tx:jta-transaction-manager />

<bean id="transactionManager" class="org.springframework.transaction.jta.JtaTransactionManager" />
Next configuration of JPA and persistence follows:
<bean id="entityManagerFactory" class="org.springframework.orm.jpa.LocalContainerEntityManagerFactoryBean" depends-on="transactionManager">
   <property name="persistenceXmlLocation" value="classpath:/META-INF/jbpm-persistence.xml" />
</bean>
Configure security and user/group information providers
<util:properties id="roleProperties" location="classpath:/roles.properties" />

<bean id="userGroupCallback" class="org.jbpm.services.task.identity.JBossUserGroupCallbackImpl">
  <constructor-arg name="userGroups" ref="roleProperties"></constructor-arg>
</bean>

<bean id="identityProvider" class="org.jbpm.spring.SpringSecurityIdentityProvider"/>
Configure runtime manager factory that is Spring context aware and by that can interact with spring container in correct way and supporting services (transactional command service and task service)
<bean id="runtimeManagerFactory" class="org.kie.spring.manager.SpringRuntimeManagerFactoryImpl">
  <property name="transactionManager" ref="transactionManager"/>
  <property name="userGroupCallback" ref="userGroupCallback"/>
</bean>

<bean id="transactionCmdService" class="org.jbpm.shared.services.impl.TransactionalCommandService">
  <constructor-arg name="emf" ref="entityManagerFactory"></constructor-arg>
</bean>

<bean id="taskService" class="org.kie.spring.factorybeans.TaskServiceFactoryBean" destroy-method="close">
  <property name="entityManagerFactory" ref="entityManagerFactory"/>
  <property name="transactionManager" ref="transactionManager"/>
  <property name="userGroupCallback" ref="userGroupCallback"/>
  <property name="listeners">
    <list>
      <bean class="org.jbpm.services.task.audit.JPATaskLifeCycleEventListener">
        <constructor-arg value="true"/>
      </bean>
    </list>
  </property>
</bean>
Configure jBPM services as spring beans
<!-- definition service -->
<bean id="definitionService" class="org.jbpm.kie.services.impl.bpmn2.BPMN2DataServiceImpl"/>

<!-- runtime data service -->
<bean id="runtimeDataService" class="org.jbpm.kie.services.impl.RuntimeDataServiceImpl">
  <property name="commandService" ref="transactionCmdService"/>
  <property name="identityProvider" ref="identityProvider"/>
  <property name="taskService" ref="taskService"/>
</bean>

<!-- -- deployment service -->
<bean id="deploymentService" class="org.jbpm.kie.services.impl.KModuleDeploymentService" depends-on="entityManagerFactory" init-method="onInit">
  <property name="bpmn2Service" ref="definitionService"/>
  <property name="emf" ref="entityManagerFactory"/>
  <property name="managerFactory" ref="runtimeManagerFactory"/>
  <property name="identityProvider" ref="identityProvider"/>
  <property name="runtimeDataService" ref="runtimeDataService"/>
</bean>

<!-- process service -->
<bean id="processService" class="org.jbpm.kie.services.impl.ProcessServiceImpl" depends-on="deploymentService">
  <property name="dataService" ref="runtimeDataService"/>
  <property name="deploymentService" ref="deploymentService"/>
</bean>

<!-- user task service -->
<bean id="userTaskService" class="org.jbpm.kie.services.impl.UserTaskServiceImpl" depends-on="deploymentService">
  <property name="dataService" ref="runtimeDataService"/>
  <property name="deploymentService" ref="deploymentService"/>
</bean>

<!-- register runtime data service as listener on deployment service so it can receive notification about deployed and undeployed units -->
<bean id="data" class="org.springframework.beans.factory.config.MethodInvokingFactoryBean" depends-on="deploymentService">
  <property name="targetObject" ref="deploymentService"></property>
  <property name="targetMethod"><value>addListener</value></property>
  <property name="arguments">
  <list>
      <ref bean="runtimeDataService"/>
  </list>
  </property>
</bean>
And this is all is needed to build fully featured execution server with Spring and jBPM services. A complete Spring web application with this setup can be found here.
jBPM since version 6.2 provides out of the box integration layer with Enterprise Java Beans (EJB) for both local and remote interaction.
Ejb services are brought by following modules:
jbpm-services-ejb-api
API module that extends jbpm-services-api with EJB specific interfaces and objects
jbpm-services-ejb-impl
EJB extension to core services
jbpm-services-ejb-timer
jBPM Scheduler Service implementation backed by EJB Timer Service
jbpm-services-ejb-client
EJB remote client implementation for remote interaction, provides JBoss AS support out of the box
EJB layer is based on jbpm services and thus provides almost same capabilities as the core module though there are some imiliations when it comes to remote interfaces. Main difference is for the DeploymentService that has been limited for remote ejb service to following methods:
deploy
undeploy
activate
deactivate
isDeployed
Main rationale behind is to avoid returning runtime objects such as RuntimeManager over EJB remote as it won't bring any value because it will be "disconnected" state.
All other services do provide exact same set of functionality as core module.
Ejb services as an extension of core services provide EJB based execution semantic and based on various EJB specific features.
DeploymentServiceEJBImpl
is implemented as ejb singleton with container managed concurrency and lock type set to write
DefinitionServiceEJBImpl
is implemented as ejb singleton with container managed concurrency with overall lock type set to read, except buildProcessDefinition method that has lock type set to write
ProcessServiceEJBImpl
is implemented as stateless session bean
RuntimeDataServiceEJBImpl
is implemented as ejb singleton with mojority of methods with lock type read, except following that are with lock type write:
onDeploy
onUnDeploy
onActivte
onDeactivate
UserTaskServiceEJBImpl
is implemented as stateless session bean
Transactions
Transaction is managed by EJB container thus there is no need to setup any sort of transaction manager or user transaction within application code.
Identity provider
Identity provider by default is backed by EJBContext and will rely on caller principal information for both name and roles. When inspecting IdentityProvider interface there are two methods related to roles:
getRoles
this method returns empty list due to the fact EJBContext does not provide options to fetch all roles for given user
hasRole
this method will delegate to context's isCallerInRole method
This means that ejb must be secured according to JEE security practices to authentiate and authorize users so valid information will be available. In case no authentication/authorization is configured for EJB services an anonymous user is always assumed.
In addition to that, EJB services acept CDI sytly injection for IdentityProvider in case another (non ejb) security model is used. Simply create valid CDI bean that implements org.kie.internal.identity.IdentityProvider and make it available for injection with application and such implementation will take precedence over EJBContext based identity provider.
Deployment synchronization
Deployment synchronization is enabled by default and will attempt to synchronize any deployments every 3 seconds. It is implemented as ejb singleton with container managed concurrency and lock type set to write. Under the covers it utilizes EJB TimerService to schedule the synchronization jobs.
EJB Scheduler Service
jBPM uses scheduler service to deal with time based activities such as timer events, deadlines, etc. When running in EJB environment and EJB Timer Service based scheduler will be used. It will be automatically registered for all instances of RuntimeManager. When it comes to cluster support application server specific configuration might be required.
UserGroupCallback and UserInfo selection
UserGroupCallback and UserInfo might differ for various applications and thus should be sort of pluggable. With EJB we could not make it directly available for injections as they could not be injected with common type so there is another mechanism that allows to select one of provided out of the box implementation or to give a custom one. This mechanism is based on ssytem properties:
org.jbpm.ht.callback
specify what implementation of user group callback will be selected
mvel - default mostly used for testing
ldap - ldap backed implementation - requires additional configuration via jbpm.usergroup.callback.properties file
db - data base backed implementation - requires additional configuration via jbpm.usergroup.callback.properties file
jaas - delegates to container to fetch information about user data
props - simple property based callback - requires additional file that will keep all information (users and groups)
custom - custom implementation that requires to have additional system property set (FQCN of the implementation) - org.jbpm.ht.custom.callback
org.jbpm.ht.userinfo
specify what implementation of UserInfo shall be used, one of:
ldap - backed by ldap - requires configuration via jbpm-user.info.properties file
db - backed by data base - requires configuration via jbpm-user.info.properties file
props - backed by simple property file
custom - custom implementation that requires to have additional system property set (FQCN of the implementation) - org.jbpm.ht.custom.userinfo
System properties can either be added to the startup configuration of the server (jvm) which is recommended or be set programmatically before services will be used - for example with custom @Startup bean that will configure it properly for selected callback and user info.
A example application that utilizes EJB services can be found here.
Local EJB services are brought via dedicated local interfaces that extends core services:
org.jbpm.services.ejb.api.DefinitionServiceEJBLocal
org.jbpm.services.ejb.api.DeploymentServiceEJBLocal
org.jbpm.services.ejb.api.ProcessServiceEJBLocal
org.jbpm.services.ejb.api.RuntimeDataServiceEJBLocal
org.jbpm.services.ejb.api.UserTaskServiceEJBLocal
These interfaces should be used as injection points and shall be annotated with @EJB:
@EJB
private DefinitionServiceEJBLocal bpmn2Service;

@EJB
private DeploymentServiceEJBLocal deploymentService;

@EJB
private ProcessServiceEJBLocal processService;

@EJB
private RuntimeDataServiceEJBLocal runtimeDataService;
Once injected operations can be invoked on them as with core modules, there are no restrictions to their usage.
Remote EJB services are defined as dedicated remote interfaces that extends core services:
org.jbpm.services.ejb.api.DefinitionServiceEJBRemote
org.jbpm.services.ejb.api.DeploymentServiceEJBRemote
org.jbpm.services.ejb.api.ProcessServiceEJBRemote
org.jbpm.services.ejb.api.RuntimeDataServiceEJBRemote
org.jbpm.services.ejb.api.UserTaskServiceEJBRemote
These can be used similar way as local interfaces except for handling custom types. Custom types can be defined:
globally
such types are available on application classpath - included in the enterprise application
locally to the deployment unit
such types are declared as project (kjar) dependency and are resolved on deployment time
Globally available types do not require any special handling as they will be available for EJB container when remote requests are handled - marshalling of incoming data. Though local custom types won't be visible by default to EJB container as they are not on application classpath. Thus special handling of such types is required.
EJB services provides easy yet rather powerful mechanism to resolve the issue - it comes with two additional types:
org.jbpm.services.ejb.remote.api.RemoteObject
Serializable wrapper class for single value parameters
org.jbpm.services.ejb.remote.api.RemoteMap
Dedicated java.util.Map implementation to simplify remote invocation of service methods that accept custom object input. This map is backed by an internal map that holds already serialized content to avoid additional serialization on sending time. That removes the burden of ensuring that container will know about all custom data model classes as part of global classpath.
This implementation does not support all methods that are usually not used when sending data. It shall be considered only as a wrapper only and not actual and complete implementation of a map.
These special objects will perform eager serialization to bytes using ObjectInputStream to remove the need of serialization from the EJB client/container. Though it might be worse in case of performance it does overcome much more complecated handling of class loaders on EJB container side to allow use of custom types defined in the project.
Here is an example code needed to work with local types and remote EJB:
// start a process with custom types via remote EJB

Map<String, Object> parameters = new RemoteMap();
Person person = new org.jbpm.test.Person("john", 25, true);
parameters.put("person", person);

Long processInstanceId = processService.startProcess(deploymentUnit.getIdentifier(), "custom-data-project.work-on-custom-data", parameters);

// fetch task data and complete task with custom types via remote EJB
Map<String, Object> data = userTaskService.getTaskInputContentByTaskId(taskId);

Person fromTaskPerson = data.get("_person");
fromTaskPerson.setName("John Doe");

RemoteMap outcome = new RemoteMap();
outcome.put("person_", fromTaskPerson);

userTaskService.complete(taskId, "john", outcome);
Similar way RemoteObject can be used for example to send evnet to process instance:
// send event with custom type via remote EJB
Person person = new org.jbpm.test.Person("john", 25, true);

RemoteObject myObject = new RemoteObject(person);

processService.signalProcessInstance(processInstanceId, "MySignal", myObject);
These illustrates how to wrap custom data when interacting with remote EJB services. Next section will introduce how to make a connection to a remote service vai client code.
Remote client support is provided by implemetation of ClientServiceFactory interface that is facede for application server specific code:
/**
 * Generic service factory used for remote look ups that are usually container specific.
 *
 */
public interface ClientServiceFactory {

	/**
	 * Returns unique name of given factory implementation
	 * @return
	 */
	String getName();

	/**
	 * Returns remote view of given service interface from selected application
	 * @param application application identifier on the container
	 * @param serviceInterface remote service interface to be found
	 * @return
	 * @throws NamingException
	 */
	<T> T getService(String application, Class<T> serviceInterface) throws NamingException;
}
Implementations can be dynamically registered using ServiceLoader mechanism and by default there is only one available for JBoss AS/EAP/Wildfly. Each ClientServiceFactory must provide name which will be used to register it within the client registry so it can be then easily looked up.
Here is a code used to get hold of default JBoss based remote client:
// get hold of valid client service factory
ClientServiceFactory factory = ServiceFactoryProvider.getProvider("JBoss");

// application is the name known to application server aka module name
String application = "sample-war-ejb-app";

// get given service out of the factory
DeploymentServiceEJBRemote deploymentService = factory.getService(application, DeploymentServiceEJBRemote.class);
With service available all know to its interface methods are ready to be used.
When working with JBoss AS and remote client you can add following maven dependency to bring in all EJB client libraries:
<dependency>
  <groupId>org.jboss.as</groupId>
  <artifactId>jboss-as-ejb-client-bom</artifactId>
  <version>7.2.0.Final</version> <!-- use valid version for the server you run on -->
  <optional>true</optional>
  <type>pom</type>
</dependency>
All core jBPM JARs (and core dependencies) are OSGi-enabled. That means that they contain MANIFEST.MF files (in the META-INF directory) that describe their dependencies etc. These manifest files are automatically generated by the build. You can plug these JARs directly into an OSGi environment.
OSGi is a dynamic module system for declarative services. So what does that mean? Each JAR in OSGi is called a bundle and has its own Classloader. Each bundle specifies the packages it exports (makes publicly available) and which packages it imports (external dependencies). OSGi will use this information to wire the classloaders of different bundles together; the key distinction is you don't specify what bundle you depend on, or have a single monolithic classpath, instead you specify your package import and version and OSGi attempts to satisfy this from available bundles.
It also supports side by side versioning, so you can have multiple versions of a bundle installed and it'll wire up the correct one. Further to this Bundles can register services for other bundles to use. These services need initialisation, which can cause ordering problems - how do you make sure you don't consume a service before its registered? OSGi has a number of features to help with service composition and ordering. The two main ones are the programmatic ServiceTracker and the XML based Declarative Services. There are also other projects that help with this; Spring DM, iPOJO, Gravity.
The following jBPM JARs are OSGi-enabled:
- jbpm-flow
- jbpm-flow-builder
- jbpm-bpmn2
Some more advanced topics
jBPM provides the ability to create and use domain-specific task nodes in your business processes. This simplifies development when you're creating business processes that contain tasks dealing with other technical systems.
When using jBPM, we call these domain-specific task nodes "custom work items" or (custom) "service nodes". There are two separate aspects to creating and using custom work items:
- Adding a node with a custom work item to a process definition using the Eclipse editor or jBPM designer.
- Creating a custom work item handler that the jBPM engine will use when executing the custom work item in a running process.
With regards to a BPMN2 process, custom work items are certain types of
<task> nodes. In most cases, custom work items are <task>
nodes in a BPMN2 process definition, although they can also be used with certain other task type
nodes such as, among others, <serviceTask> or
<sendTask> nodes.
Tip
When creating custom work items, it's important to separate the data associated with the work item, from how the work item should be handled. In other words, separate the what from the how. That means that custom work items should be:
- declarative (what, not how)
- high-level (no code)
On the other hand, custom work item handlers, which are Java classes, should be:
- procedural (how, not what)
- low-level (because it's code!)
Work item handlers should almost never contain any data.
Users can thus easily define their own set of domain-specific service nodes and integrate them with the process language. For example, the next figure shows an example of a healthcare-related BPMN2 process. The process includes domain-specific service nodes for measuring blood pressure, prescribing medication, notifying care providers and following-up on the patient.
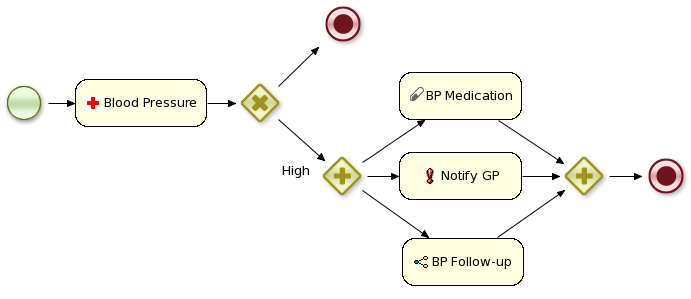
Before moving on to an example, this section explains what custom work items and custom work item handlers are.
In short, we use the term custom work item when we're describing a node
in your process that represents a domain-specific task and as such, contains extra properties and
is handled by a WorkItemHandler implementation.
Because it's a domain-specific task, that means that a custom
work item is equivalent to a <task> or <task>-type
node in BPMN2. However, a WorkItem is also Java class instance
that's used when a WorkItemHandler instance is called to complete the task or work
item.
Depending on the BPMN2 editor you're using, you can create a custom work item definition in one of two ways:
- If you're using Designer, then this means creating a MVEL based definition and adding the definition in Designer itself. A description of this can be found in the ??? section in the ??? chapter. Once this is done, a new service node will appear on the BPMN 2.0 palette.
- If you're using the Eclipse BPMN 2.0 modeler plugin (which can
be found here), then you'll can modify
the BPMN2
<task>or<task>-type element to work withWorkItemHandlerimplementations. See the ??? section in the ??? chapter.
A work item handler is a Java class used to execute (or abort) work
items. That also means that the class implements the org.kie.runtime.instance.WorkItemHandler
interface. While jBPM provides some custom WorkItemHandler instances (listed below),
a Java developer with a minimal knowledge of jBPM can easily create a new work item handler class
with its own custom business logic.
Among others, jBPM offers the following WorkItemHandler implementations:
- In the
jbpm-bpmn2module,org.jbpm.bpmn2.handlerpackage:- ReceiveTaskHandler (for use with BPMN element
<receiveTask>) - SendTaskHandler (for use with BPMN element
<sendTask>) - ServiceTaskHandler (for use with BPMN element
<serviceTask>)
- ReceiveTaskHandler (for use with BPMN element
- In the
jbpm-workitemsmodule, in various packages under theorg.jbpm.process.workitempackage:- ArchiveWorkItemHandler
There are a many more WorkItemHandler implementations present in the
jbpm-workitems module. If you're looking for specific integration logic with
Twitter, for example, we recommend you take a look at the classes made available there.
In general, a WorkItemHandler's .executeWorkItem(...) and
.abortWorkItem(...) methods will do the following:
- Extract information about the task being executed (or aborted) from the
WorkIteminstance - Execute the necessary business logic. This might be mean interacting with a web service, database, or other technical component.
- Inform the process engine that the work item has been completed (or aborted) by
calling one of the following two methods on the
WorkItemManagerinstance passed to the method:
WorkItemManager.completeWorkItem(long workItemId, Map<String, Object> results)
WorkItemManager.abortWorkItem(long workItemId)
In order to make sure that your custom work item handler is used for a particular process
instance, it's necessary to register the work item handler before starting the process. This makes
the engine aware of your WorkItemHandler so that the engine can use it for the proper
node. For example:
ksession.getWorkItemManager().registerWorkItemHandler("Notification",
    new NotificationWorkItemHandler());
The ksession variable above is a StatefulKnowledgeSession (and
also a KieSession) instance. The example code above comes from the example that
we will go through in the next session.
Work item handler life cycle management
Work item handler is registered on kie session and then can be used whenever process engine encounters a node that should be handled by that handler. Depending on the implementation of the handler (e.g. some handler might keep state or depend on some resources such as data base connection) there might be a need to maintain life cycle of the handler. To ease the way of doing that jBPM comes with two additional interfaces that handler might implement:
org.kie.internal.runtime.Closeable - allows auto close of the handler whenever owner (work item handler manager) of it is closed or disposed. This is useful in case a handler can be quickly and frequently recreated so the engine will have it for the execution and when disposed it will dispose as well all handlers of Closeable type.
org.kie.internal.runtime.Cacheable - allows handlers to be cached and resused to avoid recreation of the objects. There might be several reasons of doing so - expensive bootstrap of the handler, dependency to external resources - socket connections, db connections, web service client. While this brings powerful feature to the work item handler management it does put additional requirement on the implementation - needs to deal with exceptions internally and recover from any failures. In case recovery cannot be performed it needs to remove itself from the cache.
Closeable interface is handled for all use cases, while Cacheable is available only when RuntimeManager is used. RuntimeManager provides caching capabilities via its CacheManager (available via InternalRuntimeManager in case self removal is required).
Tip
You can use different work item handlers for the same process depending on the
system on which it runs: by registering different work item handlers on different systems, you can
customize how a custom work item is processed on a particular system. You can also substitute mock
WorkItemHandler instances when testing.
Let's start by showing you how to include a simple work item for sending notifications. A work item is defined by a unique name and includes additional parameters that describe the work in more detail. Work items can also return information after they have been executed, specified as results.
Our notification work item could be defined using a work definition with four parameters and no results. For example:
- Name: "Notification"
- Parameters:
- From [String type]
- To [String type]
- Message [String type]
- Priority [String type]
In our example we will create a MVEL work item definition that defines a "Notification" work
item. Using MVEL is the default way to This file will be placed in the project classpath in a directory called
META-INF. The work item configuration file for this example,
MyWorkDefinitions.wid, will look like this:
import org.drools.core.process.core.datatype.impl.type.StringDataType;
[
  // the Notification work item
  [
    "name" : "Notification",
    "parameters" : [
      "Message" : new StringDataType(),
      "From" : new StringDataType(),
      "To" : new StringDataType(),
      "Priority" : new StringDataType(),
    ],
    "displayName" : "Notification",
    "icon" : "icons/notification.gif"
  ]
]
The project directory structure could then look something like this:
project/src/main/resources/META-INF/MyWorkDefinitions.widWe also want to add a specific icon to be used in the process editor
with the work item. To add this, you will need .gif or
.png images with a pixel size of 16x16. We put them in a directory outside
of the META-INF directory, for example, here:
project/src/main/resources/icons/notification.gifThe jBPM Eclipse editor uses the configuration mechanisms supplied by Drools to register work item definition
files. That means adding a drools.workDefinitions property to the
drools.rulebase.conf file in the META-INF.
The drools.workDefinitions property represents a list of files containing work
item definitions, separated using spaces. If you want to exclude all other
work item definitions and only use your definition, you could use the following:
drools.workDefinitions = MyWorkDefinitions.widHowever, if you only want to add the newly created node definition to the existing palette
nodes, you can define the drools.workDefinitions property as follows:
drools.workDefinitions = MyWorkDefinitions.wid WorkDefinitions.conf
We recommended that you use the extension .wid for your own definitions of
domain specific nodes. The .conf extension used with the default definition file,
WorkDefinitions.conf, for backward compatibility reasons.
We've created our work item definition and configured it, so now we can start using it in our processes. The process editor contains a separate section in the palette where the different service nodes that have been defined for the project appear.
Using drag and drop, a notification node can be created inside your process. The properties can be filled in using the properties view.
Besides any custom properties, the following three properties are available for all work items:
Parameter Mapping: Allows you to map the value of a variable in the process to a parameter of the work item. This allows you to customize the work item based on the current state of the actual process instance (for example, the priority of the notification could be dependent of some process-specific information).Result Mapping: Allows you to map a result (returned once a work item has been executed) to a variable of the process. This allows you to use results in the remainder of the process.Wait for completion: By default, the process waits until the requested work item has been completed before continuing with the process. It is also possible to continue immediately after the work item has been requested (and not waiting for the results) by settingwait for completionto false.
Here is an example that creates a domain specific node to execute Java, asking for
the class and method parameters. It includes a custom java.gif icon and
consists of the following files and resulting screenshot:
import org.drools.core.process.core.datatype.impl.type.StringDataType;
[
  // the Java Node work item located in:
  // project/src/main/resources/META-INF/JavaNodeDefinition.wid
  [
    "name" : "JavaNode",
    "parameters" : [
      "class" : new StringDataType(),
      "method" : new StringDataType(),
    ],
    "displayName" : "Java Node",
    "icon" : "icons/java.gif"
  ]
]
// located in: project/src/main/resources/META-INF/drools.rulebase.conf
drools.workDefinitions = JavaNodeDefinition.wid WorkDefinitions.conf

// icon for java.gif located in:
// project/src/main/resources/icons/java.gif
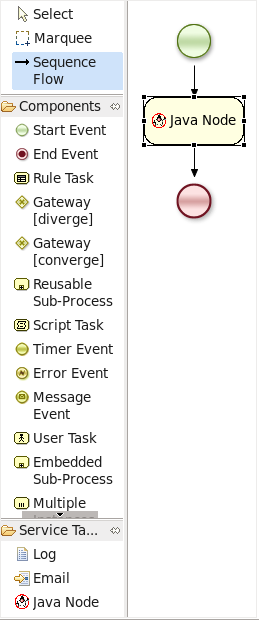
Once we've created our Notification work item definition (see the sections
above), we can then create a custom implementation of a work item handler that
will contain the logic to send the notification.
In order to execute our Notification work items, we first create a
NotificationWorkItemHandler that implements the WorkItemHandler
interface:
package com.sample; import org.kie.api.runtime.process.WorkItem; import org.kie.api.runtime.process.WorkItemHandler; import org.kie.api.runtime.process.WorkItemManager; public class NotificationWorkItemHandler implements WorkItemHandler { public void executeWorkItem(WorkItem workItem, WorkItemManager manager) { // extract parameters String from = (String) workItem.getParameter("From"); String to = (String) workItem.getParameter("To"); String message = (String) workItem.getParameter("Message"); String priority = (String) workItem.getParameter("Priority"); // send email EmailService service = ServiceRegistry.getInstance().getEmailService(); service.sendEmail(from, to, "Notification", message); // notify manager that work item has been completed manager.completeWorkItem(workItem.getId(), null);} public void abortWorkItem(WorkItem workItem, WorkItemManager manager) { // Do nothing, notifications cannot be aborted } }
| The |
| Notifying the |
This WorkItemHandler sends a notification as an email and then
notifies the WorkItemManager that the work item has been completed.
Note that not all work items can be completed directly. In cases where executing a work item takes some time, execution can continue asynchronously and the work item manager can be notified later.
In these situations, it might also be possible that a work item is aborted
before it has been completed. The WorkItemHandler.abortWorkItem(...) method can be
used to specify how to abort such work items.
Tip
Remember, if the WorkItemManager is not notified about the completion, the
process engine will never be notified that your service node has completed.
WorkItemHandler instances need to be registered with the
WorkItemManager in order to be used. In this case, we need to register an instance of
our NotificationWorkItemHandler in order to use it with our process containing a
Notification work item. We can do that like this:
StatefulKnowledgeSession ksession = kbase.newStatefulKnowledgeSession(); ksession.getWorkItemManager().registerWorkItemHandler( "Notification",new NotificationWorkItemHandler());
| This is the drools name of the |
| This is the instance of our custom work item handler instance! |
If we were to look at the BPMN2 syntax for our process with the Notification
process, we would see something like the following example. Note the use of the
tns:taskName attribute in the <task> node. This is necessary for the
WorkItemManager to be able to see which WorkItemHandler instance should
be used with which task or work item.
<?xml version="1.0" encoding="UTF-8"?>
<definitions id="Definition"
             xmlns="http://www.omg.org/spec/BPMN/20100524/MODEL"
             xs:schemaLocation="http://www.omg.org/spec/BPMN/20100524/MODEL BPMN20.xsd"
...
             xmlns:tns="http://www.jboss.org/drools">

...

  <process isExecutable="true" id="myCustomProcess" name="Domain-Specific Process" >

...

    <task id="_5" name="Notification Task" tns:taskName="Notification" >

...
Tip
Different work item handlers could be used depending on the context. For example, during testing or simulation, it might not be necessary to actually execute the work items. In this case specialized dummy work item handlers could be used during testing.
A lot of these domain-specific services are generic, and can be reused by a lot of different users. Think for example about integration with Twitter, doing file system operations or sending email. Once such a domain-specific service has been created, you might want to make it available to other users so they can easily import and start using it.
A service repository allows you to import services by browsing the repository looking for services you might need and importing these services into your workspace. These will then automatically be added to your palette and you can start using them in your processes. You can also import additional artefacts like for example an icon, any dependencies you might need, a default handler that will be used to execute the service (although you're always free to override the default, for example for testing), etc.
To browse the repository, open the wizard to import services, point it to the right location (this could be to a directory in your file system but also a public or private URL) and select the services you would like to import. For example, in Eclipse, right-click your project that contains your processes and select "Configure ... -> Import jBPM services ...". This will open up a repository browser. In the URL field, fill in the URL of your repository (see below for the URL of the public jBPM repository that hosts some common service implementations out-of-the-box), or use the "..." button to browse to a folder on your file system. Click the Get button to retrieve the contents of that repository.
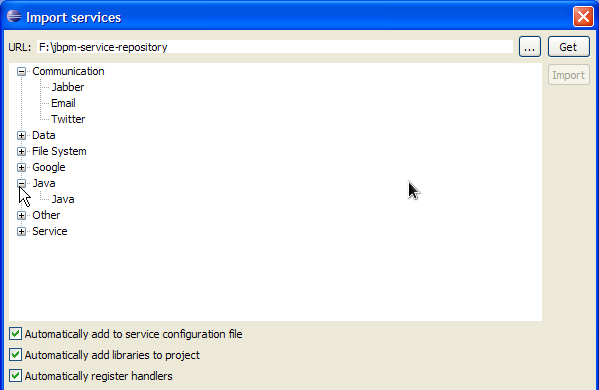
Select the service you would like to import and then click the Import button. Note that the Eclipse wizard allows you to define whether you would like to automatically configure the service (so it shows up in the palette of your processes), whether you would also like to download any dependencies that might be needed for executing the service and/or whether you would like to automatically register the default handler, so make sure to mark the right checkboxes before importing your service (if you are unsure what to do, leaving all check boxes marked is probably best).
After importing your service, (re)open your process diagram and the new service should show up in your palette and you can start using it in your process. Note that most services also include documentation on how to use them (e.g. what the different input and output parameters are) when you select them browsing the service repository.
Click on the image below to see a screencast where we import the Twitter service in a new jBPM project and create a simple process with it that sends an actual tweet. Note that you need the necessary Twitter keys and secrets to be able to programmatically send tweets to your Twitter account. How to create these is explained here, but once you have these, you can just drop them in your project using a simple configuration file.
Figure 21.1.
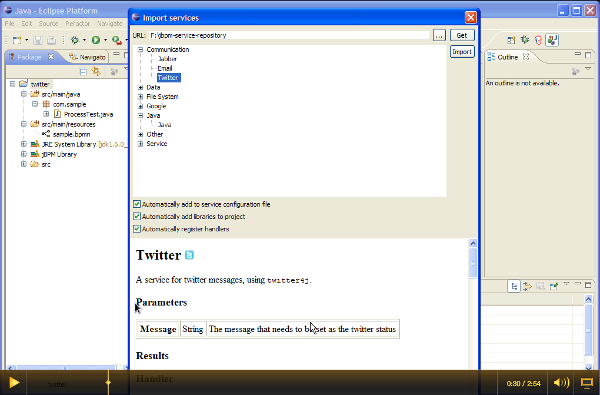
We are building a public service repository that contains predefined services that people can use out-of-the-box if they want to:
http://docs.jboss.org/jbpm/v6.0/repository/
This repository contains some integrations for common services like Twitter integration or file system operations that you can import. Simply point the import wizard to this URL to start browsing the repository.
If you have an implementation of a common service that you would like to contribute to the community, do not hesitate to contact someone from the development team. We are always looking for contributions to extend our repository.
You can set up your own service repository and add your own services by creating a configuration file that contains the necessary information (this is an extended version of the normal work definition configuration file as described earlier in this chapter) and putting the necessary files (like an icon, dependencies, documentation, etc.) in the right folders.
The extended configuration file contains the normal properties (like name, parameters, results and icon), with some additional ones. For example, the following extended configuration file describes the Twitter integration service (as shown in the screencast above):
import org.drools.core.process.core.datatype.impl.type.StringDataType;
[
  [
    "name" : "Twitter",
    "description" : "Send a Twitter message",
    "parameters" : [
      "Message" : new StringDataType()
    ],
    "displayName" : "Twitter",
    "eclipse:customEditor" : "org.drools.eclipse.flow.common.editor.editpart.work.SampleCustomEditor",
    "icon" : "twitter.gif",
    "category" : "Communication",
    "defaultHandler" : "org.jbpm.process.workitem.twitter.TwitterHandler",
    "documentation" : "index.html",
    "dependencies" : [
      "file:./lib/jbpm-twitter.jar",
      "file:./lib/twitter4j-core-2.2.2.jar"
    ]
  ]
]
- The name property is the unique name for your service
- The parameters property defines the service data inputs giving them a name and a type
- You can similarly to input parameters also define the "results" property for service data ouputs (same structure applies)
- The icon property should refer to a file with the given file name in the same folder as the extended configuration file (so it can be downloaded by the import wizard and used in the process diagrams). Icons should be 16x16 GIF files.
- The category property defines the category this service should be placed under when browsing the repository.
- The defaultHandler property defines the default handler implementation (i.e. the Java class that implements the `WorkItemHandler` interface and can be used to execute the service).
This can automatically be registered as the handler for that service when importing the service from the repository.
You can also use mvel to resolve the default handler expression which has the additional benefit of being able to resolve the handlers parameters,
for example:
Some of the available named parameters you can use are:"defaultHandler" : "mvel: new org.jbpm.process.workitem.twitter.TwitterHandler(ksession)",ksession taskService runtimeManager classLoader entityManagerFactory - The documentation property defines a documentation file that describes what the service does and how it works. This property should refer to a HTML file with the given name in the same folder as the extended configuration file (so it can be shown by the import wizard when browsing the repository).
- TThe dependencies property defines additional dependencies that are necessary to execute this service.
This usually includes the handler implementation JAR, but could also include additional external dependencies.
These dependencies should also be located on the repository on the given location (relative to the folder where the extended configuration file is located),
so they can be downloaded by the import wizard when importing the service. If the necessary dependencies are located in a maven repository you can define them via the mavenDependencies property,
for example:
The root of your repository should also contain an [path]_index.conf_ file that references all the folders that should be processed when searching for services on the repository. This file could look as follows:"mavenDependencies" : [ "org.jbpm:jbpm-twitter:1.0", "org.twitter4j:twitter4j-core:2.2.2" ]Email FileSystem ESB FTP Google Java Jabber Rest RSS Transform Twitter
The root of your repository should also contain an index.conf file that
references all the folders that should be processed when searching for services on the repository.
Each of those folders should then contain:
- An extended configuration file with the same name as the folder (e.g.
Twitter.conf) - The icon as references in the configuration file
- The documentation as references in the configuration file
- The dependencies as references in the configuration file (for example in a lib folder)
You can create your own hierarchical structure, because if one of those folders also contains an
index.conf file, that will be used to scan additional sub-folders. Note that the
hierarchical structure of the repository is not shown when browsing the repository using the import
wizard, as the category property in the configuration file is used for that.
jBPM provides classes in the org.jbpm.process.workitem package which allows you to connect and retrieve your service information. For example:
      Map<String, WorkDefinitionImpl> workitemsFromRepo =
      WorkItemRepository.getWorkDefinitions("http://docs.jboss.org/jbpm/v6.0/repository/");
This will provide you with all services defined in the repository (and declared in your index.conf file). You can then get more detailed information about each of services in the repository using their name as deflared in the service wid file, for example when using the twitter wid configuration from above we could do:
      workitemsFromRepo.get( "Twitter" ).getName();                 // "Twitter"
      workitemsFromRepo.get( "Twitter" ).getDescription();          // "Send a Twitter message"
      workitemsFromRepo.get( "Twitter" ).getDefaultHandler();       // "org.jbpm.process.workitem.twitter.TwitterHandler"
      workitemsFromRepo.get( "Twitter" ).getDependencies();         // String["file:./lib/jbpm-twitter.jar","file:./lib/twitter4j-core-2.2.2.jar"]
      ...
or you could for example check if the correct version of the service you need is contained in the repository:
      if( workitemsFromRepo.containsKey( "Twitter" ) && workitemsFromRepo.get( "Twitter" ).getVersion().equals( "1.0" )) {
      // do something
      }
Currently all operations are read-only. There isn’t a way to update the service repository automatically.
The previous extended configuration example for the Twitter service was defined with the default mvel configuration. It is also possible to do this with JSON and the Twitter example would look like this:
      [
        [
          "java.util.HashMap",
          {
            "name":"TestServiceFour",
            "displayName":"Twitter",
            "description":"Send a Twitter message",
            "parameters":[
            "java.util.HashMap",
            {
              "Message":["org.drools.core.process.core.datatype.impl.type.StringDataType", {}]
            }
            ],
          "eclipse:customEditor":"org.drools.eclipse.flow.common.editor.editpart.work.SampleCustomEditor",
          "defaultHandler" : "org.jbpm.process.workitem.twitter.TwitterHandler",
          "documentation" : "index.html",
          "dependencies":[
            "java.util.ArrayList", ["file:./lib/jbpm-twitter.jar", "file:./lib/twitter4j-core-2.2.2.jar"]
            ]
          }
        ]
      ]
In your service repository you can define the extended configuration of your services with mvel or JSON (or have some defined in one way and some in the other as well). Defining the extended configuration with JSON might have some benefits if being red by custom web-based clients for example.
The Workbench provides two ways of installing services from the user defined service repositories:
- Automatic install - allows you to specify the repository URL and a list of services (via their unique names specified in the wid) that will get installed and be ready for use when you create/open a business process in the Workbench.
For example let’s say we have a service repository available at http://mysite.com/myservicerepo and there we define as previsously mentione two services,
namely BuyStock and SellStock. To have these services automatically installed in the Workbench you can add the following startup parameters:
Or if you wanted just the SellStock service installed:AS/bin/standalone.sh -Dorg.jbpm.service.repository=http://mysite.com/myservicerepo -Dorg.jbpm.service.servicetasknames=BuyStock,SellStock
Currently there is not an install-all option available so service names must be individually specified. When creating a new or opening an existing business process then the Workbench will attempt to install the specified services from the provided repository URL. This will isntall the service wid configuration, the spcified icon (if there is one or if not the Workbecnh will provide a default one for it), the default handler will be added to the deployment descriptor of your Workbench project as well as the specified maven dependencies in the service configuration will be added to the Workbench project pom.xml file. Please note that currently there is no option to specify maven repositories via the service task configurqtion so they must be added via the Workbench in its POM Editor by the users.AS/bin/standalone.sh -Dorg.jbpm.service.repository=http://mysite.com/myservicerepo -Dorg.jbpm.service.servicetasknames=SellStock - Manual installation through the Workbench - allows users to install one or more services from the services throgh the Workbench. You can find detailed information on how to do that in the Process Designer section of the documentation.
This chapter will describe how to deal with unexpected behavior in your business processes using both BPMN2 and technical mechanisms.
The first section will explain Technical Exceptions: we'll go through an example that uses both BPMN2 and
WorkItemHandler implementations in order to isolate and handle exceptions caused
by a technical component. We will also explain how to modify the example to suit other use
cases.
The second section will define and explain the types of (BPMN2) exceptions that can happen or be used in a business process.
What happens to a business process when something unexpected happens during the process? Most of the time, when creating and designing a new process definition, the first step is to describe the normative or desirable behaviour. However, a process definition that only describes all of the normal tasks and their execution order is incomplete.
The next step is to think about what might go wrong when the business process is run. What would happen if any of the human or technical actors in the process do not respond in unexpected ways? Will any of the technical systems that the process interacts with return unexpected results -- or not return any results at all?
Deviations from the normative or "happy" flow of a business process are called exceptions. In some cases, exceptions might not be that unusual, such as trying to debit an empty bank account. However, some processes might contain many complex situations involving exceptions, all of which must be handled correctly.
Note
The rest of chapter assumes that you know how to create custom <task>
nodes and how to implement and register WorkItemHandler implementations. More
information about these topics can be found in the Domain-specific Processes chapter.
Technical exceptions happen when a technical component of a business process acts in an unexpected way. When using Java based systems, this often results in a literal Java Exception being thrown by the system.
Technical components used in a process can fail in a way that can not be described using BPMN2. In this case, it's important to handle these exceptions in expected ways.
The following types of code might throw exceptions:
Any code that is present in the process definition itself
Any code that is executed during a process and is not part of jBPM
Any code that interacts with a technical component outside of the process engine
However, those are somewhat abstract definitions. We can narrow down the places at which an exception might be thrown. Technical exceptions can occur at the following points:
Code present in
<scriptTask>nodes or in the jbpm-specific<onEntry>and<onExit>elementsCode executed in
WorkItemHandlersassociated with<task>and task-type nodes
It is much easier to ensure correct exception handling for
<task> and other task-type nodes that use WorkItemHandler
implementations, than for code executed directly in a <scriptTask>.
Exceptions thrown by <scriptTask> can cause the process
to fail in an unrecoverable fashion. While there are certain things that you can do to contain the
damage, a process that has failed in this way can not be restarted or otherwise recovered. This
also applies for other nodes in a process definition that contain script code in the node
definition, such as the <onEntry> and <onExit>
elements.
When jBPM engine does throw an exception generated by the code in a <scriptTask>
the exception thrown is a special Java exception called the WorkflowRuntimeException that
contains information about the process.
Warning
Again, exceptions generated by a <scriptTask> node (and other nodes
containing script code) will leave the
process unrecoverable. In fact, often, the code that starts the process
itself will end up throwing the exception generated by the business process, without returning
a reference to the process instance.
For this reason, it's important to limit the scope of the code in these nodes to operations
dealing with process variables. Using a <scriptTask> to interact with a different technical component, such as a
database or web service has significant risks because any exceptions thrown
will corrupt or abort the process.
<task> nodes, <serviceTask> nodes and the rest of
the task-type nodes are explicitly meant for interacting with other systems -- not
<scriptTask> nodes! Use <task>-type nodes to interact with
other technical components.
WorkItemHandler classes are used when your process interacts with other technical
systems. For an introduction to them and how to use them in processes, please see the Domain-specific Processes chapter.
While you can build exception handling into your own WorkItemhandler
implementations, there are also two “handler decorator” classes that you can use to
wrap a WorkItemhandler implementation.
These two wrapper classes include logic that is executed when an exception is thrown during the execution (or abortion) of a work item.
Table 22.1. Exception Handling WorkItemHandler wrapper classes
Decorator classes in the org.jbpm.bpmn2.handler package | Description |
|---|---|
SignallingTaskHandlerDecorator | This class wraps an existing WorkItemHandler implementation. When the
.executeWorkItem(...) or .abortWorkItem(...) methods of the original
WorkItemHandler instance throw an exception, the
SignallingTaskHandlerDecorator will catch the exception and signal the process instance
using a configurable event type. The exception thrown will be passed as part of the event. This
functionality can be used to signal an Event SubProcess defined in the process
definition. |
LoggingTaskHandlerDecorator | This class reacts to all exceptions thrown by the .executeWorkItem(...)
or .abortWorkItem(...) WorkItemHandler methods by logging the errors. It
also saves any exceptions thrown so to an internal list so that they can be retrieved later for
inspection or further logging. Lastly, the content and format of the message logged upon an
exception are configurable. |
While the two classes described above should cover most cases involving exception handling, a
Java developer with some experience with jBPM should be able to create a
WorkItemHandler that executes custom code upon an exception.
If you do decide to write a custom WorkItemHandler that includes exception
handling logic, keep the following checklist in mind:
Are you catching all possible exceptions that you want to (and no more, or less)?
Are you making sure to either complete or abort the work item after an exception has been caught? If not, are there mechanisms to retry the process later? Or are incomplete process instances acceptable?
- >
What other actions should be taken when an exception is caught? Do you want to simply log the exception, or is it also important to interact with other technical systems? Do you want to trigger a (BPMN2) subprocess that will handle the exception?
Important
When you use the WorkItemManager to signal that the work item has been completed
or aborted, make sure to do that after you've sent any signals to the process
instance. Depending on how you've defined your process, calling WorkItemManager.completeWorkItem(...) or
WorkItemManager.abortWorkItem(...) will trigger the completion of the process instance.
This is because the these methods trigger the jBPM process engine to continue the process flow.
In the next section, we'll describe an example that uses the
SignallingTaskHandlerDecorator to signal an event subprocess when
a work item handler throws an exception.
We'll go through one example in this section, and then look quickly at how you can change
it to get the behavior you want. The example involves an
<error> event that's caught by an (Error) Event SubProcess.
When an Error Event is thrown, the containing process will be interrupted. This means that after the process flow attached to the error event has executed, the following will happen:
process execution will stop, and no other parts of the process will execute
the process instance will end up in an aborted state (instead of completed)
The example we'll go through contains an <error>, but at the end of the
section, we'll show how you can change the process to use a <signal>
instead.
Tip
The code and BPMN2 process definition shown in the next section are available in the
jbpm-examples module. See the
org.jbpm.examples.exceptions.ExceptionHandlingErrorExample class for the Java
code. The BPMN2 process definition is available in the
exceptions/ExceptionHandlingWithError.bpmn2 file in the
src/main/resources directory of the jbpm-examples
module.
Let's look at the BPMN2 process definition first. Besides the definition of the process, the BPMN2 elements defined before the actual process definition are also important. Here's an image of the BPMN2 process that we'll be using in the example:
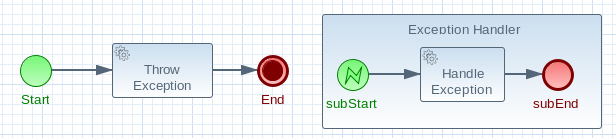
The BPMN2 process fragment below is part of the process shown above, and contains some notes on the different BPMN2 elements.
Note
If you're viewing this on a web browser, you may need to widen or narrow your browser window in order to see the "callout" or note numbers on the right hand side of the code.
<itemDefinition id="_stringItem" structureRef="java.lang.String"/> <message id="_message" itemRef="_stringItem"/><interface id="_serviceInterface" name="org.jbpm.examples.exceptions.service.ExceptionService"> <operation id="_serviceOperation" name="throwException"> <inMessageRef>_message</inMessageRef></operation> </interface> <error id="_exception" errorCode="code" structureRef="_exceptionItem"/> <itemDefinition id="_exceptionItem" structureRef="org.kie.api.runtime.process.WorkItem"/> <message id="_exceptionMessage" itemRef="_exceptionItem"/> <interface id="_handlingServiceInterface" name="org.jbpm.examples.exceptions.service.ExceptionService"> <operation id="_handlingServiceOperation" name="handleException"> <inMessageRef>_exceptionMessage</inMessageRef></operation> </interface> <process id="ProcessWithExceptionHandlingError" name="Service Process" isExecutable="true" processType="Private"> <!-- properties --> <property id="serviceInputItem" itemSubjectRef="_stringItem"/> <property id="exceptionInputItem" itemSubjectRef="_exceptionItem"/> <!-- main process --> <startEvent id="_1" name="Start" /> <serviceTask id="_2" name="Throw Exception" implementation="Other" operationRef="_serviceOperation"> <!-- rest of the serviceTask element and process definition... --> <subProcess id="_X" name="Exception Handler" triggeredByEvent="true" > <startEvent id="_X-1" name="subStart"> <dataOutput id="_X-1_Output" name="event"/> <dataOutputAssociation> <sourceRef>_X-1_Output</sourceRef> <targetRef>exceptionInputItem</targetRef></dataOutputAssociation> <errorEventDefinition id="_X-1_ED_1" errorRef="_exception" /> </startEvent> <!-- rest of the subprocess definition... --> </subProcess> </process>
| This |
| This |
| This |
| This In the process itself, a |
Caution
When you're using a <serviceTask> to call a Java class, make sure to double
check the class name in your BPMN2 definition! A small typo there can cost you time later when
you're trying to figure out what went wrong.
Now that BPMN2 process definition is (hopefully) a little clearer, we can look at how to set up jBPM to take advantage of the above BPMN2.
In the (BPMN2) process definition above, we define two different <serviceTask>
activities. The org.jbpm.bpmn2.handler.ServiceTaskHandler class is the default task
handler class used for <serviceTask> tasks. If you don't specify a
WorkItemHandler implementation for a <serviceTask>, the
ServiceTaskHandler class will be used.
In the code below, you'll see that we actually wrap or decorate the
ServiceTaskHandler class with a SignallingTaskHandlerDecorator instance.
We do this in order to define the what happens when the ServiceTaskHandler throws an
exception.
In this case, the ServiceTaskHandler will throw an exception because it's
configured to call the ExceptionService.throwException method, which throws an exception.
(See the _handlingServiceInterface <interface> element in the BPMN2.)
In the code below, we also configure which (error) event is sent to the process instance by
the SignallingTaskHandlerDecorator instance. The SignallingTaskHandlerDecorator
does this when an exception is thrown in a task. In this case, since we've
defined an <error> with the error code “code”
in the BPMN2, we set the signal to Error-code.
Important
When signalling the jBPM process engine with an event of some sort, you should keep in mind the rules for signalling process events.
- Error events can be signalled by sending an "Error-" + <the
errorCodeattribute value> value to the session. - Signal events can be signalled by sending the name of the signal to the session.
import java.util.HashMap; import java.util.Map; import org.jbpm.bpmn2.handler.ServiceTaskHandler; import org.jbpm.bpmn2.handler.SignallingTaskHandlerDecorator; import org.jbpm.examples.exceptions.service.ExceptionService; import org.kie.api.KieBase; import org.kie.api.io.ResourceType; import org.kie.api.runtime.KieSession; import org.kie.api.runtime.process.ProcessInstance; import org.kie.internal.builder.KnowledgeBuilder; import org.kie.internal.builder.KnowledgeBuilderFactory; import org.kie.internal.io.ResourceFactory; public class ExceptionHandlingErrorExample { public static final void main(String[] args) { runExample(); } public static ProcessInstance runExample() { KieSession ksession = createKieSession(); String eventType = "Error-code";SignallingTaskHandlerDecorator signallingTaskWrapper = new SignallingTaskHandlerDecorator(ServiceTaskHandler.class, eventType); signallingTaskWrapper.setWorkItemExceptionParameterName(ExceptionService.exceptionParameterName); ksession.getWorkItemManager().registerWorkItemHandler("Service Task", signallingTaskWrapper); Map<String, Object> params = new HashMap<String, Object>(); params.put("serviceInputItem", "Input to Original Service"); ProcessInstance processInstance = ksession.startProcess("ProcessWithExceptionHandlingError", params); return processInstance; } private static KieSession createKieSession() { KnowledgeBuilder kbuilder = KnowledgeBuilderFactory.newKnowledgeBuilder(); kbuilder.add(ResourceFactory.newClassPathResource("exceptions/ExceptionHandlingWithError.bpmn2"), ResourceType.BPMN2); KieBase kbase = kbuilder.newKnowledgeBase(); return kbase.newKieSession(); }
| Here we define the name of the event that will be sent to the process instance if
the wrapped |
| Then we construct an instance of the |
| When an exception is thrown by the wrapped |
In the BPMN2 process definition above, a service interface is defined that references
the ExceptionService class:
<interface id="_handlingServiceInterface" name="org.jbpm.examples.exceptions.service.ExceptionService">
    <operation id="_handlingServiceOperation" name="handleException">
In order to fill in the blanks a little bit, the code for the ExceptionService
class has been included below. In general, you can specify any Java class with the default or an
other no-argument constructor and have it executed during a <serviceTask>
public class ExceptionService {

  public static String exceptionParameterName = "my.exception.parameter.name";

  public void handleException(WorkItem workItem) {
    System.out.println( "Handling exception caused by work item '" + workItem.getName() + "' (id: " + workItem.getId() + ")");

    Map<String, Object> params = workItem.getParameters();
    Throwable throwable = (Throwable) params.get(exceptionParameterName);
    throwable.printStackTrace();
  }

  public String throwException(String message) {
      throw new RuntimeException("Service failed with input: " + message );
  }

  public static void setExceptionParameterName(String exceptionParam) {
      exceptionParameterName = exceptionParam;
  }

}
In the example above, the thrown Error Event interrupts the process: no other flows or activities are executed once the Error Event has been thrown.
However, when a Signal Event is processed, the process will continue after the Signal Event SubProcess (or whatever other activities that the Signal Event triggers) has been executed. Furthermore, this implies that the the process will not end up in an aborted state, unlike a process that throws an Error Event.
In the process above, we use the <error> element in order to be able
to use an Error Event:
<error id="_exception" errorCode="code" structureRef="_exceptionItem"/>When we want to use a Signal Event instead, we remove that line and use a
<signal> element:
<signal id="exception-signal" structureRef="_exceptionItem"/> However, we must also change all references to the "_exception"
<error> so that they now refer to the "exception-signal"
<signal>.
That means that the <errorEventDefintion> element in the <startEvent>,
<errorEventDefinition id="_X-1_ED_1" errorRef="_exception" /> must be changed to a <signalEventDefintion> which would like like this:
<signalEventDefinition id="_X-1_ED_1" signalRef="exception-signal"/> In short, we have to make the following changes to the <startEvent> in
the Event SubProcess:
- It will now contain a
<signalEventDefintion>instead of a<errorEventDefintion> - The
errorRefattribute in the<erroEventDefintion>is now asignalRefattribute in the<signalEventDefintion>. - The
idattribute in thesignalRefis of course now the id of the<signal>element. Before it was id of<error>element. - Lastly, when we signal the process in the Java code, we do not signal
"
Error-code" but simply "exception-signal", theidof the<signal>element.
In this section, we'll briefly describe what's possible when dealing with
<scriptTask> nodes that throw exceptions, and then quickly go through an example
(also available in the jbpm-examples module) that illustrates this.
If you're reading this, then you probably already have a problem: you're either expecting to run into this problem because there are scripts in your process definition that might throw an exception, or you're already running a process instance with scripts that are causing a problem.
Unfortunately, if you're running into this problem, then there is not much you can do. The only
thing that you can do is retrieve more information about exactly what's causing
the problem. Luckily, when a <scriptTask> node causes an exception,
the exception is then wrapped in a WorkflowRuntimeException.
What type of information is available? The WorkflowRuntimeException instance
will contain the information outlined in the following table. All of the fields listed are
available via the normal get* methods.
Table 22.2. Information contained in WorkflowRuntimeException instances.
| Field name | Type | Description |
|---|---|---|
processInstanceId | long | The id of the ProcessInstance instance in which the exception occurred. This
ProcessInstance may not exist anymore or be available in the database if using
persistence! |
processId | String | The id of the process definition that was used to start the process (i.e.
"ExceptionScriptTask" in
|
nodeId | long | The value of the (BPMN2) id attribute of the node that threw the exception. |
nodeName | String | The value of the (BPMN2) name attribute of the node that threw the exception. |
variables | Map<String, Object> | The map containing the variables in the process instance (experimental). |
message | String | The short message indicating what went wrong. |
cause | Throwable | The original exception that was thrown. |
The following code illustrates how to extract extra information from a process instance
that throws a WorkflowRuntimeException exception instance.
import org.jbpm.workflow.instance.WorkflowRuntimeException;
import org.kie.api.KieBase;
import org.kie.api.io.ResourceType;
import org.kie.api.runtime.KieSession;
import org.kie.api.runtime.process.ProcessInstance;
import org.kie.internal.builder.KnowledgeBuilder;
import org.kie.internal.builder.KnowledgeBuilderFactory;
import org.kie.internal.io.ResourceFactory;

public class ScriptTaskExceptionExample {

    public static final void main(String[] args) {
        runExample();
    }

    public static void runExample() {
        KieSession ksession = createKieSession();
        Map<String, Object> params = new HashMap<String, Object>();
        String varName = "var1";
        params.put( varName , "valueOne" );
        try {
            ProcessInstance processInstance = ksession.startProcess("ExceptionScriptTask", params);
        } catch( WorkflowRuntimeException wfre ) {
            String msg = "An exception happened in "
                    + "process instance [" + wfre.getProcessInstanceId()
                    + "] of process [" + wfre.getProcessId()
                    + "] in node [id: " + wfre.getNodeId()
                    + ", name: " + wfre.getNodeName()
                    + "] and variable " + varName + " had the value [" + wfre.getVariables().get(varName)
                    + "]";
            System.out.println(msg);
        }
    }

    private static KieSession createKieSession() {
        KnowledgeBuilder kbuilder = KnowledgeBuilderFactory.newKnowledgeBuilder();
        kbuilder.add(ResourceFactory.newClassPathResource("exceptions/ScriptTaskException.bpmn2"), ResourceType.BPMN2);
        KieBase kbase = kbuilder.newKnowledgeBase();
        return kbase.newKieSession();
    }

}
Business Exceptions are exceptions that are designed and managed in the BPMN2 specification of a business process. In other words, Business Exceptions are exceptions which happen at the process or workflow level, and are not related to the technical components.
Many of the elements in BPMN2 related to Business Exceptions are related to Compensation and Business Transactions. Compensation, in particular, is complexer than many other parts of the BPMN2 specification.
Full support for compensation and business transactions is expected with the release of jBPM 6.1 or 6.2. Once that has been implemented, this section will contain more information about using those BPMN2 features with jBPM.
The following attempts to briefly describe Compensation and Business Transaction related
elements in BPMN2. For more complete information about these elements and their uses, see
the BPMN2 specification, Bruce Silver's book BPMN Method and Style or any of
the other available books about the use of BPMN2.
Table 22.3. BPMN2 Exception Handling Elements
| BPMN2 Element types | Description |
|---|---|
| Errors | Error Events can be used to signal when a process has encountered an unexpected situation: signalling an error is often called throwing an error. Boundary Error Events in a different part of the process can then be used to catch the error and initiate a sequence of activities to handle the exception. Errors themselves can be extended with extra information that is passed from the throwing to catching event. This is done with the use of an Item Definition. |
| Compensation | Exception handling activities associated with the normal activities in a Business Transaction are triggered by Compensation Events. There are 3 types of compensation events: Intermediate (a.k.a. Boundary) (catch) events, Start (catch) events, and Intermediate or End (throw) events. Compensation Boundary (catch) events may only be attached to activities (e.g. tasks) that could cause an exception. These Boundary events are then associated (not linked!) with a Task that will be executed if the Boundary event catches a (thrown) Compensation signal. Start (catch) events are used when defining an Compensation Event SubProcess, which requires them in order to be able to catch a (thrown) Compensation signal. Compensation Intermediate and End events are used in order to throw Compensation Events. These events often follow decision nodes that determine whether the workflow executed up to that point has succeeded. If not, the path including the Intermediate or End Event is chosen in order to trigger Compensatoin for the activities that did not succeed. |
BPMN2 contains a number of constructs to model exceptions in business processes. There are several advantages to doing exception handling at the business process level (as opposed to handling it with code):
- Transparency
- Being able to quickly see what happens in exceptional situations means that the results and performance of a process is more easily monitored and measured.
- It also increases how easily a process can be implemented as well as how maintainable a process definition is.
- Business Logic Isolation
- Again, the idea behind using a business process is to isolate the business logic from the technical code. This simplifies the complexity of the system and increases how quickly you can create new business processes and change existing ones.
- Implementing exception handling at a technical level often takes more time because it's often complexer and specific to a system.
Where are business exceptions likely to occur? There is academic research on this, but some possible examples are:
- When an interaction with an external party or 3rd party system does not go as planned
- When you can not fully check the the input data in your process (like a client's address information, for example)
- In general, if there are parts of your process that are particularly dependent on one of the following,
a business exception will be a good idea:
- Company policy or policy governing certain (in-house) procedures
- Laws governing the business process (such as age requirements, for example)
Case management and its relation to BPM is a hot topic nowadays. There definitely seems to be a growing need amongst end users for more flexible and adaptive business processes, without ending up with overly complex solutions. Everyone seems to agree that using a process-centric approach only in many cases leads to complex solutions that are hard to maintain. The "knowledge workers" no longer want to be locked into rigid processes but wants to have the power and flexibility to regain more control over the process themselves.
The term case management is often used in that context. Without trying to give a precise definition of what it might or might not mean, as this has been a hot topic for discussion, it refers to the basic idea that many applications in the real world cannot really be described completely from start to finish (including all possible paths, deviations, exceptions, etc.). Case management takes a different approach: instead of trying to model what should happen from start to finish, let's give the end user the flexibility to decide what should happen at runtime. In its most extreme form for example, case management doesn't even require any process definition at all. Whenever a new case comes in, the end user can decide what to do next based on all the case data.
A typical example can be found in healthcare (clinical decision support to be more precise), where care plans can be used to describe how patients should be treated in specific circumstances, but people like general practitioners still need to have the flexibility to add additional steps and deviate from the proposed plan, as each case is unique. And there are similar examples in claim management, help desk support, etc.
So, should we just throw away our BPM system then? No! Even at its most extreme form (where we don't model any process up front), you still need a lot of the other features a BPM system (usually) provides: there still is a clear need for audit logs, monitoring, coordinating various services, human interaction (e.g. using task forms), analysis, etc. And, more importantly, many cases are somewhere in between, or might even evolve from case management to more structured business process over time (when we for example try to extract common approaches from many cases). If we can offer flexibility as part of our processes, can't we let the users decide how and where they would like to apply it?
Let me give you two examples that show how you can add more and more flexibility to your processes. The first example shows a care plan that shows the tasks that should be performed when a patient has high blood pressure. While a large part of the process is still well-structured, the general practitioner can decide himself which tasks should be performed as part of the sub-process. And he also has the ability to add new tasks during that period, tasks that were not defined as part of the process, or repeat tasks multiple times, etc. The process uses an ad-hoc sub-process to model this kind of flexibility, possibly augmented with rules or event processing to help in deciding which fragments to execute.
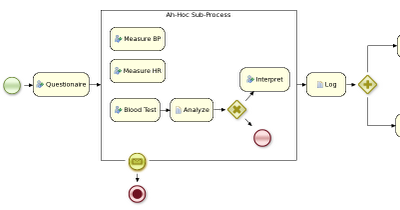
The second example actually goes a lot further than that. In this example, an internet provider could define how cases about internet connectivity problems will be handled by the internet provider. There are a number of actions the case worker can select from, but those are simply small process fragments. The case worker is responsible for selecting what to do next and can even add new tasks dynamically. As you can see, there is not process from start to finish anymore, but the user is responsible for selecting which process fragments to execute.
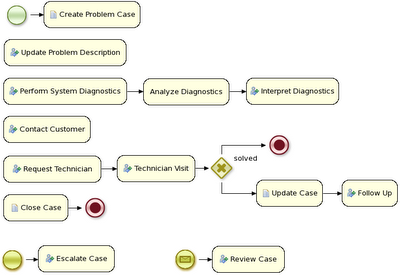
And in its most extreme form, we even allow you to create case instances without a process definition, where what needs to be performed is selected purely at runtime. This however doesn't mean you can't figure out anymore what 's actually happening. For example, meetings can be very ad hoc and dynamic, but we usually want a log of what was actually discussed. The following screenshot shows how our regular audit view can still be used in this case, and the end user could then for example get a lot more info about what actually happened by looking at the data associated with each of those steps. And maybe, over time, we can even automate part of that by using a semi-structured process.
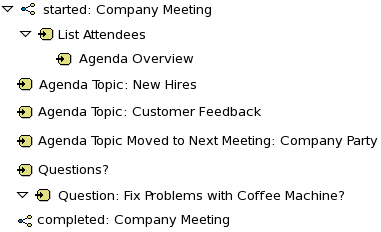
In the following text, we will refer to two types of "multi-threading": logical and technical. Technical multi-threading is what happens when multiple threads or processes are started on a computer, for example by a Java or C program. Logical multi-threading is what we see in a BPM process after the process reaches a parallel gateway, for example. From a functional standpoint, the original process will then split into two processes that are executed in a parallel fashion.
Of course, the jBPM engine supports logical multi-threading: for example, processes that include a parallel gateway. We've chosen to implement logical multi-threading using one thread: a jBPM process that includes logical multi-threading will only be executed in one technical thread. The main reason for doing this is that multiple (technical) threads need to be be able to communicate state information with each other if they are working on the same process. This requirement brings with it a number of complications. While it might seem that multi-threading would bring performance benefits with it, the extra logic needed to make sure the different threads work together well means that this is not guaranteed. There is also the extra overhead incurred because we need to avoid race conditions and deadlocks.
In general, the jBPM engine executes actions in serial. For example, when the engine encounters a script task in a process, it will synchronously execute that script and wait for it to complete before continuing execution. Similarly, if a process encounters a parallel gateway, it will sequentially trigger each of the outgoing branches, one after the other. This is possible since execution is almost always instantaneous, meaning that it is extremely fast and produces almost no overhead. As a result, the user will usually not even notice this. Similarly, action scripts in a process are also synchronously executed, and the engine will wait for them to finish before continuing the process. For example, doing a Thread.sleep(...) as part of a script will not make the engine continue execution elsewhere but will block the engine thread during that period.
The same principle applies to service tasks. When a service task is reached in a process, the engine will also invoke the handler of this service synchronously. The engine will wait for the completeWorkItem(...) method to return before continuing execution. It is important that your service handler executes your service asynchronously if its execution is not instantaneous.
An example of this would be a service task that invokes an external service. Since the delay in invoking this service remotely and waiting for the results might be too long, it might be a good idea to invoke this service asynchronously. This means that the handler will only invoke the service and will notify the engine later when the results are available. In the mean time, the process engine then continues execution of the process.
Human tasks are a typical example of a service that needs to be invoked asynchronously, as we don't want the engine to wait until a human actor has responded to the request. The human task handler will only create a new task (on the task list of the assigned actor) when the human task node is triggered. The engine will then be able to continue execution on the rest of the process (if necessary) and the handler will notify the engine asynchronously when the user has completed the task.
The simplest way to run multiple processes is to run them all using one knowledge session. However, there are cases in which it's necessary to run multiple processes in different knowledge sessions, even in different (technical) threads. Both are supported by jBPM.
When we add persistence (using a database, for example) to a situation in which we have multiple knowledge sessions (and processes), there is a guideline that users should be aware of. The following paragraphs explain why this guideline is important to follow.
Tip
Please make sure to use a database that allows row-level locks as well as table-level locks.
For example, a user could have a situation in which there are 2 (or more) threads running, each with its own knowledge session instance. On each thread, jBPM processes are being started using the local knowledge session instance.
In this use case, a race condition exists in which both thread A and thread B will have coincidentally simultaneously finished a process. At this point, because persistence is being used, both thread A and B will be committing changes to the database. If row-level locks are not possible, then the following situation can occur:
Thread A has a lock on the ProcessInstanceInfo table, having just committed a change to that table.
Thread A wants a lock on the SessionInfo table in order to commit a change there.
Thread B has the opposite situation: it has a lock on the SessionInfo table, having just committed a change there.
Thread B wants a lock on the ProcessInstanceInfo table, even though Thread A already has a lock on it.
This is a deadlock situation which the database and application will not be able to solve. However, if row-level locks are possible (and enabled!!) in the database (and tables used), then this situation will not occur.
How can we implement an asynchronous service handler? To start with, this depends on the technology you're using. If you're only using Java, you could execute the actual service in a new thread:
public class MyServiceTaskHandler implements WorkItemHandler {


  public void executeWorkItem(WorkItem workItem, WorkItemManager manager) {
    new Thread(new Runnable() {
      public void run() {
        // Do the heavy lifting here ...
      }
    }).start();
  }

  public void abortWorkItem(WorkItem workItem, WorkItemManager manager) {
  }
}
It's advisable to have your handler contact a service that executes the business operation, instead of having it perform the actual work. If anything goes wrong with a business operation, it doesn't affect your process. The loose coupling that this provides also gives you greater flexibility in reusing services and developing them.
For example, you can have your human task handler simply invoke the human task service to add a task there. To implement an asynchronous handler, you usually have to simply do an asynchronous invocation of this service. This usually depends on the technology you use to do the communication, but this might be as simple as asynchronously invoking a web service, or sending a JMS message to the external service.
In version 6, jBPM introduces new component called jbpm executor which provides quite advanced features for asynchronous execution. It delivers generic environment for background execution of commands. Commands are nothing more than business logic encapsulated within simple interface. It does not have any process runtime related information, that means no need to complete work items, or anything of that sort. It purely focuses on the business logic to be executed. It receives data via CommandContext and returns results of the execution with ExecutionResults.
Before looking into details on jBPM support for asynchronous execution let's look at what are the common requirements for such execution:
allows asynchronous execution of given piece of business logic
allows to retry in case of resources are temporarily unavailable e.g. external system interaction
allows to handle errors in case all retries have been attempted
provides cancellation option
provides history log of execution
When confronting these requirements with the "simple async handler" (executed as separate thread) you can directly notice that all of these would need to be implemented all over again by different systems. Due to that a common, generic component has been provided out of the box to simplify and empower usage.
jBPM executor operates on commands, which are essential piece of code that is going to be executed as background job.
/**
 * Executor's Command are dedicated to contain purely business logic that should be executed.
 * It should not have any reference to underlying process engine and should not be concerned
 * with any process runtime related logic such us completing work item, sending signals, etc.
 * <br/>
 * Information that are taken from process will be delivered as part of data instance of
 * <code>CommandContext</code>. Depending on the execution context that data can vary but
 * in most of the cases following will be given:
 * <ul>
 *  <li></li>
 *  <li>businessKey - usually unique identifier of the caller</li>
 *  <li>callbacks - FQCN of the <code>CommandCollback</code> that shall be used on command completion</li>
 * </ul>
 * When executed as part of the process (work item handler) additional data can be expected:
 * <ul>
 *  <li>workItem - the actual work item that is being executed with all its parameters</li>
 *  <li>processInstanceId - id of the process instance that triggered this work</li>
 *  <li>deploymentId - if given process instance is part of an active deployment</li>
 * </ul>
 * Important note about implementations is that it shall always be possible to be initialized with default constructor
 * as executor service is an async component so it will initialize the command on demand using reflection.
 * In case there is a heavy logic on initialization it should be placed in another service implementation that
 * can be looked up from within command.
 */
public interface Command {

    /**
     * Executed this command's logic.
     * @param ctx - contextual data given by the executor service
     * @return returns any results in case of successful execution
     * @throws Exception in case execution failed and shall be retried if possible
     */
    public ExecutionResults execute(CommandContext ctx) throws Exception;
}
Looking at the interface above, there is no specific integration with the jBPM runtime engine, it's decoupled from it to put main focus on the actual logic that shall be executed as part of that command rather to worry about integration with process engine. This design promotes reuse of already existing logic by simply wrapping it with Command implementation.
Input data is transferred from process engine to command via CommandContext. It acts purely as data transfer object and puts single requirement on the data it holds - all objects must be serializable.
/**
 * Data holder for any contextual data that shall be given to the command upon execution.
 * Important note that every object that is added to the data container must be serializable
 * meaning it must implement <code>java.io.Seriazliable</code>
 *
 */
public class CommandContext implements Serializable {

    private static final long serialVersionUID = -1440017934399413860L;
    private Map<String, Object> data;

    public CommandContext() {
        data  = new HashMap<String, Object>();
    }

    public CommandContext(Map<String, Object> data) {
        this.data = data;
    }

    public void setData(Map<String, Object> data) {
        this.data = data;
    }

    public Map<String, Object> getData() {
        return data;
    }

    public Object getData(String key) {
        return data.get(key);
    }

    public void setData(String key, Object value) {
        data.put(key, value);
    }

    public Set<String> keySet() {
        return data.keySet();
    }

    @Override
    public String toString() {
        return "CommandContext{" + "data=" + data + '}';
    }
}
Next outcome is provided to process engine via ExecutionResults, which is very similar in nature to the CommandContext and acts as data transfer object.
/**
 * Data holder for command's result data. Whatever command produces should be placed in
 * this results so they can be later on referenced by name by the requester - e.g. process instance.
 *
 */
public class ExecutionResults implements Serializable {

    private static final long serialVersionUID = -1738336024526084091L;
    private Map<String, Object> data = new HashMap<String, Object>();

    public ExecutionResults() {
    }

    public void setData(Map<String, Object> data) {
        this.data = data;
    }

    public Map<String, Object> getData() {
        return data;
    }

    public Object getData(String key) {
        return data.get(key);
    }

    public void setData(String key, Object value) {
        data.put(key, value);
    }

    public Set<String> keySet() {
        return data.keySet();
    }

    @Override
    public String toString() {
        return "ExecutionResults{" + "data=" + data + '}';
    }


}
Executor covers all requirements listed above and provides user interface as part of jbpm console and kie workbench (kie-wb) applications.
Above screenshot illustrates history view of executor's job queue. As can be seen on it there are several options available:
view details of the job
cancel given job
create new job
jBPM (again in version 6) provides an out of the box async work item handler that is backed by the jbpm executor. So by default all features that executor delivers will be available for background execution within process instance. AsyncWorkItemHandler can be configured in two ways:
as generic handler that expects to get the command name as part of work item parameters
as specific handler for given type of work item - for example web service
Option 1 is by default configured for jbpm console and kie-wb web applications and is registered under async name in every ksession that is bootstrapped within the applications. So whenever there is a need to execute some logic asynchronously following needs to be done at modeling time (using jbpm web designer):
specify async as TaskName property
create data input called CommandClass
assign fully qualified class name for the CommandClass data input
Next follow regular way to complete process modeling. Note that all data inputs will be transferred to executor so they must be serializable.
Second option allows to register different instances of AsyncWorkItemHandler for different work items. Since it's registered for dedicated work item most likely the command will be dedicated to that work item as well. If so CommandClass can be specified on registration time instead of requiring it to be set as work item parameters. To register such handlers for jbpm console or kie-wb additional class is required to inform what shall be registered. A CDI bean that implements WorkItemHandlerProducer interface needs to be provided and placed on the application classpath so CDI container will be able to find it. Then at modeling time TaskName property needs to be aligned with those used at registration time.
jbpm executor is configurable to allow fine tuning of its environment. In general jbpm executor runs as a thread pool that periodically checks for waiting jobs and executes them when needed. Configuration of jbpm executor is done via system properties:
org.kie.executor.disabled = true|false - allows to completely disable executor component
org.kie.executor.pool.size = Integer - allows to specify thread pool size where default it 1
org.kie.executor.retry.count = Integer - allows to specify number of retries in case of errors while running a job
org.kie.executor.interval = Integer - allows to specify interval (in seconds) that executor will use while checking for waiting jobs where default is 3 seconds
org.kie.executor.timeunit = String - allows to specify timer unit used for calculating interval, value must be a valid constant of java.util.concurrent.TimeUnit, by default it's SECONDS.
jbpm executor introduced (in verion 6.2) extension to jobs (aka commands) that allow single job to be executed multiple times. That feature is brought to the executor via additional interface that command should implement.
/**
 * Marks given executor command it is reoccurring and shall be rescheduled after completion of single instance.
 *
 */
public interface Reoccurring {

	/**
	 * Returns next time to be scheduled. Date must be in future as jobs cannot be scheduled in past.
	 * Returns null in case it should not be scheduled any more.
	 * @return
	 */
	Date getScheduleTime();
}
Reoccurring interface is very simple and enforces implementation to provide the next schedule time that the command should be executed at. It must already be valid date that is not in the past. In case no more invocation of given command should happen return value of this method should be null.
An excellent example of such command is org.jbpm.executor.commands.LogCleanupCommand that provides easy and convineint way to schedule periodic clean up of jBPM log tables on defined time intervals. See this article to see it in action and how to configure and run it.
By default jbpm executor is cluster ready and by that will distribute jobs across all cluster members. That might result in execution of given job on different cluster member than it was scheduled which is not always desired. To override this mechanism job can set 'Owner' as part of their data when being registered wher owner is the executor instance that is scheduling the job.
CommandContext ctx = new CommandContext();
ctx.setData("some data", "data...");
ctx.setData("Retries", 0);
ctx.setData("Owner", ExecutorService.EXECUTOR_ID);
That will ensure that only the isntance that scheduled the job will be the one which will execute it. Note that it might impact the time when the job is executed especially in cases where given cluster member will be unavailable.
The following features were added to jBPM 6.5
The jBPM services module has been extended with admin capability to allow basic process instance migration. Process instance migration allows you to upgrade an already active process instance to a newer version of the process definition (than the one it was started with). The service primary targets migration of process instance:
between deployments (kjars)
between process definitions
Optionally it allows to perform node mapping of active node instances within process instance (to accommodate for use cases where currently active nodes might have changed).
Kie Server client has been enhanced to support various response handlers for JMS based integration. By default it stays as in previous version (request reply interaction pattern) but allows to select another one that might fit better for some uses cases:
fire and forget - essentially means there won’t be any response
asynchronous with callback - response to the message will be delivered asynchronously to given callback
6.5 comes with enhancement for accessing task variables (both input and output) from within task event listener. Once there is a need to get hold of task variables in the listener it’s enough to call:
@Override
public void beforeTaskStartedEvent(TaskEvent event) {
Task task = event.getTask();
event.getTaskContext().loadTaskVariables(task);
Map<String, Object> inputVariables = task.getTaskInputVariables();
Map<String, Object> outputVariables = task.getTaskOutputVariables();
}Additional operations have been added to the remote API to simplify integration: operations to get deployment information of your projects based on their group, id and/or version (GAV).
You can import custom service tasks from a service repository into Designer so they can be used in your process, like for example Twitter, FTP, etc. The workbench now automates a lot of the additional configuration as well:
Installs the service configuration (wid) into the users Workbench project
Installs the service icon (defined in the service configuration)
Installs the service maven dependencies into the project POM
Installs the service default handler into the project Deployment Descriptor
Using start up parameters, you can also register a default service repositories and even install service tasks by default for new projects. More details are available in the documentation.
You can now also perform copy/paste operations across different processes.
Various small improvements allow you to use the workbench together with (one or more) kie-server execution servers to manage your process instances and tasks (sharing the same underlying datasource). As a result, processes and task created on one of the execution servers can now be managed in the workbench UI as well.
The jbpm-installer is now configured out-of-the-box to have a managed kie-server deployed next to it where you can deploy your processes to as well.
Various components have been added / upgraded:
Upgraded to WildFly 10
Added support for EAP 7
Upgraded to Spring 4
The jbpm-installer now uses WildFly 10.0.0.Final as the default.
Composite field constraints now support use of formulae.
When adding constraints to a Pattern the "Multiple Field Constraint" selection ("All of (and)" and "Any of (or)") supports use of formulae in addition to expressions.
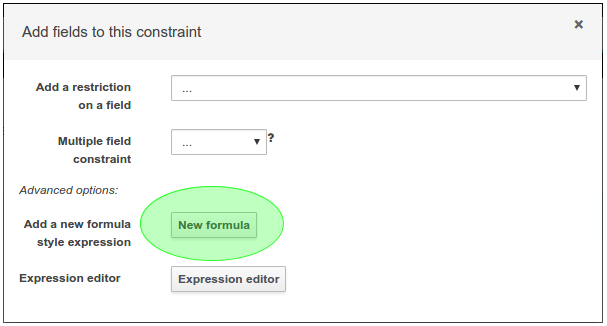
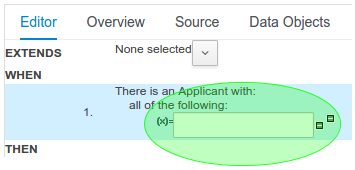
The following features were added to jBPM 6.4
The jBPM Process Dashboard has been entirely rewritten in this version and now is based on a native workbench perspective instead of a separated web application. The main goal is to deliver a better user experience, thanks to a much more appealing as well as polished user interface.
This dashboard version also provides the ability to navigate from the graphical indicators to any of the related process or task instances. Now, end users can easily find out the instances that are related to a given indicator and deep into their details as well.
The resulting dashboard is more fluent, more interactive and with a better integration with the jBPM runtime.
By default process variables are stored in audit tables (VariableInstanceLog) that allows simplified access to variable values without need to load individual process instances. Moreover that provides option to search by process variables and process variable values e.g. to find process instances that have given value for given variable.
This was missing for task variables as task variables were not stored in any audit tables. This has been improved in version 6.4.0 and now task variables are stored in audit table (TaskVariableImpl) by default. It does follow the same mechanism as for process variables - variable.toString() is the value stored in table. With this services and query APIs have been enhanced to take advantage of this support and to search for tasks by their variables.
By default process and task variables are indexed with simplest possible mechanism - that is variable.toString() while for some object this can be sufficient, like simple types, for others it can cause significant problems when performing queries. To solve the problem process and task variables are equipped with pluggable indexation. This is realized by two interfaces that shall be implemented to provide custom indexation behavior.
org.kie.internal.process.ProcessVariableIndexer
org.kie.internal.task.api.TaskVariableIndexer
details about how to use the indexers can be found in Audit log section of the documentation
QueryService that is an addition to jbpm services, brings in power of Dashbuilder DataSets (SQL based) to jbpm services. This allows more tailored queries that can include both jBPM tables and external tables such as external system data. With this users are in control of what data and how data are going to be queried.
Dashbuilder DataSet introduce concept of building "data base views" for part of the data that can later on be filtered to find relevant data for given invocation.
QueryService is available for all add-ons for services meanign pure java, CDI and EJB.
One of task deadlines actions is notification which by default is implemented as email notification. Although this type of notification does not always fit the requirement. To allow custom notification to be used, jBPM 6.4 was enhanced to support pluggable notification listeners. Notification is realized as broadcast, meaning all available listeners will be invoked, although each listener can decide if it shall react to given notification or not. For instance email notification listener will only send email if it's properly configured (with mail server etc) otherwise it will ignore the notification.
The user can now create a specific filter that provides domain specific columns to be added to a task list. When the user creates a custom filter for a specific task name the task variables are enabled as columns.
The custom filter that activates the capability to display task variables as columns is set a filter with the restriction Name="taskName".
When the filter with the restriction over a specific task name is applied, the task associated variables appear as a selectable columns, to the task list.
Users are able to view and share process documentation during business process modelling. Process documentation is dynamically updated as users are working on their business process.
Users can print the documentation or view it as a png file.
Process Documentation includes the following sections:
Process Overview (general info, process variables, globals, and imports)
Process Element Details (totals, and specific element information)
Process Image
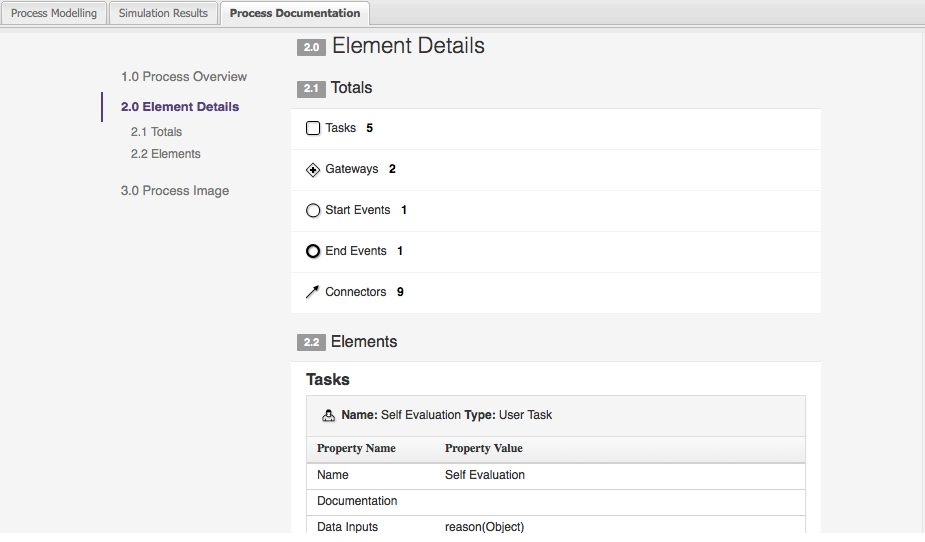
The general look and feel in the entire workbench has been updated to adopt PatternFly. The update brings a cleaner, lightweight and more consistent user experience throughout every screen. Allowing users focus on the data and the tasks by removing all uncessary visual elements. Interactions and behaviors remain mostly unchanged, limiting the scope of this change to visual updates.
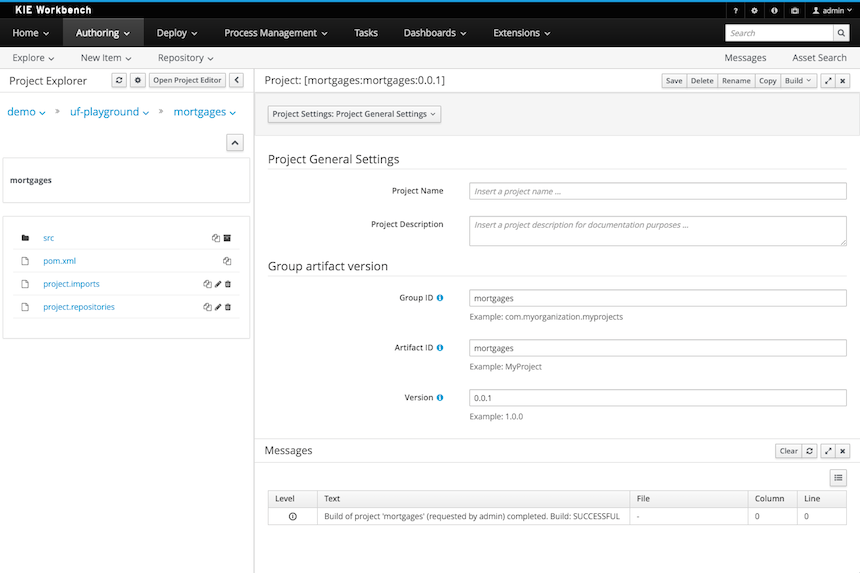
In addition to the PatternFly update described above which targeted the general look and feel, many individual components in the workbench have been improved to create a better user experience. This involved making sure the default size of modal popup windows is appropriate to fit the corresponding content, adjusting the size of text fields as well as aligning labels, and improving the resize behaviour of various components when used on smaller screens.

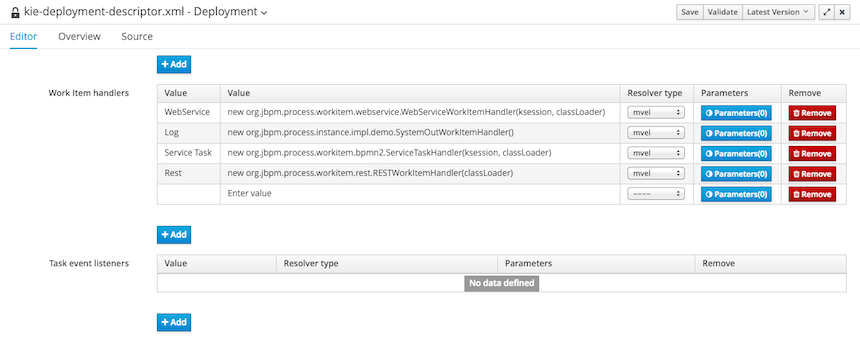
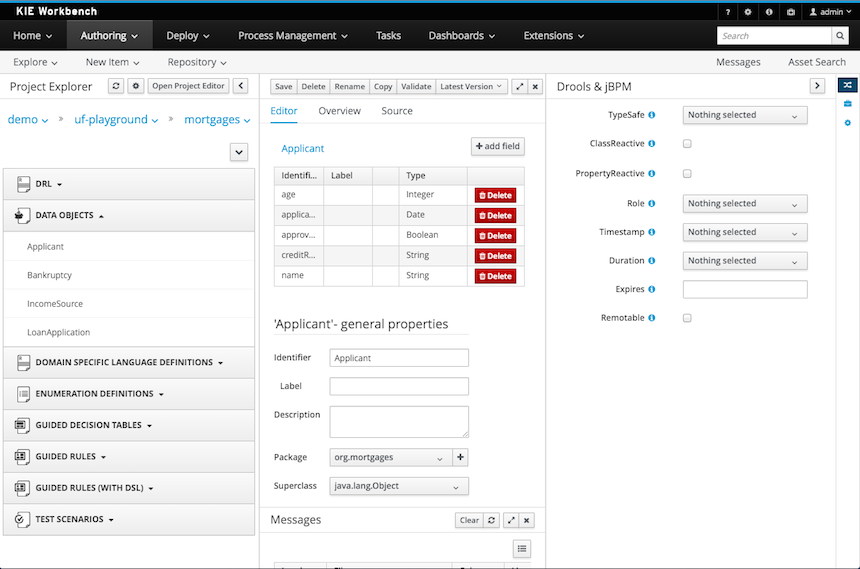
Locales ru (Russian) and zh_TW (Chineses Traditional) have now been added.
The locales now supported are:
Default English.
es(Spanish)fr(French)de(German)ja(Japanese)pt_BR(Portuguese - Brazil)zh_CN(Chinese - Simplified)zh_TW(Chinese - Traditional)ru(Russian)
The Workbench used to have a section in the Project Editor for "Import Suggestions" which was really a way for Users to register classes provided by the Java Runtime environment to be available to Rule authoring. Furthermore Editors had a "Config" tab which was where Users were expected to import classes from other packages to that in which the rule resides.
Neither term was clear and both were inconsistent with each other and other aspects of the Workbench.
We have changed these terms to (hopefully) be clearer in their meaning and to be consistent with the "Data Object" term used in relation to authoring Java classes within the Workbench.
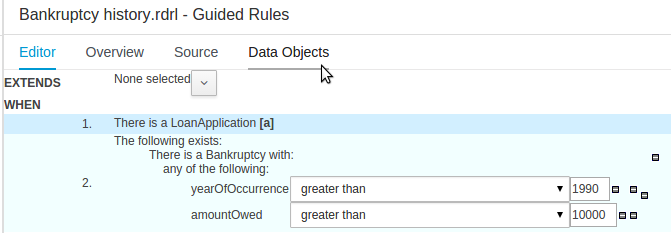
Figure 25.15. Asset Editors - Defining Data Objects available for authoring
The Data Object screen lists all Data Objects in the same package as the asset and allows other Data Objects from other packages to be imported.

When navigating Projects with the Project Explorer the workbench automatically builds the selected project, displaying build messages in the
Message Console. Whilst this is beneficial it can have a detremental impact on performance of the workbench when authoring large projects. The
automatic build can now be disabled with the org.kie.build.disable-project-explorer System Property. Set the value
to true to disable. The default value is false.
When cloning git Repositories it is now possible to use SCP style URLS, for example git@github.com:user/repository.git.
If your Operating System's public keystore is password protected the passphrase can be provided with the org.uberfire.nio.git.ssh.passphrase System Property.
When performing any of the following operations a check is now made against all Maven Repositories, resolved for the Project,
for whether the Project's GroupId, ArtifactId and Version pre-exist. If a clash is found the operation is prevented; although this can be overridden by Users
with the admin role.
Note
The feature can be disabled by setting the System Property org.guvnor.project.gav.check.disabled to true.
Resolved repositories are those discovered in:-
The Project's
POM<repositories>section (or any parentPOM).The Project's
POM<distributionManagement>section.Maven's global
settings.xmlconfiguration file.
Affected operations:-
Creation of new Managed Repositories.
Saving a Project defintion with the Project Editor.
Adding new Modules to a Managed Multi-Module Repository.
Saving the
pom.xmlfile.Build & installing a Project with the Project Editor.
Build & deploying a Project with the Project Editor.
Asset Management operations building, installing or deploying Projects.
RESToperations creating, installing or deploying Projects.
Users with the Admin role can override the list of Repositories checked using the "Repositories" settings in the Project Editor.
The KIE Execution Server Management UI has been completely redesigned to adjust to major improvements introduced recently. Besides the fact that new UI has been built from scratch and following best practices provided by PatternFly, the new interface expands previous features giving users more control of their servers.
Provides the backend services and an intuitive and friendly user interface that allows the workbench administrators to manage the application's users and groups.
This interface provides to the workbench administrators the ability to perform realm related operations such as create users, create groups, assign groups or roles to a given user, etc.
It comes by default with built-in implementations for the administration of Wildfly, EAP and Tomcat default realms, and it's designed to be extensible - any third party realm management system can be easily integrated into the workbench.
The following features were added to jBPM 6.3.
JavaScript as script language
You can now use JavaScript as dialect in scripts (script task and on-entry and on-exit scripts) and for constraints (for example on gateways). Same as with the Java and MVEL dialect, you have direct access to variables, globals and to the kcontext variable (giving you access to the ProcessContext).
For example, you can write something like:
kcontext.setVariable('surname', "tester"); var text = 'Hello '; print(text + kcontext.getVariable('name') + '\n'); try { somethingInvalid; } catch(err) { print(err + '\n'); }
Async continuation
Async continuation simplifies usage of asynchronous processing of process activities. Simply marking process activity as async will instruct the engine to complete current processing (including committing transaction) before entering that activity. This in turn will allow more control over what is executed in sequence and improve overall managebility of process execution. Here you can read an article describing this in details.
Signal scopes
Version 6.3 comes with improved support for signaling process instances. Based on concepts of singals defined in BPMN2 jBPM provides additional characteristic to them - the scope. Scope defines how to propagate the signal:
process instance scope - signals only elements within the same process instance, other process isntances won't be affected
default (ksession) scope - signals all elements that are waiting for given signal and are known to running ksession
project scope - signals all components within given project (that means managed by the same instance of runtime manager)
external scope - pluggable scope that allow to customize signal propagation - jBPM 6.3 comes with JMS based implementation which is enabled in workbench (receiving part)
More about the improved signaling can be found in this article.
Improved search capabilities when using jbpm services (RuntimeDataService) that allows
search by correlation key
search by process variable name
search by process variable name and value
Throw async signals
If there are several process instances from different process definitions, all of them waiting the same signal and only one of these process instances throws a RuntimeException all others not related will not move forward as well, because they are executed sequentially in the same transaction. That creates heavy dependency between unrelated process instances. Asynchronous throw event solves the problem by individually signaling each process instance in background.
The core process engine has always contained the flexibility to model adaptive and flexible processes. These kinds of features are typically also required in the context of case management. To simplify picking up some of these more advanced features, we created a (wrapper) API that exposes some of these features in a simple API. Note that this API simply relies on other existing features / API and can easily be extended. The API and implementation is added as part of a new jbpm-case-mgmt module.
Process instance description
Each case can have a unique name, specific to that case.
Case roles
A case can keep track of who is participating by using case roles. These roles can be defined as part of the case definition (by giving them a name and (optionally) a cardinality). Case roles could also be defined dynamically (at runtime). For active case instances, specific users can be assigned to roles.
Ad-hoc cases
One can start a new case without even having a case definition. Whatever happens inside this case is completely determined at runtime.
Case file
A case can contain any kind of data, from simple key-value pairs to custom data objects or documents.
Ad-hoc tasks
Using the ad-hoc constructs available in BPMN2, one can model optional process fragments, where only at runtime it is decided which of these fragments should be executed (and how many times). This could be driven by end users (selecting optional fragments for execution) or automatically (for example by rules that trigger certain fragments under certain conditions, or whenever triggered by external services).
Dynamic tasks
It is possible to add new tasks dynamically, even if they weren't defined upfront (in the case definition). This includes human tasks, service tasks and other processes.
Milestones
You can define milestones as part of the case definition (or even dynamically) and keep track of which milestones were reach for specific case instances.
The remote REST API for accessing the workbench received the following extensions:
Process instance image
Through the remote REST API you can now retrieve an image that represents the status of a particular process instance, annotated on the process diagram. This will generate the same image as you could already see in the workbench by looking at the process instance diagram, i.e. active nodes will be marked with a red border and completed nodes have a gray background. This is generated based on the SVG of the process diagram, which can automatically be generated by designer whenever saving a process.
Note
A newSVGImageProcessorhas been used to add the necessary annotations based on the audit log data. Note that this processor (in thejbpm-process-svgmodule) could be extended to support more advanced visualizations.This feature is unfortunately not active by default! In order to activate this feature, it is necessary to follow the following steps:
- Open the
org.kie.workbench.KIEWebapp/profiles/jbpm.xmlfile in the kie-wb war. Towards the top of this
jbpm.xmlfile, you'll see the following xml element:<storesvgonsave enabled="false"/>Change the
falsevalue here totrue.- (Re)Deploy the war
Furthermore, only process definitions that have been opened in the designer after this modification will be available via the REST operations described below. However, providing process images by default via REST (without having to turn on an option or open the process definition in designer) is on the roadmap.
2 new REST operation URLs have been made available to provide the image:
The following URL provides an image of the process definition:
{server}/jbpm-console/rest/runtime/{deploymentId}/process/{processDefId}/imageThe
deploymentIdURL parameter corresponds to the deployment id, while theprocessDefIdparameter corresponds to the process (definition) id.The following URL provides an image of the process definition, with the active nodes marked to correspond to the process instance URL parameter passed:
{server}/jbpm-console/rest/runtime/{deploymentId}/process/{processDefId}/image/{procInstId}The
deploymentIdURL parameter corresponds to the deployment id, theprocessDefIdparameter corresponds to the process (definition) id, and theprocInstIdURL parameter corresponds to the process instance id.
- Open the
The remote clients - kie-remote-client for accessing the workbench embedded in the workbench and kie-server-client for the separate (unified) execution server - are now also available as an OSGi feature.
jBPM Designer includes a new dialog for editing data inputs and outputs on activities in Business Processes. The dialog combines the functions of the dialogs in previous versions of jBPM Designer for editing data inputs and outputs, and for defining assignments between data inputs/outputs and process variables. The dialog allows the user to:
create and edit data inputs and data outputs on activities
define assignments from process variables or constants to data inputs, and from data outputs to process variables
The dialog is accessed by editing the Assignments property for activities which have this property, such as User Tasks, or by editing the DataInputAssociations or DataOutputAssociations property for activities which have one of these properties. The dialog is also available by clicking on a new button associated with those activities for which it is relevant:

jBPM executor has been significantly enhanced in version 6.3 where the biggest improvement was to provide support for JMS based notification mechanism to improve performance for immediate job execution. Instead of always relying on poll based mechanism, in case of immediate job request the executor is notified via JMS. Though it still provides same set of capabilities:
retry mechanism
error handling
search capabilities to look through job requests
Retry mechanism was static in prior versions, which means that the retry happened directly with next execution cycle. That made it rather low in terms of usage as in case there was a temporary problem e.g. network issue, system not available. It has been improved as well and allows configurable retry delay to be specified on each job individually. This delay can be given as time expressions that will be calculated from current time stamp. Retry delay can be given as:
single time expression - 5m or 2h
comma separated list of time expressions that should be used for subsequent retries - 10s,10m,1h,1d
In case number of retry delays is smaller than number of retries it will use last available value from the list of retry delays. Which for single value means it will always be the same value.
More information about executor enhancements can be found in these two articles: Shift gears with jBPM executor and Asynchronous processing
jBPM 6.3 brings in fully featured Unified KIE Execution Server that is based on successful KIE Execution Server that was released with 6.2 and covered rules use case. In 6.3 this execution server has ben enhanced and now support for rules and process (including user tasks and asynchronous jobs). It provides lightweight mechanism for executing your business assets. Number of environments can be built with with it:
single execution server (similar to workbench)
execution server per kjar
execution server per domain knowledge (set of kjars)
and more...
It is prepared to run on almost any container where tested configuration include following:
JBoss EAP 6.4
Wildfly 8.1 and 8.2
Tomcat 7 and 8
WebSphere 8.5.5.x
Weblogic 12c
To get started with KIE Execution Server look at this blog series that provides KIE Execution Server introduction.
The process and task lists screens are now backed up by the Dashbuilder's DataSet APIs and data providers. This enable these runtime screens to retrieve the data in a much more efficient way and enable the users to apply more advanced filters.
The initial version for creating filters is provided with jBPM 6.3.0.Final and it will be extended and polished in future versions.
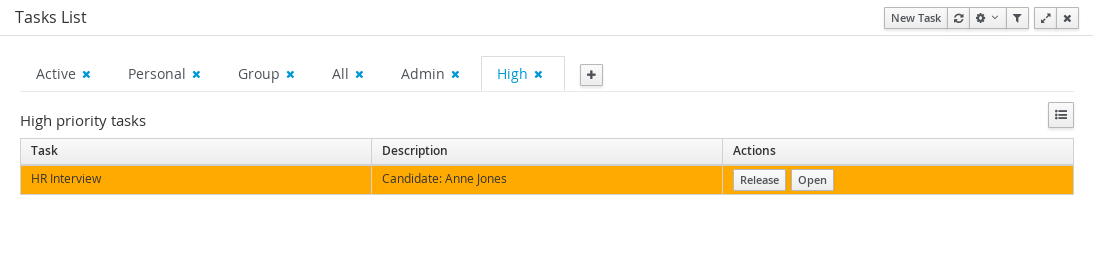
A new button to restore the default filters if needed is provided.
New filters can be created using the + button. This enable users to have custom filters. There is one filter per tab.
Users can create as many custom filters as they want. These filters will be stored in the user preferences.

The process instance list now provides domain specific columns to be added in custom filters. When the user creates a custom filter for a specific process definition the process variables are enabled as columns, to the process instance list. This feature wil be added to the task list as well in future versions.
Note
Only Process Variables with values will be listed in the column picker inside the custom filter tab.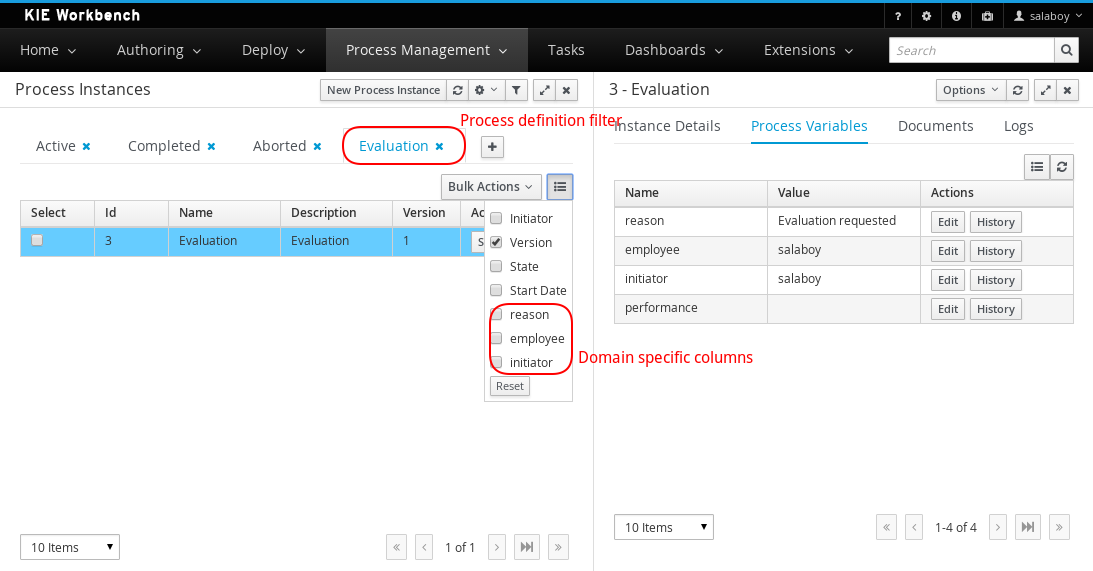
Decision tables used to have a Validation-button for validating the table. This is now removed and the table is validated after each cell value change. The validation and verification checks include:
- Redundancy
- Subsumption
- Conflicts
- Missing Columns
These checks are explained in detail in the workbench documentation.
The DRL Editor has undergone a face lift; moving from a plain TextArea to using ACE Editor and a custom DRL syntax highlighter.
To avoid conflicts when editing assets, a new locking mechanism has been introduced that makes sure that only one user at a time can edit an asset. When a user begins to edit an asset, a lock will automatically be acquired. This is indicated by a lock symbol appearing on the asset title bar as well as in the project explorer view. If a user starts editing an already locked asset a pop-up notification will appear to inform the user that the asset can't currently be edited, as it is being worked on by another user. As long as the editing user holds the lock, changes by other users will be prevented. Locks will automatically be released when the editing user saves or closes the asset, or logs out of the workbench. Every user further has the option to force a lock release in the metadata tab, if required.
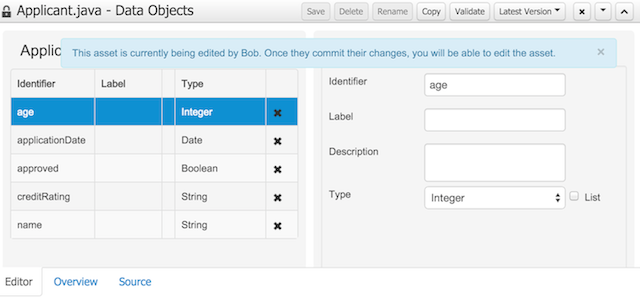
Drools and jBPM configurations, Persistence (see Generation of JPA enabled Data Models) and Advanced configurations were moved into "Tool Windows". "Tool Windows" are a new concept introduced in latest Uberfire version that enables the development of context aware screens. Each "Tool Window" will contain a domain editor that will manage a set of related Data Object parameters.
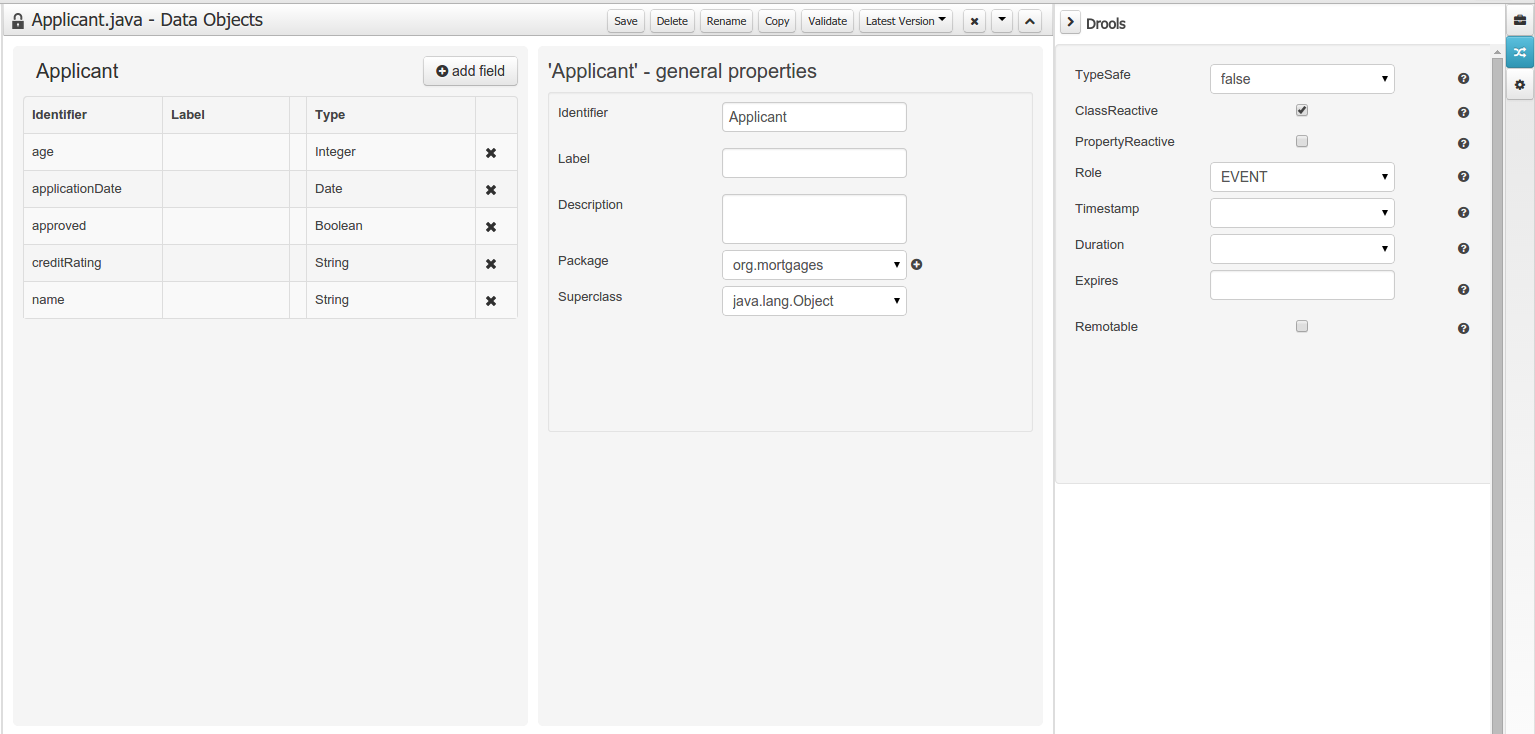
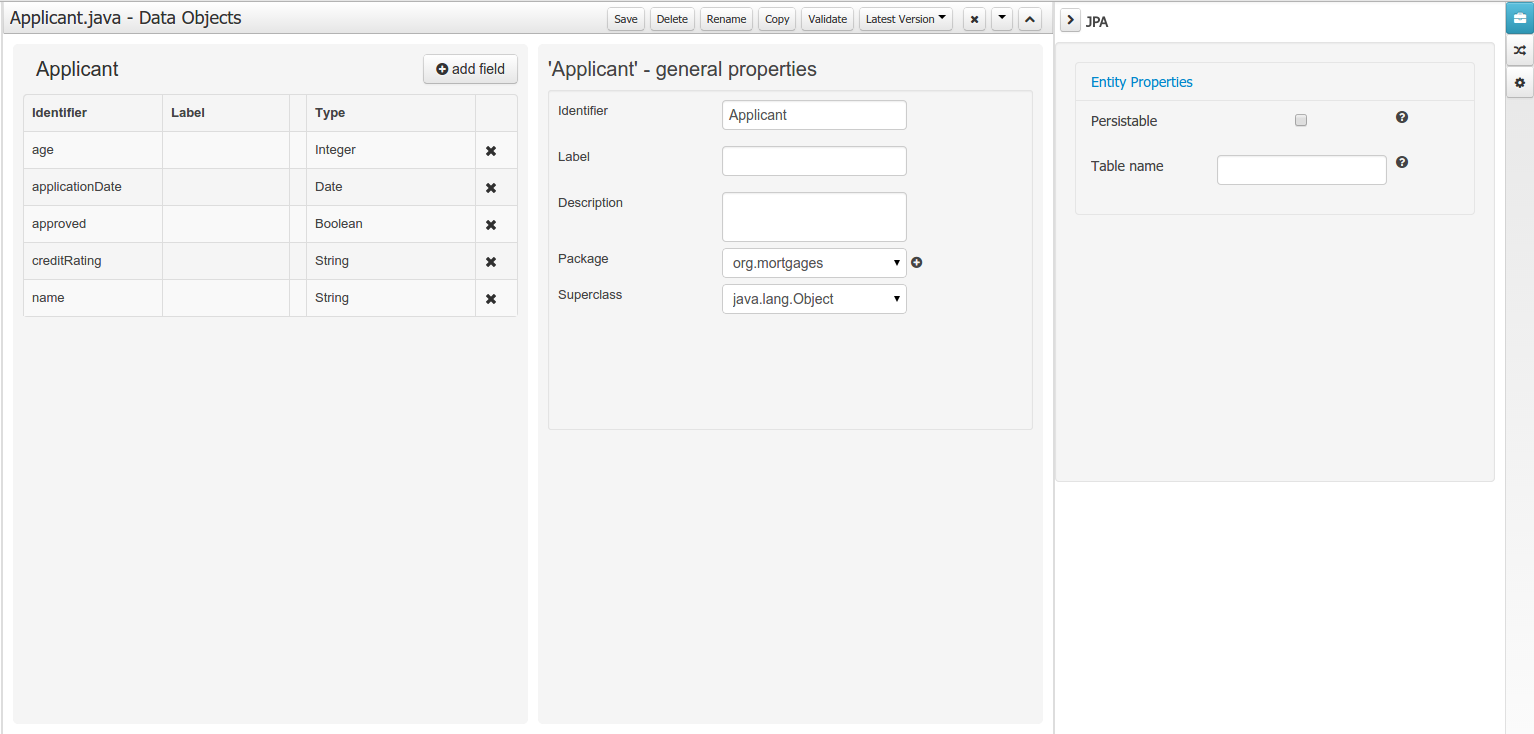
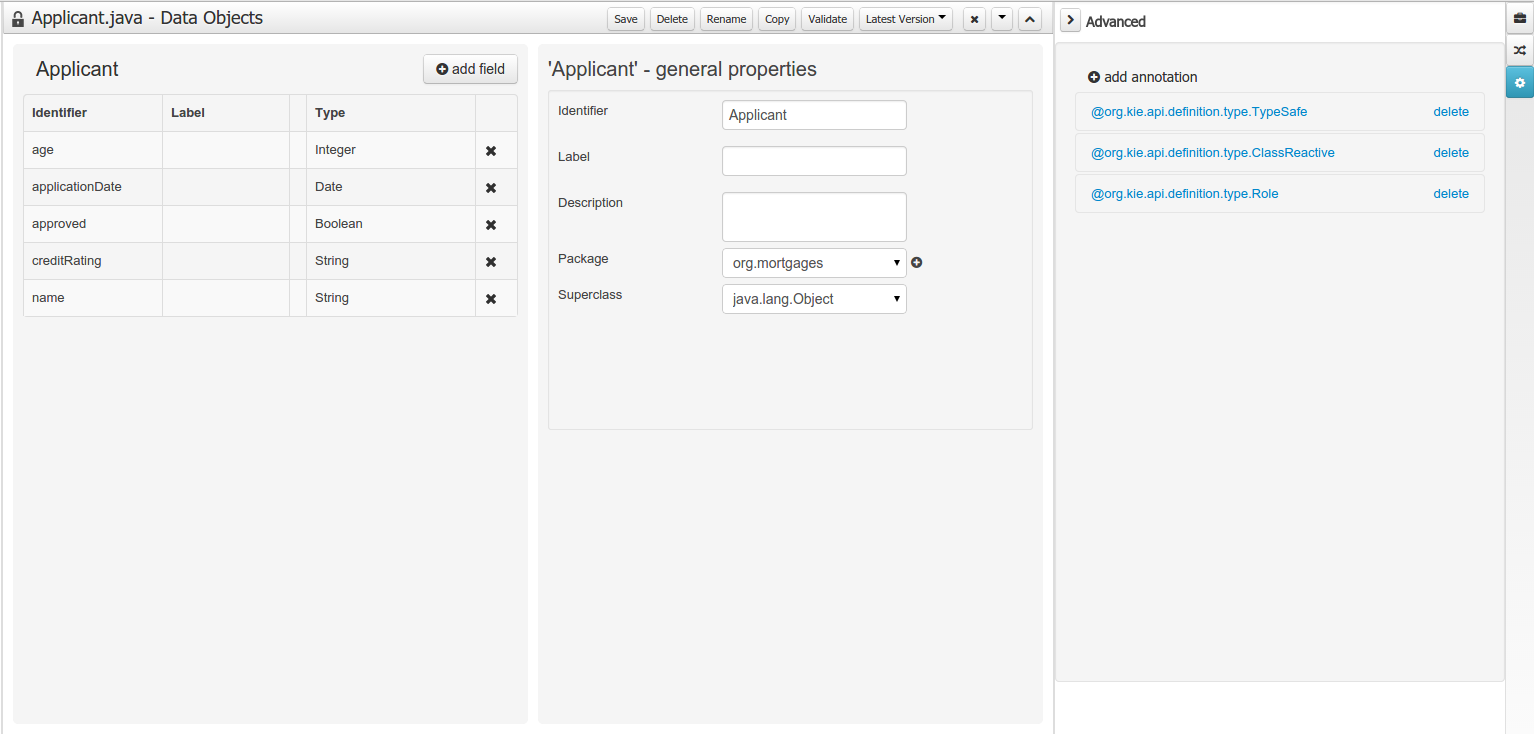
Data modeller was extended to support the generation of persistable Data Objects. The persistable Data Objects are based on the JPA specification and all the underlying metadata are automatically generated.
"The New -> Data Object" Data Objects can be marked as persistable at creation time.
The Persistence tool window contains the JPA Domain editors for both Data Object and Field. Each editor will manage the by default generated JPA metadata
Persistence configuration screen was added to the project editor.
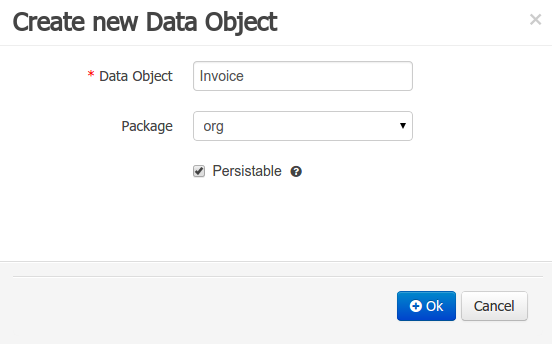
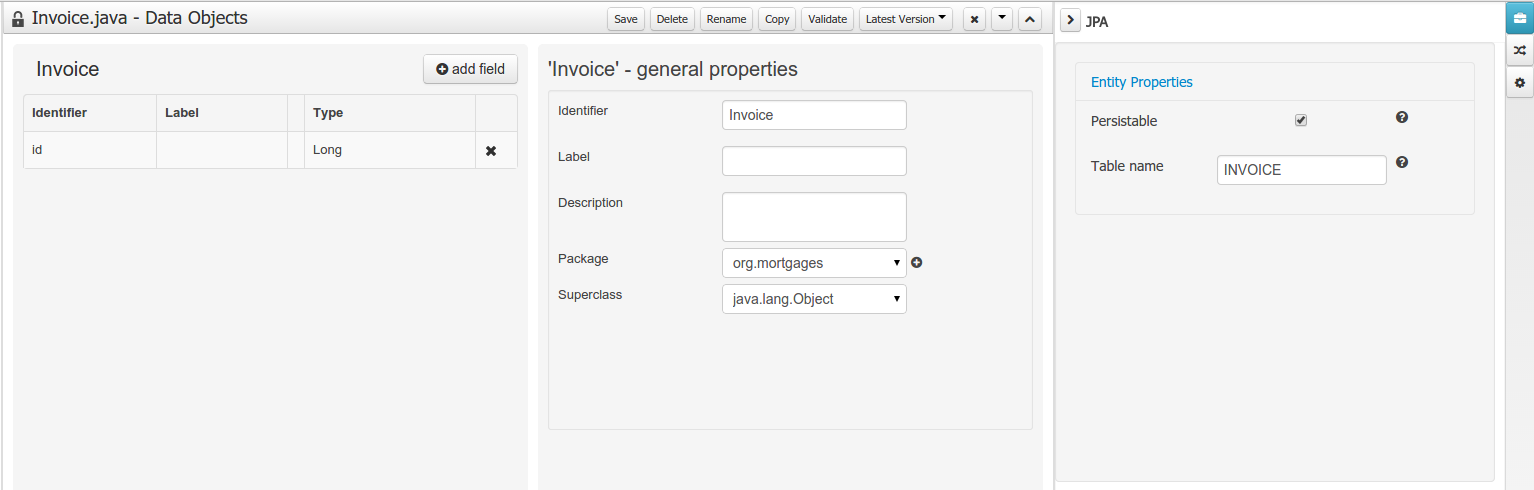
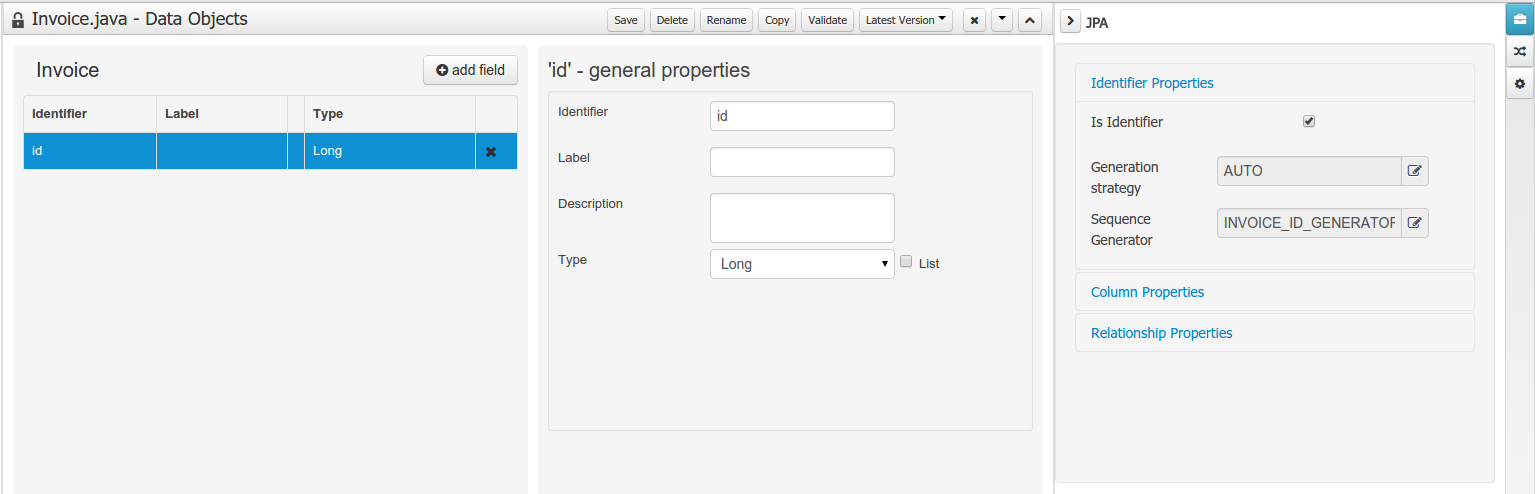
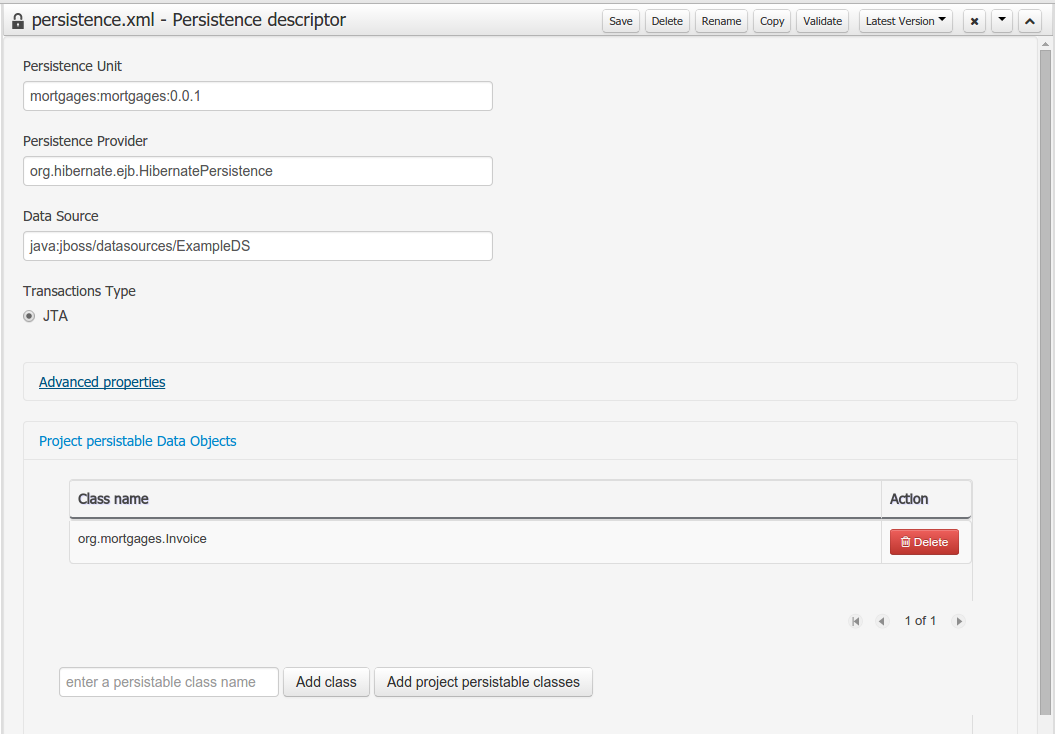
A new perspective for authoring data set definitions has been added. Data set definitions make it possible to retrieve data from external systems like databases, CSV/Excel files or even use a Java class to generate the data. Once the data is available it can be used, for instance, to create charts and dashboards from the Perspective Editor just feeding the charts from any of the data sets available.

The following features were added to the jBPM core on top of 6.1.
jBPM services modules have been significantly refactored to provide clear separation between the logic they bring and various frameworks that can be used to consume those services. With version 6.2 following modules are available:
jbpm-services-api - clear services api that shall be used by any client code that consumes services
jbpm-kie-services - core implementation of the services that do not have any framework specific code (e.g. CDI)
jbpm-services-cdi - CDI specific code on top of jbpm-kie-services
jbpm-services-ejb-api - ejb related extensions to services api - mainly to provide remote capablities for the interfaces
jbpm-services-ejb-impl - ejb specific code on top of jbpm-kie-services
jbpm-services-ejb-client - ejb client implementation to interact with services over remote ejb invocation - currently JBoss specific implementation available
jbpm-service-ejb-timer - ejb timer service backed by JEE timer service provided by container
jBPM services are intended to be base of execution server (regardless of what framework is used to build it up completely) so should be considered as first choice when enbedding jbpm in custom applications. With 6.2 capabilities it already provides support for most common frameworks used - CDI, EJB, Spring (should simply rely on core implementation). See this article for details and example.
Lazy initialization of runtime engine components by RuntimeManager to make runtime engine creation lightweight
RuntimeEngine has been enhanced to lazy initialize its components (KieSession, TaskService, AuditService) to improve overall performance of retriveing RuntimeEngine instances from RuntimeManager.
Life cycle management for work item handlers and event listeners
Handler and listeners can implement additional interface to be managed by runtime engine, see work item handler life cycle management for more details.
Deployments are now by default stored in data base (as deployment descriptors) to servive server restarts
Prior to verion 6.2 deployments that were handled by DeploymentService implementation were not persisted so they required to be handled separately - in case of kie-workbench they were stored inside system.git repo. With version 6.2 deployment service will persist that information directly into db which will make it easier in many cases including clustering as it will not require VFS clustering (Zookeeper and Helix) setup.
Extension to deployment descriptor to specify classes (by FQCN) that should be added to JAXB context for remote interfaces interaction
Deployment descriptor accept new set of elements
<remoteable-classes> ... <remotable-class>org.jbpm.test.CustomClass</remotable-class> ... </remoteable-classes>Classpath scanning for classes to be included in JAXB context for remote interfaces interaction
Classes annotated with javax.xml.bind.annotation.XmlRootElement and org.kie.api.remote.Remotable will be automatically added to JAXB context of given deployment as soon as they are defined as project dependency. At the same time all classes included in project itself are also added to deployment's JAXB context.
jbpm executor has been enhanced to provide support for:
requeue failed jobs so they can be executed once the error that caused them to is resolved.
reoccuring jobs that allows single definition to be repeatedly invoked based on time intervals, e.g. daily jobs to clean up history log tables. See this article for details and example.
CRON support for intermediate and boundary timer events
Enhanced support for multi instance activities to support completion condition as MVEL expression
While a number of core jars were OSGi-ready (in v5 already), a significant number of additional jars were now added to this list, including for example the human task service, the runtime managers, full persistence, etc. As a result, full core engine functionality is now available on top of OSGi. Specific extensions and tests showing it in action are available for Apache Karaf and Aries Blueprint (in the droolsjbpm-integration repository).
A new out-of-the-box service task has been implemented for using Apache Camel to connect a process to the outside world using some of the numerous Camel endpoint URIs. The service task allows you to for example specify how to pass data to an FTP endpoint by configuring properties such as hostname, port, username, payload, etc. for some common endpoints like (S)FTP, File, JMS, XSLT, etc. but you can use virtually any of the available endpoints by defining the URI yourself (http://camel.apache.org/uris.html).
Support for JavaScript code:
Added field property on simple fields to allow the user to add JavaScript code on the onchange event. This will allow the user to add richer functionallities on the forms.
Simplified the autogenerated field id's in order to allow the user to access the inputs directly via JavaScript.
New field types:
Added configurable ComboBox and RadioGroup fields. This new fields types allow the user to add ComboBoxes and Radio Button groups selecting their data source from the list of the Sources registered on the application.
Added support to simple types Lists (java.util.List<String>, java.util.List<Integer>, java.util.List<Long>...). This fields allow the user to upload multiple basic values (strings, numbers, dates and booleans) storing them on java.util.List
This feature makes it possible to download a repository or a folder from the repository as a ZIP file.
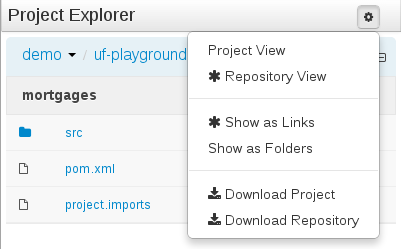
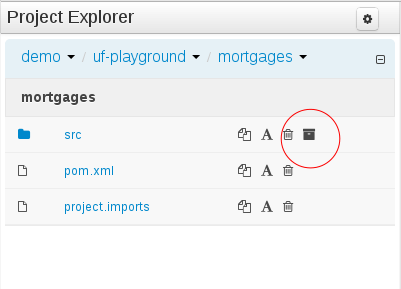
The ability to configure role-based permissions for the Project Editor have been added.
Permissions can be configured using the WEB-INF/classes/workbench-policy.properties file.
The following permissions are supported:
Save button
feature.wb_project_authoring_saveDelete button
feature.wb_project_authoring_deleteCopy button
feature.wb_project_authoring_copyRename button
feature.wb_project_authoring_renameBuild & Deploy button
feature.wb_project_authoring_buildAndDeploy
All of our new screens use GWT-Bootstrap widgets and alert users to input errors in a consistent way.
One of the most noticable differences was the Guided Decision Table Wizard that alerted errors in a way inconsistent with our use of GWT-Bootstrap.
This Wizard has been updated to use the new look and feel.
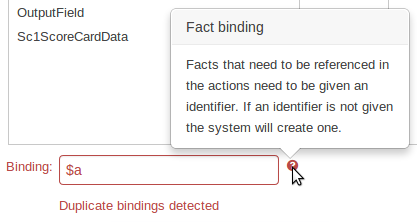
During the re-work of the Guided Decision Table's Wizard to make it's validation consistent with other areas of the application we took the opportunity to move the Wizard Framework to GWT-Bootstrap too.
The resulting appearance is much more pleasing. We hope to migrate more legacy editors to GWT-Bootstrap as time and priorities permit.
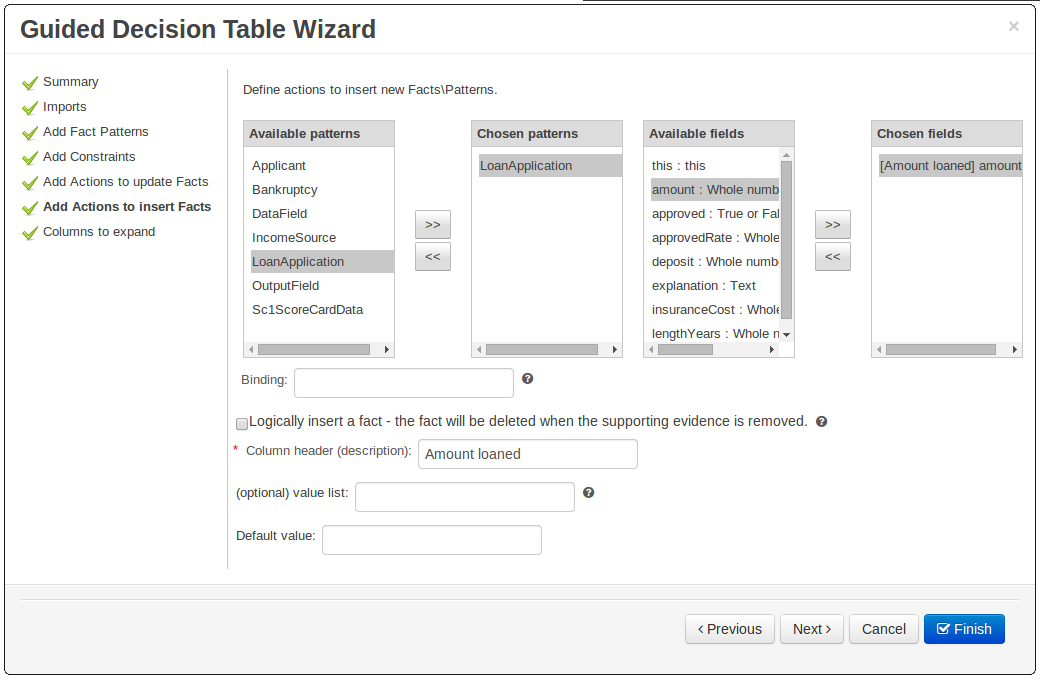
Consistency is a good thing for everybody. Users can expect different authoring metaphores to produce the same rule behaviour (and developers know when something is a bug!).
There were a few inconsistencies in the way XLS Decision Tables, Guidied Decision Tables and Guided Rule Templates generated the underlying rules for empty cells. These have been eliminated making their operation consistent.
If all constraints have null values (empty cells) the Pattern is not created.
Should you need the Pattern but no constraints; you will need to include the constraint
this != null.This operation is consistent with how XLS and Guided Decision Tables have always worked.
You can define a constraint on a String field for an empty String or white-space by delimiting it with double-quotation marks. The enclosing quotation-marks are removed from the value when generating the rules.
The use of quotation marks for other String values is not required and they can be omitted. Their use is however essential to differentiate a constraint for an empty String from an empty cell - in which case the constraint is omitted.
The Metadata tab provided in previous versions was redesigned to provide a better asset versioning information browsing and recovery. Now every workbench editor will provide an "Overview tab" that will enable the user to manage the following information.
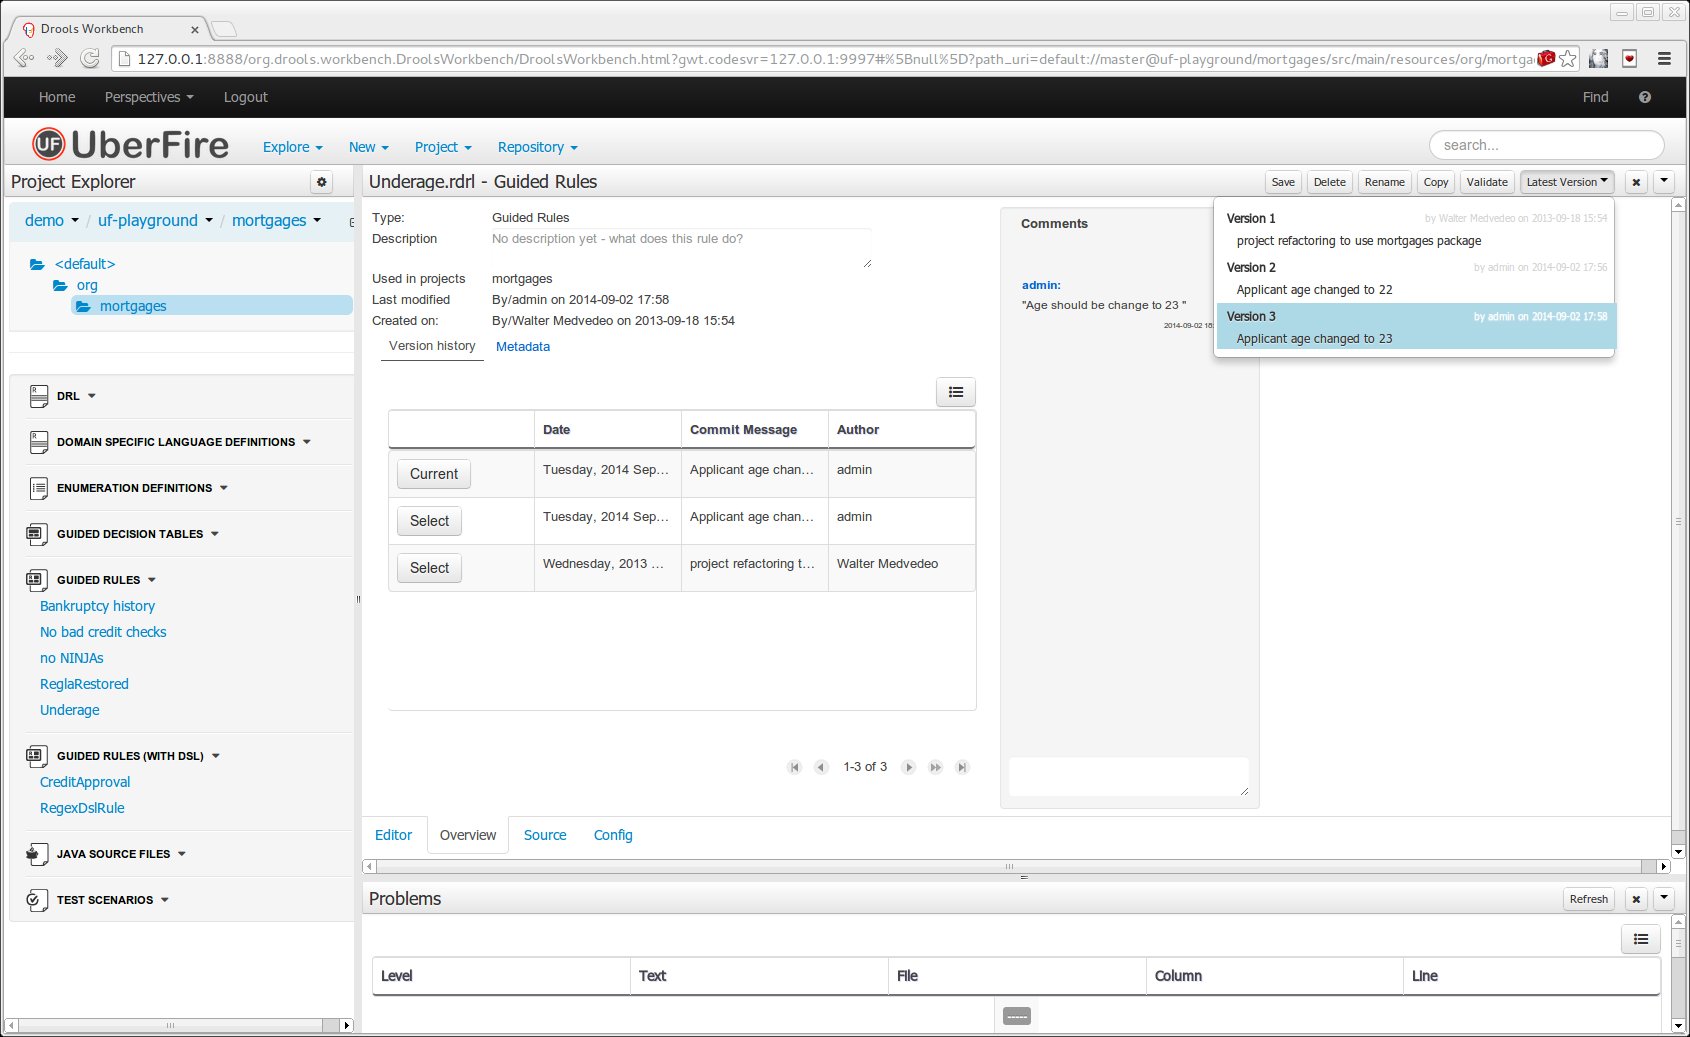
Versions history
The versions history shows a tabular view of the asset versions and provides a "Select" button that will enable the user to load a previously created version.
Metadata
The metadata section gets access to additional file attributes.
Comments area
The redesigned comments area enables much clearer discussions on a file.
Version selection dropdown
The "Version selector dropdown" located at the menu bar provides the ability to load and restore previous versions from the "Editor tab", without having to open the "Overview tab" to load the "Version history".
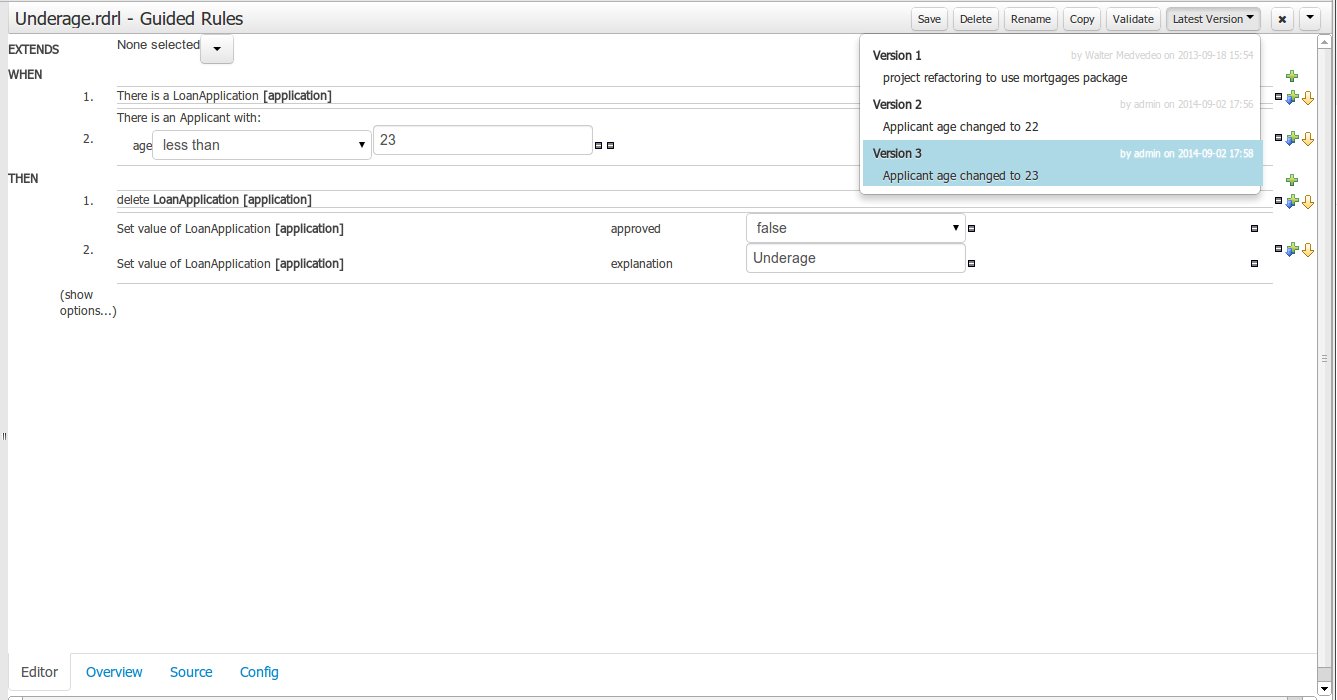
The Java editor was unified to the standard workbench editors functioning. It means that and now every data object is edited on his own editor window.
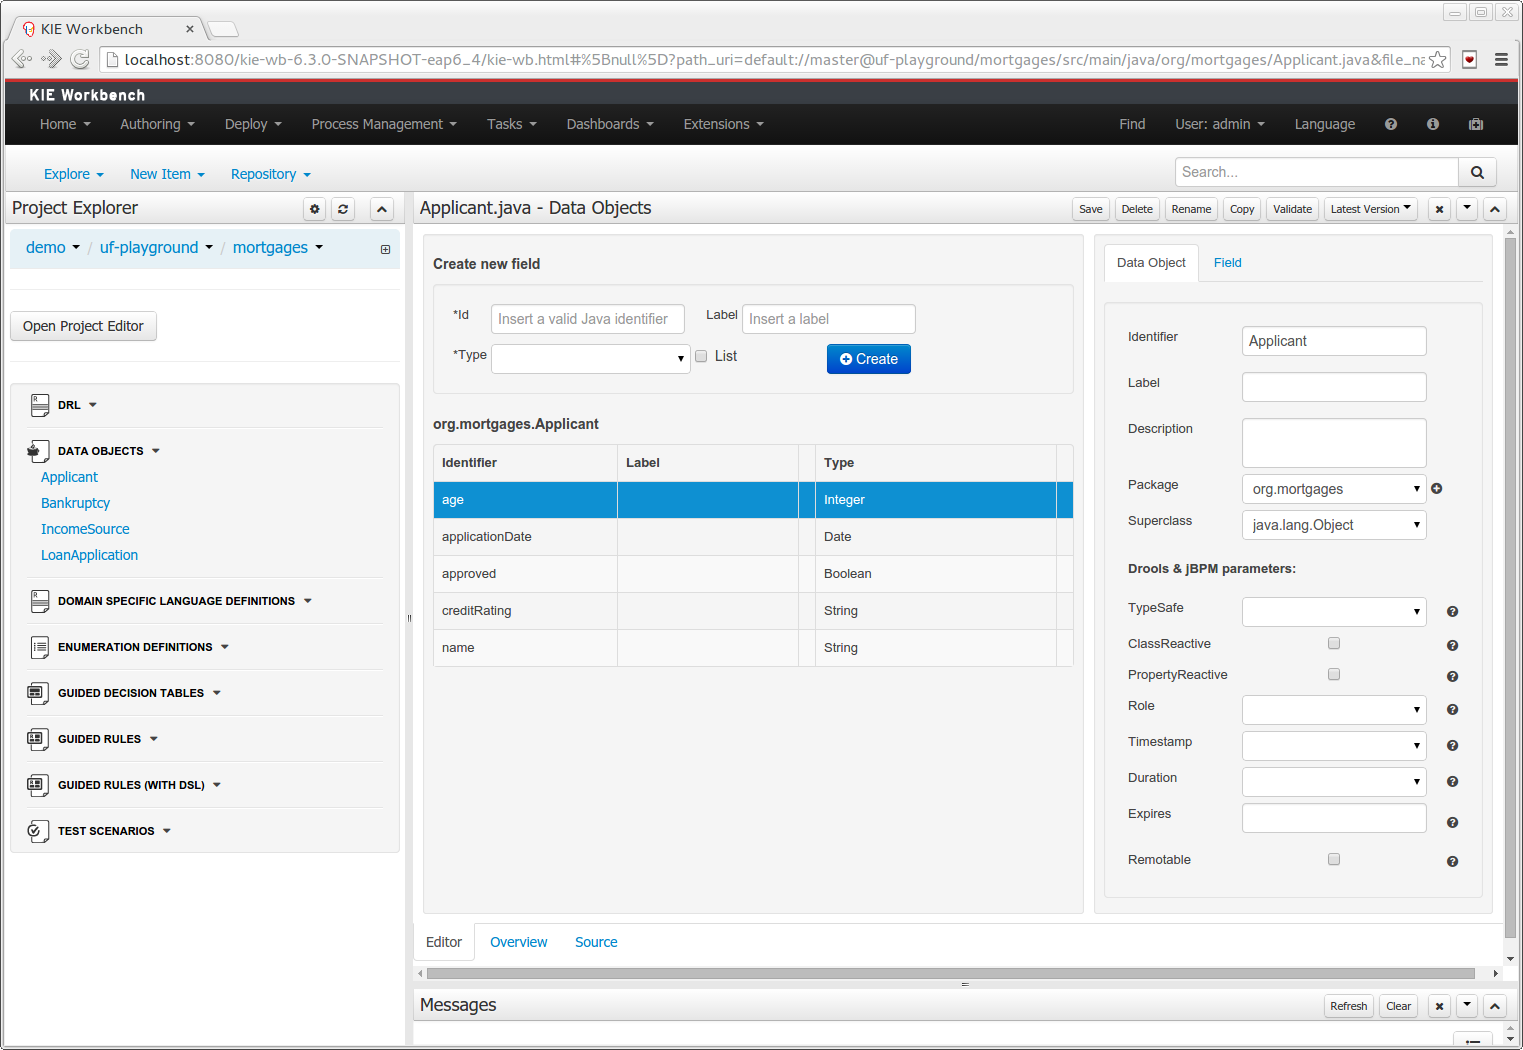
"New -> Data Object" option was added to create the data objects.
Overview tab was added for every file to manage the file metadata and have access to the file versions history.
Editable "Source Tab" tab was added. Now the Java code can be modified by administrators using the workbench.
"Editor" - "Source Tab" round trip is provided. This will let administrators to do manual changes on the generated Java code and go back to the editor tab to continue working.
Class usages detection. Whenever a Data Object is about to be deleted or renamed, the project will be scanned for the class usages. If usages are found (e.g. in drl files, decision tables, etc.) the user will receive an alert. This will prevent the user from breaking the project build.
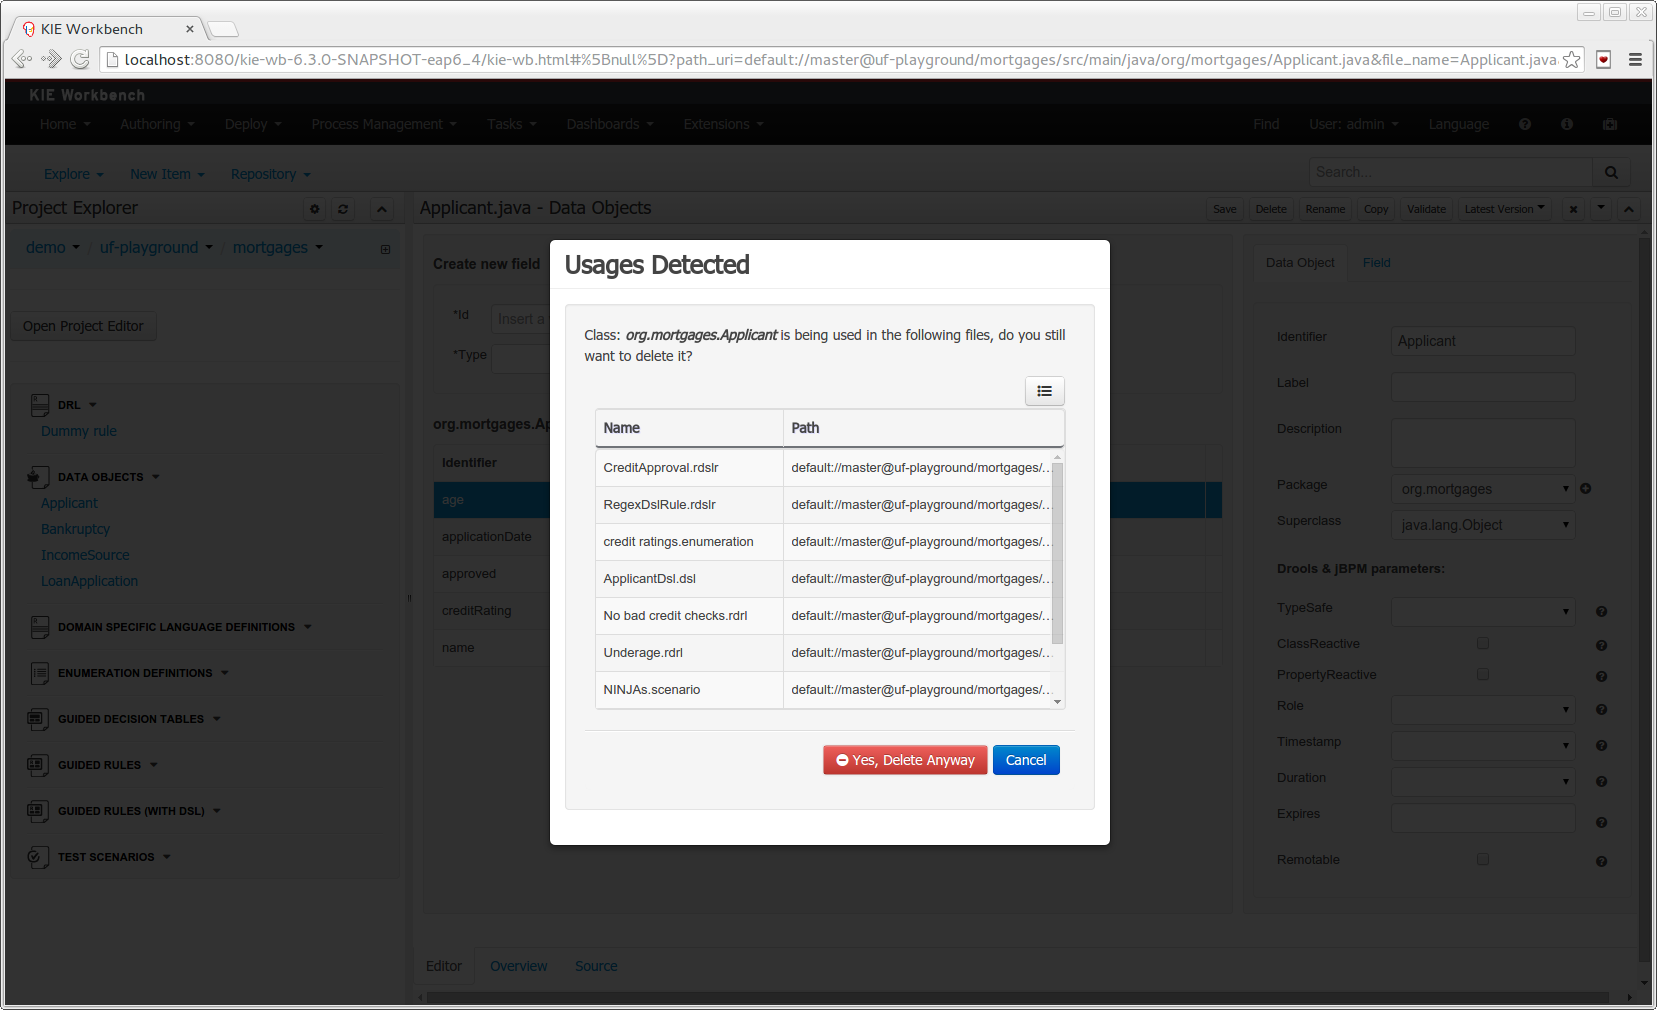
A new perspective called Management has been added under Servers top level menu. This perspective provides users the ability to manage multiple execution servers with multiple containers. Available features includes connect to already deployed execution servers; create new, start, stop, delete or upgrade containers.
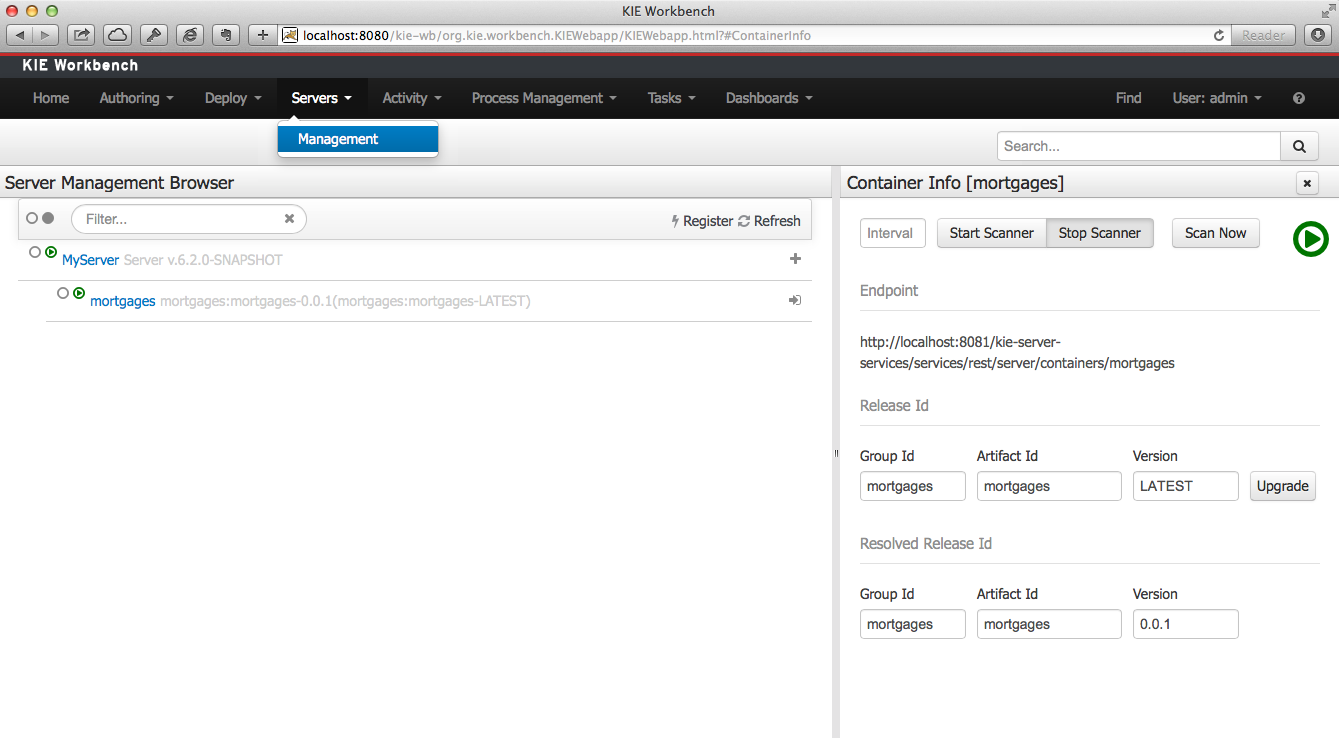
Note
Current version of Execution Server just supports rule based execution.
A brand new feature called Social Activities has been added under a new top level menu item group called Activity.
This new feature is divided in two different perspectives: Timeline Perspective and People Perspective.
The Timeline Perspective shows on left side the recent assets created or edited by the logged user. In the main window there is the "Latest Changes" screen, showing all the recent updated assets and an option to filter the recent updates by repository.
The People Perspective is the home page of an user. Showing his infos (including a gravatar picture from user e-mail), user connections (people that user follow) and user recent activities. There is also a way to edit an user info. The search suggestion can be used to navigate to a user profile, follow him and see his updates on your timeline.
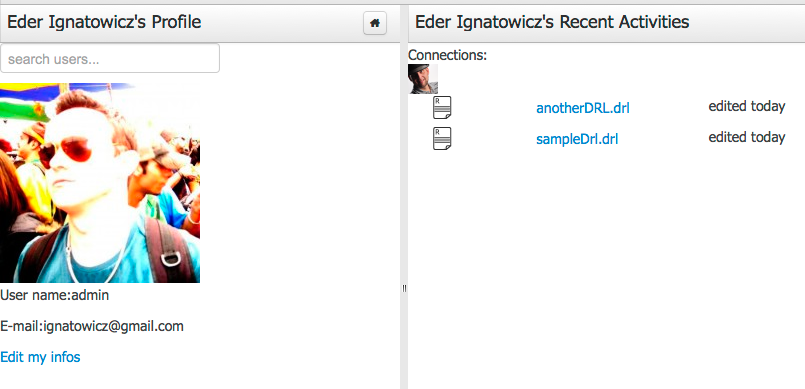
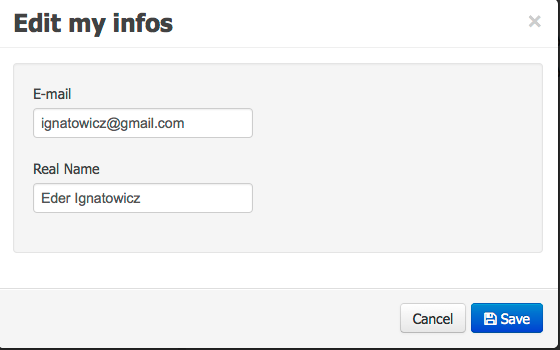
A brand new perspective called Contributors has been added under a new top level menu item group called Activity. The perspective itself is a dashboard which shows several indicators about the contributions made to the managed organizations / repositories within the workbench. Every time a organization/repository is added/removed from the workbench the dashboard itself is updated accordingly.
This new perspective allows for the monitoring of the underlying activity on the managed repositories.
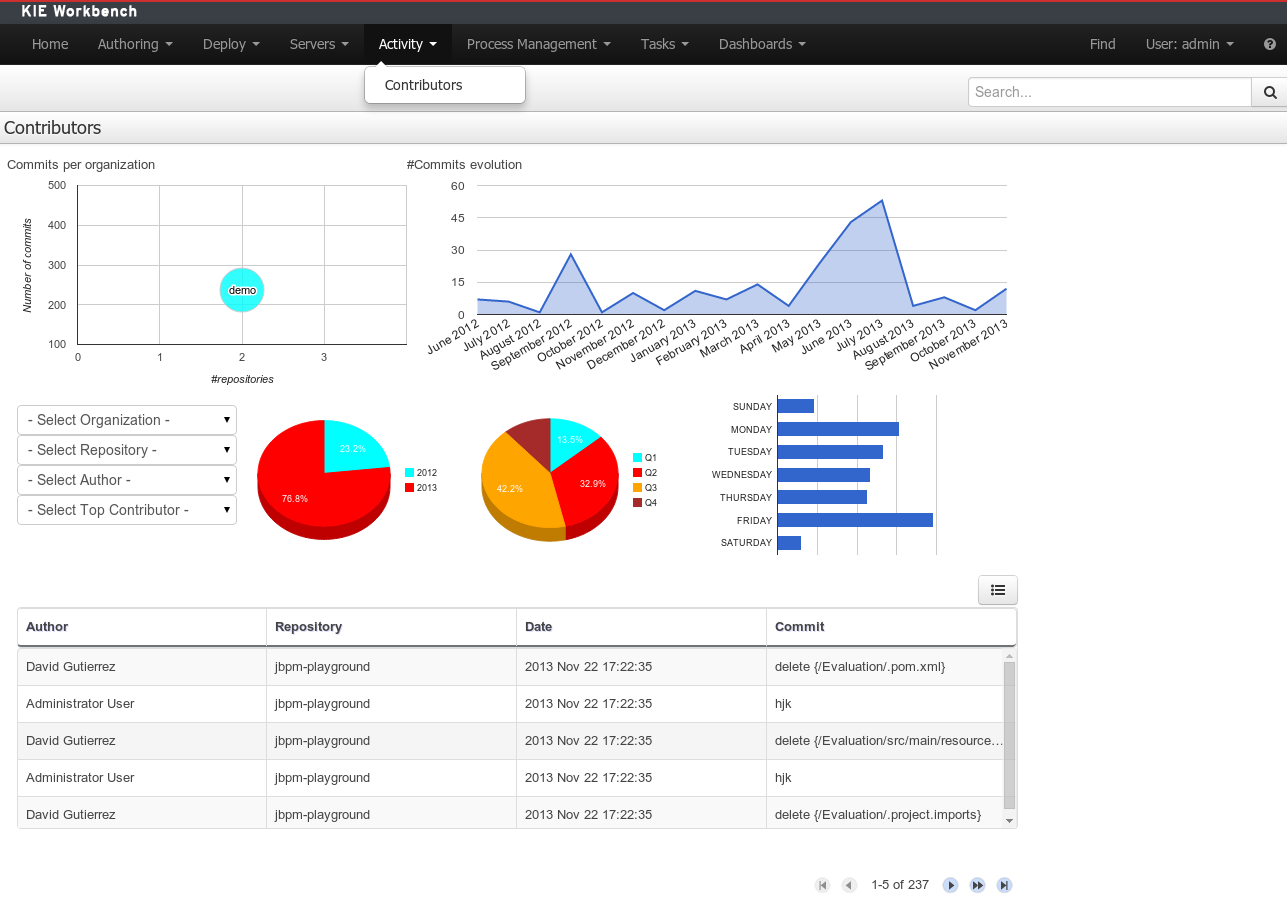
The location of new assets whilst authoring was driven by the context of the Project Explorer.
This has been replaced with a Package Selector in the New Resource Popup.
The location defaults to the Project Explorer context but different packages can now be more easily chosen.
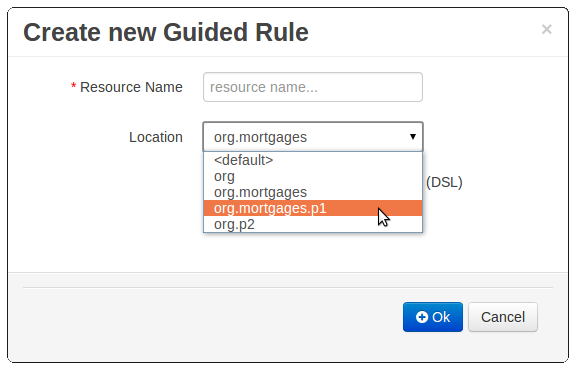
All Popups have been refactored to use GWT-Bootstrap widgets.
Whilst a simple change it brings greater visual consistency to the application as a whole.
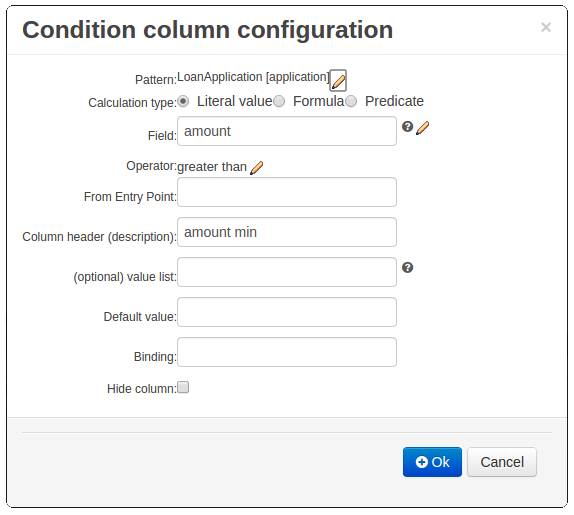
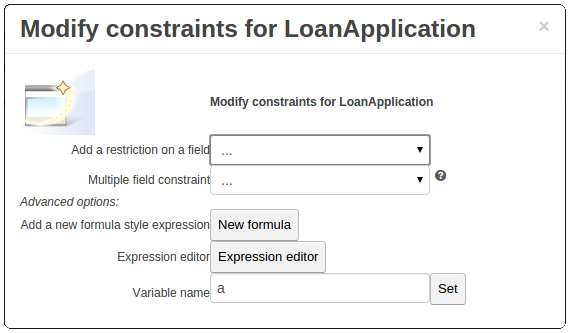
A new editor has been added to support modelling of simple decision trees.
See the applicable section within the User Guide for more information about usage.
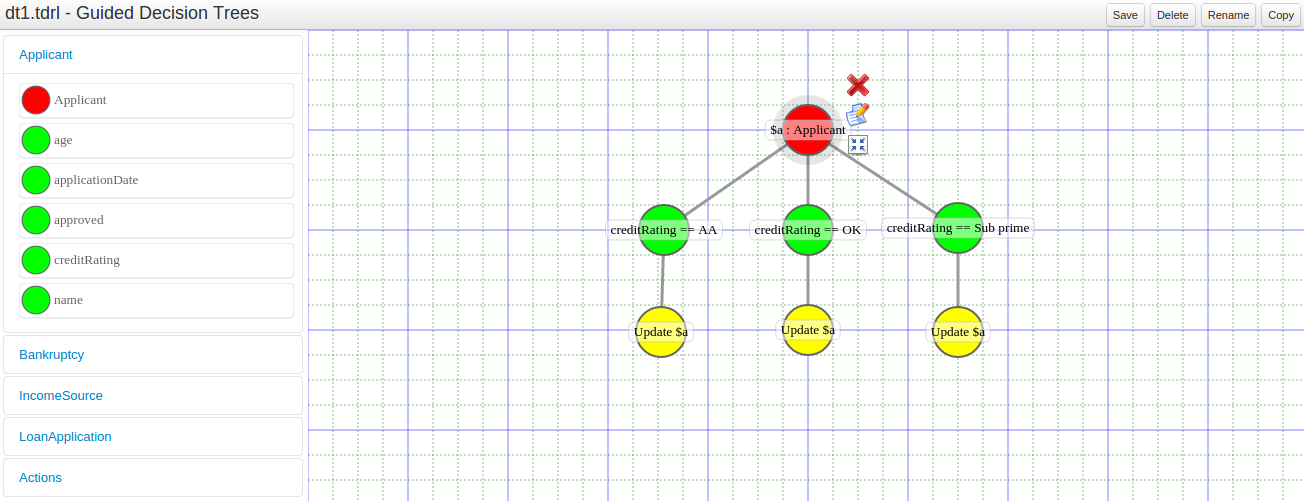
A wizard has been created to guide the repository creation process. Now the user can decide at repository creation time if it should be a managed or unmanaged repository and configure all related parameters.

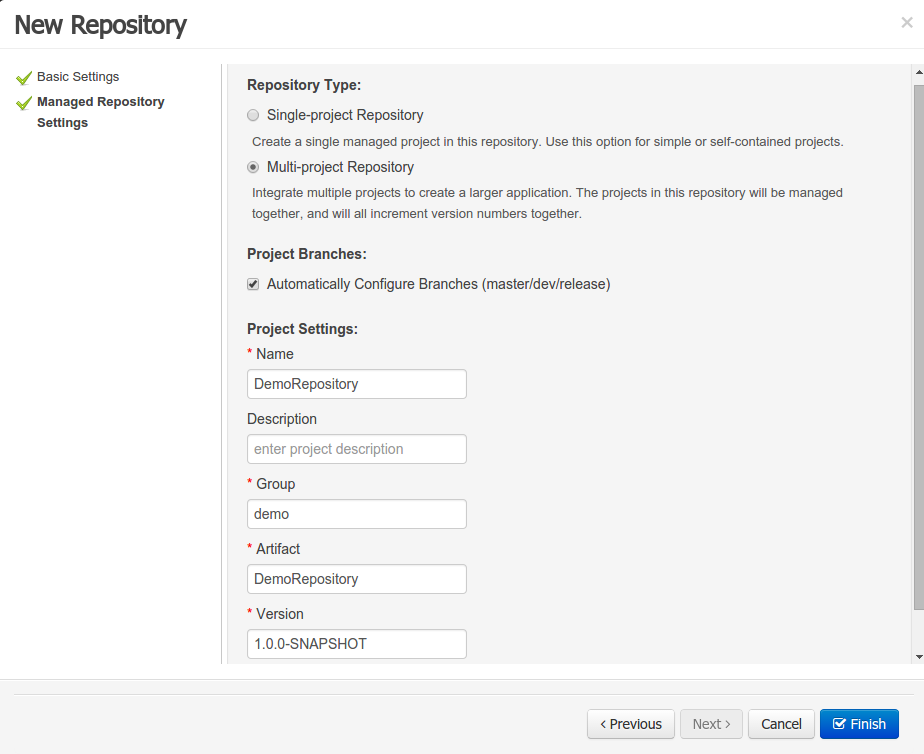
The new Repository Structure Screen will let users to manage the projects for a given repository, as well as other operations related to managed repositories like: branch creation, assets promotion and project release.
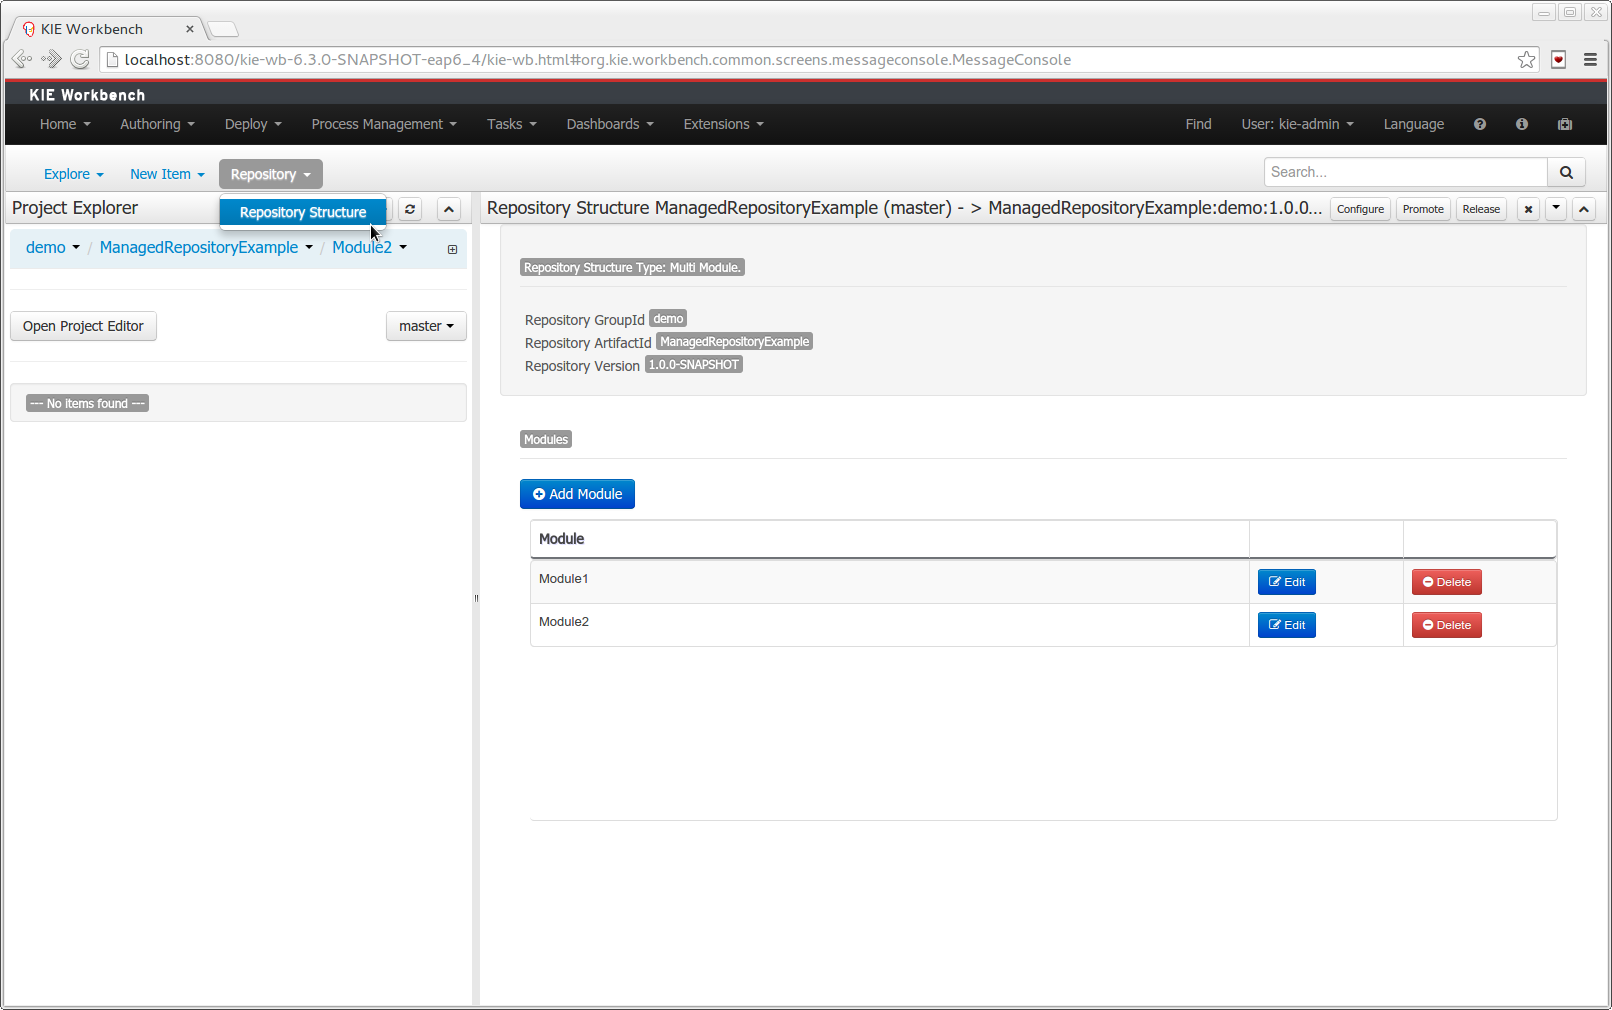
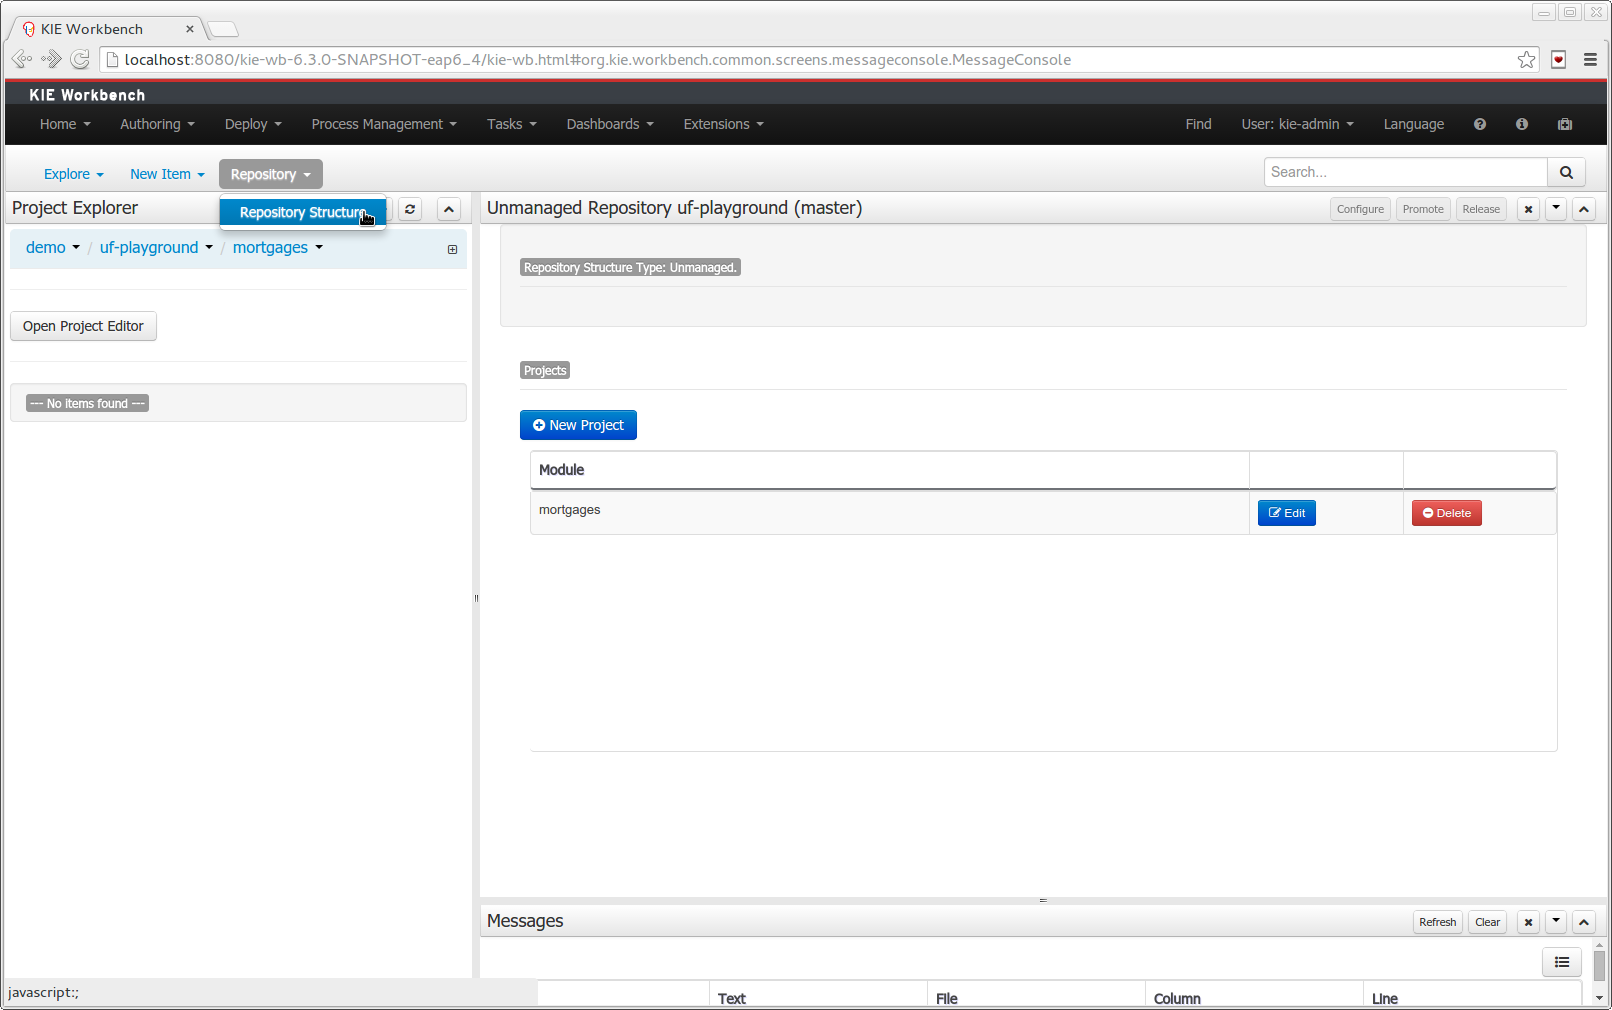
jBPM 6.1 comes with a ton of smaller improvements and bug fixes (done over the last few months on top of 6.0.1.Final), and also includes some important new features, adding to the foundation delivered as part of jBPM 6.0.
Now you can embed and run process/task forms that live inside the Kie-Workbench just adding a JavaScript library to your webapps. Look at the Using forms on client applications section to see the full functionality and usage examples.
Added new file type to manage upload documents on forms and store them on process variables. Using the Pluggable Variable Persistence you'll be able to create your own Marshalling Strategy and store the document contents on different systems (Database, Alfresco, Google Docs...) or use the default implementation and store them in your File System.
The execution server, that is part of the jbpm-console web tooling, now also comes with a Web Service interface (in addition to the existing REST, JMS and Java client interfaces).
Deployment descriptors have been added as an optional, yet powerful way of configuring deployment units - kjars. Deployment descriptors allow to configure (among others)
persistence unit names
work item handlers
event listeners (process, agenda, task)
roles (for authorizarion - see section 1.5)
Deployment descriptors can be configured on various levels for enhanced flexibility to allow simple override functionality. Detailed definition of deployment descriptor can be found in section 14.1.1. Deployment descriptors
The process definition and process instance view in the jbpm console now also take the role-based access control restrictions into account that can be defined on the project the process is defined in. You can limit the visibility of a project (or repository as a whole) by associating some roles with it that are required to be able to see the project (or repository). This can be done when creating the repository, or bu using the command line interface to connect to the execution server. The deployment descriptor (see previous section) also allows you to further customize these roles at deployment time. At runtime, the views will check if the current logged in user has one of the necessary roles to be able to see that process. If not, the user will not see this process or process instance in the process definition or process instance list respectively.
The installer is updated to support:
Wildfly 8.1 as application server
Eclipse BPMN2 Modeler 1.0.2
Eclipse Kepler SR2
Spring integration has been improved to allow complete configuration of jBPM runtime using Spring XML. That essentially means there are number of factory beans provided as part of droolsjbpm-integration module that significanlty simplifies configuration of jBPM. Moreover it allows various configuration options such as:
reply on JTA and entity manager factory
rely on JTA and shared entity manager
rely on local transactions and entity manager factory
rely on local transactions and shared entity manager
Details about spring configuration can be found in this article.
Smaller enhancements also include:
Task service (query) improvements, significantly speeding up queries when you have a large numbers of tasks in the database.
Various improvements to the asynchronous job executor so it can handle larger loads more easily and can be configured (number of parallel threads executing the jobs, retries, etc.).
Ability to configure task administrator groups in a UserTask (similar to how you already could configure individual task administrators).
Removed limitation on custom implementations of work item handler, event listeners that had to be placed on global classpath - usually in jbpm-console.war/WEB-INF/lib. With that custom classes can be added as maven dependencies into the project and will be registered on underlying components (ksession).
Full round trip between Data modeler and Java source code is now supported. No matter where the Java code was generated (e.g. Eclipse, Data modeller), data modeler will only update the necessary code blocks to maintain the model updated.
New annotations @TypeSafe, @ClassReactive, @PropertyReactive, @Timestamp, @Duration and @Expires were added in order enrich current Drools annotations manged by the data modeler.
We have standardized the display of tabular data with a new table widget.
The new table supports the following features:
Selection of visible columns
Resizable columns
Moveable columns
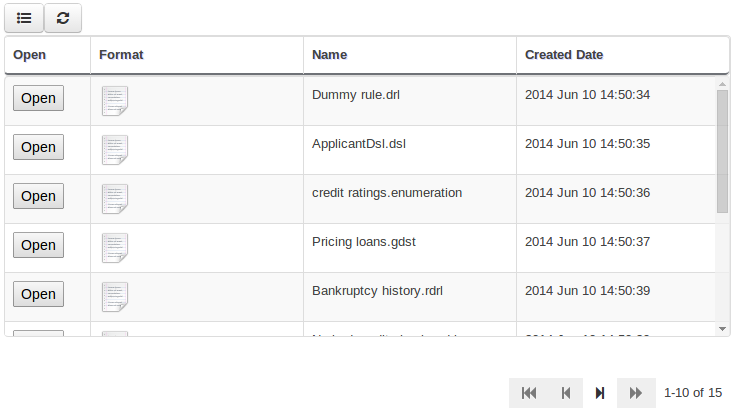
The table is used in the following scenarios:
Inbox (Incoming changes)
Inbox (Recently edited)
Inbox (Recently opened)
Project Problems summary
Artifact Repository browser
Project Editor Dependency grid
Project Editor KSession grid
Project Editor Work Item Handlers Configuration grid
Project Editor Listeners Configuration grid
Search Results grid
The Guided Rule Editor, Guided Template Editor and Guided Decision Table Editor have been
changed to generate modify(x){...}
Historically these editors supported the older update(x) syntax and hence
rules created within the Workbench would not respond correctly to
@PropertyReactive and associated annotations within a model. This has now been
rectified with the use of modify(x){...} blocks.
KIE is the new umbrella name used to group together our related projects; as the family continues to grow. KIE is also used for the generic parts of unified API; such as building, deploying and loading. This replaces the droolsjbpm and knowledge keywords that would have been used before.
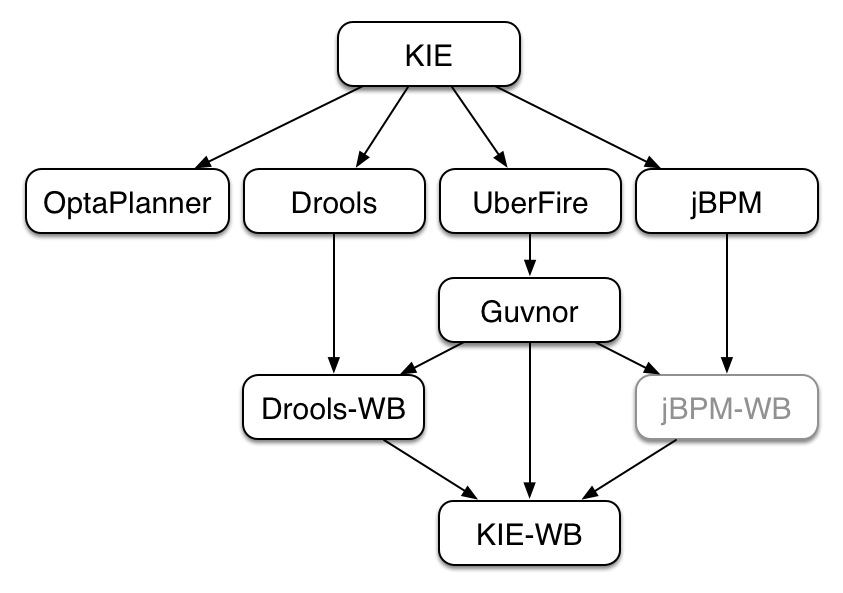
One of the biggest complaints during the 5.x series was the lack of defined methodology for deployment. The mechanism used by Drools and jBPM was very flexible, but it was too flexible. A big focus for 6.0 was streamlining the build, deploy and loading (utilization) aspects of the system. Building and deploying activities are now aligned with Maven and Maven repositories. The utilization for loading rules and processess is now convention and configuration oriented, instead of programmatic, with sane defaults to minimise the configuration.
Projects can be built with Maven and installed to the local M2_REPO or remote Maven repositories. Maven is then used to declare and build the classpath of dependencies, for KIE to access.
The 'kmodule.xml' provides declarative configuration for KIE projects. Conventions and defaults are used to reduce the amount of configuration needed.
Example 25.1. Declare KieBases and KieSessions
<kmodule xmlns="http://www.drools.org/xsd/kmodule">
<kbase name="kbase1" packages="org.mypackages">
<ksession name="ksession1"/>
</kbase>
</kmodule>Example 25.2. Utilize the KieSession
KieServices ks = KieServices.Factory.get();
KieContainer kContainer = ks.getKieClasspathContainer();
KieSession kSession = kContainer.newKieSession("ksession1");
kSession.insert(new Message("Dave", "Hello, HAL. Do you read me, HAL?"));
kSession.fireAllRules();It is possible to include all the KIE artifacts belonging to a KieBase into a second KieBase. This means that the second KieBase, in addition to all the rules, function and processes directly defined into it, will also contain the ones created in the included KieBase. This inclusion can be done declaratively in the kmodule.xml file
Example 25.3. Including a KieBase into another declaratively
<kmodule xmlns="http://www.drools.org/xsd/kmodule">
<kbase name="kbase2" includes="kbase1">
<ksession name="ksession2"/>
</kbase>
</kmodule>or programmatically using the KieModuleModel.
Example 25.4. Including a KieBase into another programmatically
KieModuleModel kmodule = KieServices.Factory.get().newKieModuleModel();
KieBaseModel kieBaseModel1 = kmodule.newKieBaseModel("KBase2").addInclude("KBase1");Any Maven produced JAR with a 'kmodule.xml' in it is considered a KieModule. This can be loaded from the classpath or dynamically at runtime from a Resource location. If the kie-ci dependency is on the classpath it embeds Maven and all resolving is done automatically using Maven and can access local or remote repositories. Settings.xml is obeyed for Maven configuration.
The KieContainer provides a runtime to utilize the KieModule, versioning is built in throughout, via Maven. Kie-ci will create a classpath dynamically from all the Maven declared dependencies for the artifact being loaded. Maven LATEST, SNAPSHOT, RELEASE and version ranges are supported.
Example 25.5. Utilize and Run - Java
KieServices ks = KieServices.Factory.get();
KieContainer kContainer = ks.newKieContainer(
ks.newReleaseId("org.mygroup", "myartefact", "1.0") );
KieSession kSession = kContainer.newKieSession("ksession1");
kSession.insert(new Message("Dave", "Hello, HAL. Do you read me, HAL?"));
kSession.fireAllRules();KieContainers can be dynamically updated to a specific version, and resolved through Maven if KIE-CI is on the classpath. For stateful KieSessions the existing sessions are incrementally updated.
Example 25.6. Dynamically Update - Java
KieContainer kContainer.updateToVersion(
ks.newReleaseId("org.mygroup", "myartefact", "1.1") );The KieScanner is a Maven-oriented replacement of the KnowledgeAgent
present in Drools 5. It continuously monitors your Maven repository
to check if a new release of a Kie project has been installed and if so, deploys it in
the KieContainer wrapping that project. The use of the KieScanner
requires kie-ci.jar to be on the classpath.
A KieScanner can be registered on a KieContainer
as in the following example.
Example 25.7. Registering and starting a KieScanner on a KieContainer
KieServices kieServices = KieServices.Factory.get();
ReleaseId releaseId = kieServices.newReleaseId( "org.acme", "myartifact", "1.0-SNAPSHOT" );
KieContainer kContainer = kieServices.newKieContainer( releaseId );
KieScanner kScanner = kieServices.newKieScanner( kContainer );
// Start the KieScanner polling the Maven repository every 10 seconds
kScanner.start( 10000L );In this example the KieScanner is configured to run with a fixed
time interval, but it is also possible to run it on demand by invoking the
scanNow() method on it. If the KieScanner finds, in the
Maven repository, an updated version of the Kie project used by that KieContainer
it automatically downloads the new version and triggers an incremental build of the new
project. From this moment all the new KieBases and KieSessions
created from that KieContainer will use the new project version.
The CompositeClassLoader is no longer used; as it was a constant source of performance problems and bugs. Traditional hierarchical classloaders are now used. The root classloader is at the KieContext level, with one child ClassLoader per namespace. This makes it cleaner to add and remove rules, but there can now be no referencing between namespaces in DRL files; i.e. functions can only be used by the namespaces that declared them. The recommendation is to use static Java methods in your project, which is visible to all namespaces; but those cannot (like other classes on the root KieContainer ClassLoader) be dynamically updated.
The 5.x API for building and running with Drools and jBPM is still available through Maven dependency "knowledge-api-legacy5-adapter". Because the nature of deployment has significantly changed in 6.0, it was not possible to provide an adapter bridge for the KnowledgeAgent. If any other methods are missing or problematic, please open a JIRA, and we'll fix for 6.1
While a lot of new documentation has been added for working with the new KIE API, the entire documentation has not yet been brought up to date. For this reason there will be continued references to old terminologies. Apologies in advance, and thank you for your patience. We hope those in the community will work with us to get the documentation updated throughout, for 6.1
A new public API has been created for interacting with the core engine (shared between jBPM and Drools). This not only handles runtime operations to start processes, etc. but also instantiating sessions, registering listeners, configuration, etc.
New APIs were added in various areas, like for example the TaskService interface was moved to the public API, the new RuntimeManager was introduced and a lot of related interfaces and classes were added as well.
For backwards compatibility with v5, a knowledge-api JAR has been constructed, that implements the old v5 knowledge-api interfaces on top of the v6 engine. Make sure to include this JAR in your classpath if you want to keep using the v5 API.
The execution engine itself has (mostly) remained the same, although we've done various improvements in the following areas:
RuntimeManager: instantiating a ksession (and an associated task service) has been simplified significantly, by introducing a runtime manager where you can simply ask for a reference to a ksession whenever you need it. The Runtime manager is responsible for initialization, configuration and disposal of the ksession (and task service), and three predefined strategies are available:
Singleton: the RuntimeManager reused the same ksession for all requests (and executes the requests in sequence, one at a time)
Session per request: the RuntimeManager instantiates a new ksession per request that will be used for executing that request and disposed at the end. Each request will receive its own ksession and they can all be executed in parallel.
Session per process instance: the RuntimeManager reuses the same ksession for all requests related to one specific process instance. This might be necessary if you are storing data inside your session (for example for rule evaluations) that you need to be available later in the process as well. Note that the session is disposed after each command but stored in the database so it can be restored whenever necessary.
jBPM Services (CDI): To simplify integration of jBPM inside CDI-based applications, the jbpm-services module contains various CDI services that you can configure and use inside your application simply by injecting the necessary services (like a RuntimeManager or TaskService for example) inside your application, making integration easier than ever.
Timer service: a Quartz-based timer service is now available, that allows you to dispose your session at any point in time, and the timer service will be responsible for rehydrating a ksession whenever a timer should be fired. This timer service also works in a clustered environment, where multiple nodes can work together on sharing the work load but timers will only be fired once by one of the nodes.
Exception and compensation management: various improvements in this area allow you to use more BPMN2 constructs related to exception and compensation management in your processes, and various strategies have been extended and documented to better handle exceptions in different ways.
Asynchronous handlers: asynchronous execution of interaction with external services can now be implemented by reusing the asynchronous job executor.
Asynchronous auditing using JMS: audit logging can now also be done asynchronously by sending the events to a JMS queue rather than persisting them as part of the engine transaction.
The task service has been refactored significantly as well, and the TaskService APIs have been moved to the public kie-api. Although the TaskService interfaces themselves haven't changed a lot, the internal implementation has been simplified. Auditing for the task-related operations (similar to the runtime engine auditing) has been added.
By default, a local task service will always be used by a ksession to perform various task-related operations (creating a task, being notified when a task is completed). Setting up a remote singleton task service and connecting multiple ksessions to this (using Mina or HornetQ) as was possible in jBPM5 is no longer possible, as it introduces more challenges that it brings advantages. Since the jBPM execution service now also provides a remote API for all task-related operations, we believe this setup is no longer necessary, and has been replaced by the use of a local task service in all use cases.
jBPM designer has been reimplemented and is fully integrated into the workbench. It now easily integrates with many of the workbench services available. In addition, the following features were added/improved on:
Improvement of jBPM Simulation engine and the UI. Added ability to specify simulation properties on more node type and added more results graphs such as the the Total Cost graph.
Many updates to the Designer Toolbar for usability purposes.
Visual Validation update - it now is a real-time visualization of issues done during process modeling.
Ability to generate task forms for specific task node.
Integration with the jBPM Form Modeler for both task and process forms.
Update to process properties - added grouping of properties into sections making it more user friendly to find properties.
Update to Object Library - added type specific tasks to palette (rather than having to morph to a certain type after adding a task to the canvas).
Save/Remove/CopyDelete feature have been added directly into Designer and integrate with the workbench services for those operations.
Autosave - option for users to enable auto-saving of their business process during modeling.
Two new default Service Tasks (REST and Web Services)
A new web-based data modeler is integrated in the workbench, which allows non-technical users to create data models (to be used in your processes and rules) in a user-friendly manner. These models are saved as Java classes (with the necessary annotations) in the project and added to the kjar upon build and deploy. Check the chapter on Data Modeler in the Workbench Part for all the details.
A new web-based form modeler is integrated in the workbench, which allows non-technical users to create forms (for starting processes and/or completing human task). The form modeler is a WYSIWYG editor where you can drag and drop form elements (text boxes, labels, etc.), link it to data that is expected as input or output of the form, customize properties of each element and the layout, etc. These forms are then shown when starting the process or completing a task, integrated into the appropriate runtime views. Check the chapter on Form Modeler in the Workbench Part for all the details.
The jBPM console has been reimplemented and is integrated into the workbench as well. It provides similar features as jBPM5 (starting process instances, inspecting current state and variables, looking at task lists) but is now much more powerful and exposes a lot more features. Check the chapter on Process and Task Management in the Workbench Part for all the details.
A new web-based monitoring and reporting tool has been integrated in the workbench. This displays charts, tables, etc. about the current status of your application(s). It comes with some process and task dashboards out-of-the-box (showing for example the number of running process instances, the number of tasks completed per time frame, etc.). These dashboards however can be fully customized to show the data that is relevant to you, including for example your own data sources, making domain-specific charts (for example showing your key performance indicators (KPIs) instead of generic process-related charts). Check the chapter on Business Activity Monitoring in the Workbench Part for all the details.
A workbench application, based on the UberFire framework, now unifies all web-based editors and tools into one large, configurable web application. It has many features, including:
Configurable workspace where you layout your own views by dragging and dropping
Unified login and role-based authentication, where what features you see depends on your role (admin, analyst, developer, user, manager, etc.).
A new home screen that will guide you through the life cycle of your business processes (authoring, deployment, execution, tasks and reporting).
Git-based repository that supports versioning and collaboration.
New project structure where artifacts (processes, rules, etc.) are combined into kjars (we removed the custom binary packages and replaced them with a normal JAR, containing the source artifacts) when a project is built. These kjars now also include not only processes and rules, but also forms, configuration files, data models (Java classes), etc. Kjars are Maven artefacts themselves (they have a group, id and version) and exposed as a Maven repository. When creating a ksession, Maven can be used to download the necessary kjars for your project from this Maven repository.
Sample
playgroundrepositories are (optionally) installed when starting up the workbench the first time, to get you started quickly with some predefined examples.
Check the Workbench Part for all the details.
The remote API has been redesigned and allows users to remotely connect to a running execution server and pass commands. The remote runtime API exposes (almost) the entire KieSession and TaskService API using REST or JMS, so commands can be sent to the remote execution server for processing and the results are returned. See the chapter on Business Activity Monitoring for all the details.
Guvnor also provides a REST API to access the various repositories, projects and artifacts inside these projects and manage and build them.
The workbench has had a big overhaul using a new base project called UberFire. UberFire is inspired by Eclipse and provides a clean, extensible and flexible framework for the workbench. The end result is not only a richer experience for our end users, but we can now develop more rapidly with a clean component based architecture. If you like he Workbench experience you can use UberFire today to build your own web based dashboard and console efforts.
As well as the move to a UberFire the other biggest change is the move from JCR to Git; there is an utility project to help with migration. Git is the most scalable and powerful source repository bar none. JGit provides a solid OSS implementation for Git. This addresses the continued performance problems with the various JCR implementations, which would slow down once the number of files and number of versions become too high. There has been a big "low tech" drive, to remove complexity. Everything is now stored as a file, including meta data. The database is only there to provide fast indexing and search. So importing and exporting is all standard Git and external sites, like GitHub, can be used to exchange repositories.
In 5.x developers would work with their own source repository and then push JCR, via the team provider. This team provider was not full featured and not available outside Eclipse. Git enables our repository to work any existing Git tool or team provider. While not yet supported in the UI, this will be added over time, it is possible to connect to the repo and tag and branch and restore things.
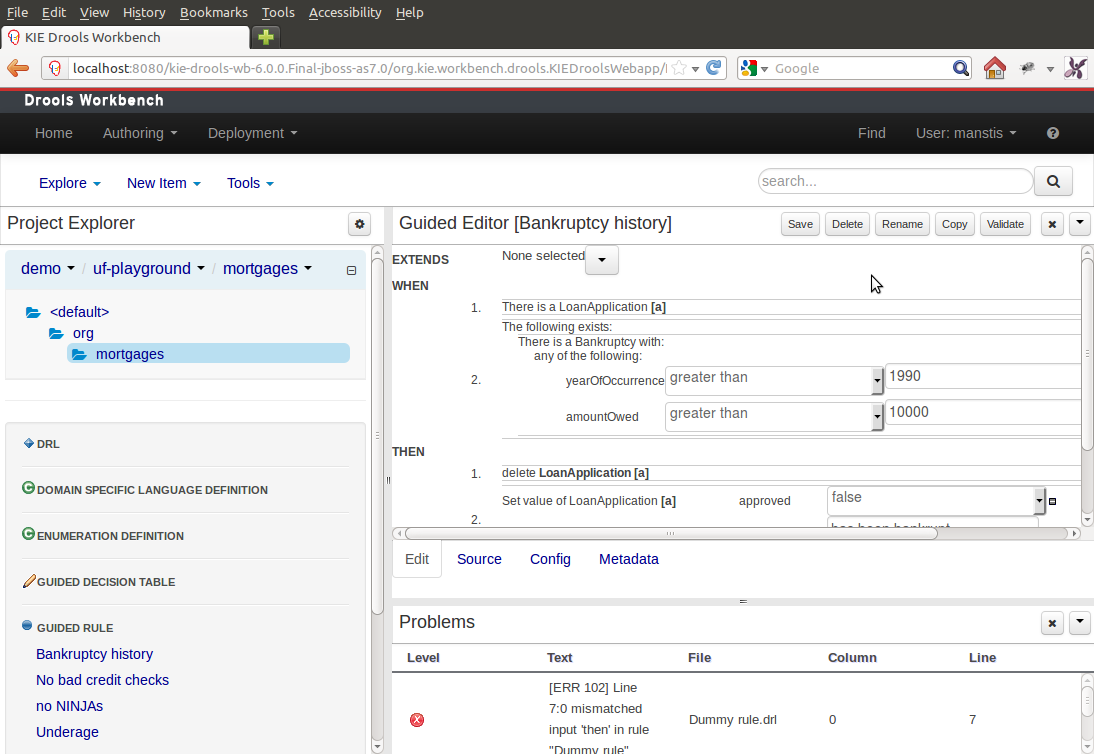
The Guvnor brand leaked too much from its intended role; such as the authoring metaphors, like Decision Tables, being considered Guvnor components instead of Drools components. This wasn't helped by the monolithic projects structure used in 5.x for Guvnor. In 6.0 Guvnor 's focus has been narrowed to encapsulates the set of UberFire plugins that provide the basis for building a web based IDE. Such as Maven integration for building and deploying, management of Maven repositories and activity notifications via inboxes. Drools and jBPM build workbench distributions using Uberfire as the base and including a set of plugins, such as Guvnor, along with their own plugins for things like decision tables, guided editors, BPMN2 designer, human tasks.
The "Model Structure" diagram outlines the new project anatomy. The Drools workbench is called KIE-Drools-WB. KIE-WB is the uber workbench that combines all the Guvnor, Drools and jBPM plugins. The jBPM-WB is ghosted out, as it doesn't actually exist, being made redundant by KIE-WB.
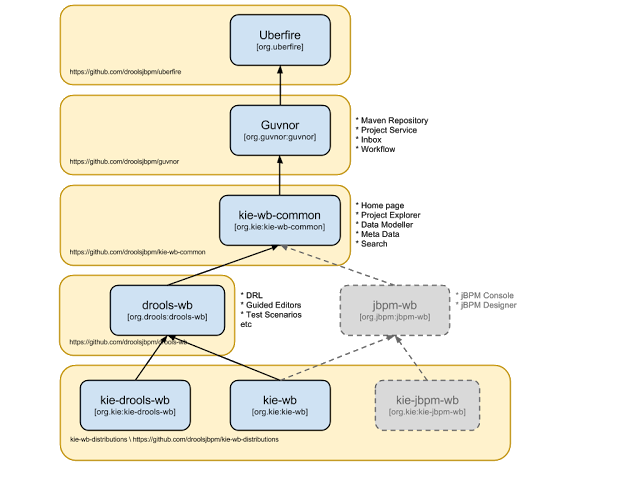
Important
KIE Drools Workbench and KIE Workbench share a common set of components for generic workbench functionality such as Project navigation, Project definitions, Maven based Projects, Maven Artifact Repository. These common features are described in more detail throughout this documentation.
The two primary distributions consist of:
KIE Drools Workbench
Drools Editors, for rules and supporting assets.
jBPM Designer, for Rule Flow and supporting assets.
KIE Workbench
Drools Editors, for rules and supporting assets.
jBPM Designer, for BPMN2 and supporting assets.
jBPM Console, runtime and Human Task support.
jBPM Form Builder.
BAM.
Workbench highlights:
New flexible Workbench environment, with perspectives and panels.
New packaging and build system following KIE API.
Maven based projects.
Maven Artifact Repository replaces Global Area, with full dependency support.
New Data Modeller replaces the declarative Fact Model Editor; bringing authoring of Java classes to the authoring environment. Java classes are packaged into the project and can be used within rules, processes etc and externally in your own applications.
Virtual File System replaces JCR with a default Git based implementation.
Default Git based implementation supports remote operations.
External modifications appear within the Workbench.
Incremental Build system showing, near real-time validation results of your project and assets.
The editors themselves are largely unchanged; however of note imports have moved from the package definition to individual editors so you need only import types used for an asset and not the package as a whole.
CDI is now tightly integrated into the KIE API. It can be used to inject versioned KieSession and KieBases.
Figure 25.63. Side by side version loading for 'jar1.KBase1' KieBase
@Inject
@KSession("kbase1")
@KReleaseId( groupId = "jar1", rtifactId = "art1", version = "1.0")
private KieBase kbase1v10;
@Inject
@KBase("kbase1")
@KReleaseId( groupId = "jar1", rtifactId = "art1", version = "1.1")
private KieBase kbase1v10;Figure 25.64. Side by side version loading for 'jar1.KBase1' KieBase
@Inject
@KSession("ksession1")
@KReleaseId( groupId = "jar1", rtifactId = "art1", version = "1.0")
private KieSession ksessionv10;
@Inject
@KSession("ksession1")
@KReleaseId( groupId = "jar1", rtifactId = "art1", version = "1.1")
private KieSession ksessionv11;Spring has been revamped and now integrated with KIE. Spring can replace the 'kmodule.xml' with a more powerful spring version. The aim is for consistency with kmodule.xml
Aries blueprints is now also supported, and follows the work done for spring. The aim is for consistency with spring and kmodule.xml